Tag: jam

Viennese donuts with cherry jam – Gordon Ramsay’s version

Viennese-donuts-with-cherry-jam


Viennese-donuts-with-cherry-jam

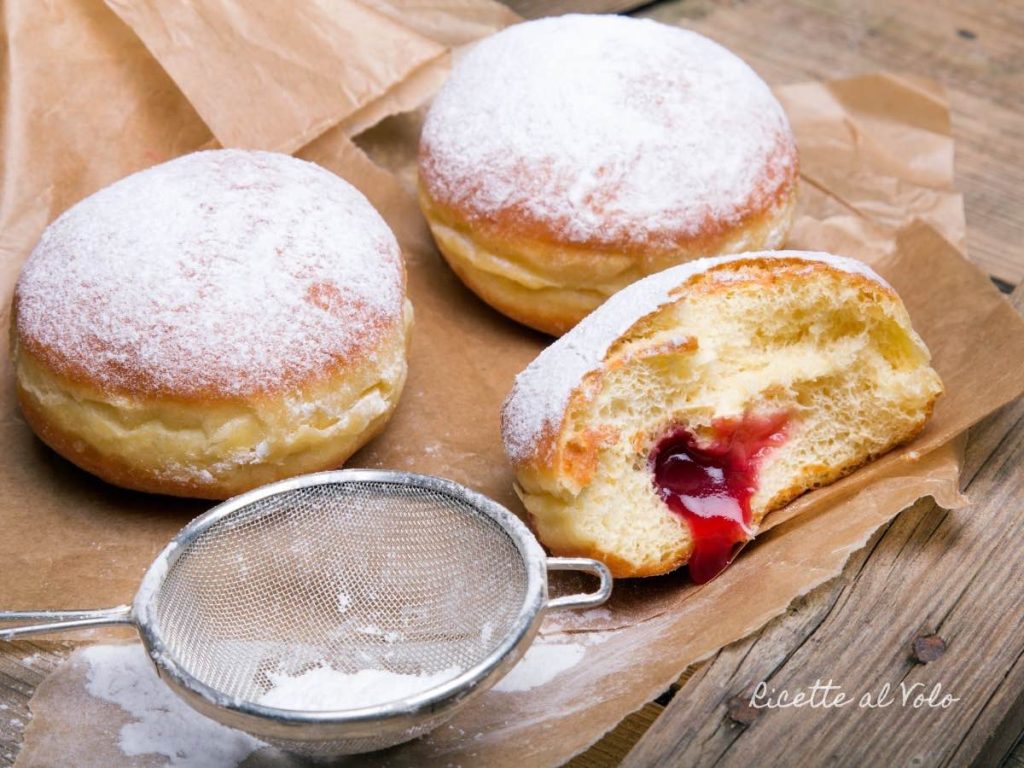
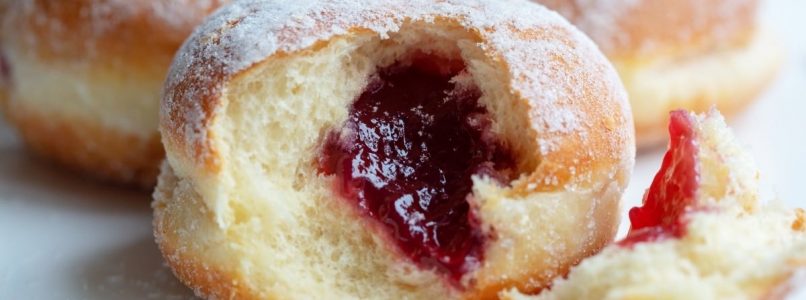
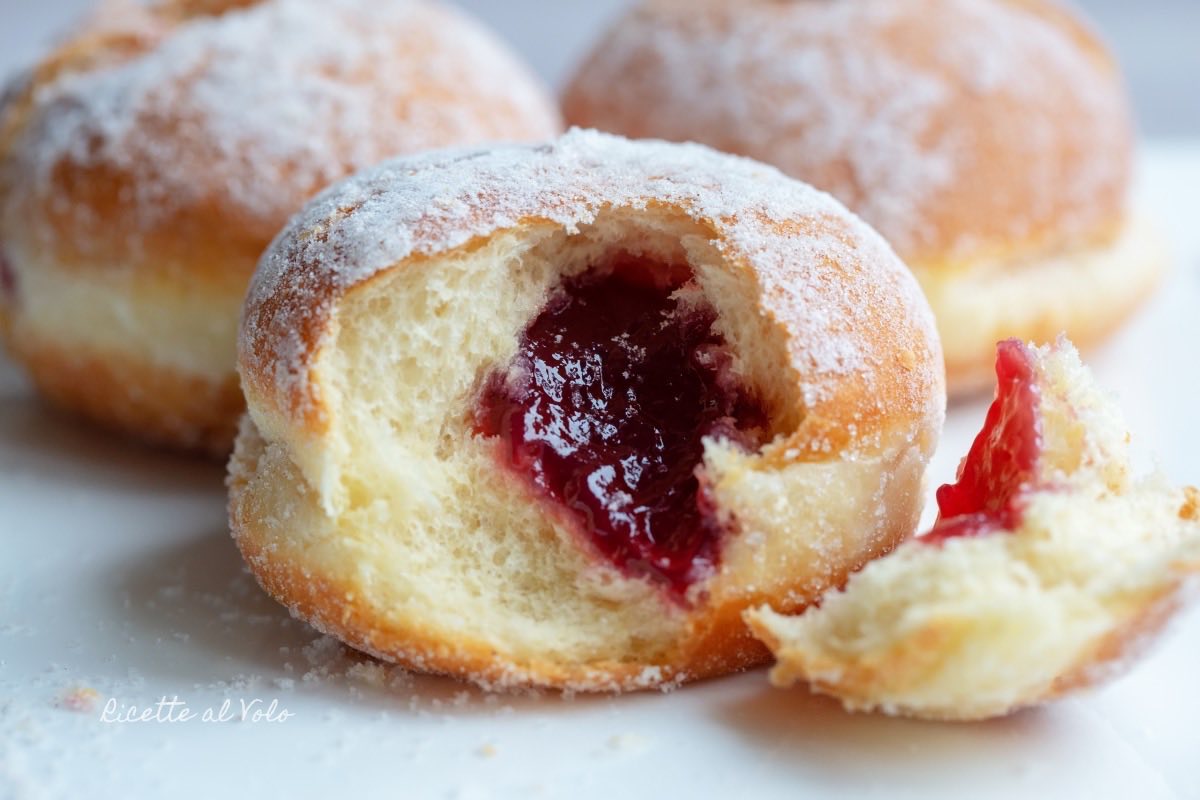
If you want to prepare an irresistible dessert that will leave everyone speechless, then try these delicious ones Viennese donuts rfilled with cherry jam. A soft leavened dessert with a red heart of cherry jam!

Viennese donuts, also known as Krapfen or Berliner, can be filled with jam or custard or hazelnut cream. In short, you can choose your favorite filling.

In a few simple steps, you can delight everyone’s palate with these soft and delicious sweets with a creamy heart. And the great thing is that you don’t need to be an expert pastry chef to make them successfully! Follow our steps and you too will be able to prepare truly irresistible delicious desserts.

The Viennese donuts should be fried in abundant seed oil. If you prefer a lighter version that requires cooking in the oven, try the recipe for baked Krapfen.

Simple and absolutely delicious! What are you waiting for? Grab the ingredients and get to work. Enjoy your meal!

If you do not have a pastry syringe available, there are however several ways to fill the donuts with jam without the use of specialized equipment. Here are some alternative methods:

  1. Using a homemade piping bag: You can make a homemade piping bag using a clean food bag. Fill the bag with cherry jam, pushing the jam towards one corner of the bag. Cut a small part of the corner of the bag and use this hole to squeeze the jam into the donuts.
  2. Using a disposable piping bag: If you have disposable pastry pockets available, you can fill them with cherry jam and cut a small corner to allow the filling to come out. This method is similar to using a homemade piping bag, but the disposable pastry bags are already pre-shaped and may be more convenient to use.
  3. Using a small spatula or teaspoon: If you don’t have access to piping bags or pastry bags, you can use a small spatula or teaspoon to spoon the jam into the donuts. Simply open the donut slightly, insert the tool and add the jam by gently pushing it inside.
viennese-donuts-with-JAM

How to make jam sous vide – Gordon Ramsay’s version

Carbonara when it was invented


Do the vacuum jam is an ancient and effective conservative technique. This method not only allows you to prolong the shelf life of the jam, but also preserves its flavour, color and nutritional properties. In an era where attention towards homemade food and natural preservation techniques are increasingly advanced, learning how to sous vide jam becomes a valuable skill for every cooking and food and wine enthusiast.

How to make jam sous vide

The process of vacuum-packed for the jam it naturally begins with the preparation of the jam itself. Once you have your jam ready (here is an example recipe: Lemon jam), the next step is to make sure you have some glass jars sterilized. Sterilization is essential to eliminate any bacteria or microorganisms that could compromise the preservation of the jam. This can be done by boiling the jars and their lids for about 10 minutes or using an oven pre-heated to 100°C for the same amount of time.

Once the jam is ready and the jars sterilized, fill the jars up to approximately 1 cm from the edge. It is important to leave this space to allow for adequate expansion during the sealing process. After filling the jars, clean the edges to remove any jam residue, which could prevent an airtight seal.

The next step is the sealing. Close the jars with their lids and place them in a large pot, making sure they are completely covered with water. Bring the water to a boil and let the jars boil for about 10-15 minutes. This process, known as “bain-marie”, is essential to create the vacuum inside the jars. The heat causes the air inside the jars to expand which, when cooled, creates a natural void hermetically sealing the lids.

After boiling, carefully remove the jars from the water and let them cool completely to room temperature. During cooling, you may hear a “pop”, a sign that the vacuum has formed correctly. Once cooled, check that the lid is well sealed by pressing in the center. If the lid doesn’t move, the vacuum sealer was a success.

In short, vacuum-packing jam requires attention and care, but it is a technique that everyone can do. Not only does it guarantee a longer conservation, but keeps the organoleptic qualities of the jam unchanged. So, with a little practice and following these steps, you can enjoy the fruit of your labor for many months to come. As we have seenthe process is simple but requires precision and attention to detail.

Lemon jam, grandma’s recipe – Gordon Ramsay’s version

Lemon jam, grandma's recipe


Dear friends who are passionate about cooking and food and wine, today I take you on an aromatic and sugary journey, to discover how to create the perfect lemon jam, the one that awakens the senses and transforms every breakfast or snack into a moment of pure happiness. Let’s get ready to immerse ourselves in this culinary adventure, armed with lemons, sugar, and lots of love!

How to make lemon jam

In a fast-paced world, where every moment seems to slip through our fingers, carve out time for create something with your own hands it can be a real lifesaver. And what is more rewarding than transforming the fruits of nature into delicacies to spread on a slice of toast? Lemon jam is just this: a small treasure of simplicity and taste, a bridge between the present time and the traditions of the past.

But how to transform lemons into this magical preserve? The answer lies in the perfect balance between ingredients and in the patience follow the steps carefully. It’s not just about cooking fruit and sugar; it is an alchemical process that transforms simple elements into something extraordinary. It is the magic of cooking, the one that allows us to create, with our hands, something unique and personal.

Preparing lemon jam at home is also a way to rediscover the value of “handmade”, of the quality of the ingredients, of the conscious choice of what we bring to the table. It’s a I invite you to slow downto enjoy the process as much as the result, to share not only the finished product but also the experience of its creation.

And now, without further ado, let’s dive into the practical steps to make our lemon jam. Follow me on this culinary adventure, and get ready to discover the secrets to obtaining a perfect jam, capable of conquering palates and hearts.

More recipes to try

Proudly powered by WordPress

By continuing to use the site, you agree to the use of cookies. Click here to read more information about data collection for ads personalisation

The cookie settings on this website are set to "allow cookies" to give you the best browsing experience possible. If you continue to use this website without changing your cookie settings or you click "Accept" below then you are consenting to this.

Read more about data collection for ads personalisation our in our Cookies Policy page

Close