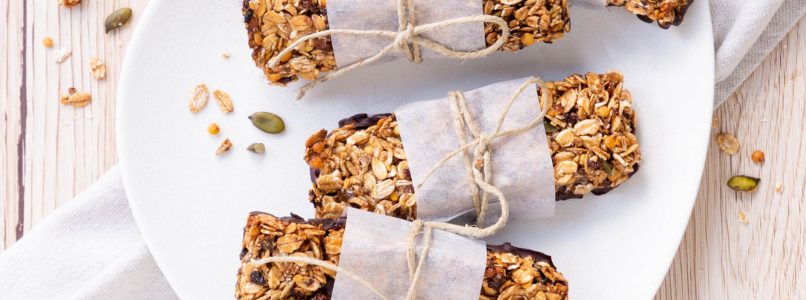
The cereal barseven better if homemadethey are an ideal snack for those looking for a tasty and nutritious alternative to breakfast, but they are also perfect for a snack, or for a snack to take anywhere.
Made with simple, healthy ingredients such as oat flakes, a variety of nuts and oilseeds, these bars are free of added fat and sugar, making them not only delicious but genuinely healthy too.
When you consider the average cost of commercial granola bars, homemade granola bars are a smart as well as health-conscious option.
You will be able to use a muesli ready*, but the best would be to make it from scratch, perhaps according to your preferences, needs and tastes.
How to make granola for your homemade granola bars
For 400 g of granola, you will need:
150 oat flakes
50 g of spelled flakes*
50 g of barley flakes*
50 g of dried red fruits
50 g of sultanas
50 g of shelled pumpkin seeds
How to make them even tastier and easier to transport
Melt the dark chocolate in a bain-marie or in the microwave, transfer it to a saucer and dip the homemade granola bars, resting the base. Transfer them to a sheet of baking paper and let them harden in the fridge.
In this way the base will be even more compact and the bars will not tend to break during transport or temperature changes.
And to make them even more practical, wrap them in a strip of baking paper and close with a piece of string.
This recipe is perfect for recycle Easter egg chocolate!
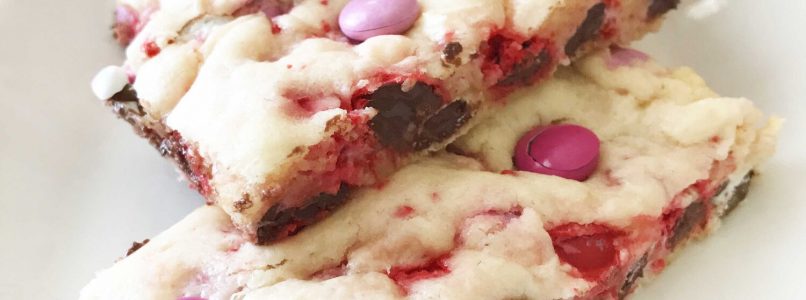
We all reserve the right to be a little lazy every so often, and with a quick trip planned for the weekend (followed by two weeks of self-quarantine) I’m feeling the laze take over. Either way, my daughter asked for some more cookies after all the GIANT Valentine Cookies from last week disappeared. Gee… I wonder how that happened…
Being as I was out of special Valentine sprinkles, and again… I’m being lazy, I thought I’d try my hand at a ‘lazy cookie bar’ recipe that was passed off to me. I did make one small change to lower the calorie count just slightly, but other than that it’s pretty much the same-same.
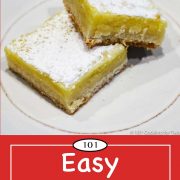
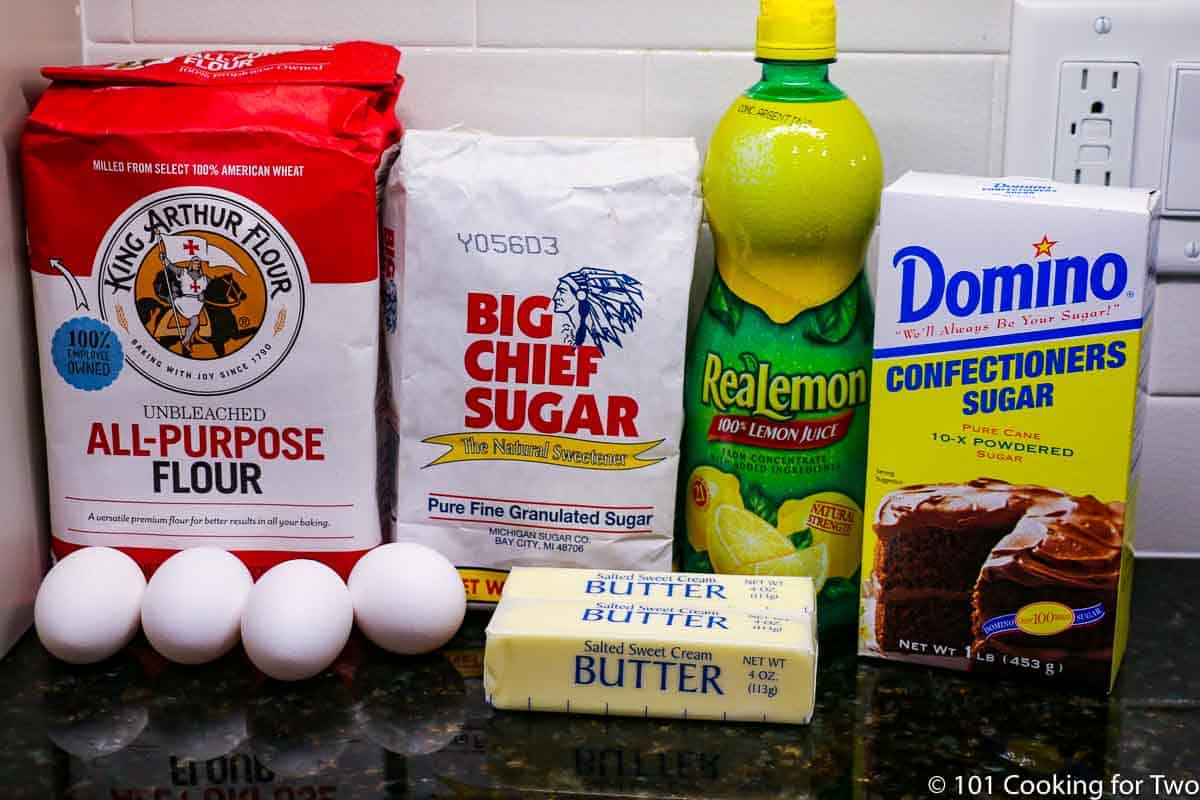
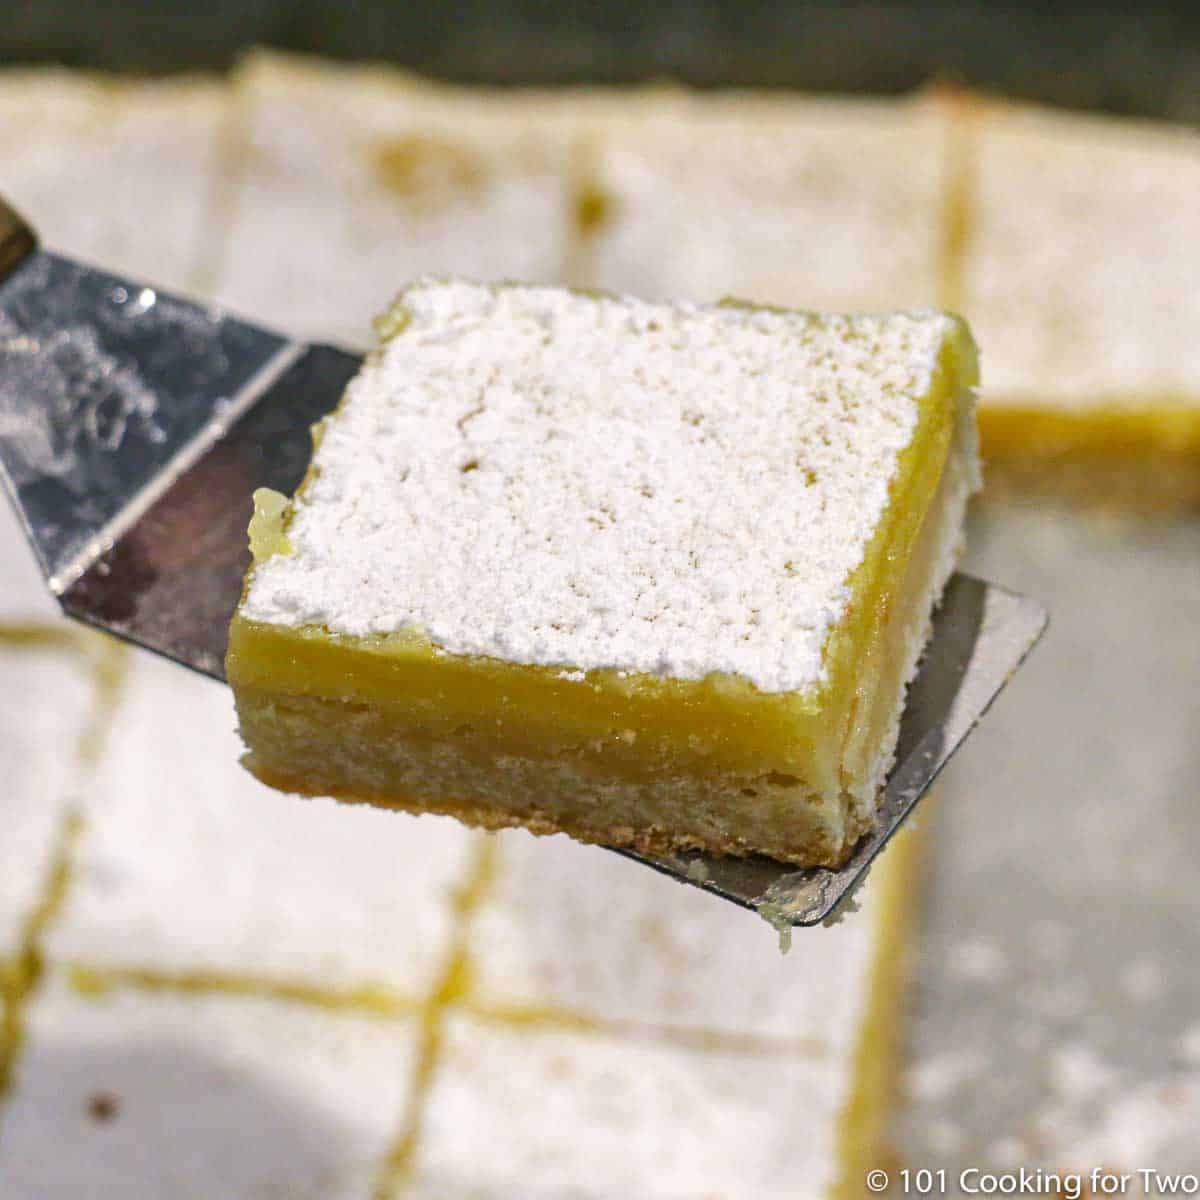
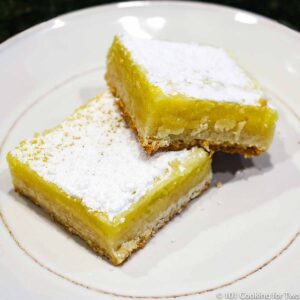
Six-ingredients are all you need for these easy lemon bars. Bursting with great sweet-tart lemon taste and a buttery shortbread base, they are everything a lemon bar should be. Perfect for every day or a special occasion.
Jump to:
Introduction and My Rating
This is a super easy recipe that we frequently make for small groups like coffee meetups, bake sales, or special family meals. I usually will make a half recipe but for larger groups, do the full recipe.
This is not a recipe from my childhood, but I always loved lemon bars. It was time to make my own. I searched for various cookbooks, but nothing worth discussing—so online time.
I started at Cooks Illustrated as usual, but the recipe went on and on and on and on. I got some hints, but I wasn’t jumping through all those hoops.
I finally zeroed in on All Recipes – The Best Lemon Bars. With a 4.5 star rating, simple instructions, and not too many ingredients, it was for me. I read several hundred of the reviews and had my plan with modifications from comment land.
My Rating
A 4 or 5, depending on if you’re a “lemon bar person” or not. But even the “not” will enjoy this. Better than any lemon bar I have tasted.
♨️The Baking Dish
The full recipe needs a 9X13 baking dish like a cake pan. A half recipe, which is what I usually will make, uses an 8X8 or 6X9 dish. I suggest glass and not metal due to sticking issues.
I also suggest parchment on the bottom and grease sides. You will still need to use a knife around the outside to remove it.
The model recipe suggested ungreased, while Cooks Illustrated goes with two crossed sheets of parchment paper. Other recipes greased the pan and some just the sides—quite some variation. Do not follow the “ungreased” recommendation.
✔️Tips
A medium lemon will have 2 ½ to 3 tablespoons of juice, so for the ⅔ cup of juice, use 4 medium lemons.
Add some lemon zest for more taste–about 2 tablespoons will do.
The bars should be refrigerated for storage and should be good for 3-4 days. You may also freeze them for three months.
📖Sweets Recipes
Cheesecake Bars
Blueberry Cream Cheese Bars
Cinnamon Roll Cake
Crock Pot White Chocolate Almond Clusters
🖼️Instructions
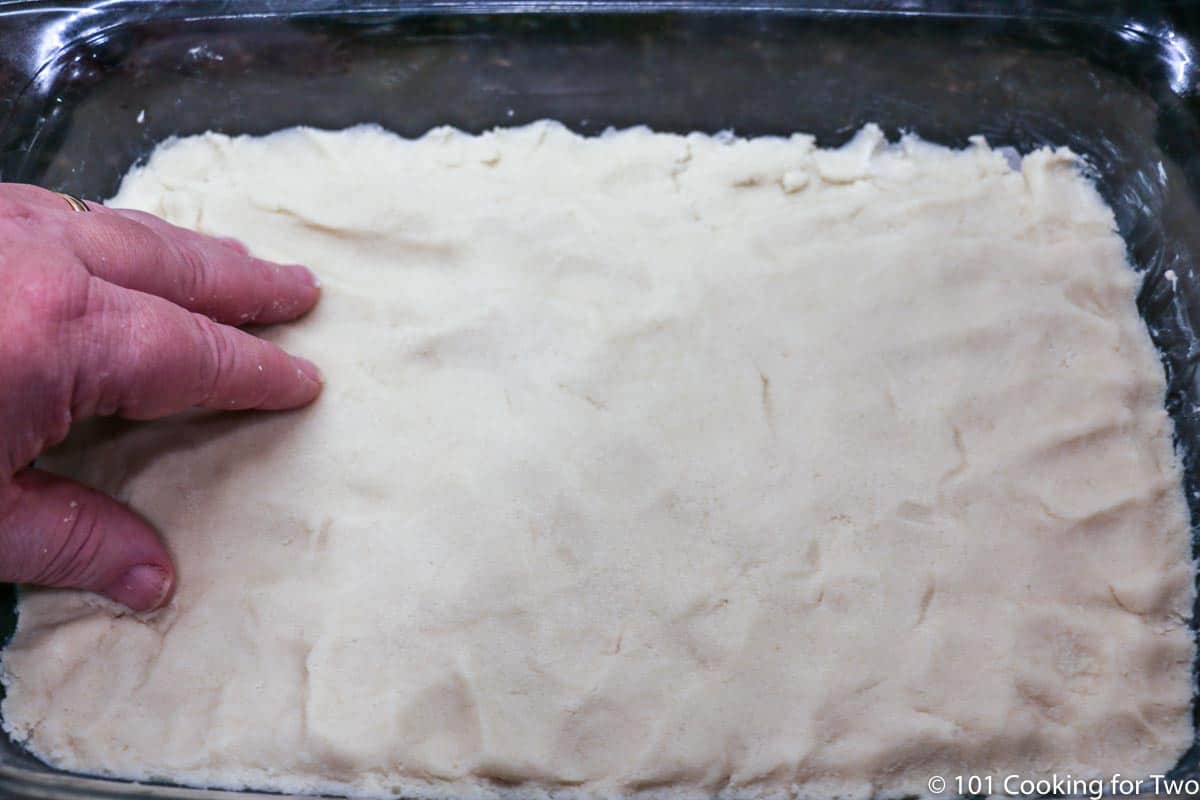
Preheat oven to 350°. Prep a 9 by 13 baking dish. Give it a light brush of butter, then cover the bottom with parchment paper. You may also use crossed sheets of parchment paper.
Soften 1 cup (two sticks) of butter in the microwave. Mix the softened butter, 2 cups flour, and ½ cup sugar. If unsalted butter, add ¼ teaspoon salt. It will look crumbly.
Press into the bottom of the prepared pan. Bake for 15 to 20 minutes until firm and lightly brown.
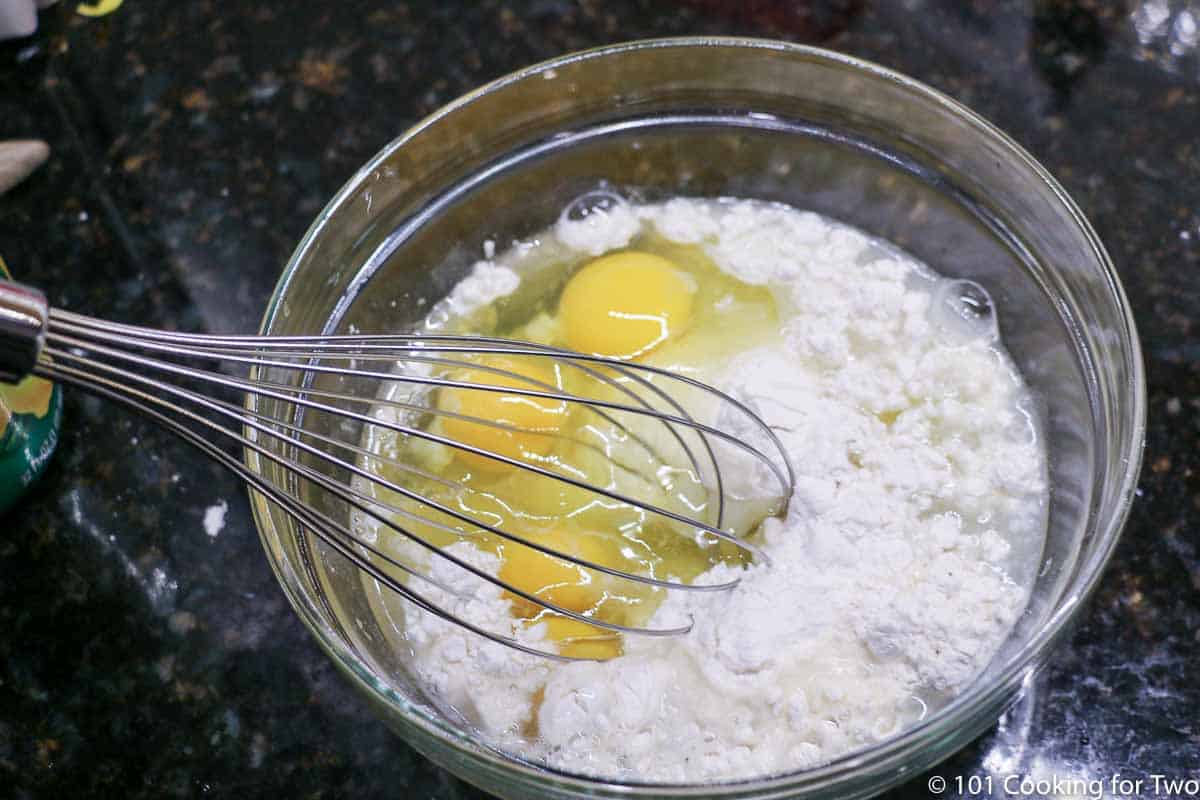
Whisk together 1 ½ cups sugar and ⅓ cup flour. Add 4 eggs and the juice of 4 medium lemons (or ⅔ cup lemon juice.) Mix well.
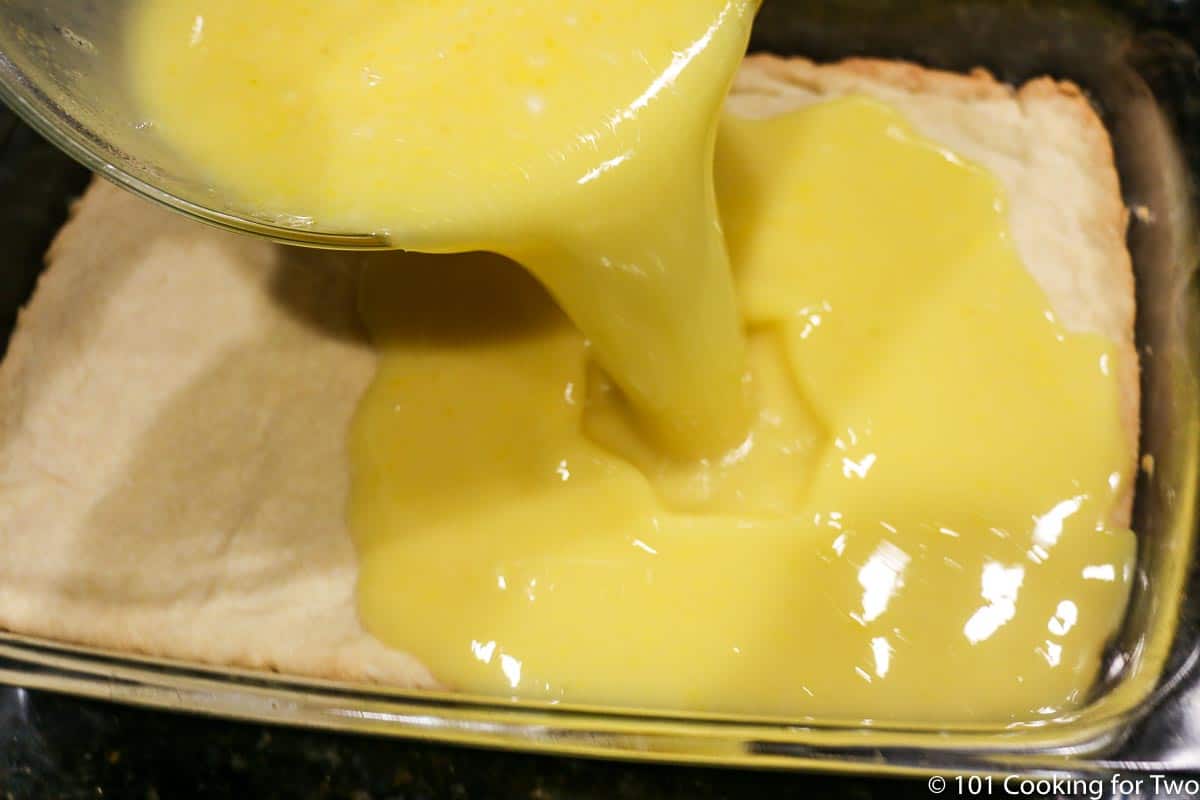
Pour the lemon/egg mixture over the baked crust—Bake for an additional 20 minutes.
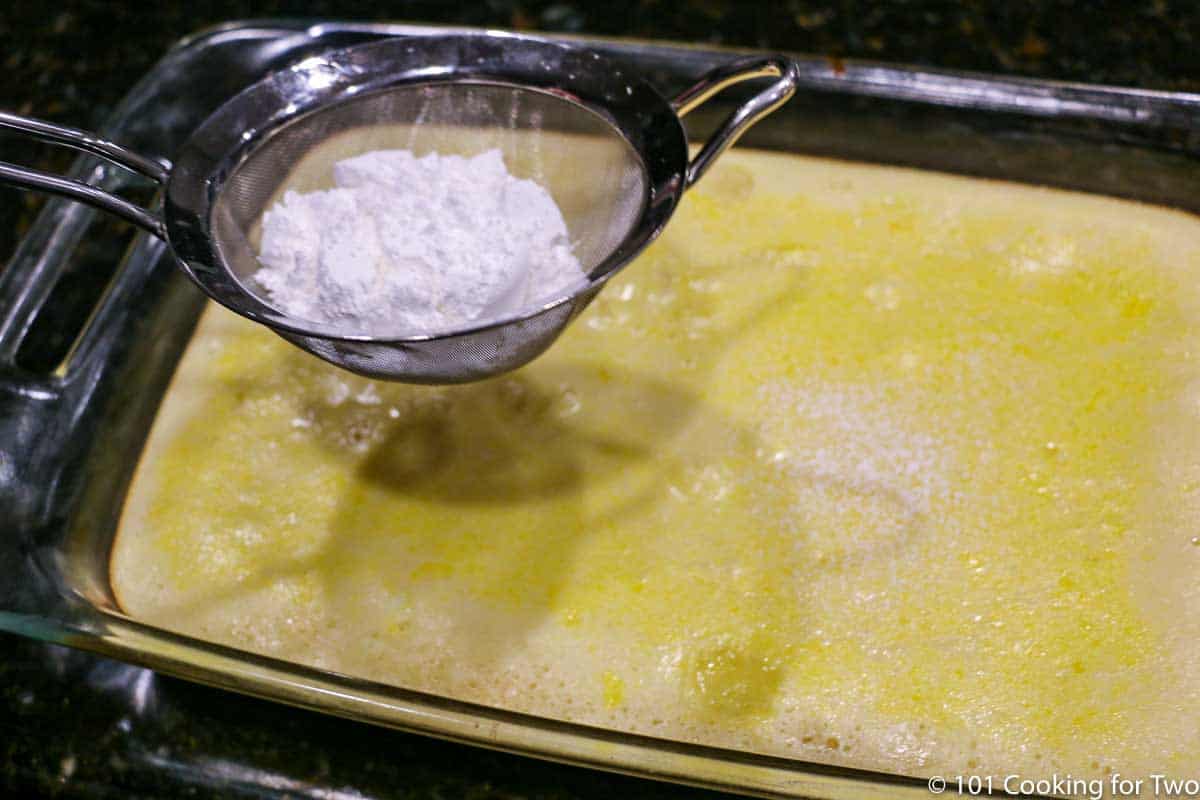
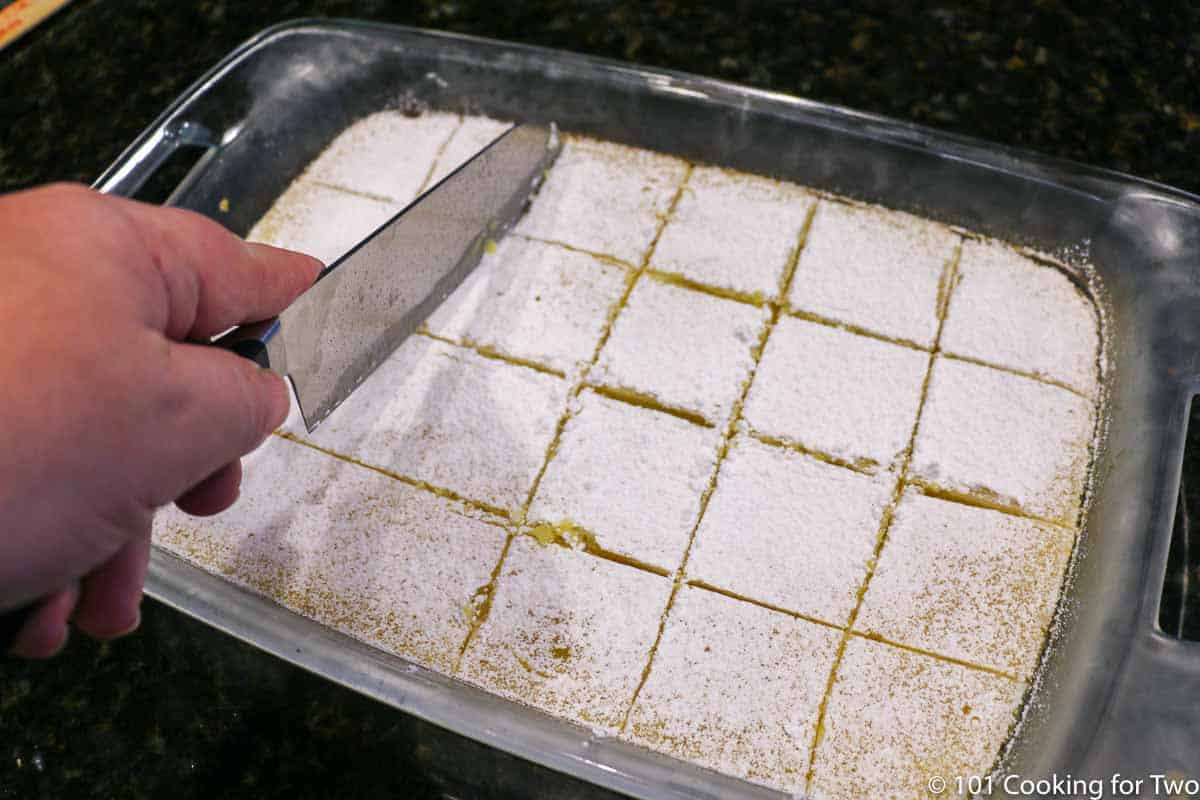
Remove from oven and dust with powdered sugar.
Cool in the refrigerator before cutting into about 2-inch squares.
Do you want more recipes from 101 Cooking for Two? Sign up for the newsletter and get all posts delivered straight to your inbox!
📖 Recipe
Easy Lemon Bars
From Dan Mikesell AKA DrDan
Six-ingredients are all you need for these easy lemon bars. Bursting with great sweet-tart lemon taste and a buttery shortbread base, they are everything a lemon bar should be. Perfect for every day or a special occasion.
Prep Time 15mins
Cook Time 40mins
Total Time 55mins
Servings #/Adjust if desired 24
Ingredients
Recipe Notes
Pro Tips
An easy recipe to cut in half using an 8 by 8 baking dish.
You may use fresh lemons or lemon juice.
A medium lemon will have 2 ½ to 3 tablespoons of juice, so for the ⅔ cup of juice, use 4 medium lemons.
Add some lemon zest for more taste–about 2 tablespoons will do.
Be sure to cool completely before cutting.
The bars should be refrigerated for storage and should be good for 3-4 days. You may also freeze them for three months.
Have More Questions?Make it Perfect First Time and Every Time. Don’t miss out, check the full post above. Almost every recipe includes easy step by step photo instructions so you can visualize yourself cooking this recipe along with helpful tips and options.
TO ADJUST THE RECIPE SIZE:You may adjust the number of servings in this recipe card under servings. This does the math for the ingredients for you. BUT it does NOT adjust the text of the instructions. So you need to do that yourself.
Serving size is my estimate of a normal size unless stated otherwise. The number of servings per recipe is stated above. This is home cooking, and there are many variables. All nutritional information are estimates and may vary from your actual results. To taste ingredients such as salt will be my estimate of the average used.
Course :Dessert
Cuisine :American
Editors Note: Originally published February 7, 2017. Updated with expanded options, refreshed photos, and a table of contents to help navigation.
The cookie settings on this website are set to "allow cookies" to give you the best browsing experience possible. If you continue to use this website without changing your cookie settings or you click "Accept" below then you are consenting to this.
Read more about data collection for ads personalisation our in our Cookies Policy page