Tag: Blackened

Oven Baked Blackened Tilapia | 101 Cooking For Two by Gordon Ramsay


Blackened Tilapia is a great way to have healthy baked tilapia that is bursting with taste and spicy goodness. With a great flavor profile, you can easily adjust or eliminate most of the heat.

close up of tilapia on white plate.

Jump to:

Blue ribbon divider used for visual effect

📰Introduction and My Rating

Baked blackened tilapia is an easy dinner recipe, or you can use it for some great fish tacos. So simple with these step by step photo instructions.

Baking is much healthier than frying. I find frying fish in a pan a “pain.” You have to do multiple batches, keep it warm in the oven, and stand there all the time. And the mess, oh the mess, oven baking is just so much easier.

I ended up with an Aaron MaCorgo Jr (Food Networks “Big Daddy”) recipe. This man can cook and is a joy to watch, highly recommended.

The big change was going from fry pan to oven. This was not that hard. Just spice it up and cook with a little oil, including a light spray of PAM, so the top is not dry. I also adjusted the spicing some.

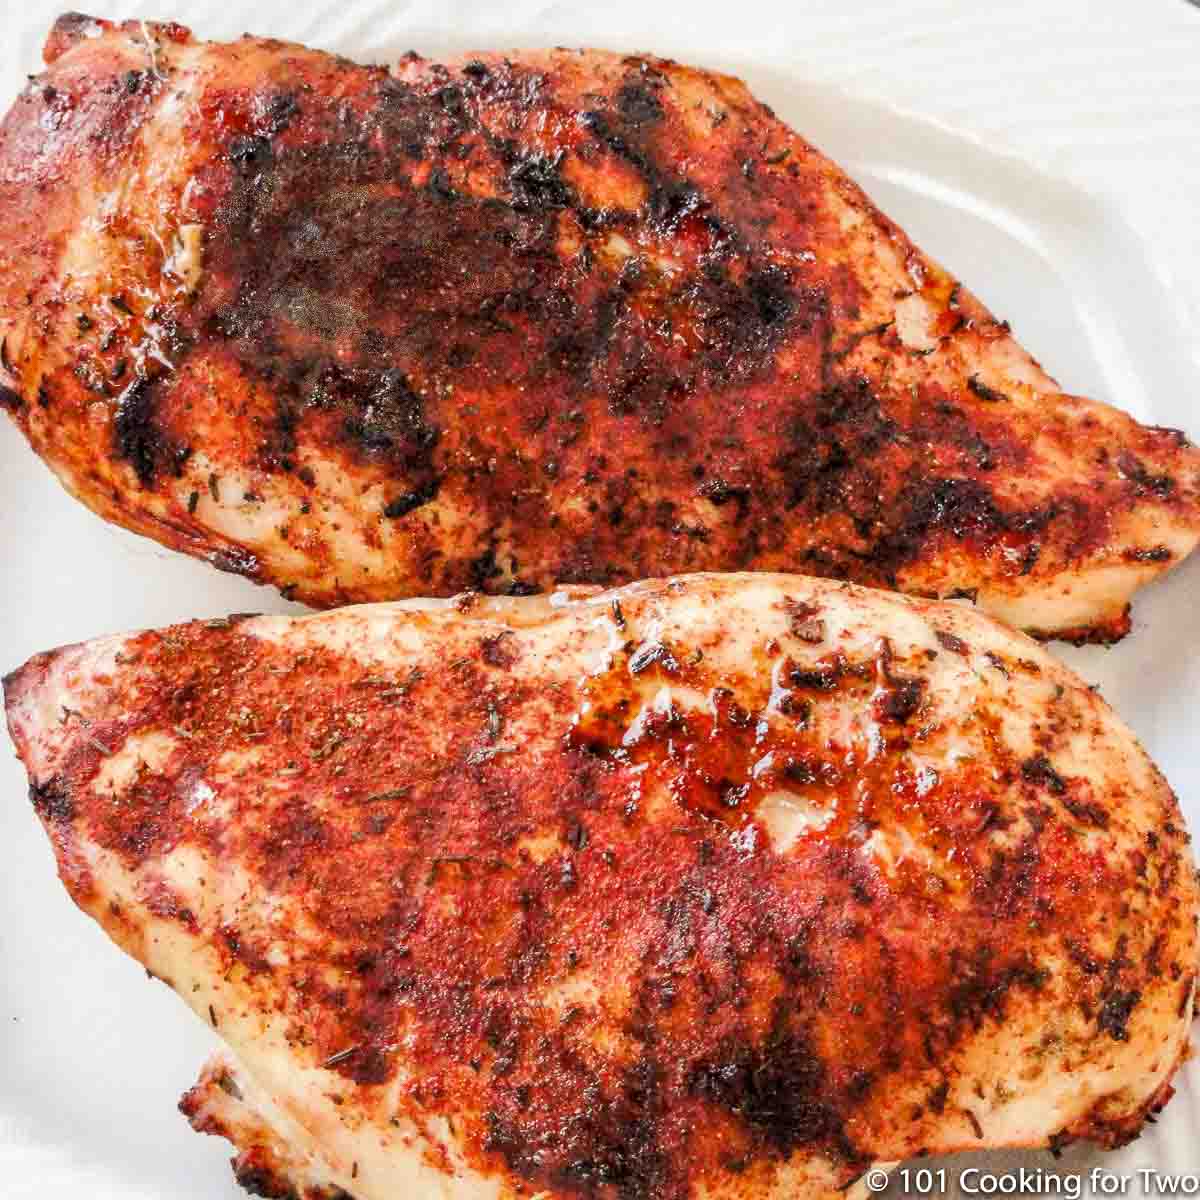
Do you want the grilled version? Try my Grilled Blackened Tilapia

My Rating

My rating system. Great 5 out of 5


Wonderful. Spice it up to your desire. Just give it a try.

🐟The Tilapia

Tilapia is a mild-tasting fish that is commonly available around the world since it is easily farmed. There are hundreds of different varieties, but they are all about the same for us consumers.

Tilapia is native to Africa and the Middle East that is generally freshwater inhabiting shallow streams, ponds, rivers, and lakes. However, they’ve been distributed around the world, and they’re farmed almost everywhere since they can tolerate a wide range of temperatures and are very hardy.

Use a different fish

So, can you do this with a different fish? Sure, other fish can be used and will generally cook about the same just adjust for the thickness.

The 10-Minute Rule for Cooking Fish

Originally published in the “Canadian Fish Cook Book” 1959 from Canadian Department of Fisheries, the 10-minute rule is not perfect, but it is very good. It works for any cooking method – frying, baking, and sautéing. For baking, it generally if for oven temperatures of 400 to 450 degrees.

  • Measure the fish at its thickest point. If the fish is stuffed or rolled, measure it after stuffing or rolling and then time it accordingly.
  • Cook fish 10 minutes per inch, turning it halfway through the cooking time. For example, a one-inch fish steak should be cooked 5 minutes on each side for a total of 10 minutes. Pieces of fish less than 1/2-inch thick do not need to be turned over.
  • Add 5 minutes to the total cooking time if you are cooking the fish in foil, or if the fish is cooked in a sauce.
  •  Double the cooking time for frozen fish that has not been defrosted.

Let’s thank our Canadian neighbors.

♨️ Seasoning

The Blackening Seasoning

First, a brief discussion about blackening, Cajun, and Creole seasoning. All have a base of paprika, pepper, along with garlic and onion powder. But Creole tends to add more herbs and is milder while Cajun is generally the hottest. So depending on how you vary your spice choices, you can change the term.

The Paprika: Traditionally, smoked paprika would be used. But I like sweeter paprika, so I generally use Spanish.

The Cayenne pepper and the heat level: The heat level is generally determined by the cayenne. For my suggested mixture of other spices.

  • 1 teaspoon will be 9/10
  • 1/2 teaspoon will be 7/10
  • 1/4 teaspoon will be 3-4/10 – my usual level
  • none then it will depend on other ingredients but generally about 1/10

This makes more than you need and save tightly sealed for another cooking. It is very handy to have around and goes well with other fish or chicken.

Can I use a totally different seasoning?

Sure, if you have a favorite season or just want to experiment, season as you wish. The basic cooking method will still work well.

🌡️⏰Temperature and Time

What oven temperature to use?

Generally, bake fish at higher temperatures. That will get better browning without overcooking the interior. You can find recommended ranging from 350 to 450 degrees.  For tilapia, I suggest 400 or 425 degrees.

How long will it bake tilapia?

The first thing to say is it varies by the oven temperature and thickness of the fish. To be safe, fish needs to be cooked to an internal temperature of 145 by FDA rules. Also, it should be flaky.

Generally 4-6 minutes cooking time for 1/2 inch thick fish at 400 to 450 degrees oven.  Measure the thickest area, and it needs to be thawed. There is also some variability due to the individual oven and starting temperature of the fish.

So 1-inch thick will be about 10 minutes. Always check the fish a minute or two early.

Other Tips

I was oven baking but did not want dry, so I use some oil on the tray and even sprayed the top with some oil in the form of PAM.

I did an easy tartar sauce that went well with this. This is included in the recipe to use if you wish.

📖Other Tilapia Recipes

Grilled Blackened Tilapia

Oven Baked Parmesan Crusted Tilapia

Easy Grilled Tilapia with Paprika

Grilled Lemon Butter Tilapia

Blue ribbon divider used for visual effect

🖼️Photo Instructions
the spices for blackening seasoning

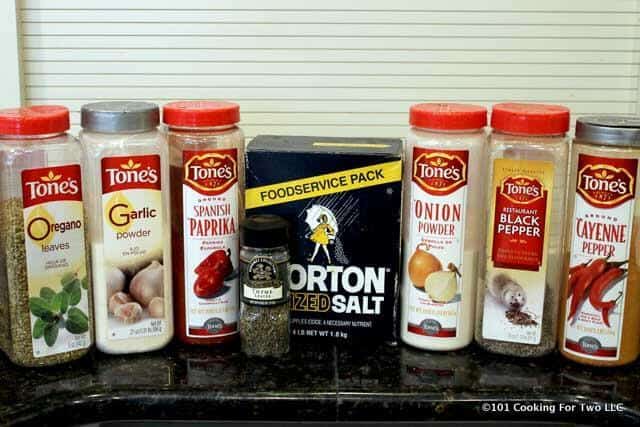
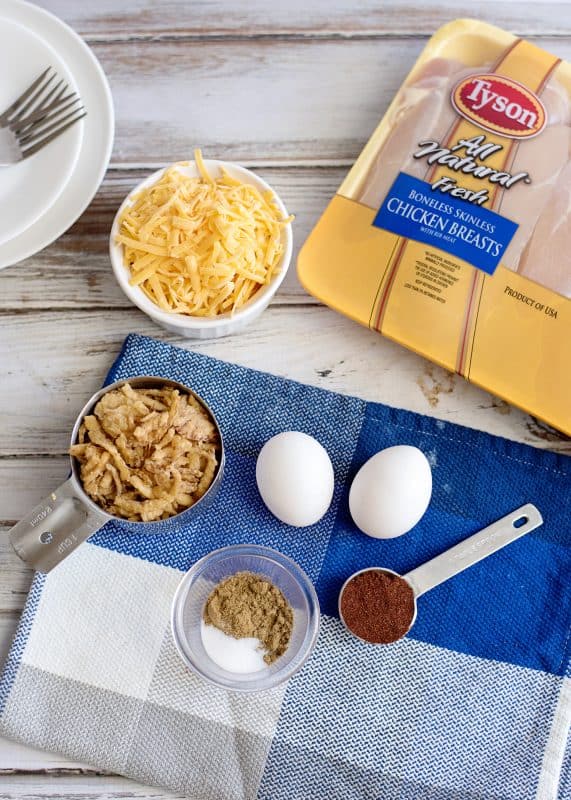
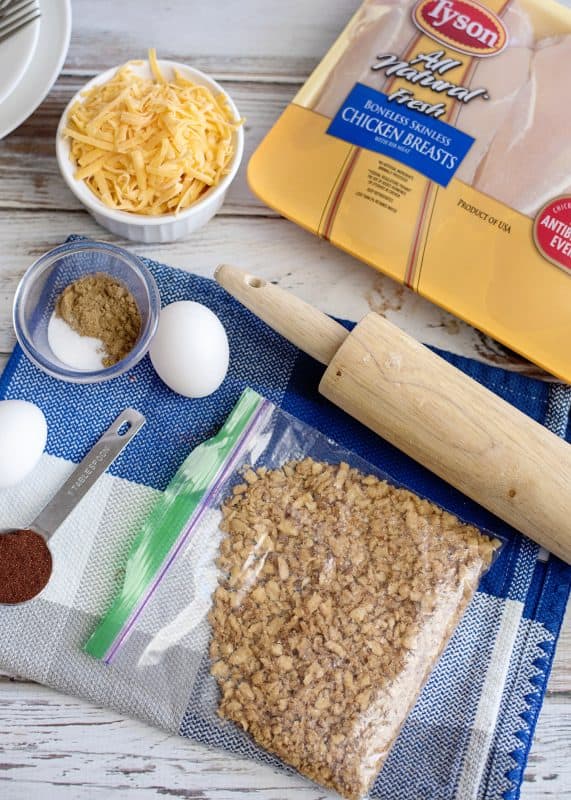
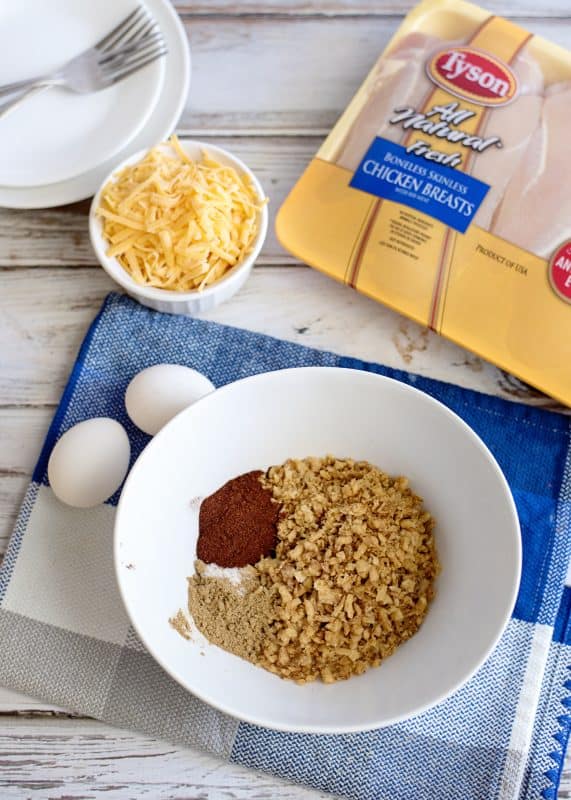
Combine 3 tablespoon paprika, 1 teaspoon salt, 1 tablespoon onion powder, one teaspoon black pepper, 1/4 to 1 teaspoon cayenne pepper, 1 teaspoon dry thyme, one teaspoon dry oregano, and 1/2 teaspoon garlic powder. This makes more than you need and save it for another cooking. The cayenne heat level will be 9/10 at 1 teaspoon, 7/10 at 1/2 teaspoon, and 3-4/10 at 1/4 teaspoon.

prepare baking tray lined with foil and brushing on olive oil

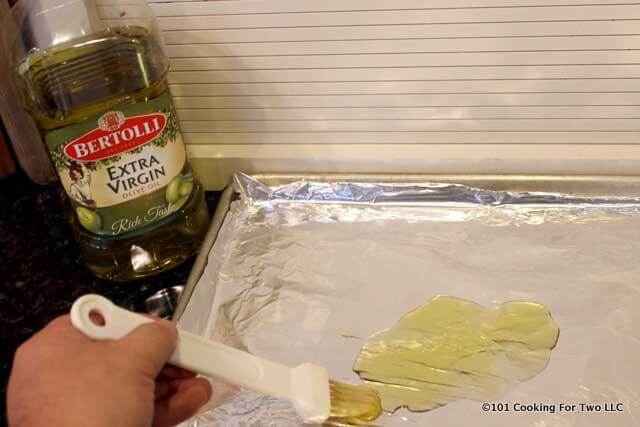
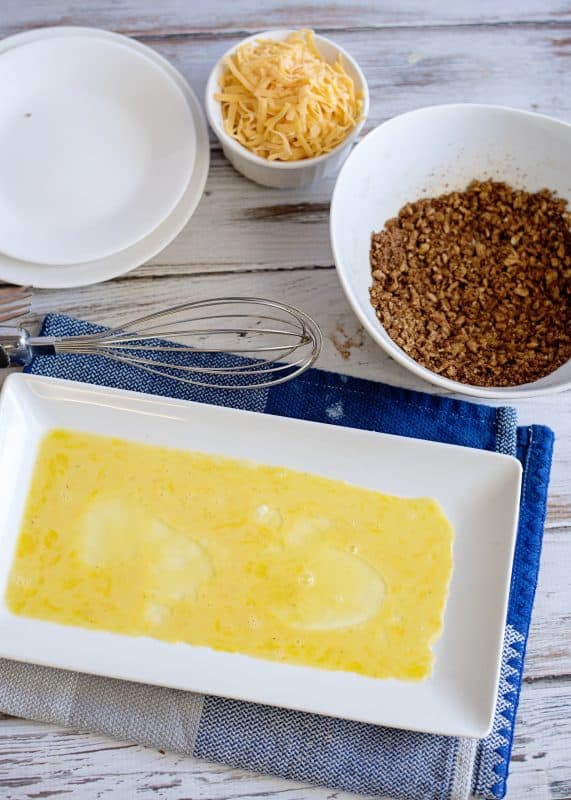
Preheat oven to 425 degrees. Line a sheet pan with foil and add 2 tablespoons of olive oil. Brush it over the foil in an area that will have fish.

pat dry tilapia with paper towels

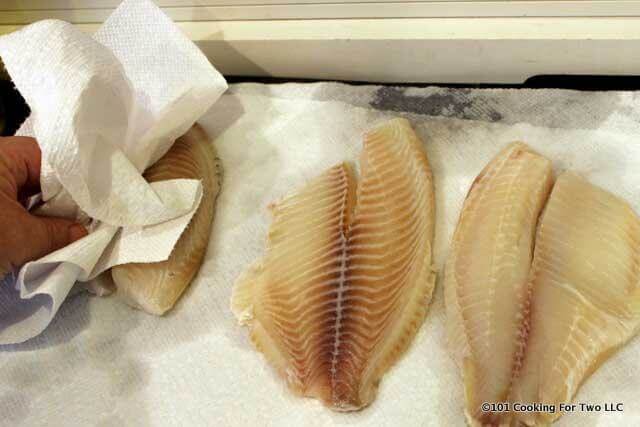
Rinse and pat dry 1 pound of tilapia.

picture of brushing tilapia with oil

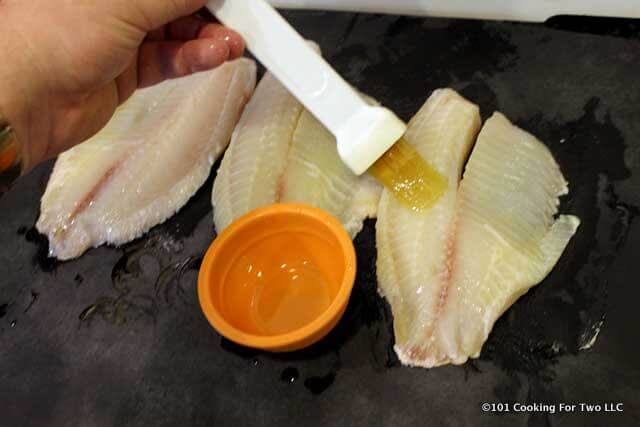
Brush the tilapia with olive oil.

coating fish with blackening seasoning

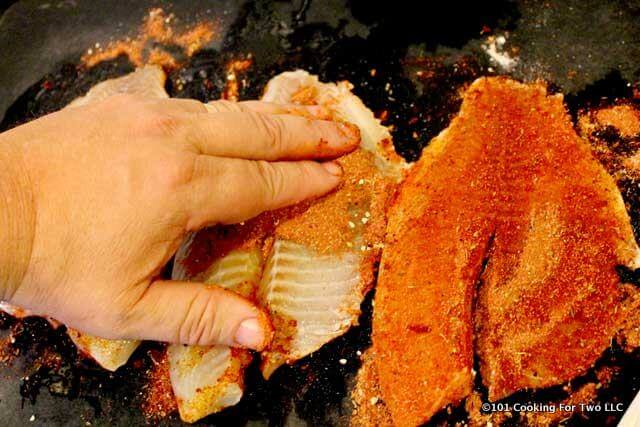
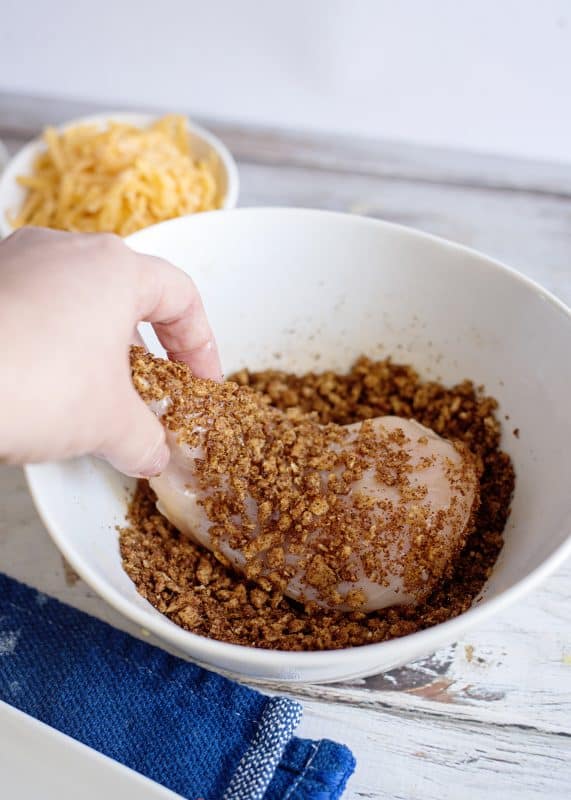
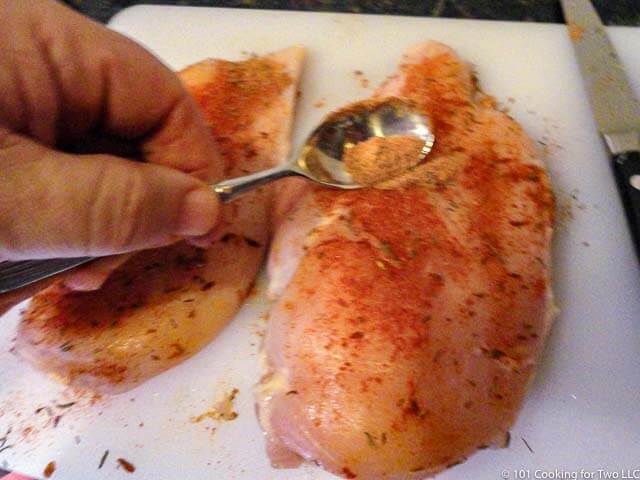
Cover the fillets with the spices and rub it in (both sides). You will only need about 1/3 to 1/2 of the spice mix you made.

a light spray of PAM after the seasoning is applied

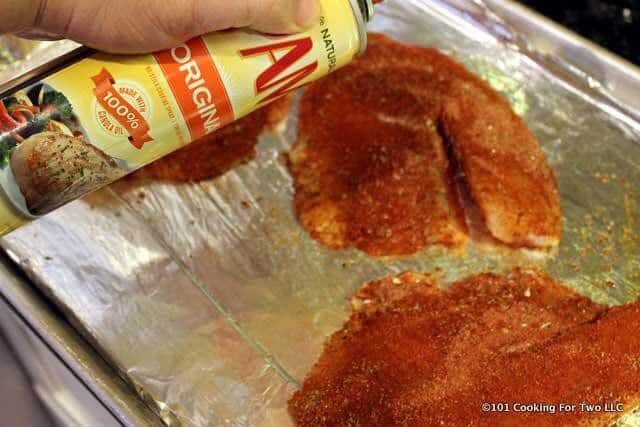
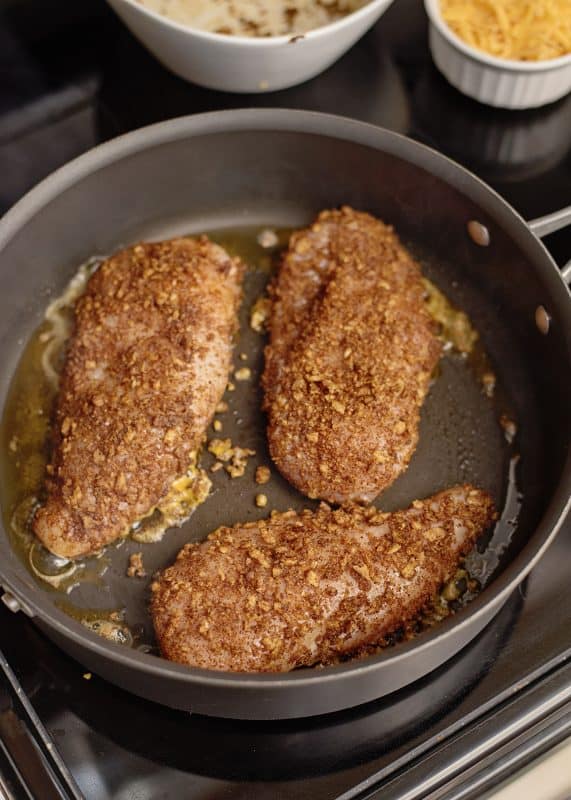
Place on the oiled pan and give the fish a light spray of PAM. Place in the preheated oven.

mixing the homemade tartar sauce

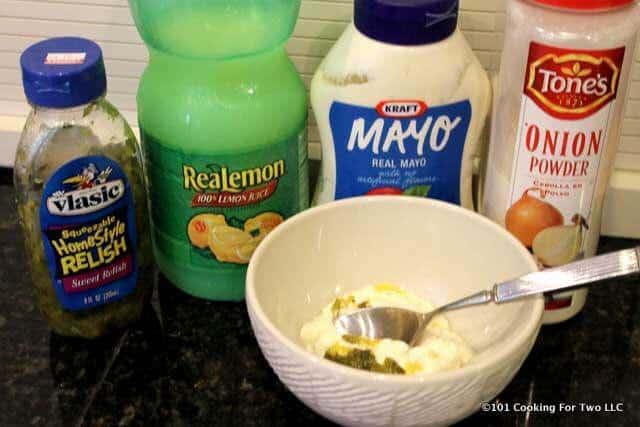
If you want a homemade tartar sauce, combine 1/3 cup mayo, 2 teaspoon lemon juice, 1 teaspoon sweet pickle relish and 1/4 teaspoon onion powder. Mix well.

Blackened Tilapia done on the baking tray

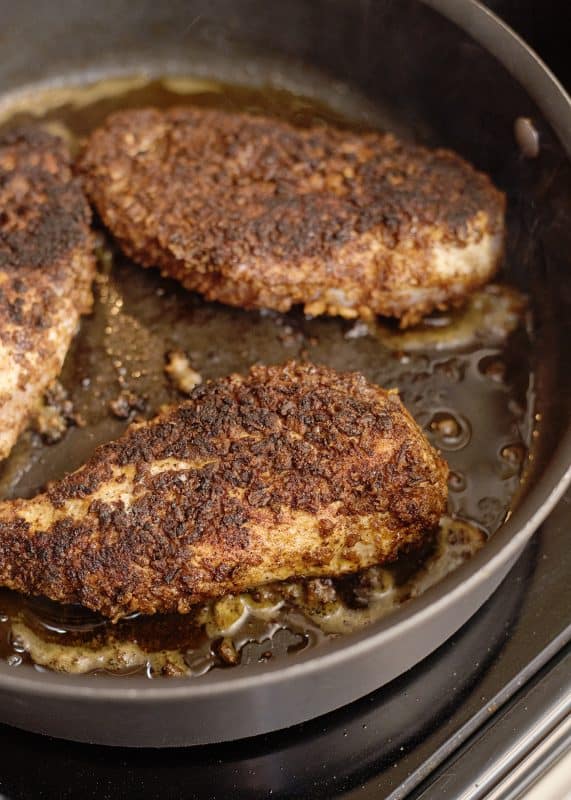
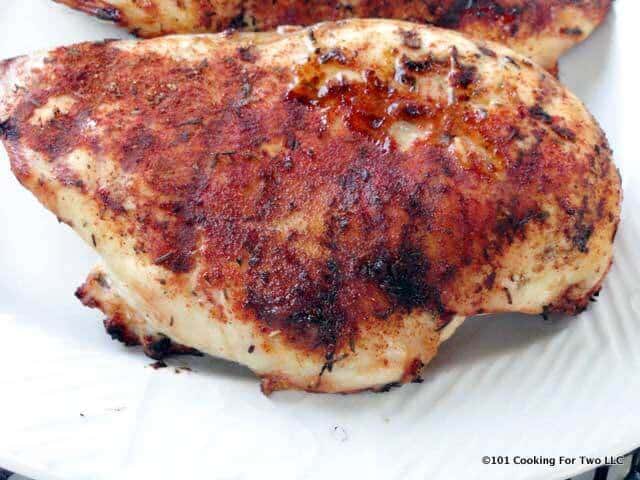
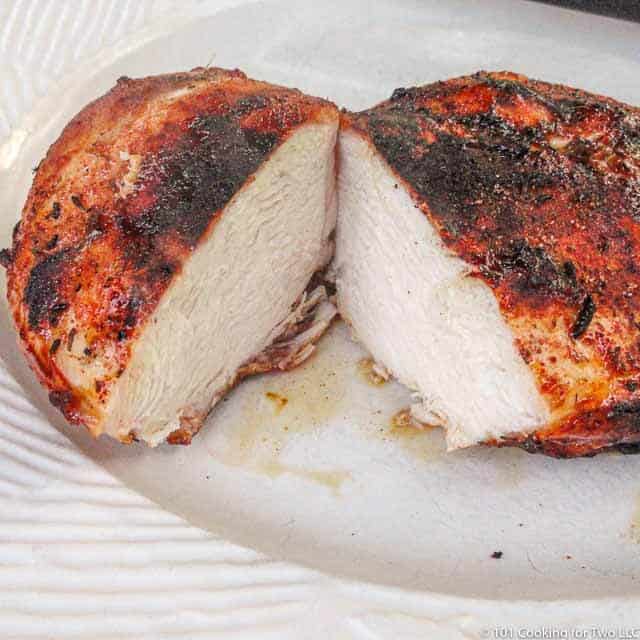
Cook until nicely brown and flaky. This is 9-10 minutes for big fillets and a minute or two less for small to medium fillets.
Blue ribbon


Do you want more recipes from 101 Cooking for Two? Sign up for the newsletter and get all posts delivered straight to your inbox!
Subscribe to 101 Cooking for Two

Editor note: Originally published August 3, 2012. Updated several times with re-editing of the text and photos.

Molly dog supervising in the kitchen

Lilly dog relaxing on a kitchen rug

Incoming search terms:

Crunchy Blackened Chicken – Southern Plate by Gordon Ramsay

Crunchy Blackened Chicken


Crunchy Blackened Chicken

My mother and I started making this delicious crunchy blackened chicken when I came across the recipe in one of my culinary labs at college. The shortcut ingredients make it simple as can be to whip up but also give it a huge pop of flavor that everyone loves. If your family is made up of chicken lovers like mine is, you may find yourself looking for something new and different to do with it – this dish is what you’ve been looking for! 

I hope you’ve carved out some time to enjoy this summer. We started school a couple of weeks ago and we’re now homeschooling ninth grade. Where has the time gone? Brady is in his sophomore year at UNA as a film and communications major. He’s been very busy producing videos for a local film company, working as a videographer for the university, and doing contract video and photography work on the side. It’s good seeing your young adult taking full advantage of their opportunities. Ricky and I are still very much enjoying our Bible studies and even with all of our work we still manage to spend a few hours each day working together on that. As my Facebook Fellowship group finishes up reading the entire Bible in one year, I’m really looking forward to us starting again October 2. We will have a little over 11,000 members when we begin again. How exciting! We have a great community of folks and really enjoy studying together. If you’d like more information, you can click here. If you’re reading this after October, membership may have closed already but you can request to join and you’ll be one of the first ones in when it opens up again next year. 

We are looking forward to the fall and temperatures have already started creeping down on the thermometer here in Alabama so that means afternoons on the back porch! Do y’all have any fall plans? I’d love to hear about them in the comments. You inspire me! Now, let me show you how easy it is to make this chicken!

Ingredients For Crunchy Blackened Chicken

You’ll need: French fried onions, chili powder, cumin, salt, eggs, boneless skinless chicken breasts, and some shredded cheese. 

My biggest problem with this recipe is I always remember how much I love eating French fried onions. I try to remember to buy double whenever I make this because I know I’m going to snack on some!

Preparing coating for Crunchy Blackened Chicken

Place your French fried onions in a zipper seal bag and crush them.

You can use a rolling pin or meat mallet, your hands, or even the back of a spoon.

Coating for Crunchy Blackened Chicken

Stir crushed French fried onions together with seasonings in a shallow bowl you can dip chicken in. 

Egg For Crunchy Blackened Chicken

Beat eggs and place in a shallow dish. 

Dipping Chicken for Crunchy Blackened Chicken

Dip each piece of chicken first in egg on both sides

Breading Crunchy Blackened Chicken

Then dip in both sides in coating mixture. 

Crunchy Blackened Chicken In Skillet

Heat oil in large skillet over medium heat. Add coated chicken to heated oil. 

Cooking Crunchy Blackened Chicken

Cook this about 4-5 minutes on each side, trying not to turn but once or twice if need be, until no longer pink in the center. 

Finishing Crunchy Blackened Chicken

Once done, top with cheese and leave just long enough for cheese to melt. 

Crunchy Blackened Chicken Ready To Go

Yum!!! This smells so good and tastes even better. The chicken is nice and juicy inside the crunchy coating!

Sliced Crunchy Blackened Chicken

Crunchy Blackened Chicken is perfect served with your favorite side.

Final Crunchy Blackened Chicken

This is also good as the centerpiece to a delicious salad! 

Crunchy Blackened Chicken

This crunchy flavorful chicken will liven up any meal plan!

Ingredients

  • 1 cup French fried onions
  • 1 tablespoon chili powder
  • 2 teaspoons cumin
  • 1/2 teaspoon salt
  • 2 eggs
  • 4 boneless skinless chicken breasts
  • 1 cup shredded cheddar cheese

Instructions

  • Place french fried onions in a zipper seal bag and roll over with a rolling pin until crushed. Pour into a shallow bowl. Stir in chili powder, cumin, and salt. 

  • In a separate shallow bowl, place eggs and beat well. 

  • Heat about two tablespoons of oil in a large skillet over medium high heat.

  • Dip each chicken breast in egg on both sides and then into breading on both sides.

  • Place in skillet and cook until browned on both sides and no longer pink in the center, turning once. Sprinkle chicken with cheese and allow to melt before removing from skillet. Serve with your favorite sides.

You might also enjoy my post : Egg and Pasta Bake, and the joy of being “old”

Click here to follow me on Instagram

Crunchy Blackened Chicken - Flavorful Addition To Your Meal Planning!

Follow me on Instagram to see more of my quotes and click here to see them all and download any you’d like to share!


Yum


Grilled Blackened Chicken Breasts | 101 Cooking For Two by Gordon Ramsay


This great classic grilled blackened chicken breast is bursting with a spicy flavor that you will love. Just follow the easy step by step photo instructions.
two chicken breast on a white plate


Editor’s Note: Originally published August 9, 2010. Updated with expanded discussion and updated photos.

You can never have enough great chicken recipes. Kick it up some with this tasty blackened chicken breasts cooked on your grill.

And by making your seasoning, you can adjust the heat to your taste. Also, we can do a quick brine for moisture. To do the brine, you need to not have salt in the seasoning. Not possible if you buy your seasoning.

The original recipe was an oven based recipe from allrecipes.com. I used the seasoning with some changes and converted to grilling with my standard chicken breast recipe.

My Rating:
My rating system of a 4 out of 5 so very nice.


A nice solid higher 4. It could be a lower 5 for many.

Pro Tips: Recipe Notes for Grilled Blackened Chicken Breasts

The Blackening Seasoning

The original seasoning needed a touch of garlic, and I added that. And a touch more salt.

The heat here is about 4/10 so adjust the cayenne to your taste.

The white pepper is a very nice different taste. It is thought to be the main secret ingredient of KFC. Use black pepper if you want or don’t have white pepper.

If you brine the chicken, you must leave the salt out of the seasoning.

The Chicken Breast

It is easier to cook chicken that is about the same size and thickness. So try to even it out when you pick your chicken.

If you get these really plump chicken breasts, flatten them a little with a meat mallet or bottom of a pan.

Flatten chicken if needed

The Brine

Like all grilled chicken breast, this can dry some if you’re not careful. A simple brine of 2 cups water, 2 tablespoons table salt, and 2 tablespoons sugar for 20 to 60 minutes help keep them moist.

The recommended brine that is relatively heavy in salt. According to Cooks Illustrated, this concentration of brine is recommended for chicken for 30 minutes to 2 hours. I find the chicken gets saltier if over 1 hour so I’m suggesting 1-hour max with this mixture Actually, 20 minutes will do a fairly good job of brining the chicken breasts.

While I no longer recommend rinsing chicken usually, you should always rinse carefully after brining to eliminate the surface salt.

You can grill skinless boneless chicken breasts and keep it moist without the brine, but it requires attention and skill. Skip the brine at your own risk.

The Grill

Grill temperature is extremely important in our keep the chicken moist.  For any chicken, you can not “sock the heat to it.” The outside will be burnt before the center is safe to eat.

I like to cook all chicken with a grill surface temperature of about 450 degrees, give a take a little. This is medium on my current grill, which is a “hot” grill. It is medium-high on most gas grills. Please see my guide A Beginners Guide to Grill Temperature on a Gas Grill and get it right. If you don’t get this right, you will not be successful with this recipe.

Suggested Sauce

I liked the taste of Alabama White BBQ sauce with the blackened chicken. A great mayonnaise-based sauce from Big Bob Gibson’s of Alabama.

clean grill

Clean and oil the grill. Preheat grill to a surface temperature of about 450 degrees which is medium-high on most grills. You must get the surface temperature correct.

trim chicken breast on white board

Trim breasts well. You can brine if you wish but then skip the salt in the rub.

a collection of spices for blackening seasoning

Mix rub: 1/2 teaspoon paprika, 1/4 teaspoon cayenne pepper, 1/4 teaspoon cumin, 1/4 teaspoon thyme, 1/4 teaspoon garlic powder, 1/8 teaspoon onion powder, 1/4 teaspoon kosher salt, and 1/8 teaspoon white pepper. You may adjust the cayenne to taste and use black pepper if you want.

applying seasoning to chicken breasts

Rub the dry mix on breast front and back. You only have 2 teaspoons so a light coat.

placing the seasoned chicken breast on the grill

Grill over direct heat with the grill lid closed for 5 minutes then flip every 5 minutes until internal temp is 165. About 25-30 minutes.

grilled blackened chicken breast on white plate

Lightly tent for 5 minutes before serving.

cut chicken breast on a white plate

Blue ribbon

Do you want more recipes from 101 Cooking for Two? Sign up for the newsletter and get all posts delivered straight to your inbox!
Subscribe to 101 Cooking for Two

Grilled Blackened Chicken Breasts

Classic grilled blackened chicken breast bursting with spicy grilled goodness that you will love. Just follow the easy step by step photo instructions.

Prep Time10 mins

Cook Time25 mins

Total Time35 mins

Author: Dan Mikesell AKA DrDan

Course : Main Course

Cuisine : American

Keyword : Blackened Chicken, Blackened Chicken Breasts, Grilled Blackened Chicken

Servings/Adjust Amount: 2

2

Ingredients

  • 2 skinless boneless chicken breasts

Blackening Seasoning

  • 1/2 teaspoon paprika
  • 1/4 teaspoon cayenne pepperadjust to taste
  • 1/4 teaspoon cumin
  • 1/4 teaspoon thyme
  • 1/4 teaspoon garlic powder
  • 1/8 teaspoon onion powder
  • 1/8 teaspoon white pepperuse black pepper if you want
  • 1/4 teaspoon kosher salt

Instructions

  • Clean and oil the grill. Preheat grill to a surface temperature of about 450 degrees which is medium-high on most grills. You must get the surface temperature correct.

  • Trim breasts well. You can brine if you wish but then skip the salt in the rub. A simple brine of 2 cups water, 2 tablespoons table salt, and 2 tablespoons sugar for 20 to 60 minutes help keep them moist.

  • 4Mix rub 1/2 teaspoon paprika, 1/4 teaspoon cayenne pepper, 1/4 teaspoon cumin, 1/4 teaspoon thyme, 1/4 teaspoon garlic powder, 1/8 teaspoon onion powder, 1/4 teaspoon kosher salt, and 1/8 teaspoon white pepper. You may adjust the cayenne to taste and use black pepper if you want.

  • Rub the dry mix on breast front and back. You only have 2 teaspoons so a light coat.

  • Grill over direct heat with the grill lid closed for 5 minutes then flip every 5 minutes until internal temp is 165. About 25-30 minutes.

  • Lightly tent for 5 minutes before serving.

Recipe Notes

Pro Tips:

  1. Scale to your needs. This is cooking for two, so I have two chicken breasts.
  2. Like all grilled chicken breast, this can dry some if you’re not careful. A simple brine of 2 cups water, 2 tablespoons table salt, and 2 tablespoons sugar for 20 to 60 minutes help keep them moist.
  3. If you brine, rinse the salt off carefully and add no salt in the seasoning.
  4. The seasoning only makes about 2 teaspoons, so only a light coating.
  5. Try to use chicken breasts that are about the same size and thickness. If you get those very thick breasts, use a meat mallet or bottom of a pan to flatten them out a little to about 3.4 inches.
  6. The seasoning is about 4/10 hot. Adjust the cayenne to your taste.
  7. Grill surface temperature is very important for cooking any chicken. Please use a grill surface thermometer to get a temperature of 450. See A Beginners Guide to Grill Temperature on a Gas Grill.
  8. The safe final temperature is 165. Less is unsafe and more will start drying.
  9. Be sure to let the chicken rest for a few minutes before serving.

Nutrition Facts

Grilled Blackened Chicken Breasts

Amount Per Serving (1 breast)

Calories 134 Calories from Fat 27

% Daily Value*

Total Fat 3g 5%

Saturated Fat 1g 5%

Cholesterol 72mg 24%

Sodium 423mg 18%

Potassium 418mg 12%

Total Carbohydrates 1g 0%

Dietary Fiber 1g 4%

Sugars 1g

Protein 24g 48%

Vitamin A 7.7%

Vitamin C 1.6%

Calcium 0.6%

Iron 3.8%

* Percent Daily Values are based on a 2000 calorie diet.

Have a question or something not clear? Ask in the comments.

Blue ribbon divider used for visual effect Do you want more recipes from 101 Cooking for Two? Sign up for the newsletter and get all posts delivered straight to your inbox!
  Subscribe to 101 Cooking for Two Blue ribbon divider used for visual effect

Nutrition is for one serving. Number of servings is stated above and is my estimate of normal serving size for this recipe.

All nutritional information are estimates and may vary from your actual results. This is home cooking, and there are many variables. To taste ingredients such as salt will be my estimate of the average used.

Blue ribbon divider used for visual effect

If you like this recipe or find it useful, the pleasure of a nice 4 or 5 rating would be greatly appreciated.

dogs at playing in the yard

Originally published on August 9, 2010.

Incoming search terms:

Proudly powered by WordPress

By continuing to use the site, you agree to the use of cookies. Click here to read more information about data collection for ads personalisation

The cookie settings on this website are set to "allow cookies" to give you the best browsing experience possible. If you continue to use this website without changing your cookie settings or you click "Accept" below then you are consenting to this.

Read more about data collection for ads personalisation our in our Cookies Policy page

Close