A simple and quick rye bread, adapted from Dan Lepard’s “The Handmade Loaf”. The “secret ingredient” here is the pickle juice with some extra dill. The bread came out with great texture and tasted so delicious.
200 g Dark rye flour, toasted
300 g Bread flour
3/4 tsp Salt
350 g Cucumber pickle juice at 20C/68F
1+1/4 tsp Fresh yeast, crumbled
5 g Dried dill
To toast the rye flour, preheat the oven to 200C/400F. Spread the rye flour in a thin layer over a baking sheet, and bake for 15 minutes, or until the flour has turned a light tannish brown. Remove from the oven and allow to cool.
Combine the flours, and mix with the salt. In another bowl, whisk the pickle juice with yeast and dill. Mix this liquid and the flour together with your hands. Squeezing it through your fingertips. When roughly combined, cover the bowl and leave it for 10 minutes. Tip the dough out on to a lightly oiled work-surface and knead gently for 10-15 seconds. Return the dough to the bowl, leave for a further 10 minutes, then knead once more for 10-15 seconds. Repeat one more time.
Stretch the dough out on the work-surface and pat it out lightly into a rectangle. Fold one end, a third of the length, back to the centre. Fold the other end back over it, so you have three layers. Repeat after 30 minutes and 1 hour. Divide the dough into two equal pieces, and shape each into a round. Place both on a flour-dusted baking sheet, leaving a space between for the cobs to grow. Cover and leave for 1 hour, or until doubled in size.
Preheat the oven to 210C/410F. Cut a slash across the center of each cob. Bake in the center of the oven for 55 minutes until the cobs are a good rich brown colour and when tapped on the bottom, sound hollow. Leave to cool on a wire rack.
Super Easy. Learn how to pick the best corn and microwave with the husk on in just a few minutes. Perfect for the smaller households. Just follow these easy step by step photo instructions.
Editor’s Note: Originally published July 19, 2012. Republished with additional details to the instructions. A guide to picking the best corn added and updated photos.
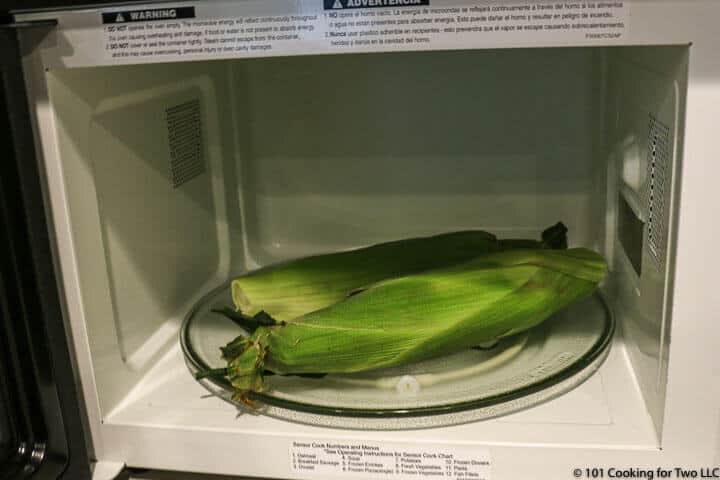
DON’T SHUCK THAT CORN. There is no easier method, just toss them in a microwave. No husking the corn, just toss them in. It’s just a matter of setting the timer.
We all look for shortcuts. We want great results but faster and easier. This is it.
It turns out that you can just toss the ears, husks and all, into the microwave. Cook them and then shuck them.
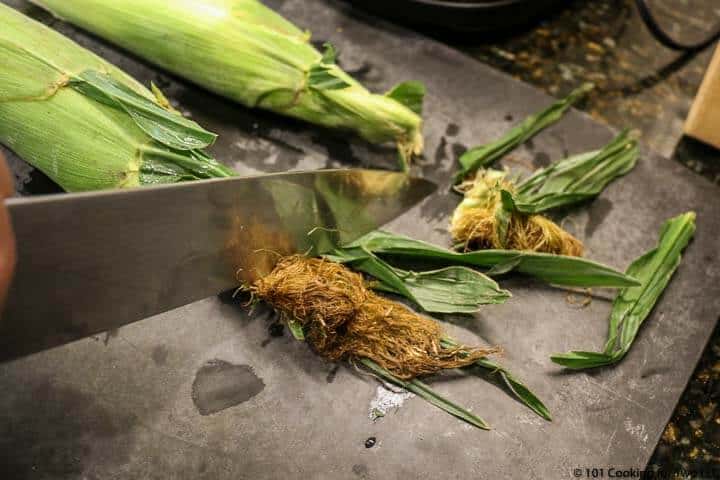
The easiest way to shuck is to cut the bottom of the ear off and squeeze the ear out. The corn silk will stay with the husks.
My Rating
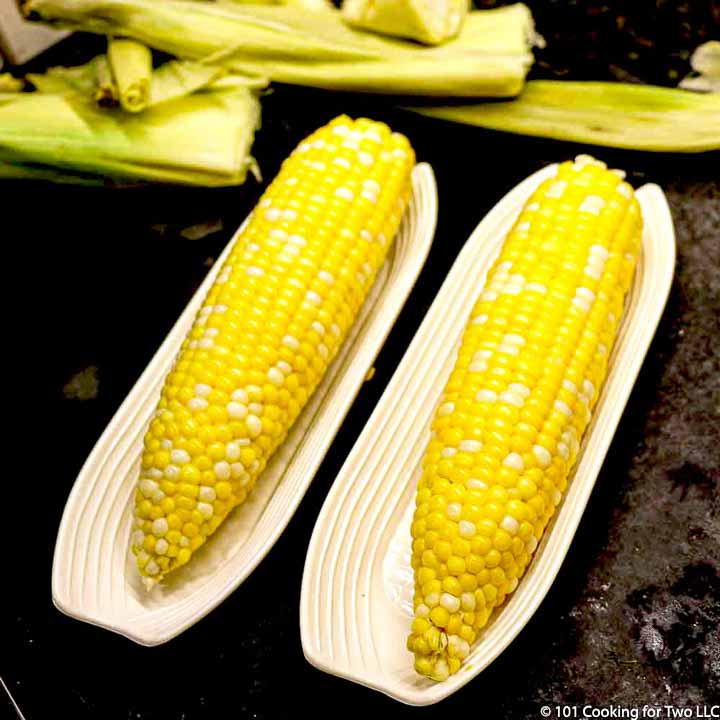
What is not to love about fresh sweet corn.
Pro Tips: Recipe Notes on Microwave Corn on the Cob
One of the keys to cooking in a smaller household is great quick side dishes. This is it.
I suggest microwave for cooking up to 4 ears of sweet corn. If you are doing more, an alternative method like the oven or boiling would be more time effective. I will discuss both below.
How to Pick the Best Sweet Corn?
Notes on Sweetness of Sweet Corn.
There are several hundred types of sweet corn. Some have enhanced the sweetness, and unless you planted the corn, you wouldn’t know the variety.
What you can control is the freshness since the sugar in the corn starts to deteriorate rapidly as soon as picked and in 3-4 days will be mostly starch. The easiest route for most of us to the sweetest corn is by getting the freshest corn.
Should You Take a peak?
The most common way to choose an ear of corn is to take a peek. My mother always did. Peel down the husk a bit and check for bright, plump kernels.
But in addition to being questionable from an etiquette point of view, it also allows that ear you didn’t buy to deteriorate faster. But also, it is probably not very effective.
So, How Should I Pick?
Get your corn in the best places. In order: your garden, neighbor vegetable stand, farmers market, supermarket.
Exam the tassel, it needs to be brown and silky, not black and dry, which is a sign of older corn.
The husk should be bright green and tight against the corn. It has good moisture and not turning yellow or brown on the edges.
Look for little brown holes in the husk, usually near the top. Those are wormholes. Just say no.
Feel the kernels through the husk to be sure that they are even and plump.
Limits of this technique.
I feel the microwave is great for 1 to 4 ears of corn. It takes 4 minutes per ear, and you can probably only fit four ears in the microwave (note: you can not stack it).
You could wrap the first batch while a second batch cooks, but there are so many great ways to cook sweet corn.
Other Ways to Cook Sweet Corn on the Cob.
How to Boil Sweet Corn.
Prep the corn by removing husk and silk.
Place corn in boiling water (no salt in water.) Cover the pan and let the water return to a boil.
Boil for 3-5 minutes until tender. This can vary some.
Corn in the Oven.
Prep corn like the microwave
Place in a 350-degree oven. Do not stack. Leave a little space.
Cook for 30 minutes.
Corn On the Grill.
Please see my Naked Grilled Corn.
Plus many many more ways that work well.
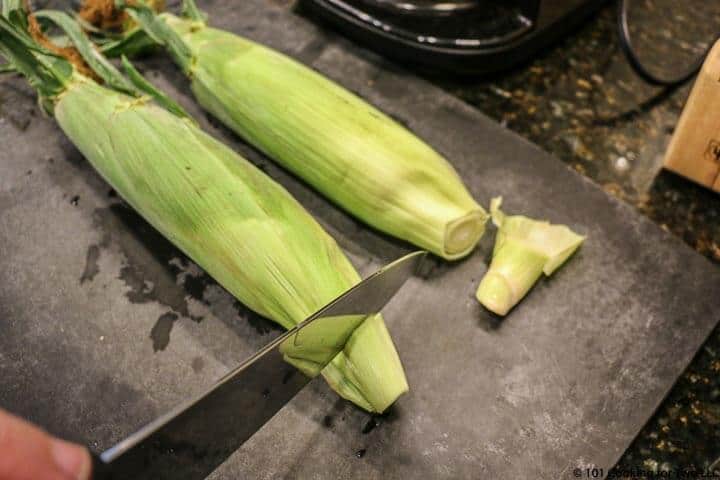
Start with 1 to 4 ears of corn. Prep the corn by first trimming back the stalk. Not too much, you want to keep the husk intact.
Next, trim off most of the silk and loose husk at the top of the ear.
Toss the amount of corn you want in a microwave on high for 4 minutes per ear (2 ears = 8 minutes).
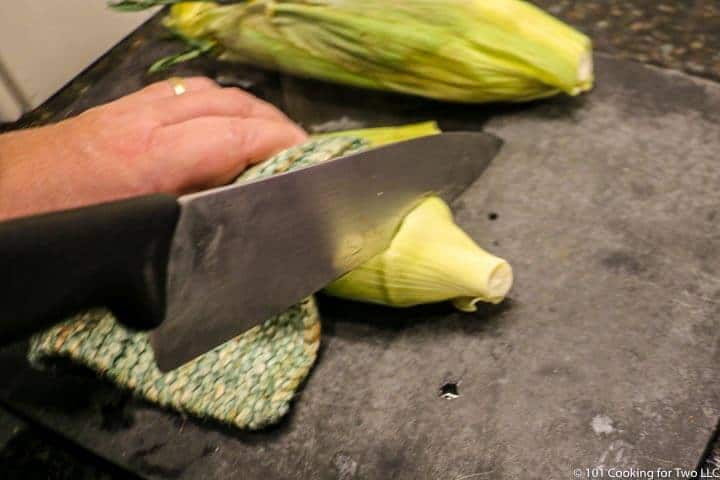
Remove from oven with a hot pad. With a SHARP chef knife cut off the bottom of the ear of corn. I take out the bottom row of kernels usually. But you can always cut again if you don’t get enough.
Slide the knife between the ear of corn and the husk and cut a couple of slits through the husk about 2 inches up two sides.
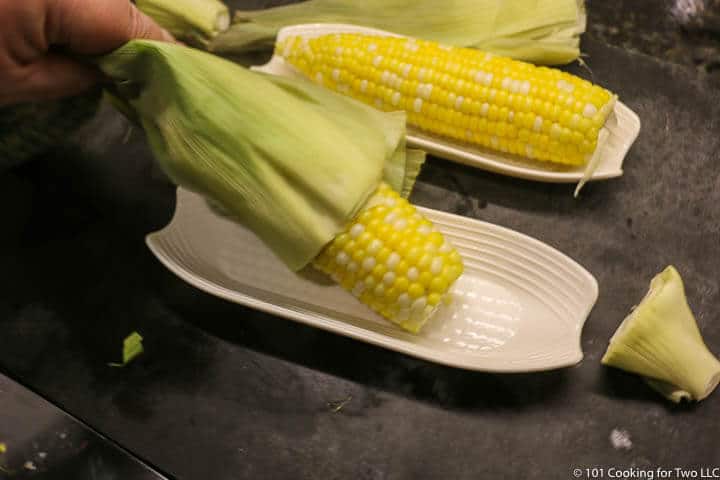
Squeeze the corn out of the husk. The silk will stay with the husk.
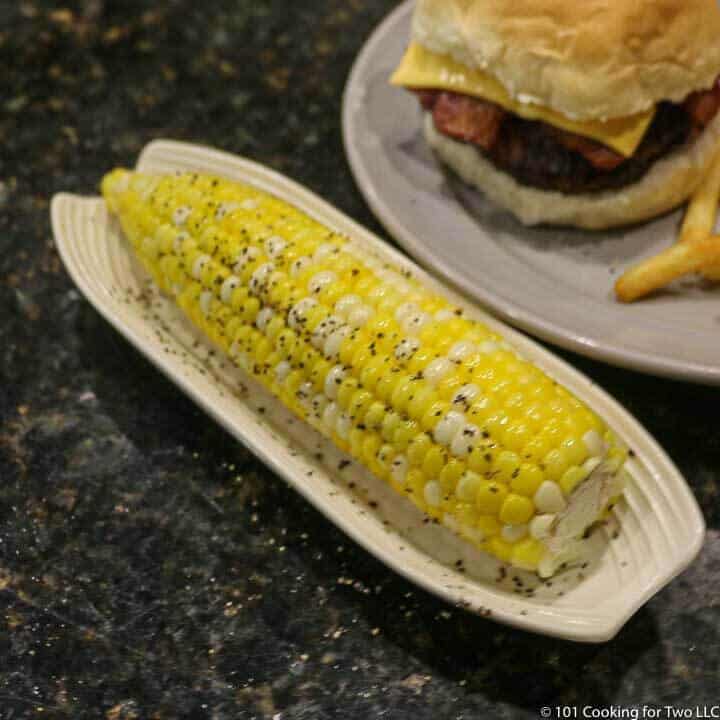
Serve hot with salt, pepper, and butter to taste.
Do you want more recipes from 101 Cooking for Two? Sign up for the newsletter and get all posts delivered straight to your inbox!
Microwave Corn on the Cob
Super Easy. Learn how to pick the best corn and microwave with the husk on in just a few minutes. Perfect for the smaller households. Just follow these easy step by step photo instructions.
Prep Time1min
Cook Time4mins
Total Time9mins
Author: Dan Mikesell AKA DrDan
Course : Vegetable
Cuisine : American
Keyword : Corn on the Cob, Micrewave Corn, Sweet Corn
Servings/Adjust Amount: 1servings
1
Ingredients
1-4earscorn on the cob – unhusked
salt and pepper to taste
butter
Instructions
Start with 1 to 4 ears of corn. Prep the corn by first trimming back the stalk. Not too much, you want to keep the husk intact.
Next, trim off most of the silk and loose husk at the top of the ear.
Place the amount of corn in a microwave on high for 4 minutes per ear (2 ears = 8 minutes).
Remove from oven with a hot pad. With a SHARP chef knife cut off the bottom of the ear of corn. I take out the bottom row of kernels usually. But you can always cut again if you don’t get enough.
Slide the knife between the ear of corn and the husk and cut a couple of slits through the husk about 2 inches up two sides.
Squeeze the corn out of the husk. The silk will stay with the husk.
Serve hot with salt, pepper, and butter to taste.
Recipe Notes
Pro Tips
This technique is good for 1-4 ears of corn. If you need more see discussion above.
Be sure to calculate the time at 4 minutes per ear. So one ear is 4 minutes, and 3 ears would be 12 minutes.
Use a microwave with a turntable.
Use hot pads to handle the hot corn, or you may get burnt.
Corn can be stored at room temperature for a day or several days in the refrigerator.
The keys to getting the corn out of the husks are the cutting the stalk off far enough into the corn to release all the husk. And the slits up the sides both being several inches long and all the way through the husk.
The silk will come off with the husk.
Nutrition Note: Value given is for just the corn. 1/2 teaspoon of butter and 1/4 teaspoon of salt would add 18 calories and about 600 to the sodium.
Nutrition Facts
Microwave Corn on the Cob
Amount Per Serving
Calories 77Calories from Fat 9
% Daily Value*
Total Fat 1g2%
Saturated Fat 1g5%
Sodium 14mg1%
Potassium 243mg7%
Total Carbohydrates 17g6%
Dietary Fiber 2g8%
Sugars 6g
Protein 3g6%
Vitamin A3.4%
Vitamin C7.4%
Iron2.6%
* Percent Daily Values are based on a 2000 calorie diet.
Have a question or something not clear? Ask in the comments.
Do you want more recipes from 101 Cooking for Two? Sign up for the newsletter and get all posts delivered straight to your inbox!
Nutrition is for one serving. Number of servings is stated above and is my estimate of normal serving size for this recipe.
All nutritional information are estimates and may vary from your actual results. This is home cooking, and there are many variables. To taste ingredients such as salt will be my estimate of the average used.
If you like this recipe or find it useful, the pleasure of a nice 4 or 5 rating would be greatly appreciated.
The cookie settings on this website are set to "allow cookies" to give you the best browsing experience possible. If you continue to use this website without changing your cookie settings or you click "Accept" below then you are consenting to this.
Read more about data collection for ads personalisation our in our Cookies Policy page