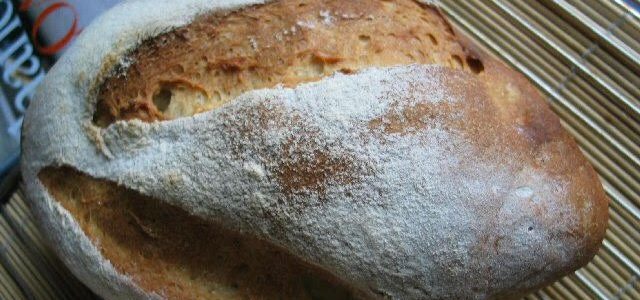
Saltless, yet it is never bland! This Tuscan bread is more substantial than the French bread, and although it hasn’t the airy lightness of a French baguette, it is not heavy like some German bread either. Fresh tomatoes and basil layered on a large slice of Tuscan loaf would make a perfect snack or like what I did, spread the bread with cheese Toscana angiesrecipes. One explanation of the saltless bread is that the Tuscans, well known for being tightfisted couldn’t bear to pay the government salt tax and chose instead to make bread without it. Perhaps, but gastronomes point out that the Tuscan bread is perfectly suited to their cuisine, which is full of strong flavors.
350 g German #550 flour (AP or bread flour)
110 g Water at 20C/68F
1 package / 7 g Instant dry yeast
30 g Olive oil
Pour the boiling water over the 250 grams flour in a bowl. Stir until you have a smooth thick paste. Cool and and let rest covered with a plastic wrap overnight in the fridge. The next day, take the dough out of the fridge and let rest for an hour to bring the paste to room temperature.
Place the paste and the rest of the ingredients in the bowl of your stand mixer and stir on low speed until combined. Increase the speed to medium and continue mixing until the dough is smooth and leave from sides of mixing bowl. Transfer the dough to a lightly oiled bowl. Cover and let rise until double in bulk, about one hour. Turn the dough onto a lightly floured work surface and divide it in half. Round each dough up and let the dough balls rest, covered, for 15-20 minutes.
After resting, shape the dough into batards. Proof the shaped batards, covered,on a piece of parchment paper or in moulds or pans for about one hour. Meanwhile, preheat the oven and the bricks to 220C/450F. Once the dough has doubled in size, sift flour on the surface of the batards to create a rustic appearance. Score the bread and carefully transfer them on the bricks in the oven. Bake the bread for 50 minutes. Cool on a wire rack.
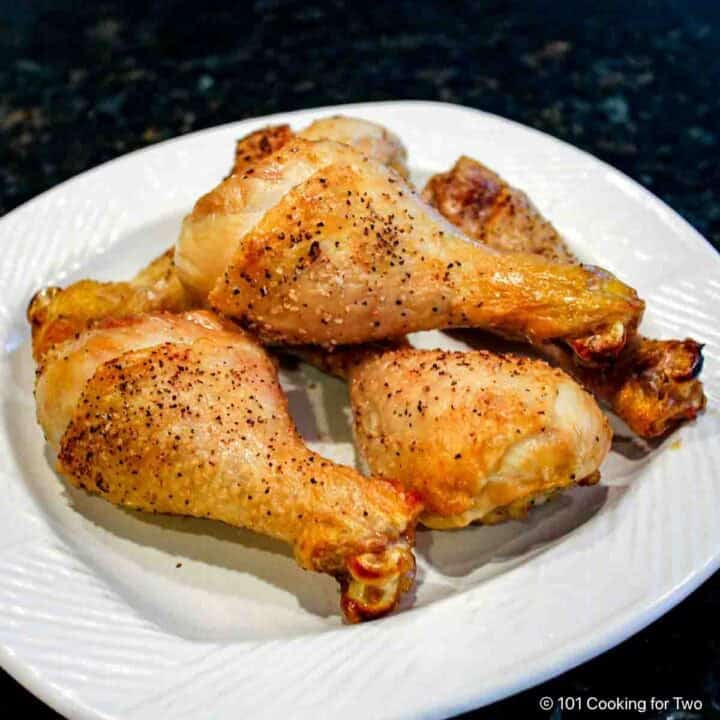
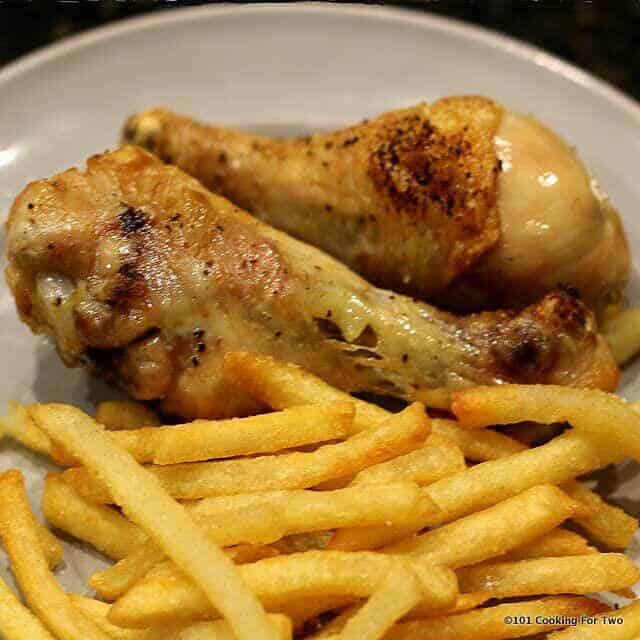
Oven baked chicken legs are a simple dinner the whole family will love. Just trim, pat dry, simple spices, and bake them in the oven. You will have perfect crispy, juicy chicken legs every time with these easy step by step photo instructions.
Table of Contents:
Introduction and My Rating
Everybody loves great chicken legs (AKA drumsticks). Kids, grandparents, and mom and dad all love a crispy drumstick. Now you can have them anytime you want. Plus they are economical.
Skip to the next section if you want to skip the story.
Last year I took several weeks working on grilled chicken legs to get them just right. We were having a large retirement party for several family friends, and I was providing the meat course for a hundred people.
I initially wanted to grill all 150 pieces of chicken, but after I got the smaller batch perfected, it was obvious that mass cooking that large was not possible on a home grill. See Grilling Chicken Drumsticks – The Art of Drummies.
But the grill recipe work did show that the secret of a great chicken leg (drumstick) was in the internal temperature of 185. Not 165, which is the safe chicken temperature, but 185 produces the moist tender chicken legs you will ever have.
So I switched my attention to the oven with excellent results. See Chicken for a Hundred. Since then, I have done mainly oven drummies. Here is the scaled-down version.
My Rating:
Just excellent. It always brings a child-like smile to my wife’s face.
♨️Cooking
DO NOT SKIP THE PAT DRY, or you will not have crispy skin. (See Chicken: To Rinse or Not To Rinse? about rinsing the chicken)
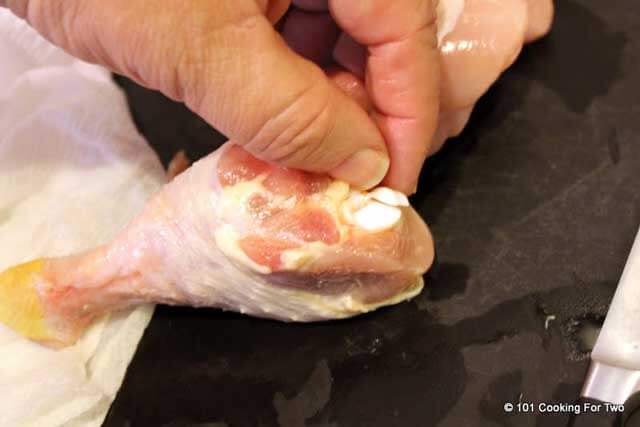
Check the cut joint area for loose parts. You may be handing this to a child and don’t need loose bone aspirated.
I like cooking this on a rack to get the meat off the pan, and with convection, all sides of the legs will be nice.
Cook at high temp, and you must use a thermometer to be sure you get to 185. Do not guess.
Spice as you want. I often add the Cayenne, but if you have little ones, skip it.
Scale to any amount you need
Seasoning
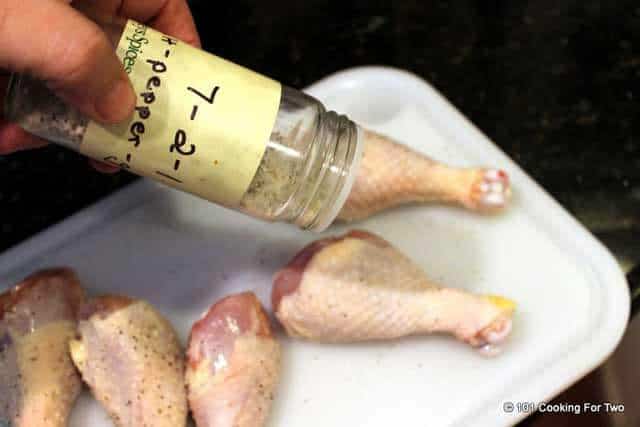
I generally use my All Purpose Seasoning; 7:2:1 and 7:2:2 but just some coarse salt and pepper or just the seasoning of your choice.
Skip the seasoning and brush with your favorite BBQ sauce the last 5 minutes to make great oven-baked BBQ drumsticks.
⏰How Long to Bake
There are three variables: the chicken leg size, oven temperature, and the desired internal temperature. I’m aiming for 185 (see next section), so at 425 degrees for about 35 minutes.
ALWAYS COOK TO A FINAL INTERNAL TEMPERATURE. PLEASE, NEVER BY TIME ALONE.
Chicken legs at 350°F convection or 375°F conventional – about 45-50 minutes
Chicken legs at 375°F convection or 400°F conventional – about 40-45 minutes
Chicken legs at 400°F convection or 425°F conventional – about 35-40 minutes
Chicken legs at 425°F convection – about 35 minutes (I don’t suggest 450°F conventional, do 425°F conventional and add a few minutes)
Remember, all these numbers vary by your oven, also.
The lower the temperature you use, the less crispy your chicken legs will be.
🌡️Best Final Internal Temperature
Many want to cook chicken legs to 165, which is the minimum safe internal temperature for chicken for the FDA. There is a difference between safe and done. Pork is safe at 145, but you sure won’t want your pulled pork to be cooked to 145. It would be terrible.
Also, a lot of recipes cook “until fluids run clear.” Excuse me, but what does that mean? You should be standing there, poking it with a knife and losing all the moisture — not a good idea. Also, I suspect that it may even be below the safe minimum temperature.
While I cook my chicken breast to 165, there is way too much fibrous tissue in chicken legs. They will be tough and stringy. Just plan not done. Please use 185 as you finish temperature. Check the comments if you need confirmation.
🖊️Other Notes
Why Use a Rack to Bake?
A lot of the fat drained during cooking on the rack. You can cook this without a rack, but you will be happier with a rack.
Storage
Good just refrigerated for 3-4 days. Also, they should freeze fine for 3-4 months. Reheat by thawing first then reheat in an oven.
Side Dish Recipes
🖼️Photo Instructions
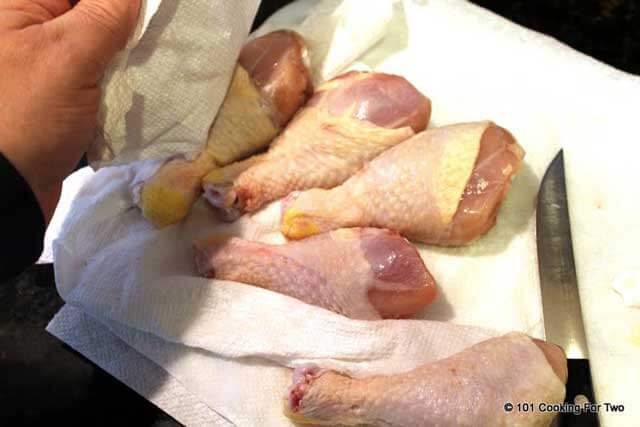
Preheat oven to 425 convection. Pat dry the chicken legs with paper towels.
Trim off any extra skin and any loose joint pieces.
Spice to taste. Here I’m using a light sprinkling of my 7:2:1 seasoning. If you don’t have that, then just some salt and pepper to taste. Other seasonings at your option.
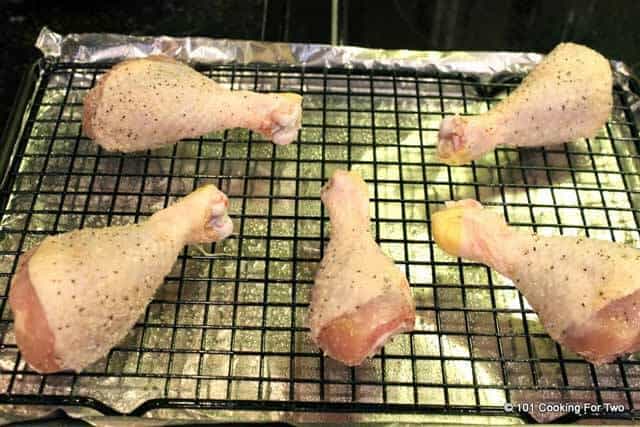
Place the legs on a prepared cooking pan with the thicker part of the chicken legs to the outside. I usually line with aluminum foil to help clean up. A rack elevates the chicken to help all sides cook evenly. You can do it without the rack but better with it. Of course, a heavy spray of PAM on the rack or foil.
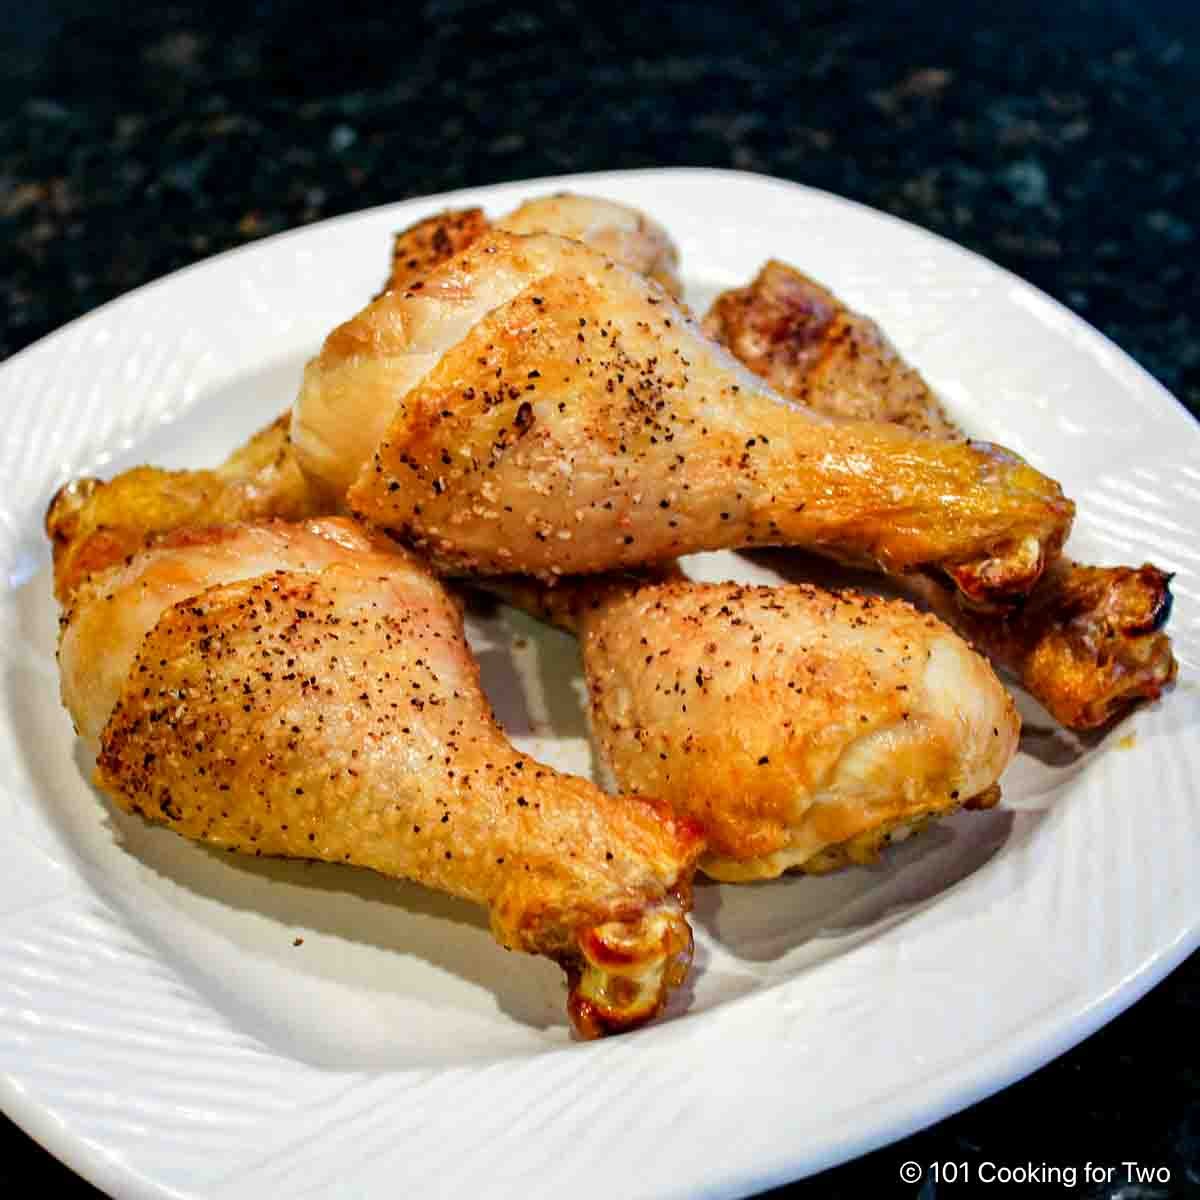
Cook to 185 plus internal temp. DO NOT STOP SHORT of 185. About 35 minutes in my oven. Let sit for 10 minutes before serving. They are way too hot to eat right away and will be better after a rest.
📖 Recipe
Oven Baked Chicken Legs
Oven baked chicken legs are a simple dinner the whole family will love. Just trim, pat dry, simple spices, and bake them in the oven. You will have perfect crispy, juicy chicken legs every time with these easy step by step photo instructions.
Prep Time10mins
Cook Time35mins
Total Time45mins
Author: Dan Mikesell AKA DrDan
Servings/Adjust Amount: 6chicken legs
6
Ingredients
6legsChicken legs – about 1 1/2 lbs
salt and pepper to taste – or 7:2:1 or 7:2:2 seasoning
US Customary – Convert to Metric
Instructions
Preheat oven to 425 convection. If you don’t have convection, do 425 conventional and add a few minutes.
Pat dry the legs with paper towels. (See https://www.101cookingfortwo.com/chicken-rinse-not-rinse/ about rinsing chicken)
Trim off any extra skin and any loose joint pieces.
Spice to taste. Here I’m using a light sprinkling of my 7:2:1 seasoning. If you don’t have that the just some salt and pepper to taste. Other seasonings at your option. A touch of cayenne is nice.
Placed on a prepared cooking pan with the thicker part of the chicken leg to the outside. I usually line with aluminum foil to help clean up. A rack elevates the chicken to help all sides cook evenly. You can do it without the rack but better with it. Of course, a heavy spray of PAM on the rack or foil.
Cook to 185 plus internal temp. DO NOT STOP SHORT of 185. About 35 minutes in my oven. Let sit for 10 minutes before serving. They are way too hot to eat right away and will be better after a rest.
Recipe Notes
Pro Tips:
DO NOT SKIP THE PAT DRY or you will not have crispy skin.
Check the cut joint area for loose parts. You may be handing this to a child and don’t need loose bone aspirated.
I like cooking this on a rack to get the meat off the pan, and with convection, all sides of the chicken legs will be nice. If no rack then flip at 20 minutes.
Cook at high temp and you must use a thermometer to be sure you get to 185. Do not guess.
Spice as you want.
Scale to any amount you need
Skip the seasoning and brush with your favorite BBQ sauce the last 5 minutes to make great oven baked BBQ chicken legs.
Good refrigerated for 3-4 days. Or will freeze well for 3-4 months.
Course Main Course
Cuisine American
Keyword Baked Chicken, Drumsticks
Check Out Other Great Recipes
HAVE A QUESTION? – Look in the full post.Make it Perfect First Time and Every Time. Don’t miss out, check the full post above. Almost every recipe includes easy step by step photo instructions so you can visualize yourself cooking this recipe along with helpful tips and options.
Nutrition is generally for one serving. Number of servings is stated above and is my estimate of normal serving size for this recipe.
All nutritional information are estimates and may vary from your actual results. This is home cooking, and there are many variables. To taste ingredients such as salt will be my estimate of the average used.
Editor’s Note: Originally published September 9, 2012. Updated with discussion and photos updated to improve the presentation and add more information. The recipe remains the same. Please enjoy the update.
This spinach coconut roll recipe is a twist on the classic cinnamon roll. Naturally green sweet bread dough with a coconut filling–delicious, healthy and fun! Spinach is known as a rich source of iron. According to the USDA, spinach contains a relatively high level of iron, compared to other vegetable and meat sources.
Dough
Filling
265 g All-purpose flour
6 g Active dry yeast
4 tbsp Sugar
1/4 tsp Salt
1 Egg
140 ml Creamed spinach angiesrecipes, thawed
70 g Butter
Some egg wash (for brushing)
4 tbsp Butter
2 tbsp Sugar
1/2 Egg
4 tbsp Dried coconut shreds angiesrecipes
Place all the dough ingredients, except butter, in a mixing bowl fixed with dough hook. Stir until a dough ball forms. Add in butter and knead until the dough has become smooth and elastic.
Place it in a lightly greased bowl, covered and let rise in a warm place for about 60 minutes until the dough has doubled in size. Coat your finger with flour and press your finger into middle of the dough, the indentation should remain visible for a few seconds.
While the dough is fermenting, you can prepare the filling. Beat the sugar and butter until light. Add in egg and coconut shreds and stir until mixed.
Punch down the dough to release the gas during the proof. Divide it into 2 portion. Cover with a plastic wrapper and let rest for about 15 minutes. Roll each into a 28x15cm rectangular dough. Spread half of the filling on the top and roll up. Cut each into 7 pieces.
Place them in a lightly greased 28cm round baking pan. Let rise for about 60 minutes and brush with egg mixture. Bake in a preheated 175C/350F oven for about 18-20 minutes.
The cookie settings on this website are set to "allow cookies" to give you the best browsing experience possible. If you continue to use this website without changing your cookie settings or you click "Accept" below then you are consenting to this.
Read more about data collection for ads personalisation our in our Cookies Policy page