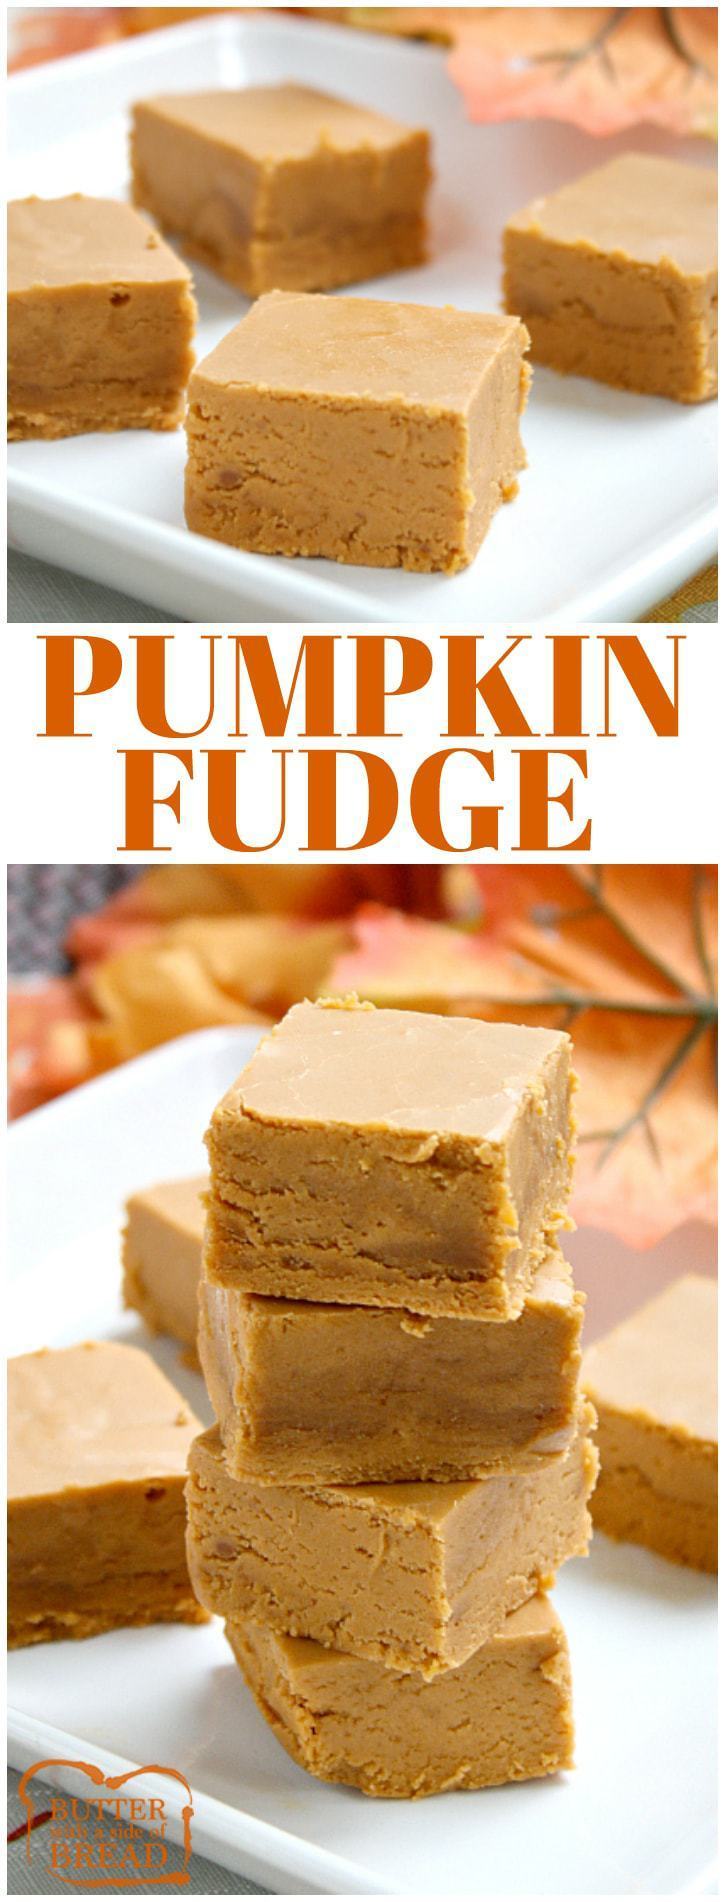
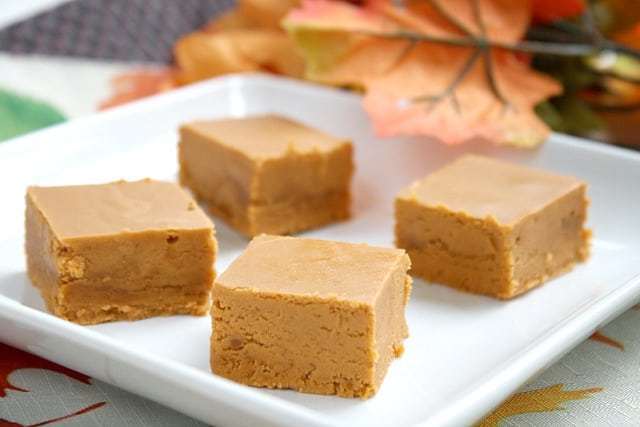
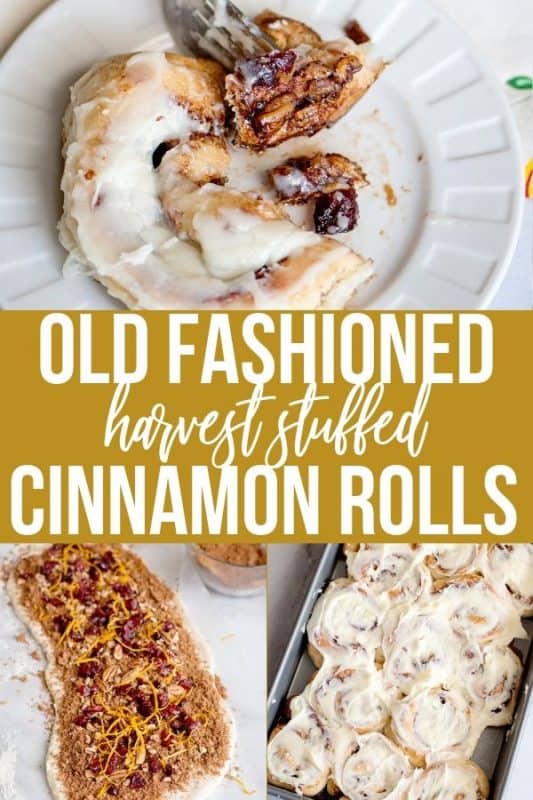
These Cinnamon Rolls are old fashioned rolls which are stuffed with brown sugar, cranberries, toasted pecans, & orange zest. This recipe, along with my shortcuts to make it easy, is sure to become one of your fall favorites! If you’ve time to visit, keep reading. If not, scroll on down to the recipe card.
Ready to make some cinnamon rolls? Let’s go!
These cinnamon rolls are so very easy.
They are a deluxe version of my original cinnamon roll recipe, ⬅click the underlined text for that one.
Today, we’ll be using my favorite shortcut of frozen bread dough.
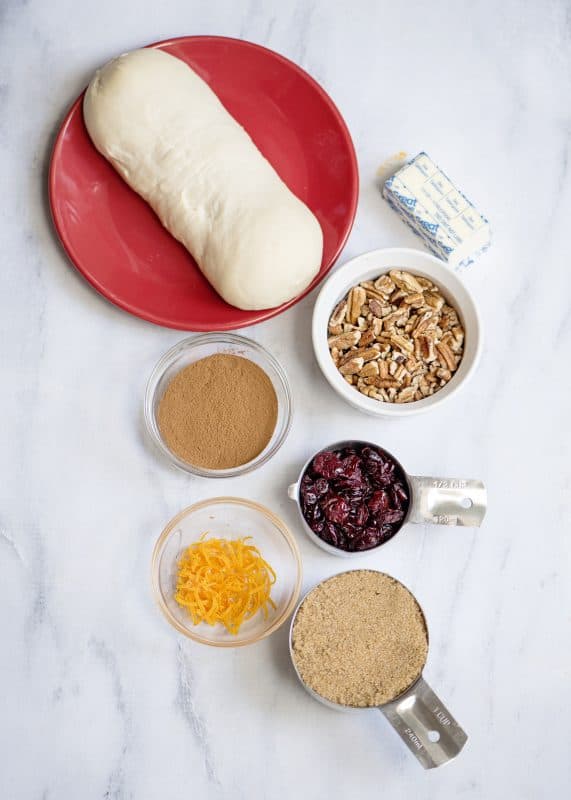
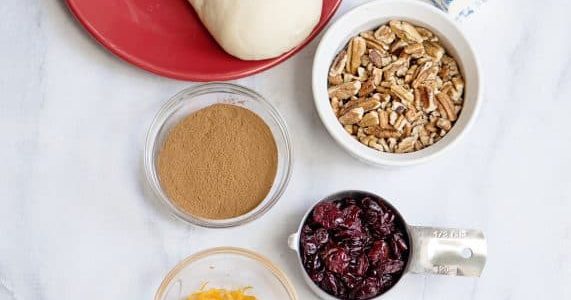
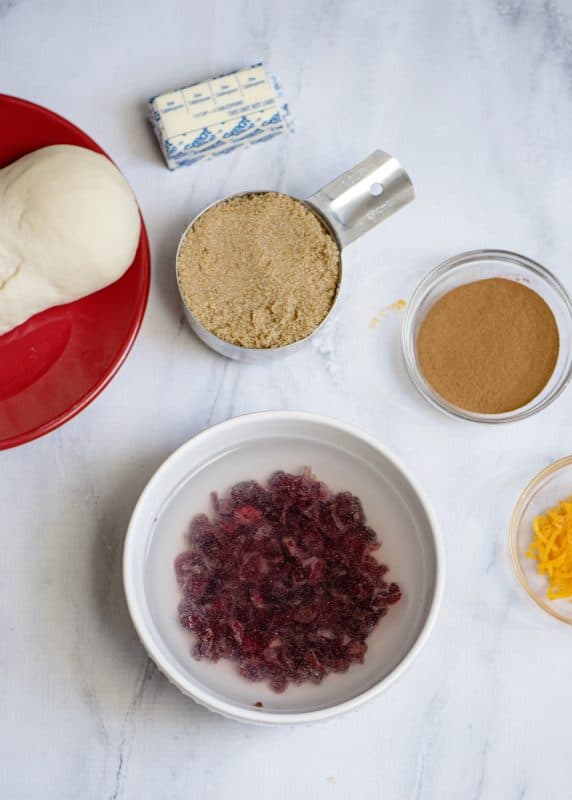
Ingredients you will need for this stuffed cinnamon roll recipe you’ll need:
- A loaf of frozen bread dough that has been thawed (I’m using Rhodes),
- Cinnamon
- An orange
- Butter
- Brown sugar
- Pecans
- Dried cranberries (also known as craisins)
You can also use raisins in this or even dried cherries if you like.
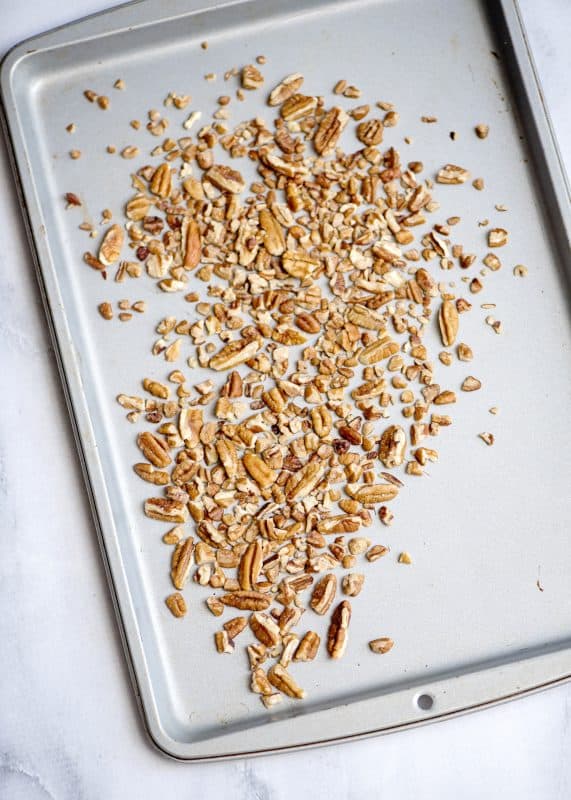
- Place your pecans on a baking sheet.
- Place them in a 350 oven for 5-6 minutes, keeping an eye on them so they don’t burn. You just want them lightly toasted.
Toasting pecans really brings out their flavor. I’ve grown to appreciate this extra step! When I was in Charleston we showcased a German Chocolate Cake from Southern Living and I took a bite of it on air. As soon as the segment ended I turned to the stylist and said “You toasted those pecans!!! That was amazing!” It changed the taste of the entire cake for me.
Now I love dried cranberries but raisins and dried cherries would work really well in this also.
Before I add mine into a recipe I like to plump them a bit.
To plump your cranberries for these cinnamon rolls, simply place dried berries in a bowl and cover them in hot water. Let them sit for about five minutes or so and then drain them.
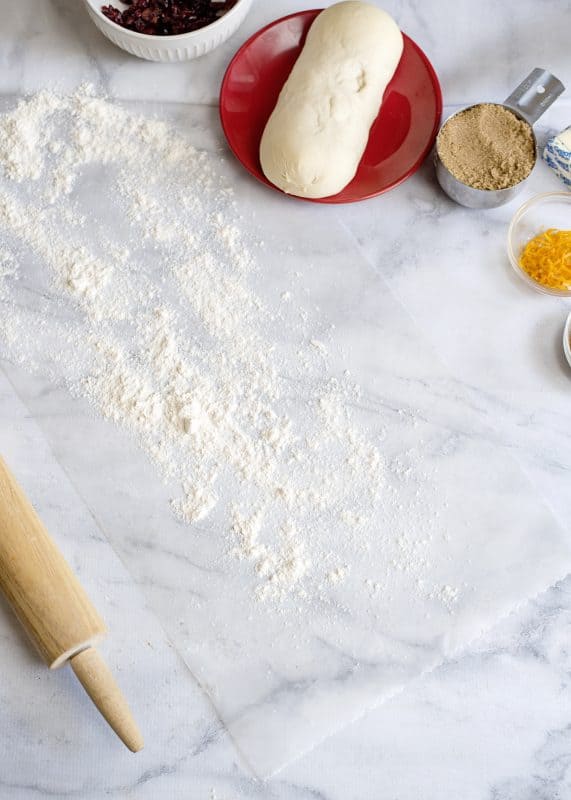
- Line a countertop with a silicone mat or some waxed paper.
- Spread some flour over that to help prevent your dough from sticking.
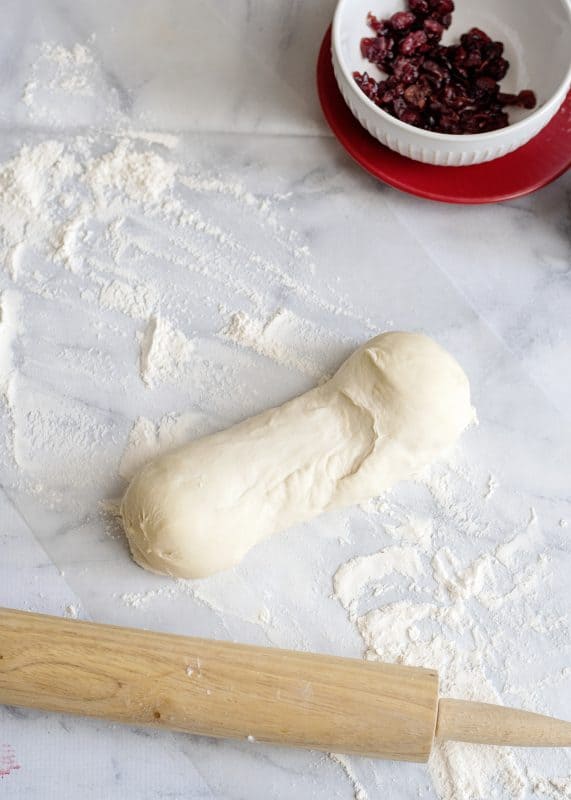
- Make sure your bread is thawed completely and place it on your floured surface.
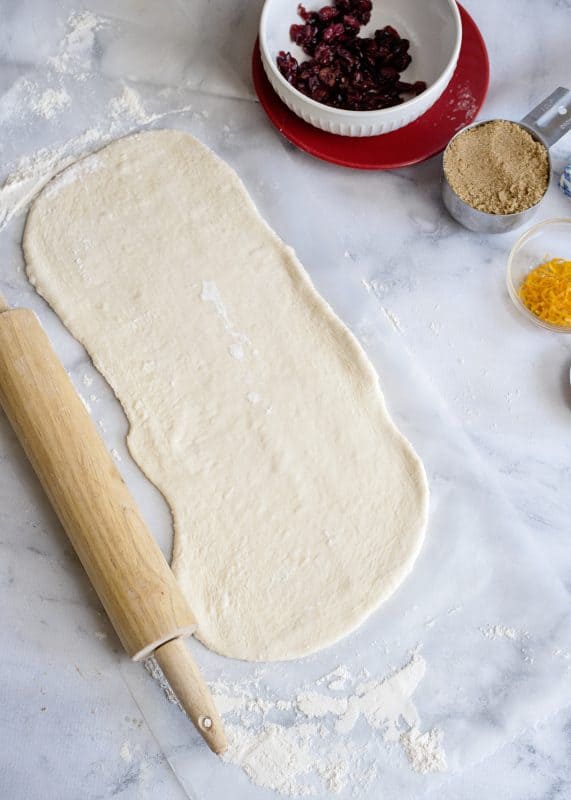
- Coat your rolling pin with a little flour (just rub it on there with your hands) and roll that puppy out into a rectangle-esque object. It’s kinda like a rectangle, but no one is taking off points for style or precision here.
If your dough struggles with you, what I often do is roll it out a little bit, let it sit for a few minutes, then roll it out again. This will let it relax some and it will be easier. Either way, rolling it out will take a little muscle. But you can do it.
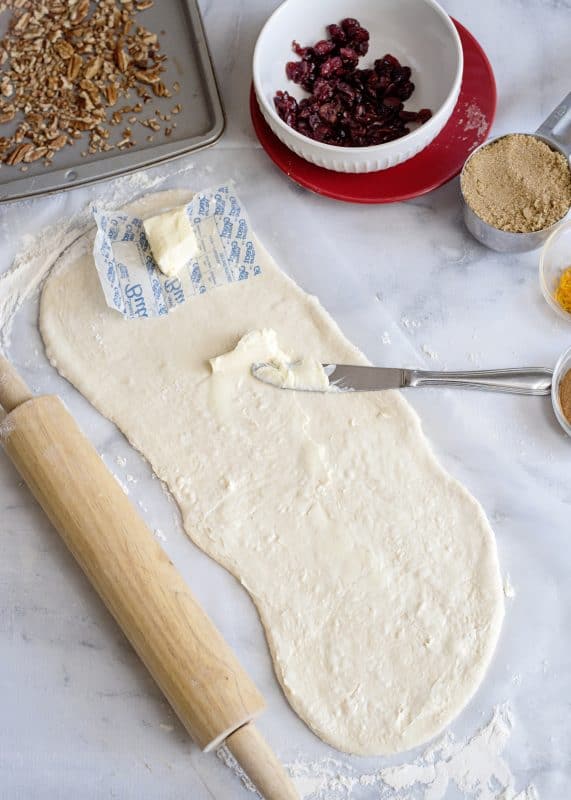
- Spread your dough with about half a stick of butter.
“About” is the key word here. Again, no points are taken off for precision. If you’re making these cinnamon rolls for anyone other than yourself, I can guarantee you won’t get complaints. If you do get complaints, take the cinnamon roll back. 🙂
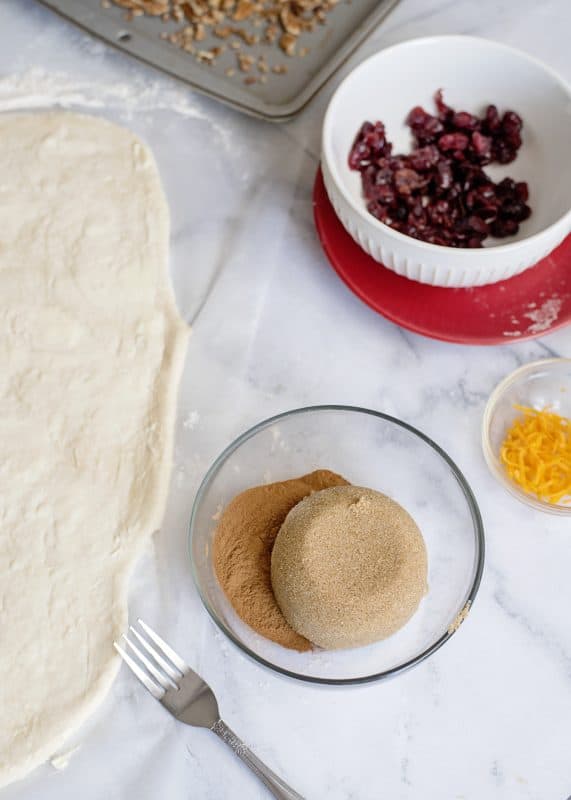
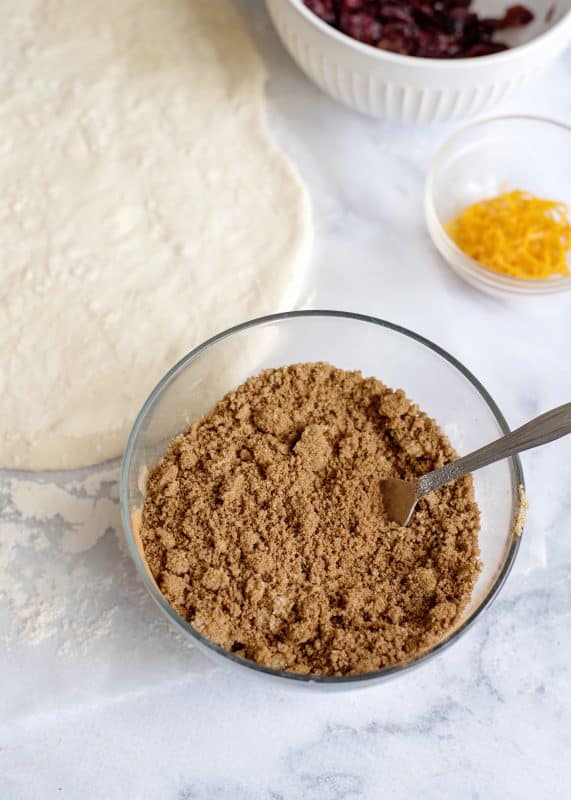
- Stir the brown sugar and your cinnamon together until well blended (or until you get tired of stirring).

Now most folks would use a zester for this but a little handheld grater works just as well as long as you have a soft touch. If you use a grater just be sure you grate only the orange part and try not to get down into the white part because supposedly, that part is bitter. I’ve never tried it myself so I’m gonna say “supposedly” here. I think orange zest is kind a bitter but in recipes like this, it is heavenly.
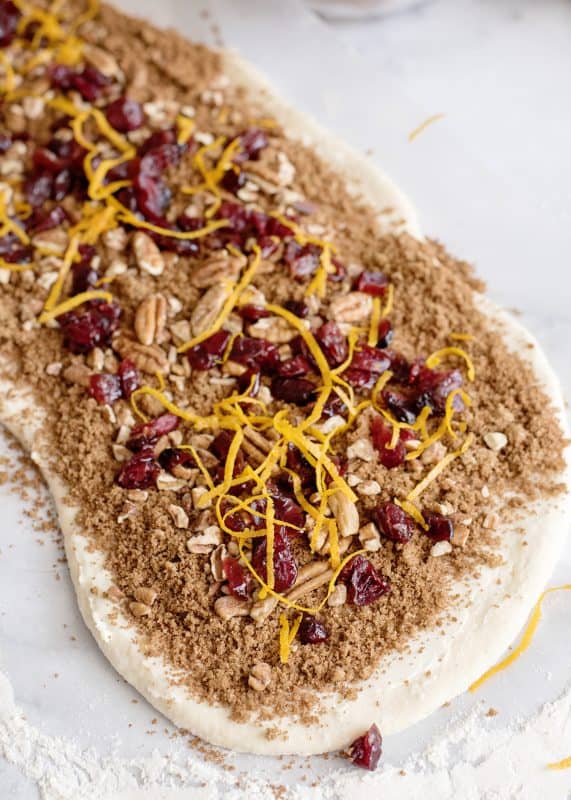
- Now sprinkle your brown sugar and cinnamon over the butter and then top with pecans, orange zest, and cranberries.
Isn’t this beautiful?

Plumped cranberries, toasted pecans, orange zest for that hint of citrus, brown sugar, and cinnamon...just in case you needed a recap. ~breathe it all in~
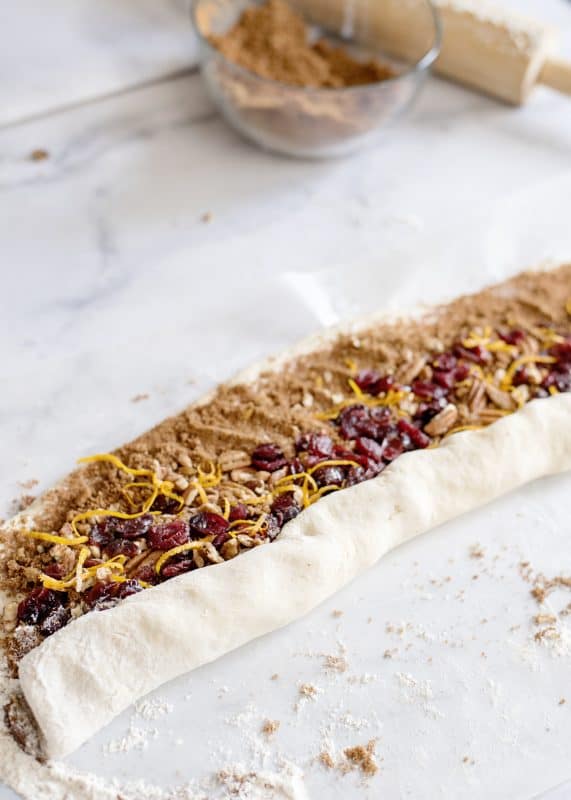
- Now we gotta roll this puppy up. The trick to rolling it up is to kinda squeeze it together as you roll.
- Roll, squeeze, roll, squeeze, roll, squeeze.
This is gonna really help keep your filling in while it bakes and also while you cut it and put the slices into your pan. You can kinda see here where I’ve pressed it together as I rolled it up. Here is my final cinnamon roll log. Now we’re ready to cut it.
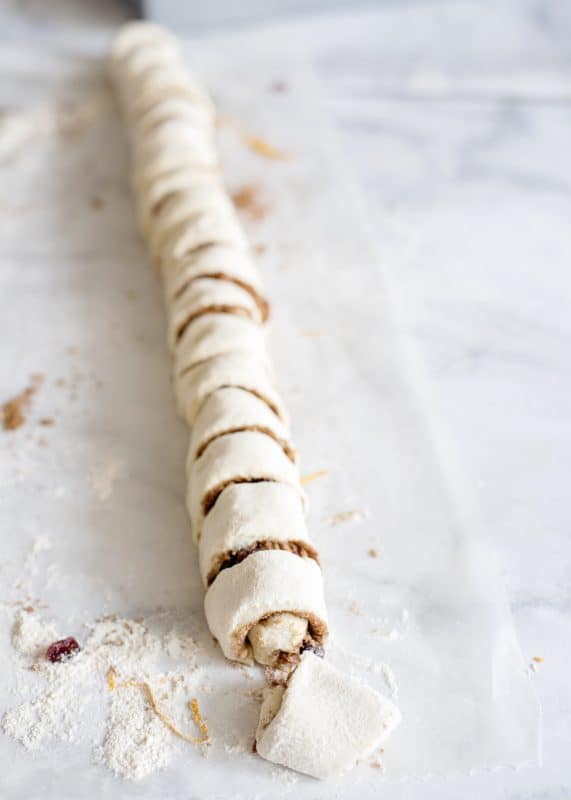
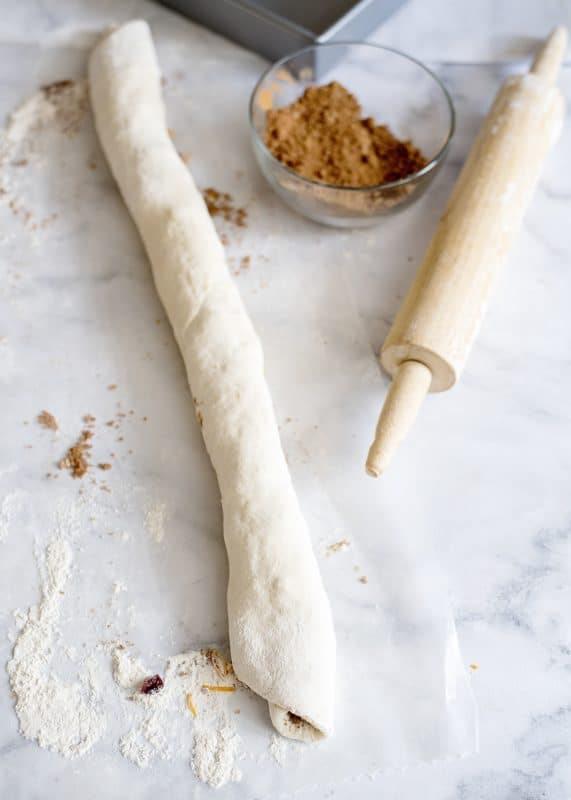
A lot of people tell you to cut your cinnamon rolls with dental floss and this or that but I have never seen the reason to go to all of that trouble…
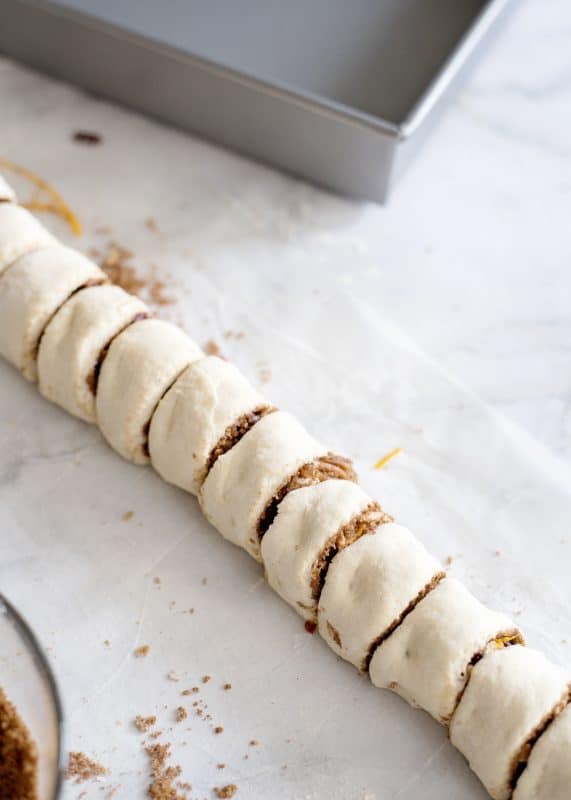
- I just grab a serrated knife (I am actually using a steak knife here) and go at it in a light sawing motion.
If you prefer to use dental floss or some other method, knock yourself out. 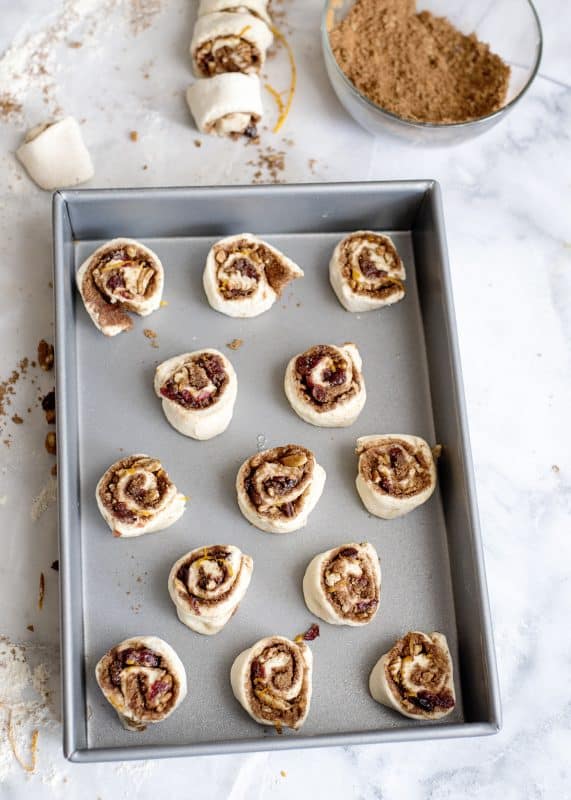
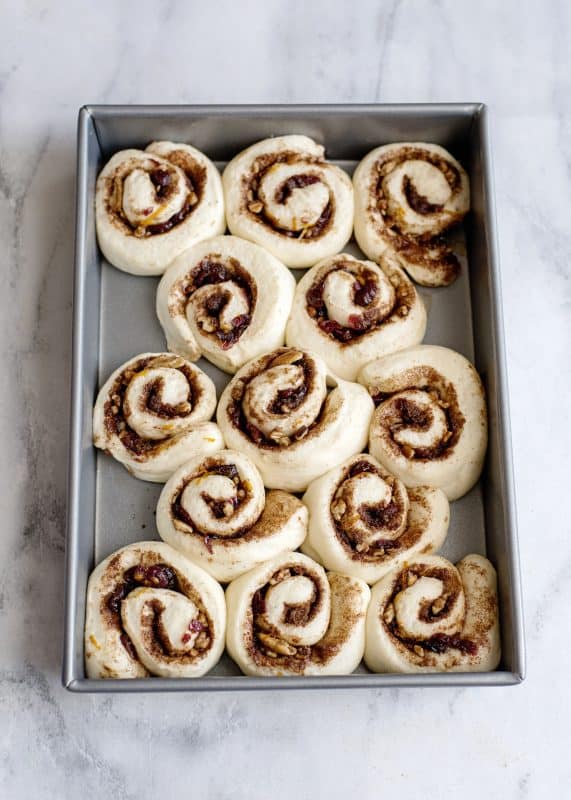
- Spray your pan with cooking spray.
- Place your cinnamon roll slices in the pan
- Spread out a bit like this so they have room to rise.
- Cover them and let them rise in a warm place until doubled in size.
If you don’t have a “warm” place, sometimes I just turn my oven on and let it preheat for a few minutes, then turn it off and open the door for a minute or two to make sure it is warm, but not hot. If it is “hot” it will start cooking your rolls and they won’t rise like they should, so make sure it is just warm.
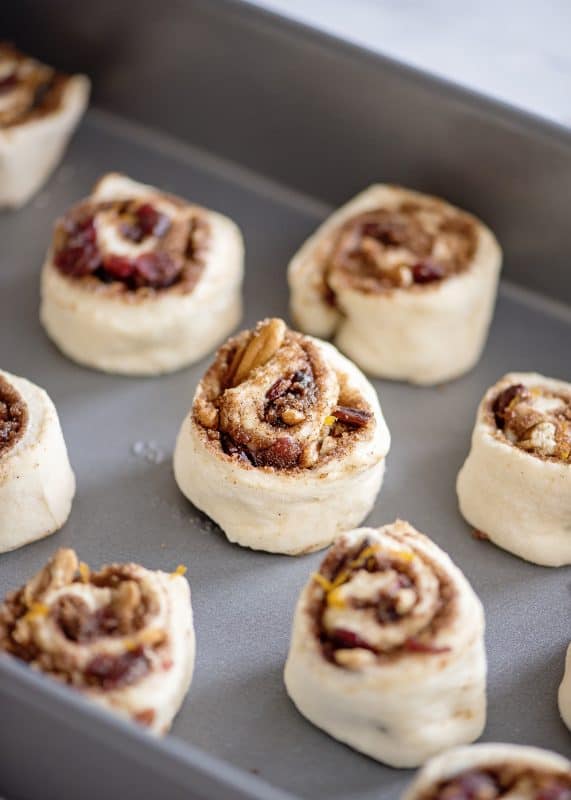
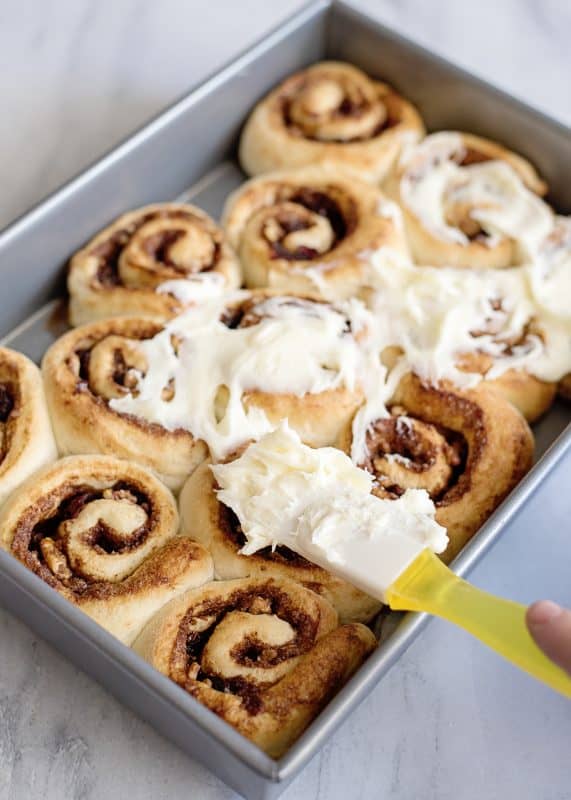
- Then place your covered rolls in the oven for an hour or so until they double.
I bake these cinnamon rolls at 400 for about fifteen minutes, or until done.
Freezing Instructions: Once you remove them from the oven, This is the point where you would freeze. If you like, you can cook them until they’re done but not quite as brown as this and then brown them more in the reheating.
If you freeze them before they are cooked, it will kill the yeast. They won’t rise the second time and if they are already risen but not baked, the yeast will still die and they’ll lose volume and be smallish, hardish things.
I called Rhode’s bread dough company and they gave me these exact instructions that I’m passing on to you for the best way to freeze these :).
To freeze: Allow to cool completely. Wrap well in foil (really well) and place in freezer. To reheat, thaw in the refrigerator (overnight is great) and remove foil. Cover loosely with more foil and place in 200 degree oven for 15-20 minutes. Ice and serve.
Now remember when I told you to kinda squeeze the dough together as you rolled it up?
I’ve seen a lot of instructions lately on the internet saying that you should turn your cinnamon rolls upside down after cooking them so that all of the good stuff goes back up in the cinnamon roll, but I find that when I kinda squeeze my dough together like I showed you…all the good stuff stays in the cinnamon roll.
Above see my pan, perfectly clean on the bottom where I took out two cinnamon rolls.
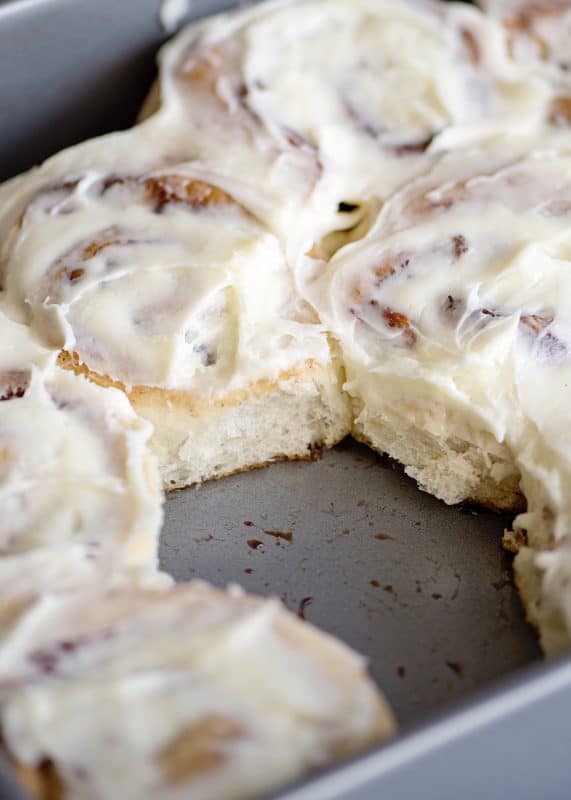
My husband ate those two just so I could show you this picture. He’s so supportive 🙂
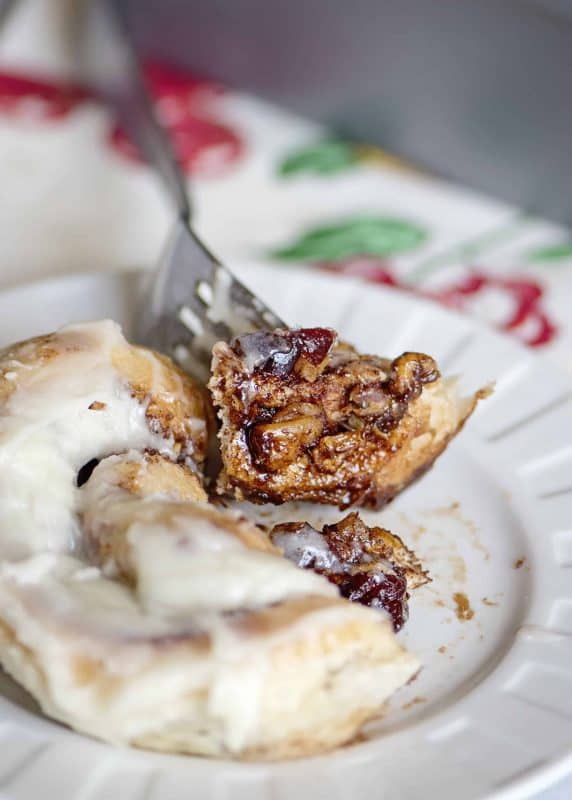
Hope you get to make these Stuffed Cinnamon Rolls recipe soon. They sure are good!
Harvest Stuffed Cinnamon Rolls
- 1 loaf frozen white bread dough such as Rhode’s
- 1/4 cup butter softened
- 1 cup brown sugar packed
- 3 tablespoons ground cinnamon *Can do less to taste
- 1/2 cup dried cranberries can use raisins or dried cherries
- 1/2 cup pecans toasted
- 1 tablespoon orange zest or more to taste
Icing
- 3 ounce cream cheese softened
- 1/4 Cup butter or margarine softened
- 1-1/2 Cups confectioner’s sugar
- 1/2 tsp vanilla optional, I usually just leave it out
-
Place loaf of dough on plate and let sit at room temperature until thawed. Once thawed, roll out onto floured surface to a size of about nine inches by sixteen inches.
-
Spread 1/4 cup butter over dough.
-
Place cranberries in a bowl and cover with hot water, let sit for five minutes to plump, then drain well.
-
In small bowl mix together brown sugar and 3 tablespoons cinnamon. Sprinkle over top of cinnamon roll, stopping about 1/2 an inch away from the sides so it will seal (see photos). Sprinkle pecans, cranberries, and orange zest over brown sugar mixture.
-
Carefully roll up cinnamon roll into a log, squeezing lightly as you do to seal it. Slice into one inch slices with serrated knife.
-
Place in greased 9×13 inch pan and cover with cling wrap. Place in warm spot and allow to rise until doubled in size. Remove cling wrap and bake at 400 for about 15 minutes, or until done.
-
Icing: Mix all ingredients together and beat with electric mixer until creamy. Spread over cinnamon rolls.
-
To Freeze: Prepare Cinnamon rolls up through step six (through the baking process). Once baked, allow to cool and then wrap well with foil. Freeze. Best if used within a month or two. To reheat frozen rolls, allow to thaw and then cover loosely with foil and place in 200 degree oven. Bake for 15-20 minutes or until heated through. Remove from oven and top with cream cheese icing.
Note: This recipe makes one pan of Cinnamon Rolls
You may also like these recipes:
Quick and Easy Pumpkin Spice Cinnamon Rolls
Upside Down Cranberry Pecan Cinnamon Rolls
Cinnamon Roll French Toast Bake
Cinnamon Love Knots
” It’s better to be kind, than to be right.”
Submitted by Diana L who found it on a fortune cookie about five years ago.
Click here to follow me on Instagram.
Click here to read today’s Bible notes.

Yum


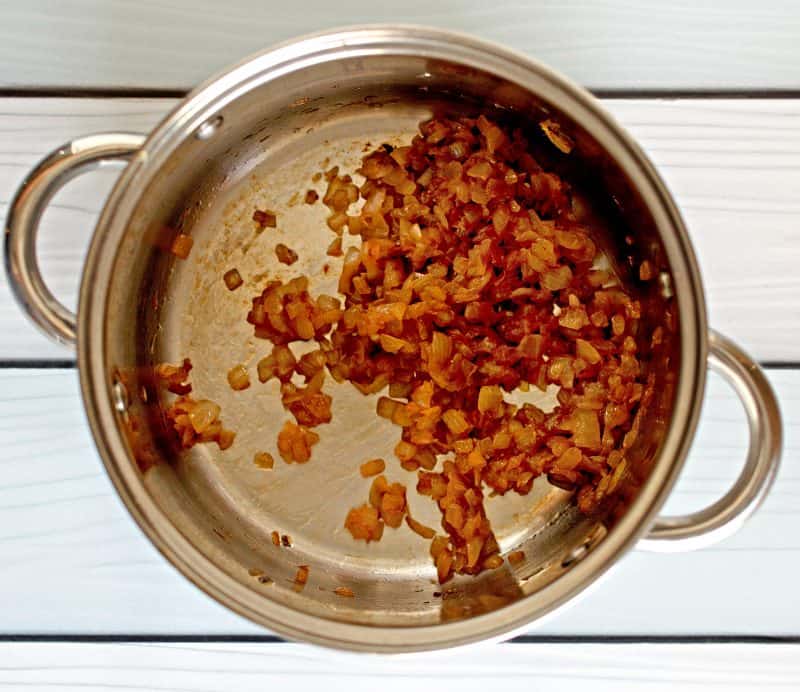
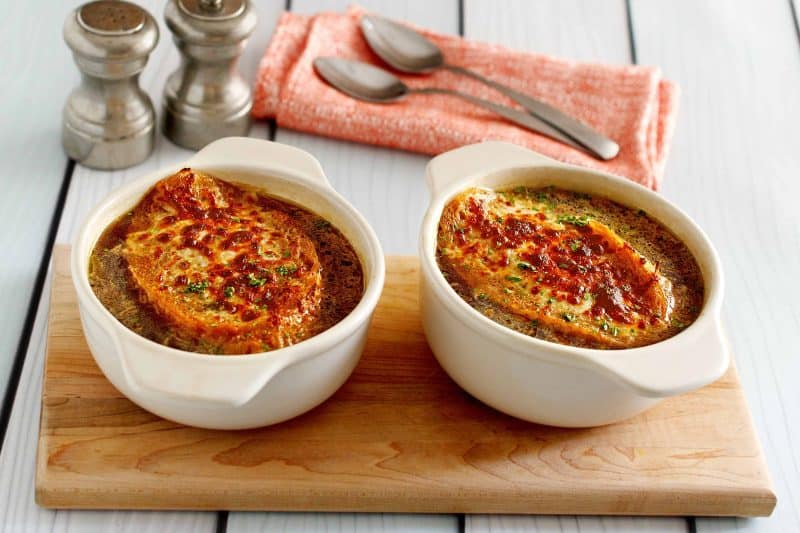
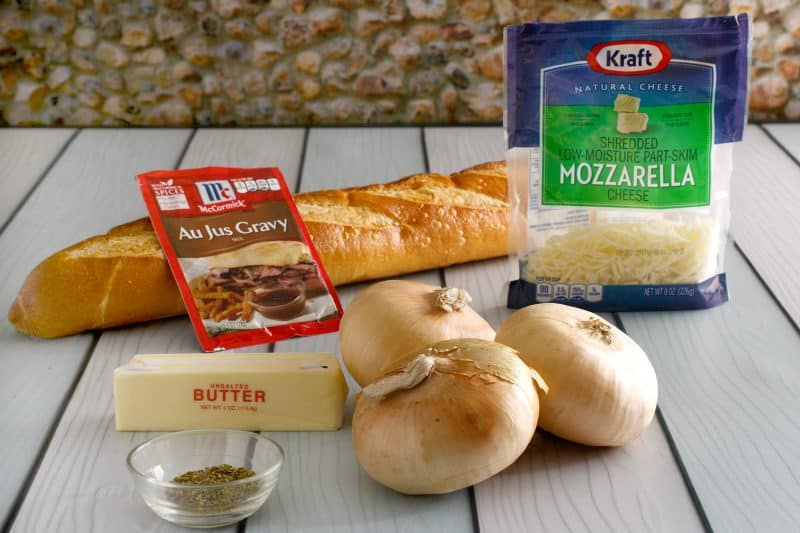 Ingredients for the French Onion Soup Recipe: