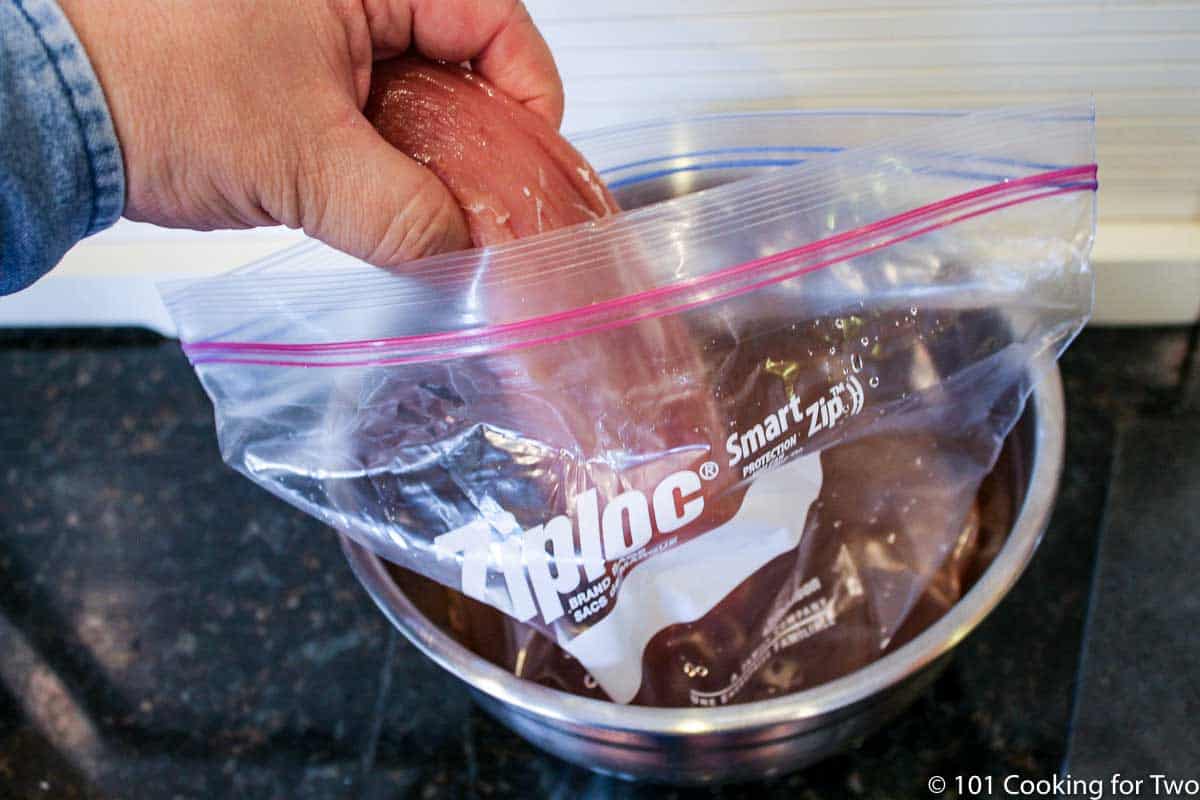
Dear Family, you know how much I love peppers in all forms! Today I share with you a quick and easy way to roast them in the microwave! I'll show you how easy it is to peel them withoutwaste, withoutsmells and without dirtying a grill.
Personally I prefer this system to the microwave for many reasons, of time, of smells, of simplicity, but also more trivially, because sometimes I don't have space on the stove!
Choose large peppers is pulpy, once roasted and removed the skin, you can use them in a thousand ways: we have put them in a beautiful piadina, as you see in the video!
By eliminating the skin, the filaments white inside and i seeds, I'm more digestible.
Once peeled and completely cold, then safely freeze. I recommend you do it in airtight containers so as not to spread the smell in the freezer.
SEE ALSO => Microwave Peppers in 9 Minutes, Ready to Freeze and 9 Super Quick Ideas to Use Them
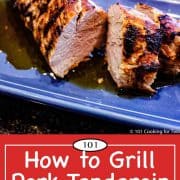
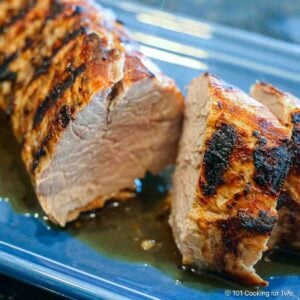
Learn the secrets to juicy and tender grilled pork tenderloin with this super easy tutorial. A properly grilled pork tenderloin will make you look like the grill master. Just don’t tell them how simple it is.
Jump to:
📰Introduction and My Rating
We all know that pork is “the other white meat.” What a great marketing phrase.
Pork tenderloin may be the perfect meat for grilling. It can be elegant or casual to fit almost any occasion. It’s cheap and healthy, plus its smaller size makes it near perfect for smaller households. But easy to double up for larger needs.
My Rating
Always a nice solid high-4 to mid-5. This is the basic technique and produces great results.
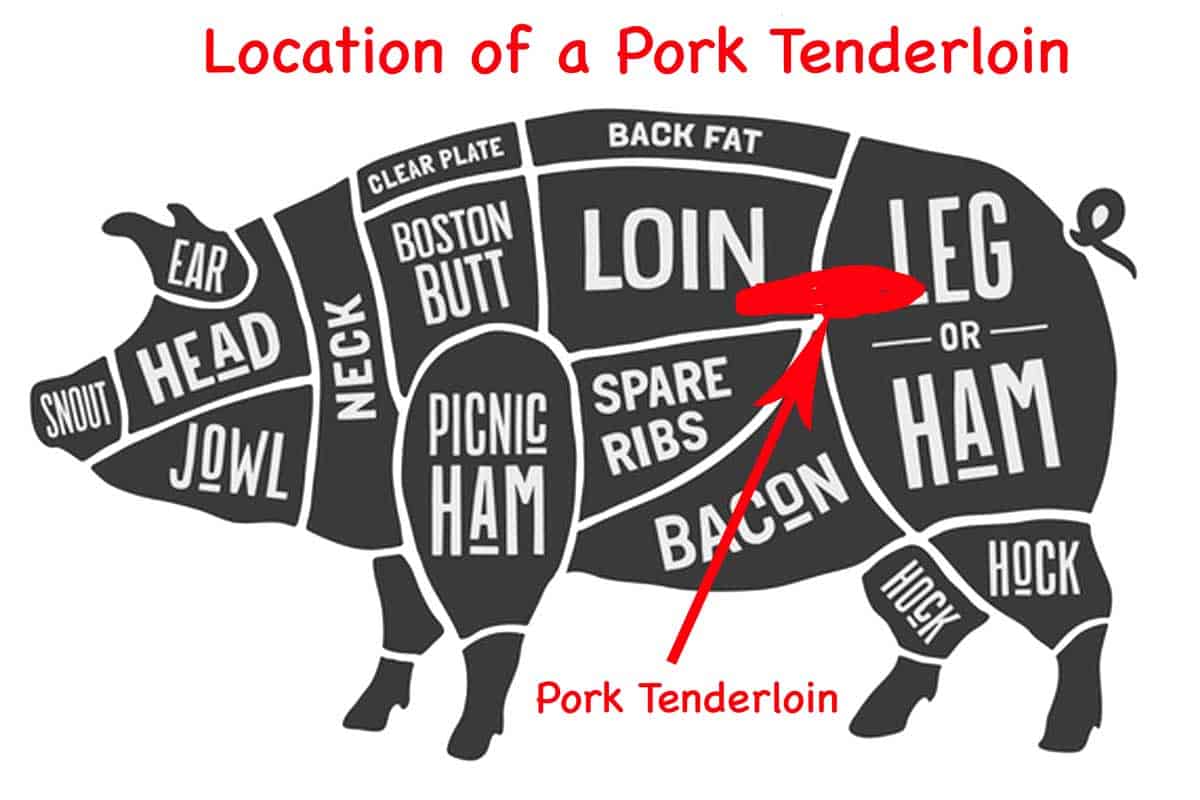
🐖Pork Tenderloin
The tenderloin refers to the psoas muscle along the lower back. It is chicken tenders in the chicken or beef tenderloin (filet mignon) in cattle. The psoas is generally the most tender cut since it is not used for movement.
A Pork Loin is NOT a pork tenderloin!!!!
Over the years on this blog, many commenters seem to get pork loin and tenderloin confused. It is obvious when they have a “4-pound pork tenderloin”. No, they do not.
The tenderloin usually weighs about 1 to 1 ½ pounds. A very large one could push towards 2 pounds. PLEASE BE SURE YOU HAVE A TENDERLOIN AND NOT A LOIN.
♨️The Grill
Almost any gas grill will do. We want a grill surface temperature of 450° to a maximum of 500°. For me, I use a super-duper Weber that can get very hot, and that will be a small amount over 50%. On most gas grills will be at about 75%, and an el-cheapo may be close to max.
Investment of $10 in a grill surface thermometer is always a good idea. DO NOT look at the thermometer on the hood of your grill; it is not even close.
For help on grill surface temperature, please see my A Beginners Guide to Grill Temperature on a Gas Grill.
Charcoal should be fine. Just don’t crank up the heat all the way and watch the temperature.
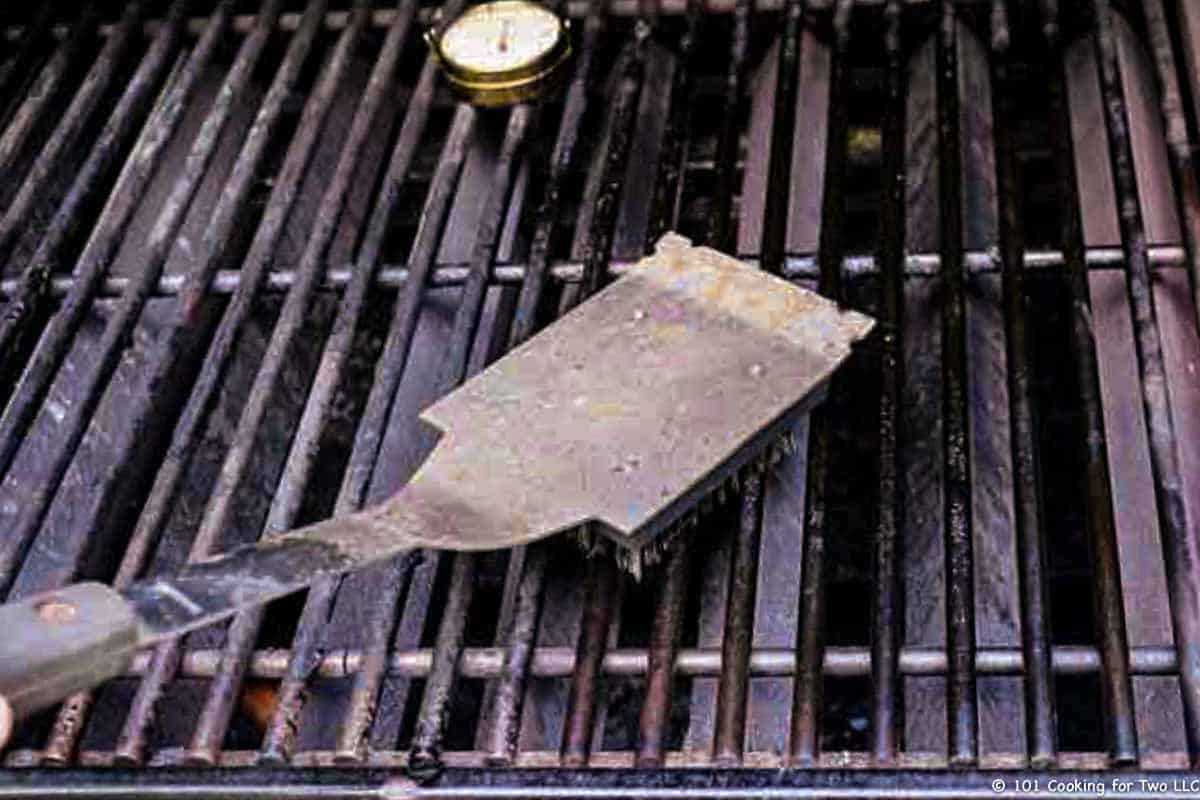
Of course, preheat, clean, and brush with vegetable oil.
🖊️ Tips
THE BIG SECRET
This is simple. It is not round, flat, nor even square. It is a triangle, so there are three sides. So, whether cooking on a grill or in a pan, cook three sides and don’t force it into a shape that is not natural.
To brine or not
A brine is not really needed but will add more moisture and tenderness. But realize it is already very tender and moist. A good starting point is for every cup of water, add 1 tablespoon salt.
You can fancy up your brine, some with sugar or brown sugar. Use about the same amount of sugar as salt. You can add some garlic or other things for flavor. An hour or two is enough time.
Of course, refrigerate during the brining and rinse the tenderloin with running water, and pat dry at the end. DO NOT ADD ANY MORE SALT if you brine.
Dry rub and marinades
Tenderloin takes flavor very well, so dry rubs and marinades work great. Today I will just use some salt, pepper, and garlic (my 7:2:2 seasoning), but the tenderloin accepts flavors very well.
Basic BBQ version
Just brush with a light coat of BBQ sauce about 5 minutes before reaching your final temperature. Then a second coat when removed from the grill to rest.
The Best BBQ Pork Tenderloin – Memphis Style
Grilled Bacon Wrapped Pork Medallions
Grilled Honey Garlic Pork Tenderloin
Oven Fried Pork Tenderloin Sandwiches
Alton Browns Chipotle Lime Pork Tenderloin
🖼️ Instructions
Editor’s note: Some images from different grillings and may not match exactly They are provided to illustrate the instructions.
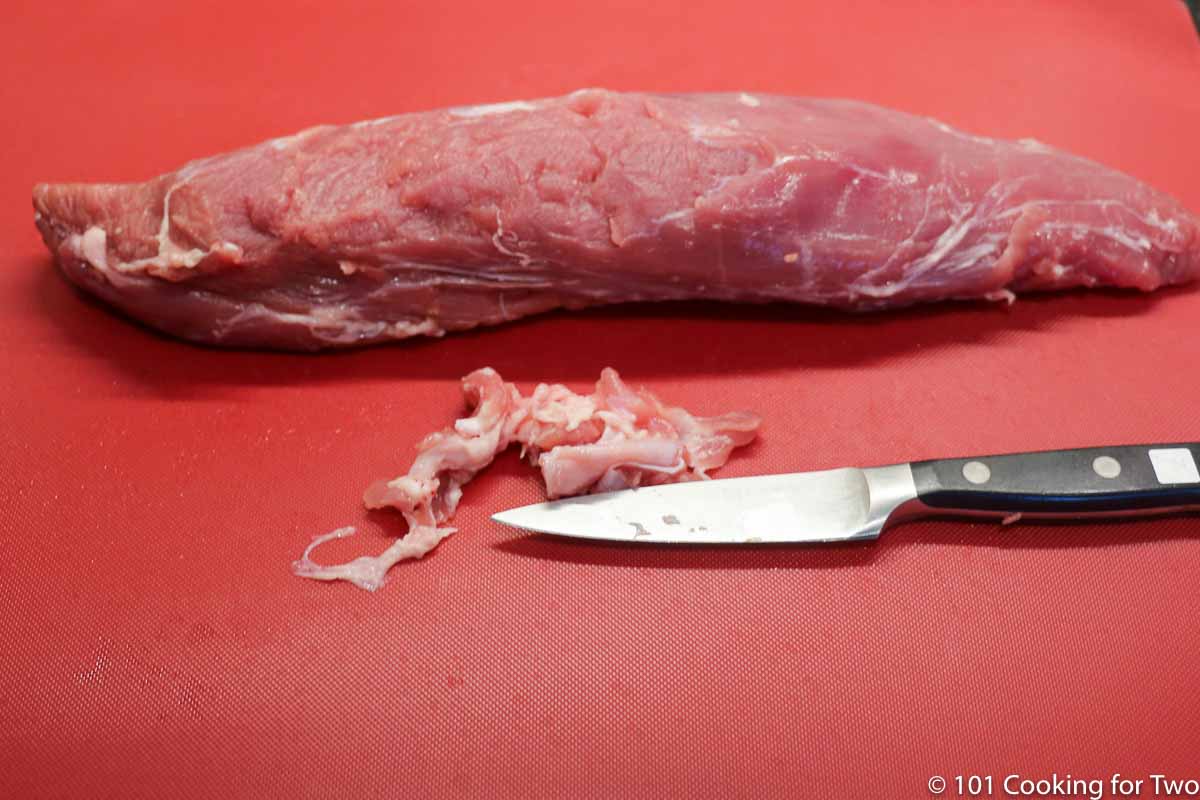
Trim the tenderloin of any excess fat and the silverskin.
This is the point to brine if you wish. Start with 4 cups of water with 4 tablespoons salt. Add 2-4 tablespoons sugar if you want. Refrigerate for 1-2 hours. When done with the brine, remove from brine, rinse under running water, and pat dry. Salt and pepper or other seasoning at this point, but DO NOT ADD SALT if you brine.
Preheat grill to a surface temperature of 450° to 500°. Medium on my super-duper grill but medium-high on lesser grills. Clean and oil.
Place over direct heat—close lid. Rotate ⅓ every 5 minutes until done to your liking. About 25 minutes for 140°. About 30 minutes for 150° (my wife’s favorite). Remember, do not cook by time alone. Use a thermometer. The time to get to your final temperature varies by weight and the exact surface temperature of the grill.
Remove from the grill a few degrees less than your desired final temperature. Tent lightly for 5 minutes before serving.
Do you want more recipes from 101 Cooking for Two? Sign up for the newsletter and get all posts delivered straight to your inbox!
📖 Recipe
How to Grill a Pork Tenderloin on a Gas Grill
From Dan Mikesell AKA DrDan
Learn the secrets to juicy and tender grilled pork tenderloin with this super easy tutorial. A properly grilled pork tenderloin will make you look like the grill master. Just don’t tell them how simple it is.
Prep Time 10mins
Cook Time 25mins
Total Time 35mins
Servings #/Adjust if desired 4
Ingredients
Recipe Notes
Pro Tips
Remember it is triangular meat not round. So a flip is ⅓ of a rotation.
Brine if you have time.
Cook over medium grill.
Season anyway you want but do not add more salt if you brined.
Final internal temperature of 145°-150° is nicely done.
Have More Questions?Make it Perfect First Time and Every Time. Don’t miss out, check the full post above. Almost every recipe includes easy step by step photo instructions so you can visualize yourself cooking this recipe along with helpful tips and options.
TO ADJUST THE RECIPE SIZE:You may adjust the number of servings in this recipe card under servings. This does the math for the ingredients for you. BUT it does NOT adjust the text of the instructions. So you need to do that yourself.
Serving size is my estimate of a normal size unless stated otherwise. The number of servings per recipe is stated above. This is home cooking, and there are many variables. All nutritional information are estimates and may vary from your actual results. To taste ingredients such as salt will be my estimate of the average used.
Course :Main Course
Cuisine :American
Publisher note: Originally Published May 21, 2017. I have re-used pictures from other posts. This is really a total rewrite of a guide I published the first year of the blog that was in great need of a re-write.
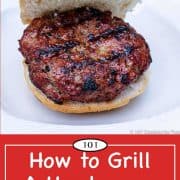
Learn the secrets of grilling an excellent burger on a gas or charcoal grill in your own backyard. It is so easy if you know a few tricks. Great burgers can be yours every day with almost no work.
Jump to:
Introduction and My Rating
This is a technique I use almost weekly. The burger goes from refrigerator to your mouth in less than 20 minutes. So please enjoy learning how I frequently cook at home.
If you’re an accomplished griller, just move on. This is a tutorial for newbies and those who just can’t seem to get it right.
This is not the gourmet burger. I’m not grounding meat. I’m not stuffing the burger, and I am not mixing in various things. We are going to learn to grill store-bought ground beef and make a darn nice meal easily in a way you don’t have to keep looking back at a recipe. How is that for a goal?
Like many things, once you get your basic method down, then the variations can flow. This is a darn good burger as made and is basically what I have done a thousand times. Not to say it is not a special meal, but it is an excellent quick everyday type of meal.
I won’t tell you this is the greatest burger in the world, but it is a very good everyday meal. So let’s do our burgers right. You will be glad you did.
Funny story (skip this paragraph if you just want to get on with it). In Lee Iacocca’s autobiography, there is a section that talks about the Ford Motor Company executive dining room having the best burgers ever. When the chef was asked about his technique, he demonstrated the method starting with a whole beef tenderloin going into the meat grinder. Great starts will give great results. I don’t start that way, and I assume you won’t either.
My Rating
I love this. I’m sure I have done this a thousand times.
🐄The Meat
Most of us will start with store-bought ground beef, which is fine. Use 80/20 ground beef is an easy answer. Skip to the next section if you want.
There is a difference between hamburger and ground beef. Ground beef has a variable amount of fat, but the fat is from the beef being ground. Hamburger can have up to 30% fat and fat, from trimming other cuts can be added. Please choose #1, not #2.
Most burger gurus suggest 20% fat for the moistest, tasty burger. I think they are right. Fat does taste good. You can sneak that amount of fat down a bit to 15% fat and still come out good, but less than 15% requires some special treatment.
You can go lower fat by adding something to retain moisture like my Healthy Low Fat Burgers or American Test Kitchen, adding a panade of milk and bread.
♨️The Grill
Your grill can be a gas grill or charcoal grill. It does not matter for this to work. Just get it as hot as you can.
You are cooking a relatively thin patty of meat rapidly, so direct high heat is correct. While my very hot Weber runs 650° plus surface temperature and you might “only” get 550°, the results will be about the same.
Some gurus suggest you must use charcoal. If true, I can’t grill a burger since I don’t have a charcoal grill. Use what you have. Just get it very hot, cleaned, and oiled.
Since the meat is under 1 inch thick, you can grill with the hood open but I prefer to keep the hood closed to keep the temperature high.
Cook for about 5 minutes (I use a watch with a second hand) on the first side, flip and cook another 3-4 minutes on the second side. I then check the temperature and will add cheese in the last 30-60 seconds if you want.
Three Secrets
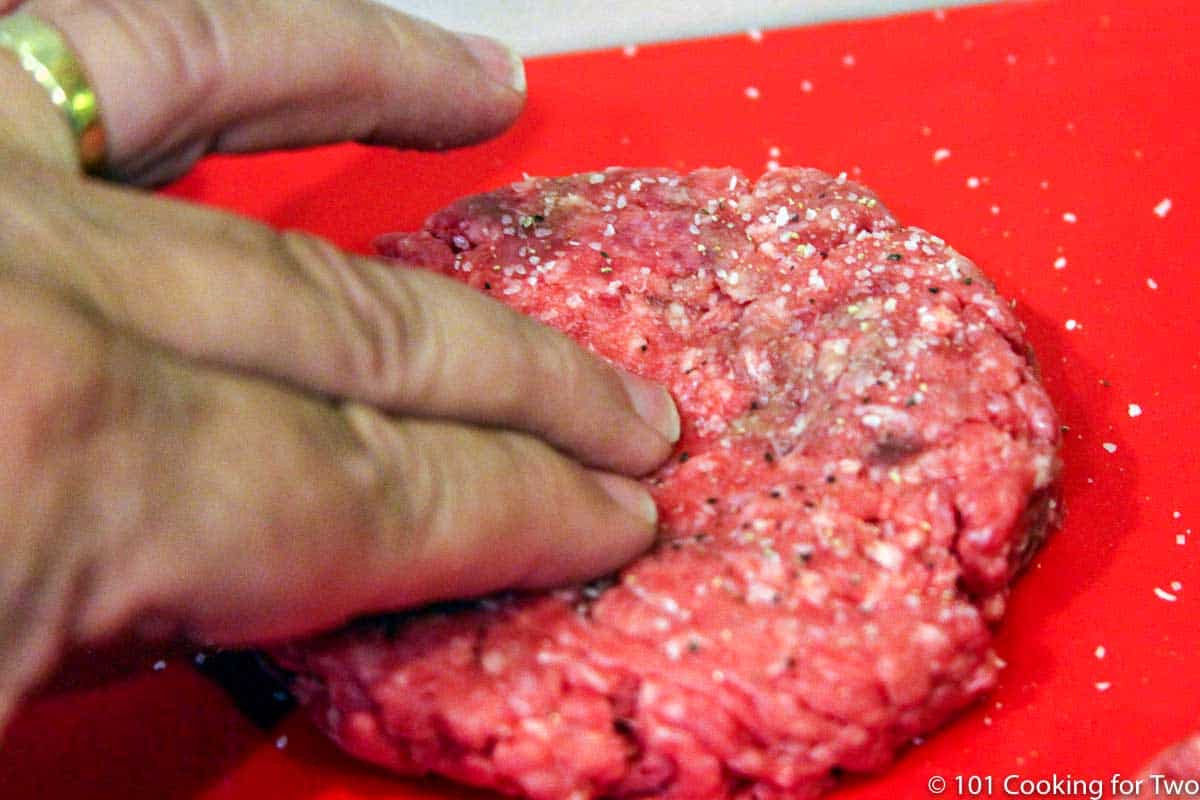
Do not compress the meat. Pat it into shape. If you use a burger press, just use it to shape.
Indent the center of the burger to prevent “puffing.” This seems strange, but it is a must-do. Without this, the center will puff up thicker, and it will be hard to get to the correct internal temperature. The outside will almost burn and will dry out — all bad things. I’m starting with a 3/4 inch thick burger and compress a 1-inch diameter area about 1/4 inch.
Flip once. Don’t play with your food, and don’t keep poking it to check the temp when you know it’s not done. I think the more you flip, the more juices drain and the more flare-ups. The more pokes, the more moisture drains.
⏰Time
8 to 10 minutes is the best answer for cooking time. There is no exact answer. But the real correct answer is as long as it takes to get to 160° internal temperature.
But there are lots of variables: The size and thickness of the burger, the start temperature of the meat and the grill, and how frequently you open the grill and flip are the most important ones.
🌡️Temperature
The minimum safe internal temperature for ground beef is 160°. I like to go to 165° to be sure all areas are done but not much higher, or you have a hockey puck.
I’m playing the Doctor’s card here. You will not eat or serve ground beef that has not reached 160°. No discussion allowed.
A good thermometer is a must. I use a Thermapen, and it is worth every cent of the almost $100 it cost. But you can get good results for $15. You can see specific models in The Cooking for Two Shop.
🖊️Tips
Buns, seasoning, and add-ons
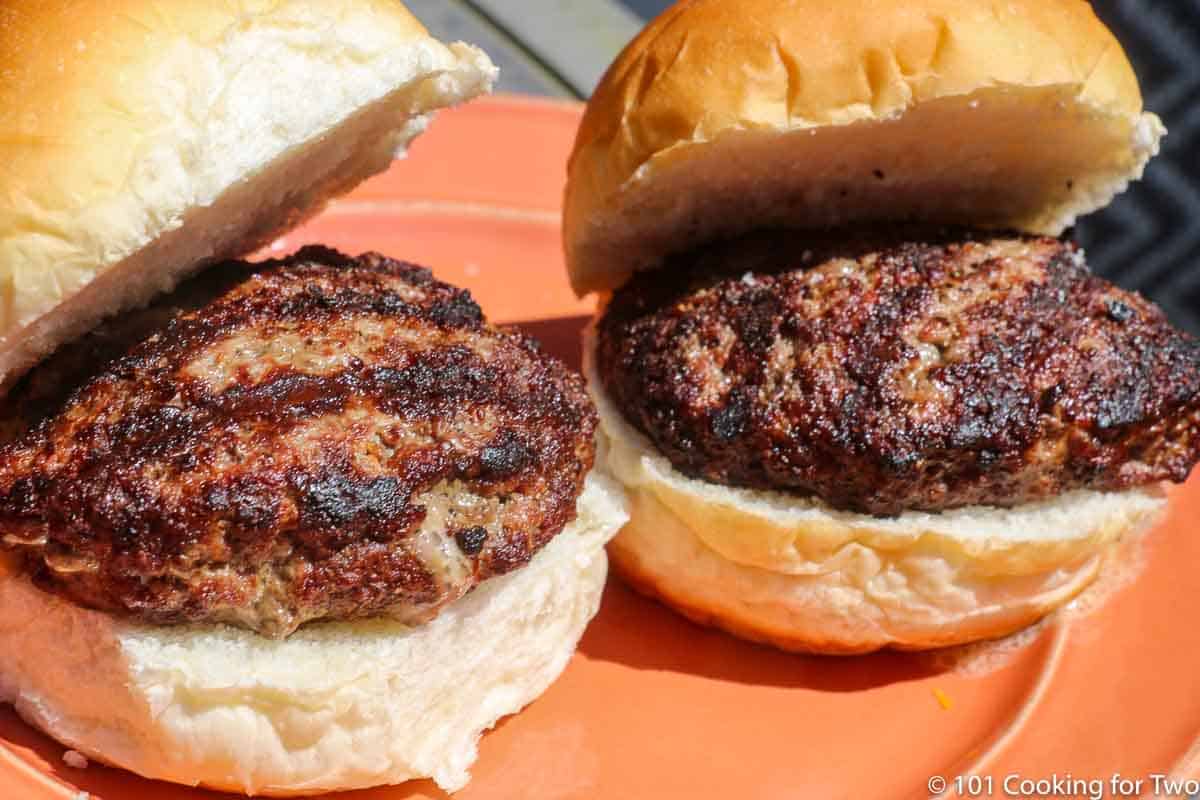
I’m a big fan of good baked goods. A cheap bun will ruin your great grilling. The meat needs to fit the bun.
I’m OK with the burger overflowing the bun some, but I don’t like a large bun and smaller burger. Since we are learning the basics, a standard burger bun fits a 1/3 to 1/2 pound burger well, and that is what we will do here.
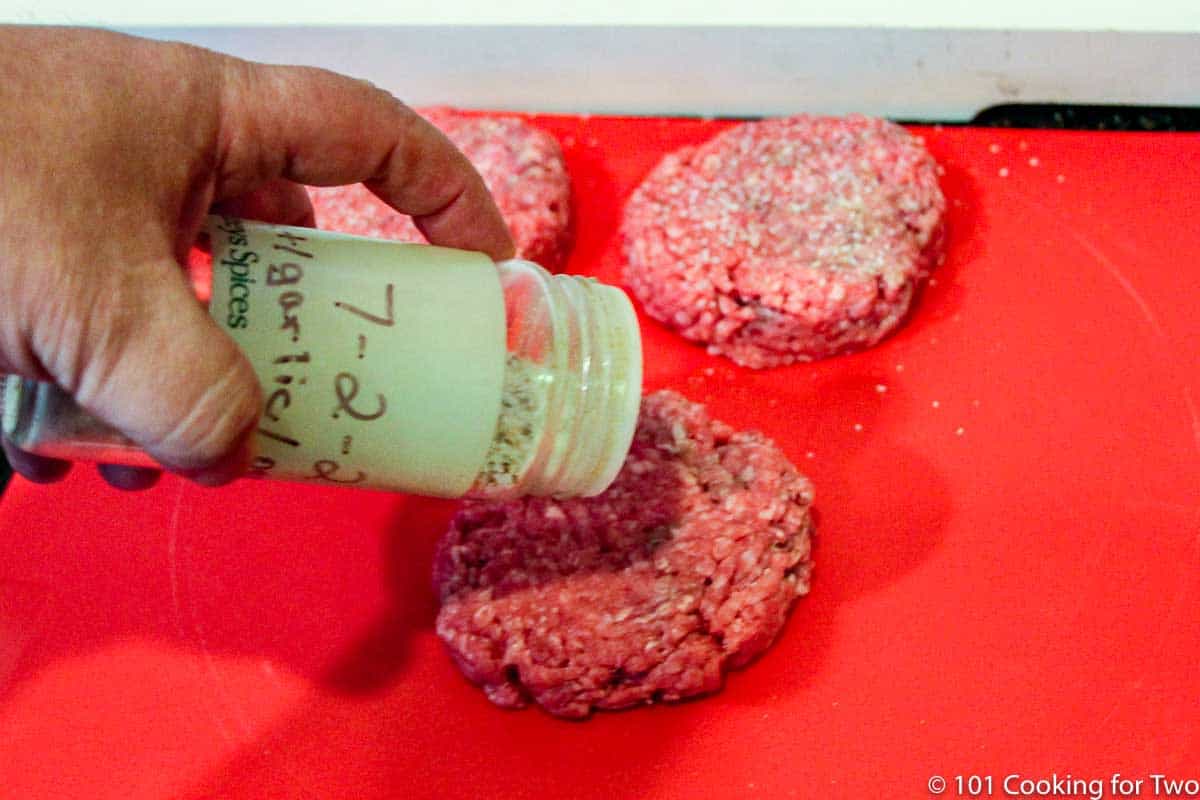
Seasoning, just some salt and pepper will do. I’m using my Homemade Everyday Seasoning Salt – 7:2:2 since we love some garlic. But season as you wish.
But I Need a Vegetarian Option: When ready to cook, the grill should be on high. This recipe fits quite well with my Grilled Portobello Mushrooms
📖Burger Recipes
Grilled Juicy Lucy Burger
Healthy Low Fat Burgers
Smokehouse Burger on a Gas Grill
Moist Grilled Chicken Burgers
🖼️Photo Instructions
Some images from different grillings so images may vary some.
Preheat grill on high. Clean and oil.
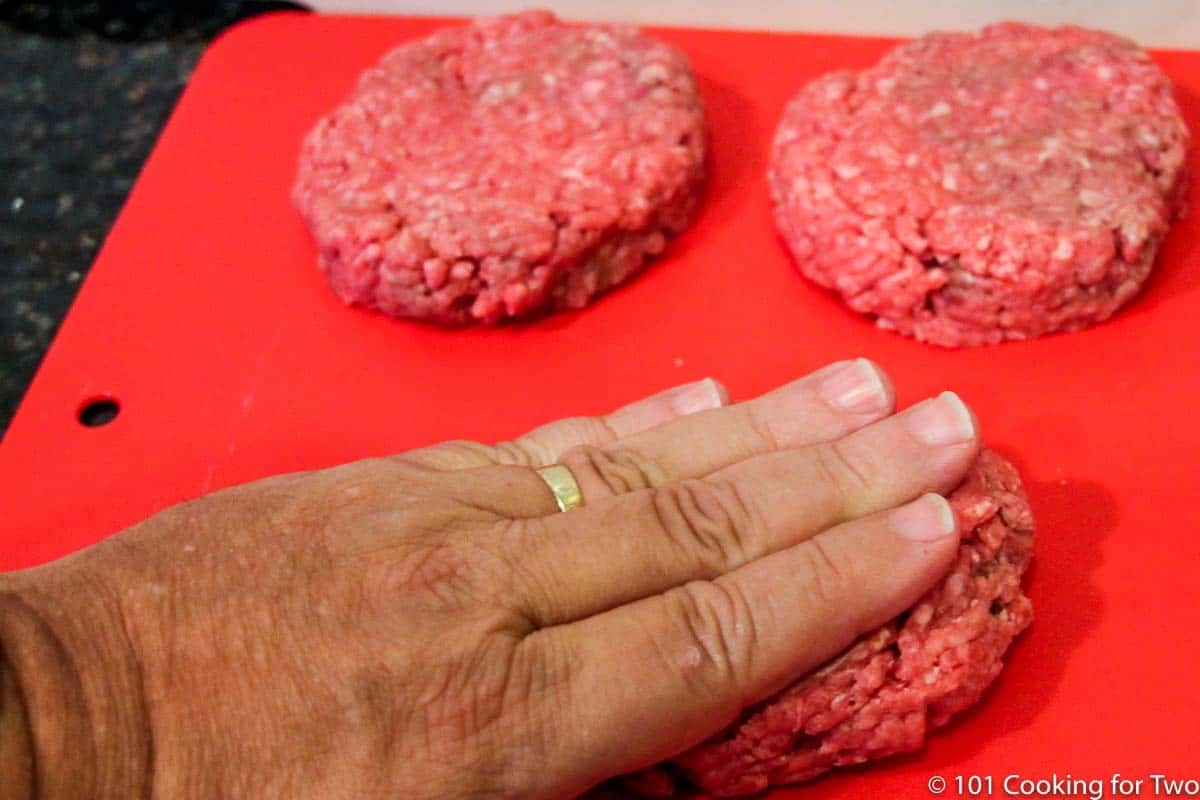
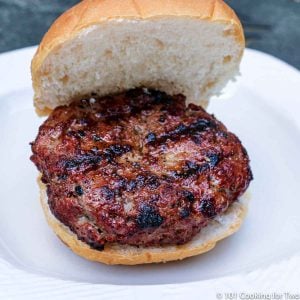
Start with 80/20 burger and divide into 1/3 to 1/2 pound balls. They are the size of a tennis ball then form into patties about 3/4 inch thick and about 4-inch diameter. Safety note: Always wash your hands for safety before and after touching ground meat.
Give them a good sprinkle of salt and pepper on both sides. I’m using my 7:2:2 (salt, pepper, garlic).
THE BIG SECRET TO GOOD RESULTS. Press one inch round 1/4 inch deep indentation into the center of one side.
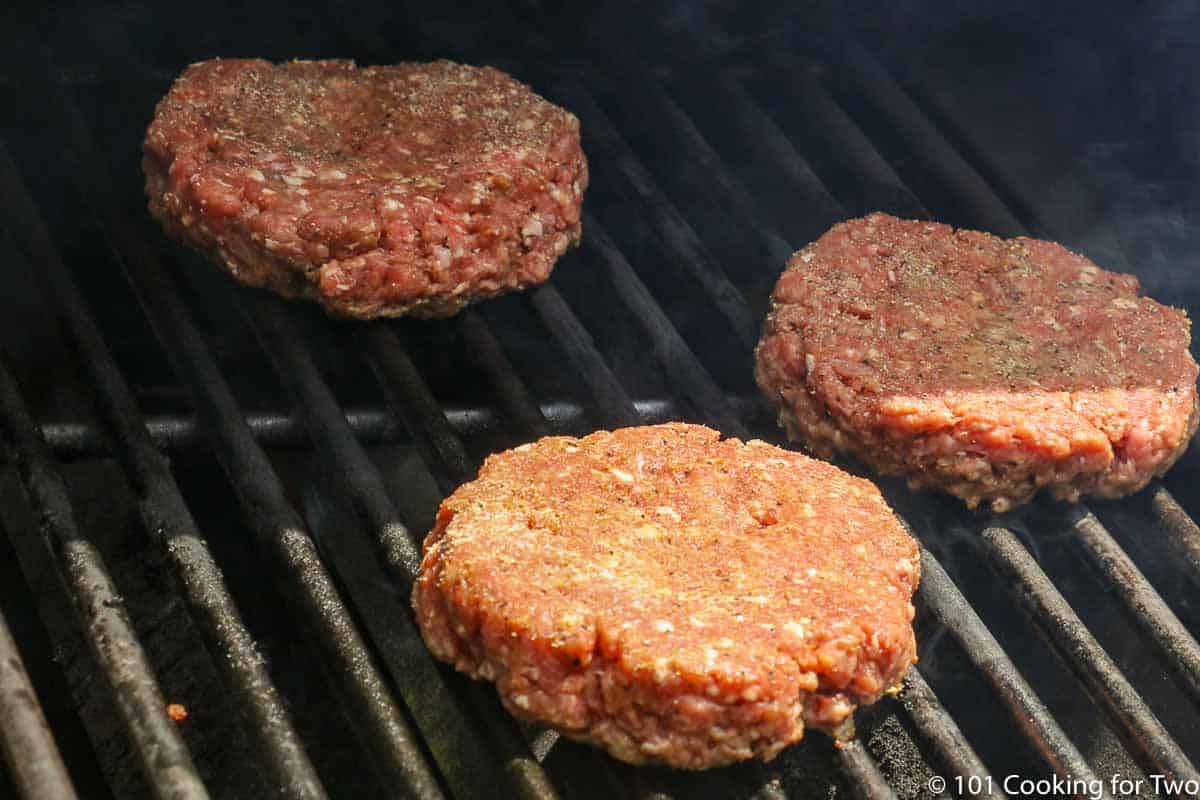
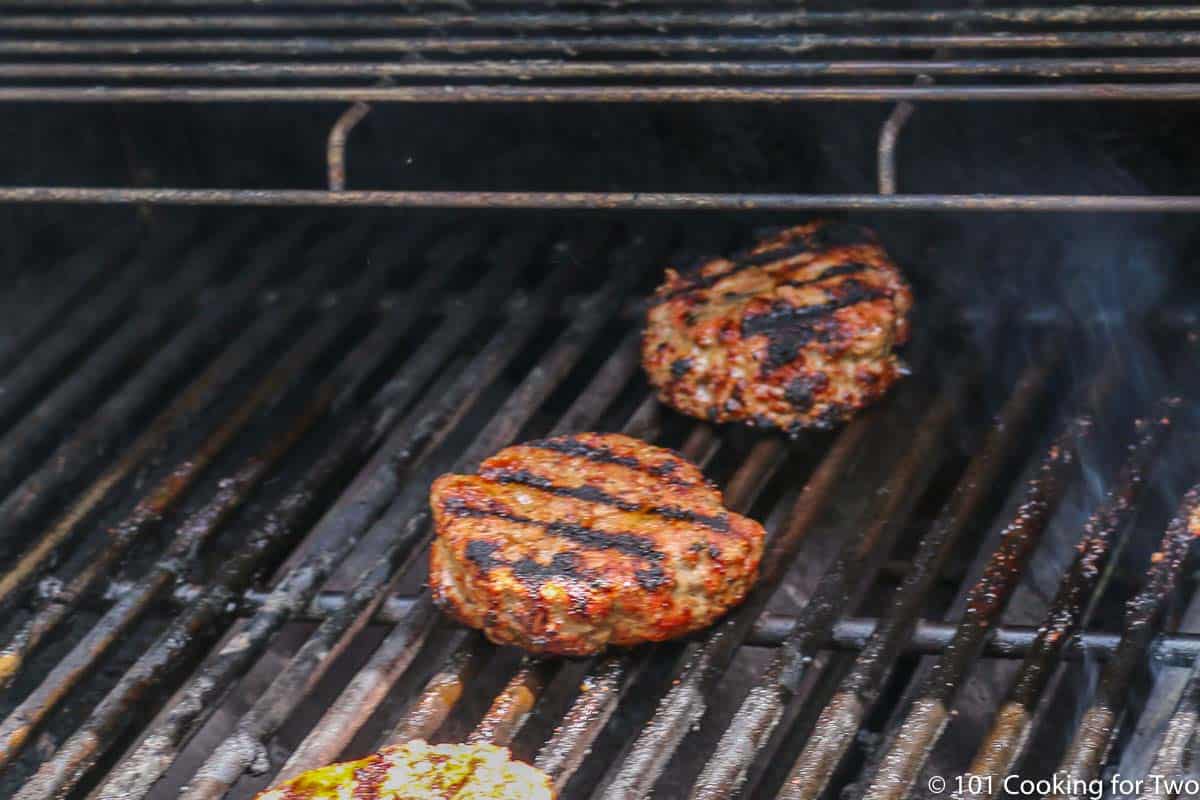
Grill over direct heat with a closed lid preferred, but you can do open grilling if you want. Flip after 5 minutes.
Grill another 3-4 minutes and check the temperature. Get to 160° to 165° then add cheese for about 30-60 seconds if using cheese.
I don’t feel a great need to rest the meat before serving. By the time you place it on the bun and do things to it, it has been enough time.
Do you want more recipes from 101 Cooking for Two? Sign up for the newsletter and get all posts delivered straight to your inbox!
📖 Recipe
How to Grill an Excellent Hamburger – A Beginner Tutorial
From Dan Mikesell AKA DrDan
Learn the secrets of grilling an excellent burger on a gas or charcoal grill in your own backyard. It is so easy if you know a few tricks. Great burgers can be yours every day with almost no work.
Prep Time 10mins
Cook Time 9mins
Total Time 19mins
Servings #/Adjust if desired 2burgers
Ingredients
Recipe Notes
Pro Tips
I suggest 80/20 ground beef for routine use. We prefer 1/3 to 1/2 pound per burger.
Wash hands for safety before and after touching ground meat.
The grill should be on high. You can grill with the hood open but I prefer to use a closed lid. It is easier to keep the grill temperature up.
Cooking time varies by your grill and the burger, so cook to a final temperature never by time alone.
160° is the minimum internal temperature for ground beef but I prefer to use 165° to be sure all areas are done.
Follow the secrets listed below.
The Three Secrets To Getting it Right
Do not compress the meat.
Indent the center of the burger
Flip once if possible. Don’t keep poking it and flipping.
Have More Questions?Make it Perfect First Time and Every Time. Don’t miss out, check the full post above. Almost every recipe includes easy step by step photo instructions so you can visualize yourself cooking this recipe along with helpful tips and options.
TO ADJUST THE RECIPE SIZE:You may adjust the number of servings in this recipe card under servings. This does the math for the ingredients for you. BUT it does NOT adjust the text of the instructions. So you need to do that yourself.
Serving size is my estimate of a normal size unless stated otherwise. The number of servings per recipe is stated above. This is home cooking, and there are many variables. All nutritional information are estimates and may vary from your actual results. To taste ingredients such as salt will be my estimate of the average used.
Course :Grill|Main Course
Cuisine :American
Editors Note: Originally published August 17, 2013, Updated with expanded options, refreshed photos, and a table of contents to help navigation.
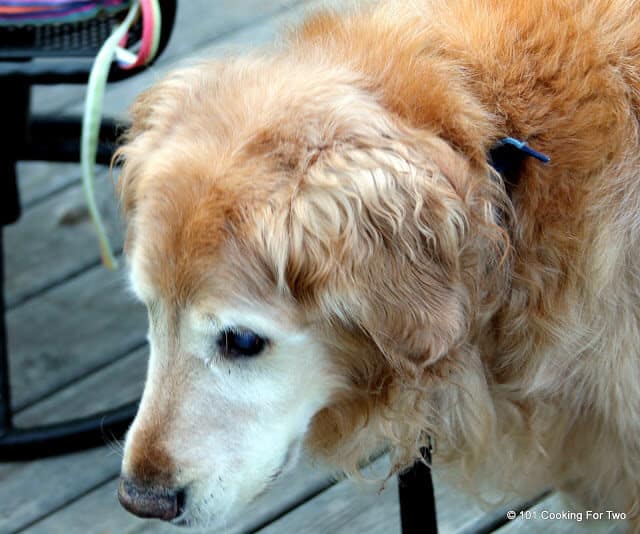
Jake getting old. Taken on the day of the original post.
The cookie settings on this website are set to "allow cookies" to give you the best browsing experience possible. If you continue to use this website without changing your cookie settings or you click "Accept" below then you are consenting to this.
Read more about data collection for ads personalisation our in our Cookies Policy page