Tag: Icing

Fresh Strawberry Cake With Cream Cheese Icing by Gordon Ramsay

Fresh Strawberry Cake With Cream Cheese Icing


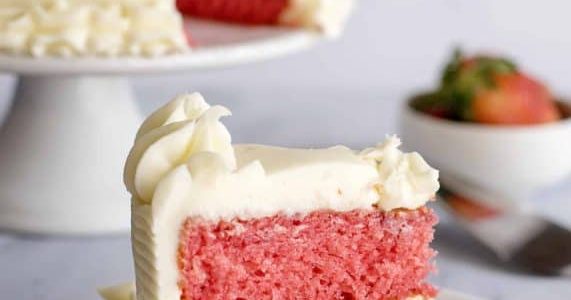
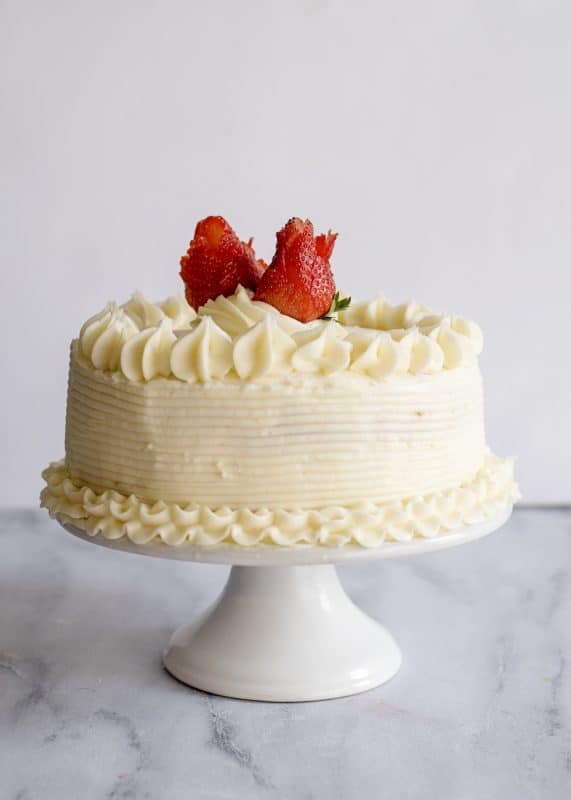
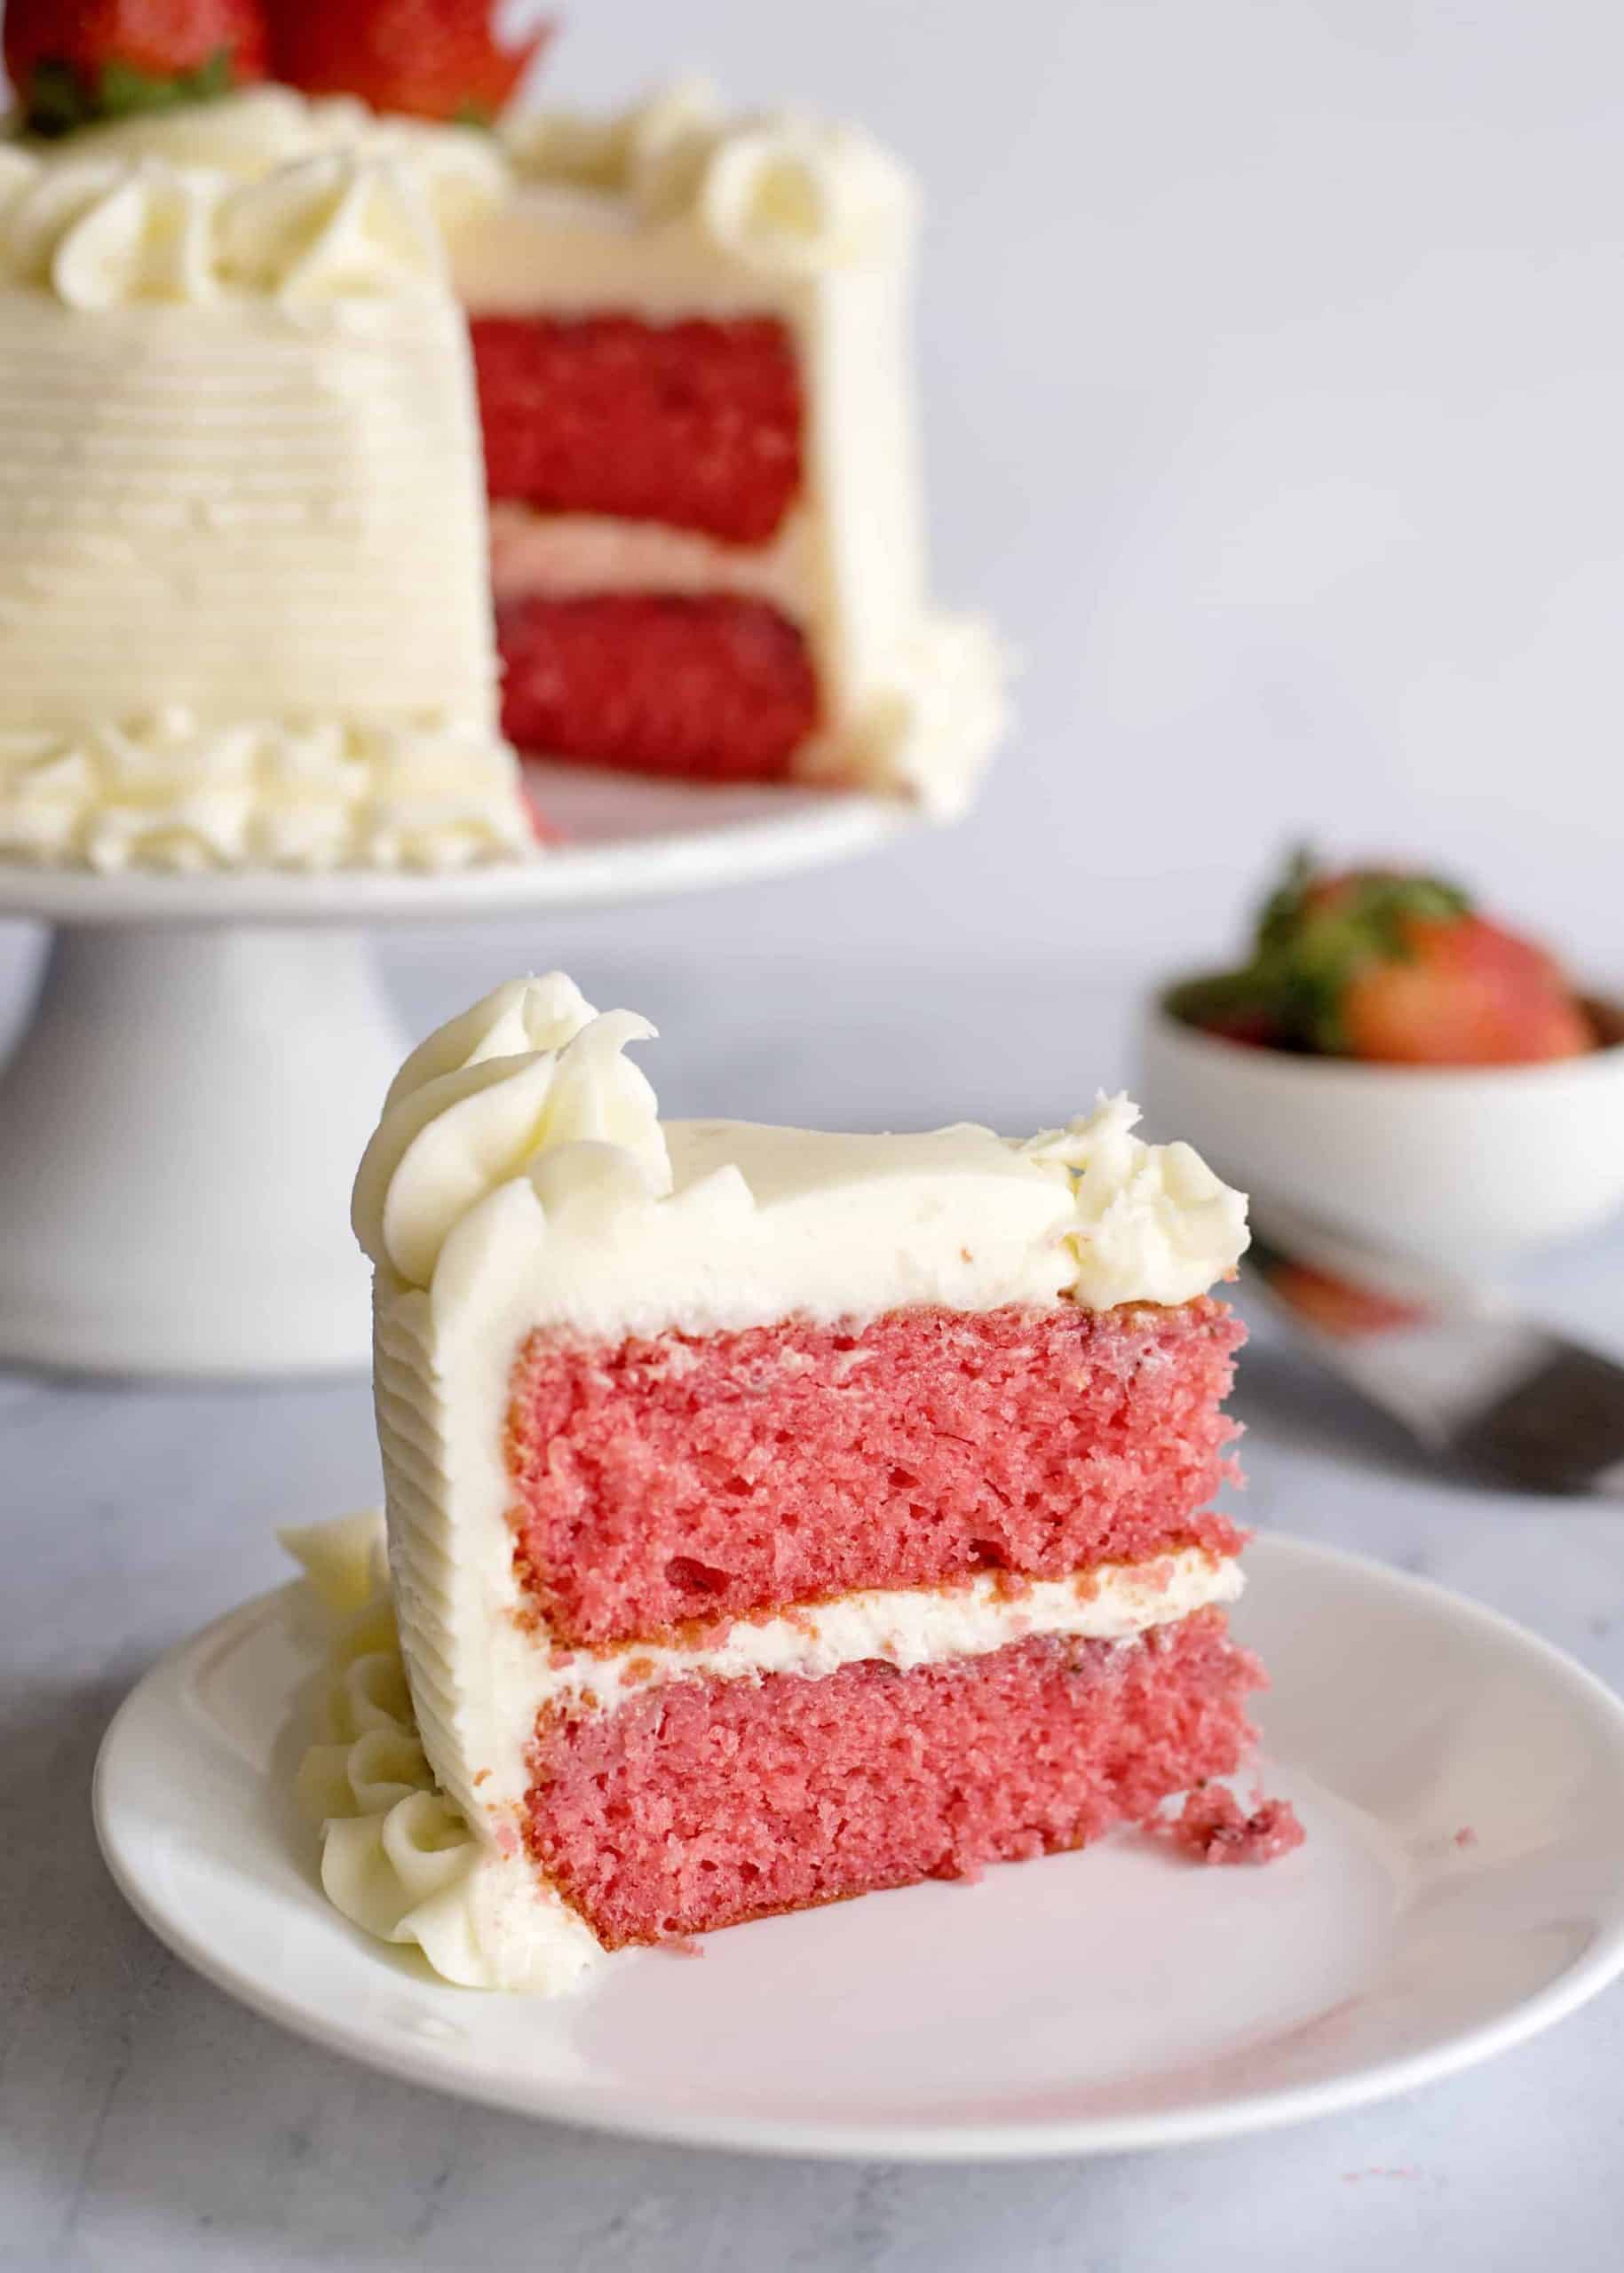
Fresh Strawberry Cake is my mother’s favorite and a guaranteed showstopper. I mean look at this y’all. I’ve served this at baby showers, bridal showers, brunches and made for birthdays as well. My favorite place to serve it, though, is at my own dinner table.

When Are Strawberries In Season?

I’ve had strawberries on the brain lately. The national strawberry season can be January all the way through to November so it is usually easy to find them at stores. Prices may vary depending on the time of year you want them.   In deeper parts of the South they are usually ready for harvesting April and May.

When I get them I tend to eat them all on the way home, then throw the container in the trash on my way in the house. The trick is always to hide the evidence! So it’s a big restraint for me to have enough left to make fresh Strawberry Cake!

I mean Y’all, look at that beauty.  It tastes even better than it looks!

The ingredients you will need for the cake are:

  • White cake mix
  • Strawberry gelatin mix
  • Cooking oil
  • Milk
  • Fresh strawberries
  • Three eggs

  • Wash your strawberries and cut the tops off, slice them up a bit.

Mashing Strawberries for Fresh Strawberry Cake

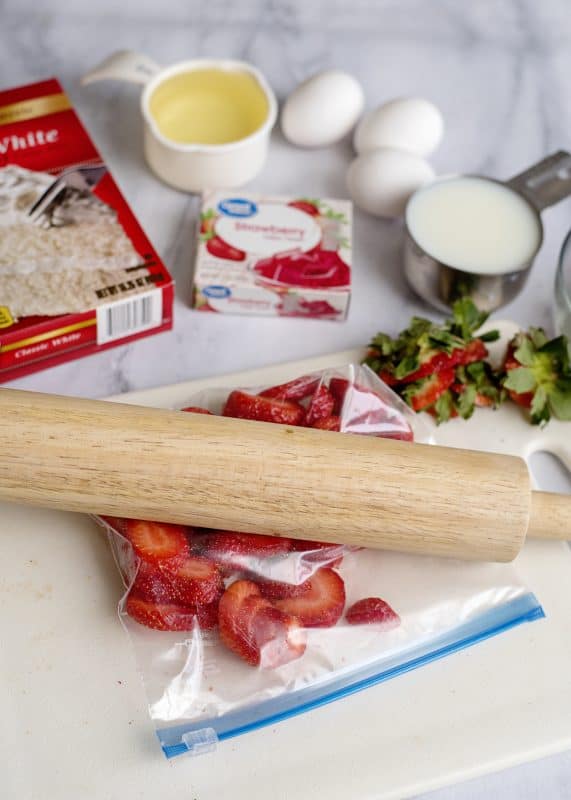
  • Put them in a big old plastic bag and crush them a bit. You can use a rolling pin if you want to be civilized but somedays call for a few fun karate chops!

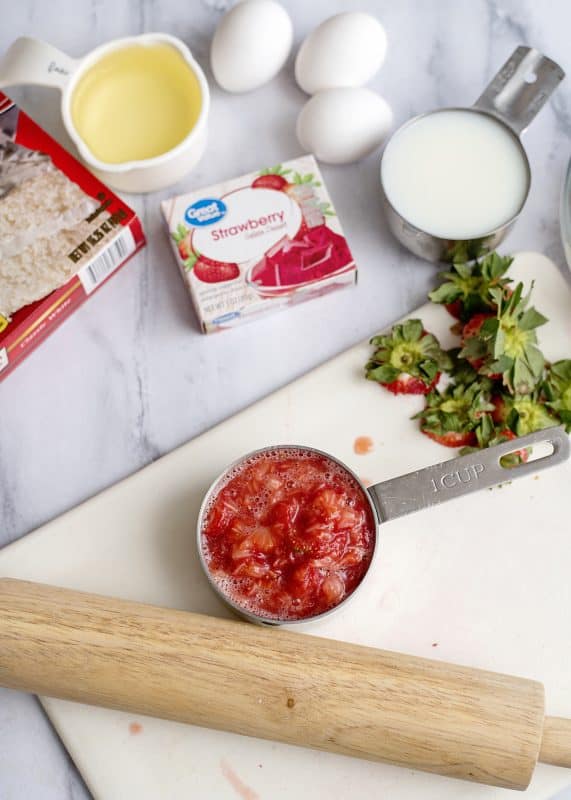
*The amount of strawberries needs to be one cup after they are crushed, not before.

Mashed Strawberries for Fresh Strawberry Cake

You can use any method of crushing that you like but I find a plastic bag and a can of somethin‘ works just great.

Mixing up Fresh Strawberry Cake

  • In a large mixing bowl, place cake mix, milk, oil, eggs, and gelatin.

Fresh Strawberry Cake Batter

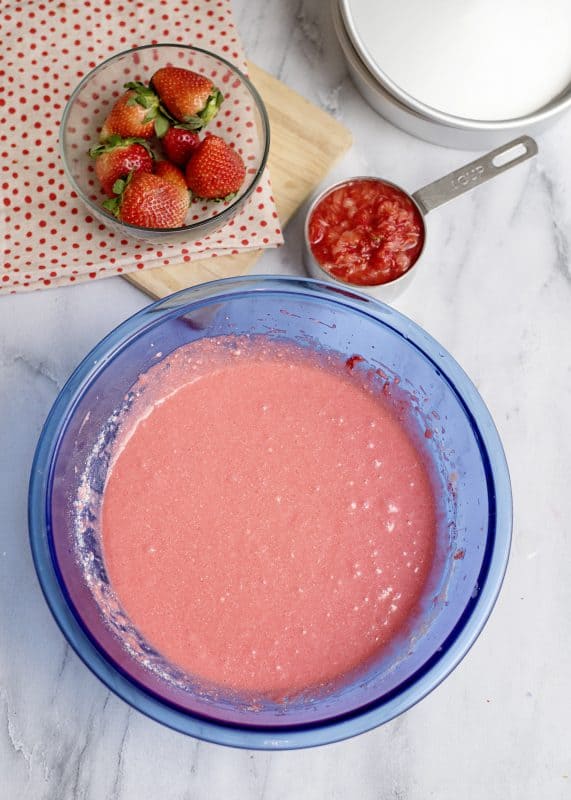
  • Mix that up with an electric mixer until you have a smooth, creamy, pink batter, about two minutes.

Fresh Strawberry Cake Batter

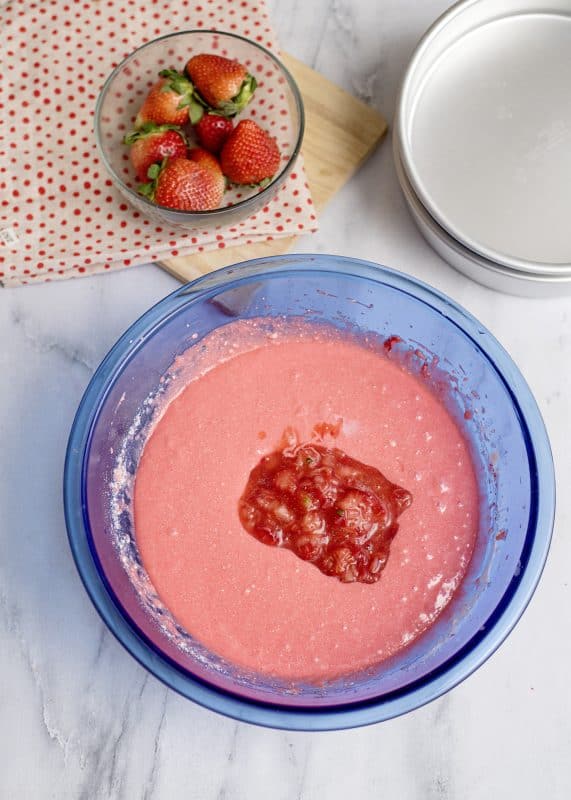
  • Add in your crushed strawberries, juice and all.
  • Mix that up again.

Batter for Fresh Strawberry Cake in Cake Pans

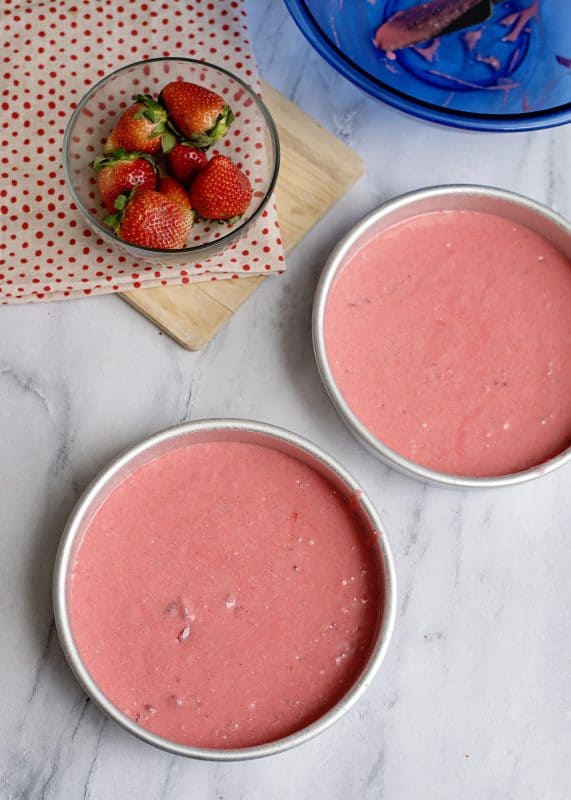
  • Now grease and flour two round cake pans.
  • Divide your batter evenly among the cake pans
  • Bake these at 350 for 25-30 minutes, or until a toothpick inserted in the center comes out clean.
  • Remove from oven and allow to sit in the pans for ten minutes before turning out to cool completely.

Making Cream Cheese Icing For Fresh Strawberry Cake

Now let’s make us some cream cheese icing.

Ingredients needed for cream cheese icing
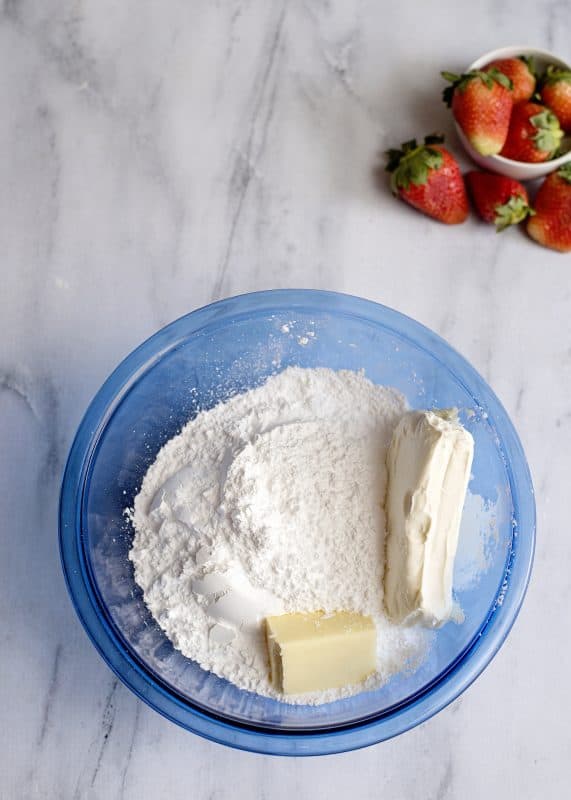
  • Cream Cheese
  • Butter
  • Powdered sugar.

Important note: If you want to decorate your cake as I have done in these photos, you will need to double this recipe.

Another note: Your cream cheese and butter really need to be room temperature so set them out earlier in the day before starting this.

  • Place your butter, cream cheese, and powdered sugar in a bowl. Mix ’em up til they’re nice and creamy smooth, scraping down sides as needed.

Fresh Strawberry Cake

  • Ice your cake however you like.

Fresh Strawberry Cake

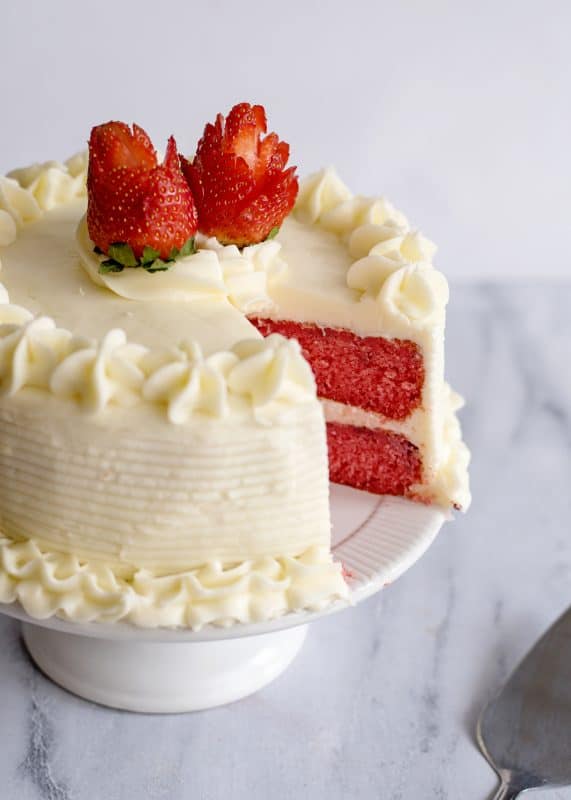
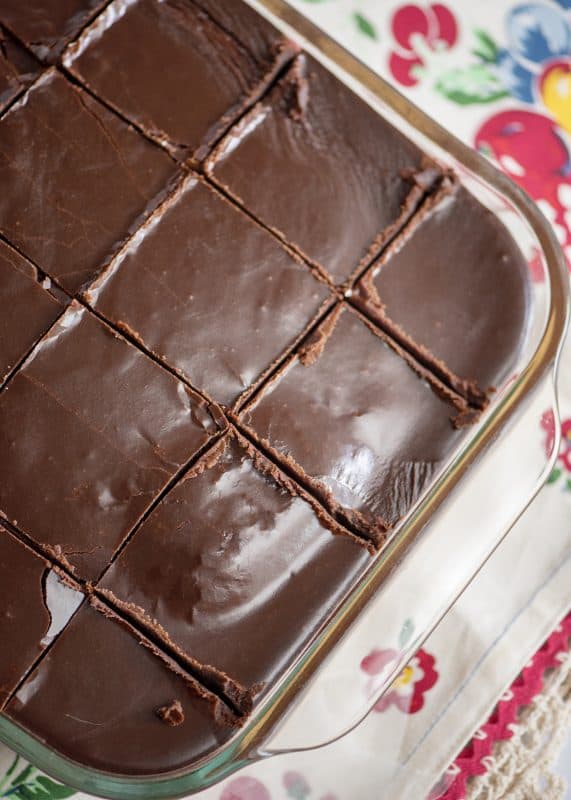
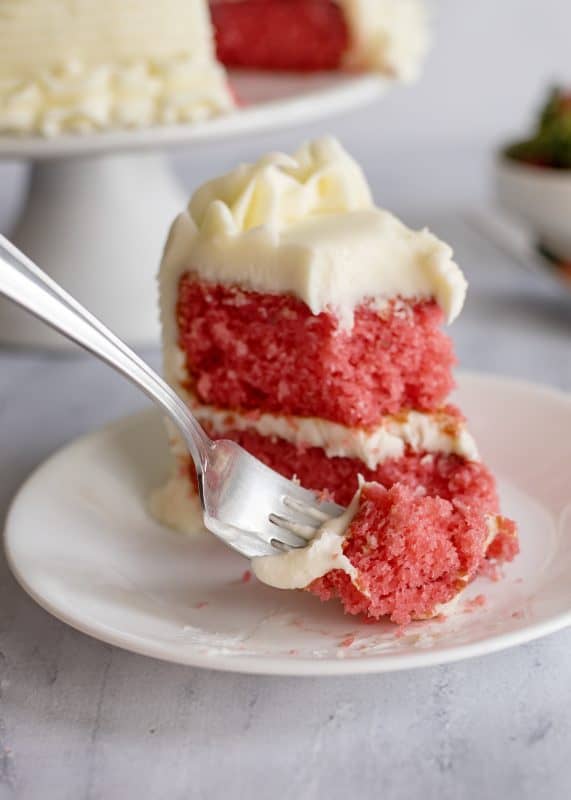
Look how pretty this fresh strawberry cake is!

Fresh Strawberry Cake

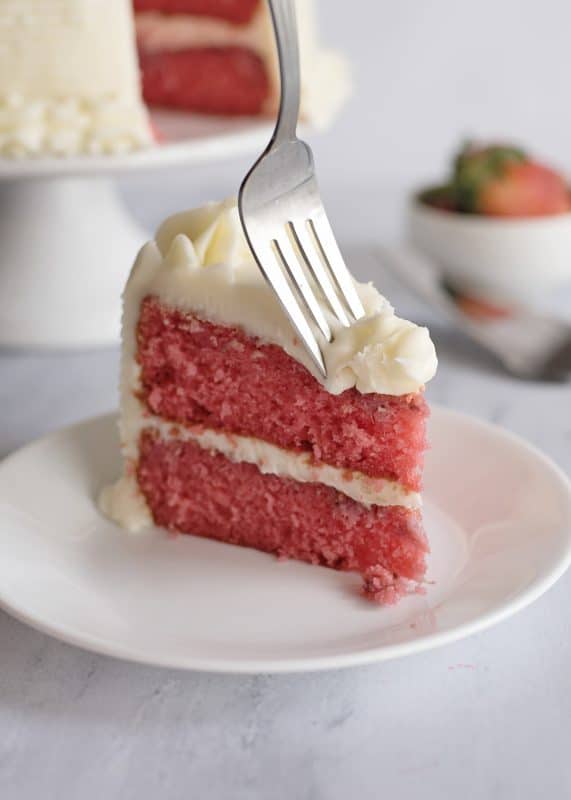
And this cake is just as delicious as it is pretty!

Fresh Strawberry Cake

Now cut it quick! The youngun’s are a waitin’!

Store this cake in the refrigerator. It’s even better served cold!
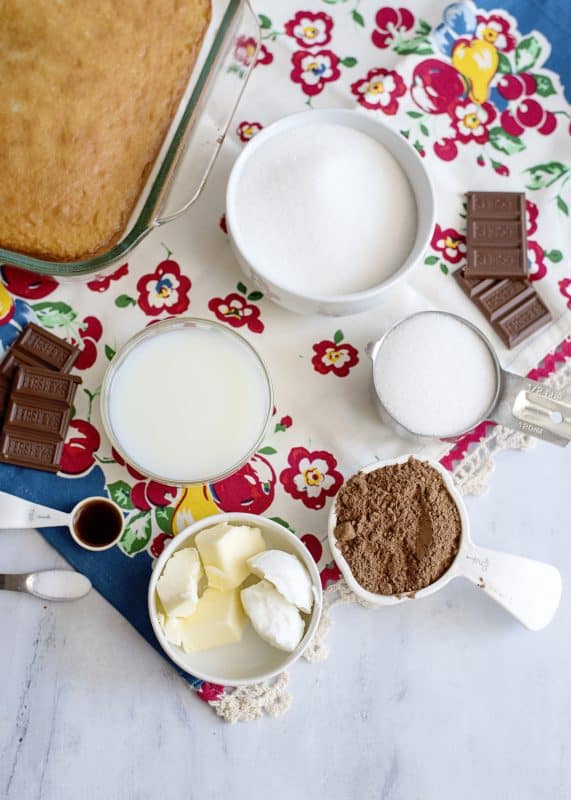
 

Fresh Strawberry Cake With Cream Cheese Icing

Ingredients

  • 1 Package Plain White Cake Mix
  • 1 Cup Chopped strawberries with juice
  • 3/4 Cup Milk
  • 1 Package Strawberry Gelatin 3 ounce
  • 3/4 Cup Vegetable Oil
  • 3 Eggs

Icing

  • 8 ounce Cream Cheese room temp
  • 4 Tablespoons butter room temp
  • 3 Cups confectioner’s sugar

Instructions

  • Grease and flour two 8 inch round baking pans or one 9×13 inch pan.

  • Wash and cut the tops of strawberries. Coarsely chop them. Gently mash strawberries by placing them in a large plastic bag and rolling over it with a rolling pin or large can.You need to measure out one cup once they are mashed.

  • Place cake mix, milk, gelatin mix, vegetable oil, and eggs in large mixing bowl. Beat with an electric mixer until smooth and creamy, about two minutes or so. Add in strawberries and juice, mix again until well combined. Pour into baking pans.

  • Bake at 350 for 25-30 minutes or until toothpick inserted in center comes out clean. If using two round pans, allow to sit for ten minutes before turning out of pans to cool completely. If baking in 9×13 pan, simply allow to cool in pan.

  • Combine all icing ingredients and mix with electric mixer until smooth and creamy. Ice cooled cake.

  • Store cake in refrigerator.

  • Ice cake. Store in the refrigerator.

Notes

Important note: If you want to decorate your cake as I have done in these photos, you will need to double this recipe.
*Some people add 1/2 cup crushed, drained strawberries to this icing as well. I leave them out to make the cake a bit prettier and easier to ice but feel free to add them in for more great strawberry flavor! Just mix them in after your icing is smooth and creamy and all other ingredients have been added.
Another note: Your cream cheese and butter really need to be room temperature so set them out earlier in the day before starting this.
If you don’t want to you can make this into a sheet cake as well.  This recipe would be good for a 9 x 13 sheet pan. 

The versatility of strawberries…

There are so many strawberry dishes that I love. My personal favorite is my Mama’s strawberry pie, My husband’s favorite is Strawberry punchbowl cake, and my son favors good old fashioned strawberry shortcake. 

“The distance between who I am and who I want to be is separated by my actions.”

~Brian Solis

Submit your quote here.


Yum

Incoming search terms:

Yellow Cake with Old Fashioned Peanut Butter Icing by Gordon Ramsay

Yellow Cake with Old Fashioned Peanut Butter Icing


Today, I’m sharing a recipe with a big old root system behind it- Yellow Cake with Old Fashioned Peanut Butter Icing. The cake we’re going to use is just a boxed mix because, well it’s not the cake that is important here, it’s the icing – My Grandmother’s old fashioned peanut butter icing to be exact. This cake will forever me endeared to be for one reason, my great aunt Red.

Red was my great grandmother’s sister. Her given name was “Stella” but I took to calling her Red when I was just a girl due to her insisting that her hair be dyed red at all times. She used to come and stay with my Grandparent’s house often and I was pretty close to both her and my great grandmother, whom we all called simply by her name, “Lela”.

Red was a young one, having been born sixteen years after Lela in the modern year of 1918. Red and Lela were very close and I was their tag along. Whenever Red was visiting, my mother would always be sure to take me by there and let me to spend a day or two with the them. Their birthdays were one day apart and Mama even started checking me out of school so that I could go take them gifts and be there for cake on the day they both celebrated (my siblings still don’t know about this!).

Lela passed away in 1991, when I was seventeen. I didn’t get to see Red nearly as much after that. She got in a “bad way” as folks say it and wasn’t able to get out much. Six years went by. I did see her some, but her health was declining and her birthday was coming up.

She had a daughter in California who wanted to visit and it was silently understood that Red might not be with us too much longer. Her daughter wanted to make a big event out of her birthday, so she rented a banquet hall at a hotel and invited a large crowd for a grand celebration.

As Red’s daughter went about making plans for the party, she asked Red what kind of cake she wanted. She had planned on ordering a grand cake from one of the local bakeries to match the status of the nice banquet hall and fancy decorations she had planned. Red, with a defiant streak to match her hair color, stated plainly “Lucille makes my cake”. Her daughter apparently had missed the tradition which had grown over the years of my grandmother making Stella’s favorite cake for her birthday each year and Red growing ever fonder of it, looking forward to this fudgy peanut butter icing on her special day. So in the end, Red got her way.

I was going to college and living with my Grandmother at this time (Lucille, Lela’s daughter and Red’s niece). Granddaddy had just passed away so it was just Grandmama and myself living together as “roomies”.

The day of Red’s party arrived and I drove Grandmama the two hours to the hotel where the party was held. The two of us walked into this hotel lobby, to this fancy banquet hall with flowers and balloons, folks all dressed up and Red in the middle of it all looking pretty as a picture with a corsage her daughter had surprised her with.

Enter my Grandmother carrying a glass 9×13 Pyrex dish with a Duncan Hines yellow cake and homemade peanut butter icing.

Red was thrilled. It was just what she wanted.

These memories are so precious to me today. I was so blessed to get to spent the early years of my life surrounded by these wonderful people and these years of my life are so much richer as a result. Red, Lela, Grandaddy, and Grandmama may not be physically sitting around our tables like they used to, but they remain very much an important and very special part of my life. I always get a nice little tear duct cleaning thinking about them whenever I have a bite of this cake. 

Ingredients for Yellow Cake with Old Fashioned Peanut Butter Icing

For the icing, you’ll need: sugar, shortening, peanut butter, milk, vanilla, and margarine. Exact recipe at bottom of page.

Tips for success with this recipe: 

  1. The boiling of the icing is the most critical step. Make sure it comes to a rolling boil and then stay right there, timing it. I suggest adding one minute to be on the safe side but don’t go over this as the icing will scorch. 
  2. You absolutely must have your cake done and ready the moment the icing is done. 
  3. Once your icing is finished, remove it from the heat and use a wire whisk to quickly stir in peanut butter and vanilla until icing thickens a bit and starts to lose some of its shine. It should still be pourable. 
  4. Don’t try to spread the icing once you’ve poured it, instead, pour it evenly over the cake so that no spreading is needed
  5. Most important tip of all: Unless you lived through the Great Depression, I strongly encourage you not to use this on anything other than a sheet cake. Only those who have the crown of wisdom that comes through age and hardship can ice a layer cake with this. 

Cooking Icing For Yellow Cake with Old Fashioned Peanut Butter Icing

In a large sauce pot, combine sugar, milk, shortening, margarine, and salt. Bring to a rolling boil over medium high heat, stirring constantly to prevent scorching. Once it reaches a boil, let boil for two to three minutes without stirring. Remove from heat and immediately stir in vanilla and peanut butter. Beat until icing is smooth and starts to lose it’s shine. Pouring Old Fashioned Boiled Icing

Immediately pour onto cake. 

Cooling Yellow Cake with Old Fashioned Peanut Butter Icing

Allow to cool before serving.

Cutting Yellow Cake with Old Fashioned Peanut Butter Icing

A nice layer of peanut butter fudge icing! 

Can you see why Yellow Cake with Old Fashioned Peanut Butter Icing is such a special cake? 

Piece Of Yellow Cake with Old Fashioned Peanut Butter Icing

This is a sight to behold. Guess what? It seems like it was a gift from above, but as a precious reminder of my past and their connection to the future – this is my daughter’s favorite cake. 

Take A Bite! Yellow Cake with Old Fashioned Peanut Butter Icing

Red’s birthday has already passed but, Happy Belated Birthday, Red. I look forward to spending it with all of you again someday. 

Yellow Cake with Old Fashioned Peanut Butter Icing

Ingredients

  • Duncan Hines yellow cake mix made according to package directions and cooled
  • 1- 1/2 Cups sugar
  • 7 tablespoons whole milk
  • 2 tablespoons shortening
  • 2 tablespoons butter or margarine
  • 1/4 teaspoon salt
  • 1 teaspoon vanilla
  • 1/2 cup creamy Peanut Butter

Instructions

  • Prepare cake mix in a 9×13 pan as directed on package. Allow to cool.

  • In a large sauce pot, combine sugar, milk, shortening, butter, and salt. Bring to a rolling boil over medium high heat, stirring constantly to prevent scorching.

  • Once it reaches a boil, let boil for two to three minutes without stirring.

  • Remove from heat and immediately stir in vanilla and peanut butter. Beat until icing is smooth and starts to lose it’s shine. Immediately pour onto cake. Allow to cool before serving.

This post was originally published in July of 2008. I updated the photos in August 2019.My Great Aunt Red and My Great Grandmother, Lela

Stella “Red” and Lela, 1988
My Great Aunt and Great Grandmother

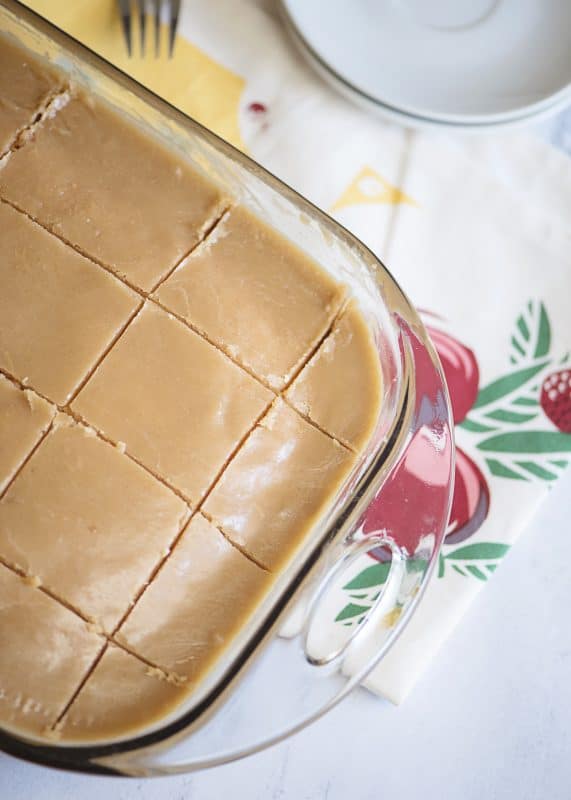
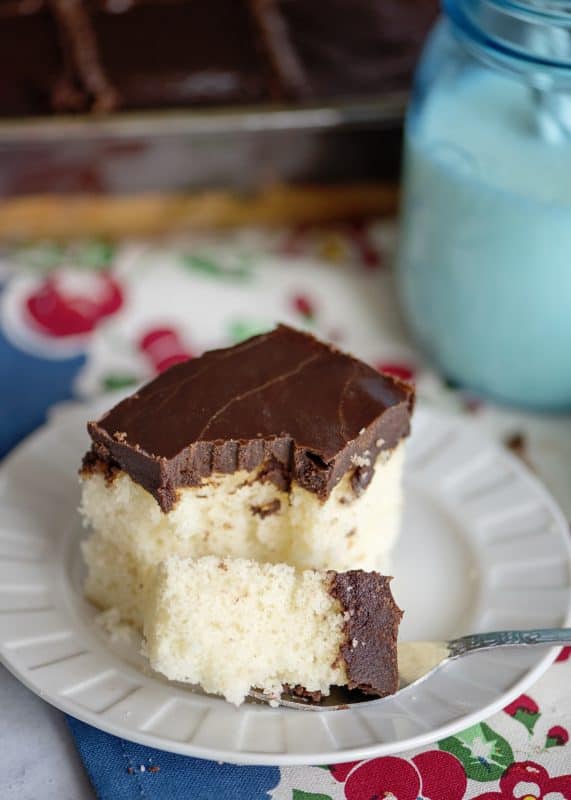
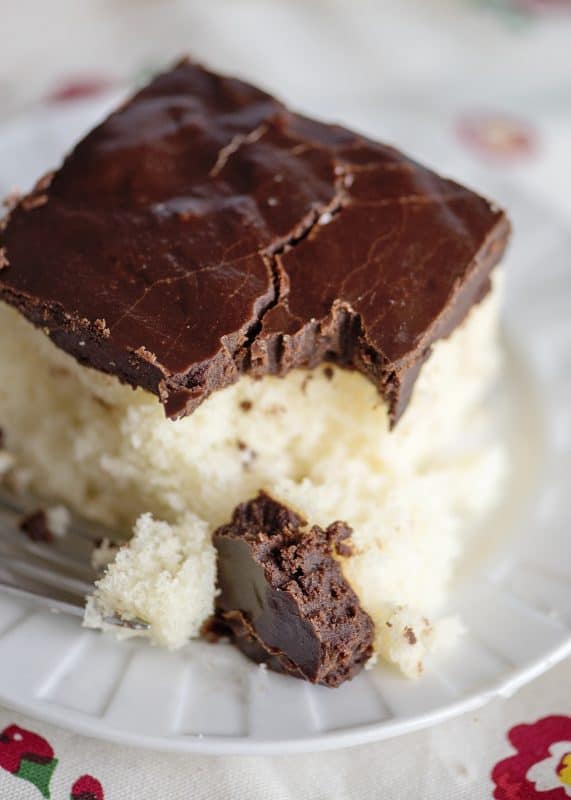
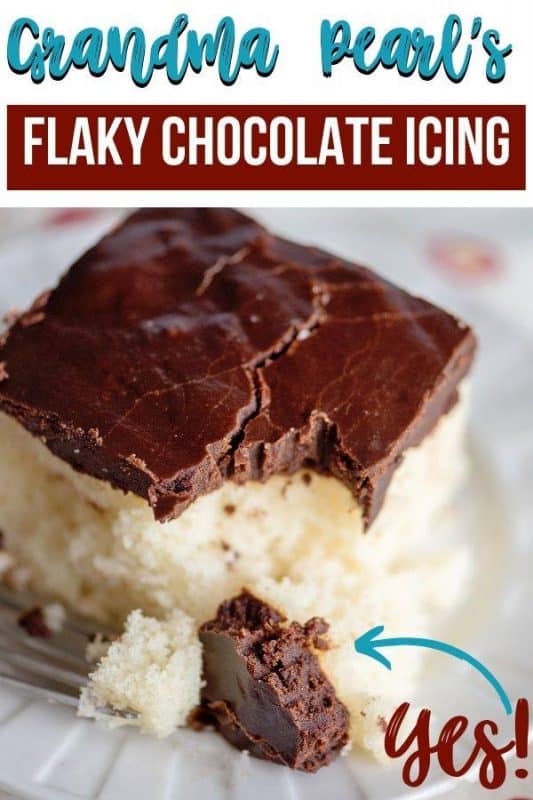
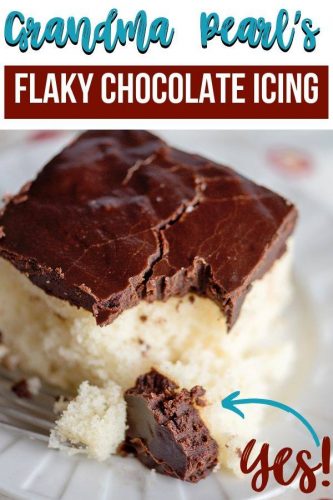
Click here to see the chocolate version of this icing! 

Yellow Cake with Old Fashioned Peanut Butter Icing


Yum

Grandma Pearl’s Flaky Chocolate Icing by Gordon Ramsay

Grandma Pearl


Did your granny ever make one of those cakes where, when she cut into it, the icing would crack and break off in huge fudgey chunks? This is that icing.

Grandma Pearl's Flaky Chocolate Icing

Grandma Pearl’s Flaky Chocolate Icing is the stuff of legend in my family. She always topped fluffy white cakes with it.

My brother used to ask for one of these special cakes for his birthday and as long as she was able, Pearl would come through! I loved seeing that aluminum cake dome show up at our house because we knew full well what was beneath it! This is what the old folks call a “boiled icing” because they cooked it in a saucepot on top of the stove and it had to come to a full rolling boil and stay there a minute or two until it was ready. The process is similar to making fudge but we don’t use a thermometer, relying on the clock instead.  This icing hardens very quickly, so it’s easiest to use on a sheet cake, where you simply pour it over the cake while it’s still in the pan and allow it to cool. If you’d like the peanut butter version of this icing, it can be found by clicking here. 

Ingredients for Grandma Pearl's Flaky Chocolate Icing

The full printable recipe card for Grandma Pearl’s Flaky Chocolate Icing is at the bottom of this post so make sure you check that out. To make this, you’ll need:  A white cake mix, prepared in a 9×13 pan according to package directions, and cooled. You’ll also need: Shortening, Butter, Milk, Sugar, Cocoa Powder, and Vanilla. 

*You don’t need a chocolate bar, but one was visiting my house and wanted to be in the photo and I was like “Why not! It’s a chocolate day!”  I do try to be inclusive.

Note: These photos are for a single recipe of icing. HOWEVER the final cake pictured has a double recipe. If you want a nice and thick icing you’ll need to double it. If you want to see what a regular portion of icing looks like, click here to see it on my old fashioned peanut butter icing post (here). These recipes are twins, with just a one ingredient difference.

Boiling Grandma Pearl's Flaky Chocolate Icing

In a large sauce pot, combine sugar, milk, shortening, margarine, and salt. Bring to a rolling boil over medium high heat, stirring constantly to prevent scorching. Once it reaches a boil, let boil for two to three minutes without stirring. Remove from heat and immediately stir in vanilla and cocoa powder. Beat until icing is smooth and starts to lose it’s shine. 

Pouring Grandma Pearl's Flaky Chocolate Icing
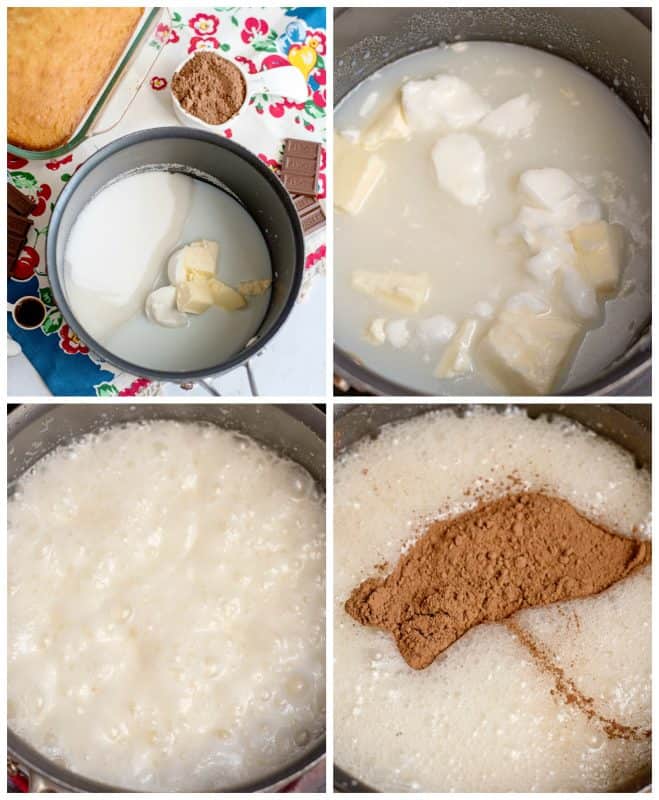
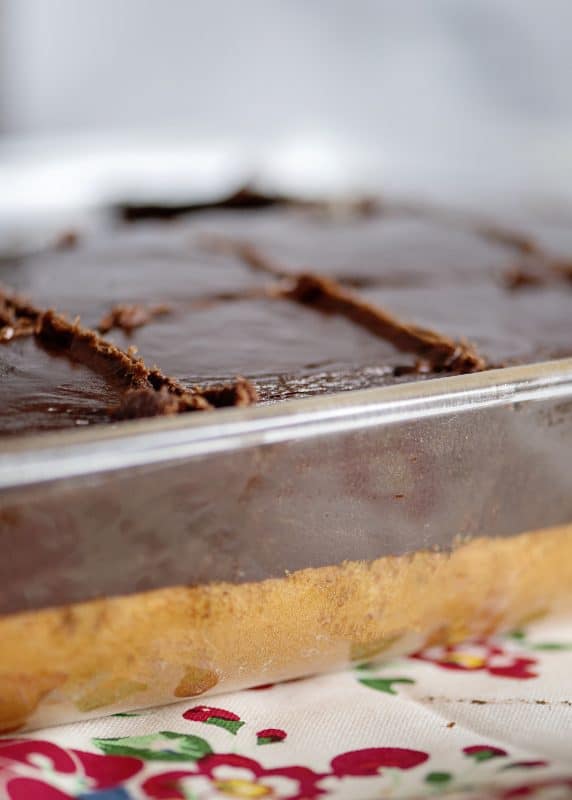
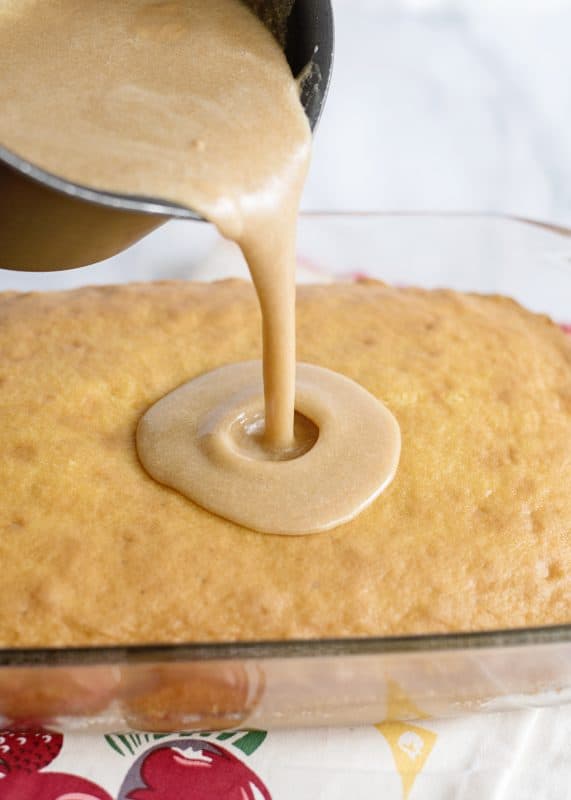
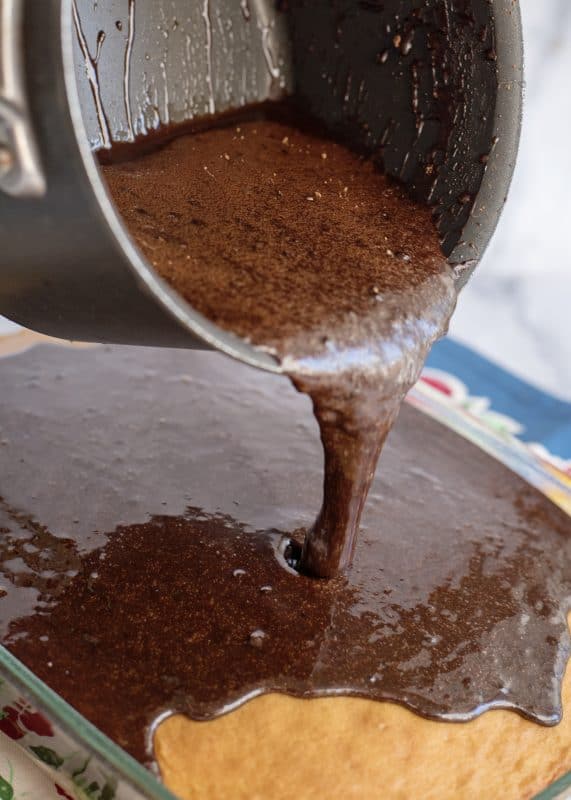
Immediately pour onto cake. Allow to cool.

Tips for success with this recipe: 

  1. The boiling of the icing is the most critical step. Make sure it comes to a rolling boil and then stay right there, timing it. I suggest adding one minute to be on the safe side but don’t go over this as the icing will scorch. 
  2. You absolutely must have your cake done and ready the moment the icing is done. 
  3. Once your icing is finished, remove it from the heat and use a wire whisk to quickly stir in your cocoa powder and vanilla, stirring until it thickens a bit and starts to lose some of its shine. It should still be pourable. 
  4. Don’t try to spread the icing once you’ve poured it, instead, pour it evenly over the cake so that no spreading is needed
  5. Most important tip of all: Unless you lived through the Great Depression, I strongly encourage you not to use this on anything other than a sheet cake. Only those who have the crown of wisdom that comes through age and hardship can ice a layer cake with this. 

Final Grandma Pearl's Flaky Chocolate Icing

Isn’t this a beautiful sight? 

Grandma Pearl’s Flaky Chocolate Icing

Grandma Pearl's Flaky Chocolate Icing

Note that your icing will go down into the sides of your pan some, but that is okay. 

Grandma Pearl's Flaky Chocolate Icing - Piece of Cake!

Once it’s cooled, cut and serve! This icing is a rare treat not often seen these days! 

Grandma Pearl's Flaky Chocolate Icing

I sure do wish we could sit down and have a nice chat over slides of this cake!

Grandma Pearl's Flaky Chocolate Icing

Y’all have a great afternoon. Be blessed and be a blessing!

Grandma Pearl’s Flaky Chocolate Icing

Author: Christy Jordan

Ingredients

  • Duncan Hines yellow cake mix made according to package directions and cooled
  • 1- 1/2 Cups sugar
  • 7 tablespoons whole milk
  • 2 tablespoons shortening
  • 2 tablespoons butter or margarine
  • 1/4 teaspoon salt
  • 1 teaspoon vanilla
  • 1/2 cup cocoa powder

Instructions

  • Prepare cake mix as directed and bake in a 9×13 pan. Cool.

  • In a large sauce pot, combine sugar, milk, shortening, butter, and salt. Bring to a rolling boil over medium high heat, stirring constantly to prevent scorching.

  • Once it reaches a boil, let boil for two to three minutes without stirring.

  • Remove from heat and immediately stir in vanilla and cocoa powder. Beat until icing is smooth and starts to lose it’s shine. Immediately pour onto cake. Allow to cool before serving.

Notes

Note: These photos are for a single recipe of icing. HOWEVER the final cake pictured has a double recipe. If you want a nice and thick icing you’ll need to double it. If you want a regular portion of icing, as pictured on my old fashioned peanut butter icing post (here) just make a single recipe.

Grandma Pearl's Flaky Chocolate Icing

Click here to check out the Peanut Butter Version of this icing.

Click here to follow me on Instagram


Yum


Proudly powered by WordPress

By continuing to use the site, you agree to the use of cookies. Click here to read more information about data collection for ads personalisation

The cookie settings on this website are set to "allow cookies" to give you the best browsing experience possible. If you continue to use this website without changing your cookie settings or you click "Accept" below then you are consenting to this.

Read more about data collection for ads personalisation our in our Cookies Policy page

Close