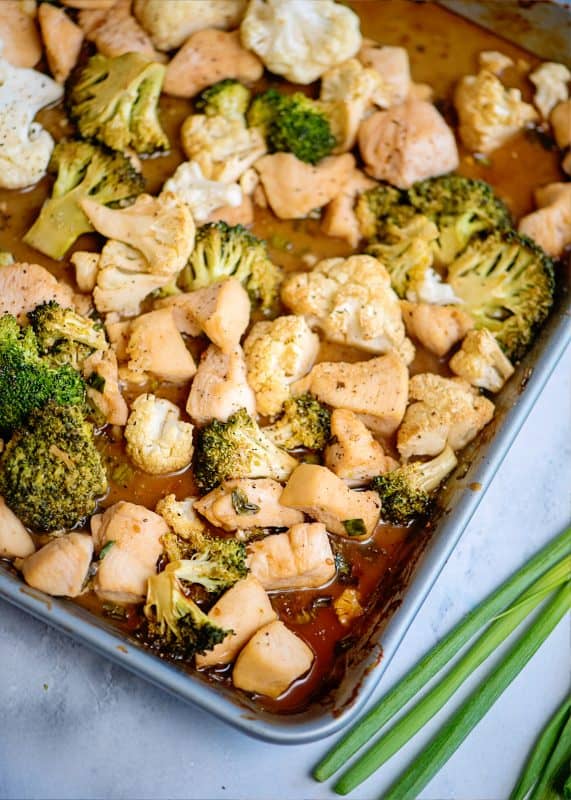
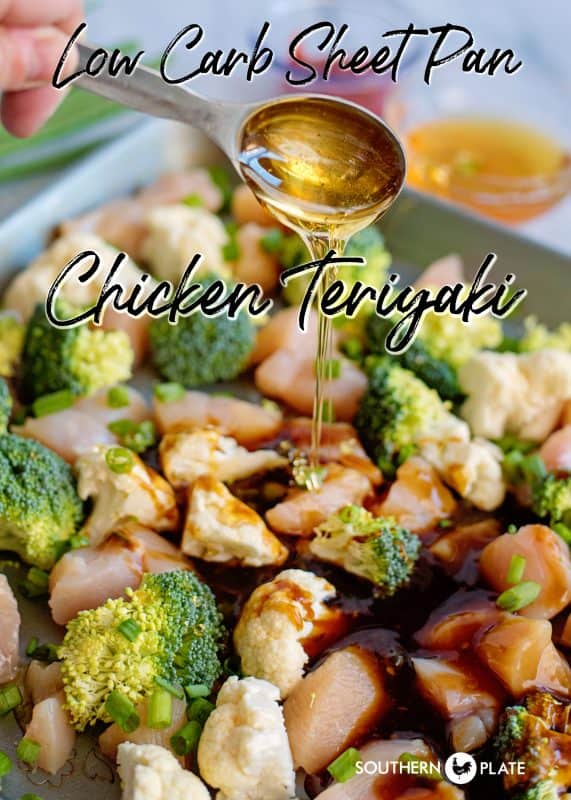
Low Carb Sheet Pan Chicken Teriyaki is a flavorful meal in one that cooks up in a flash!
Ricky and I eat a mostly low carb diet as a lifestyle choice. We aren’t super strict about it these days but we prefer low carb whenever possible. I’m always looking for more quick and easy meals to add to our arsenal so I developed this quick and easy sheet pan Chicken Teriyaki. Instead of the rice, we just load up on broccoli and cauliflower. You’ll notice that the sauce has some honey in it and yes teriyaki sauce is a bit carby, But most of the sauce ends up in the bottom of the sheet pan, with just a very faint coating on the dish to give it flavor. I count this as another powerful weapon in our low carb supper arsenal!
If you’re not eating low carb, this is still a great recipe for a low fuss supper but you have more options available to you. Try doubling the sauce, adding in your favorite veggies (such as carrots), and serving this over bowls of rice for a meal that will please the whole family.
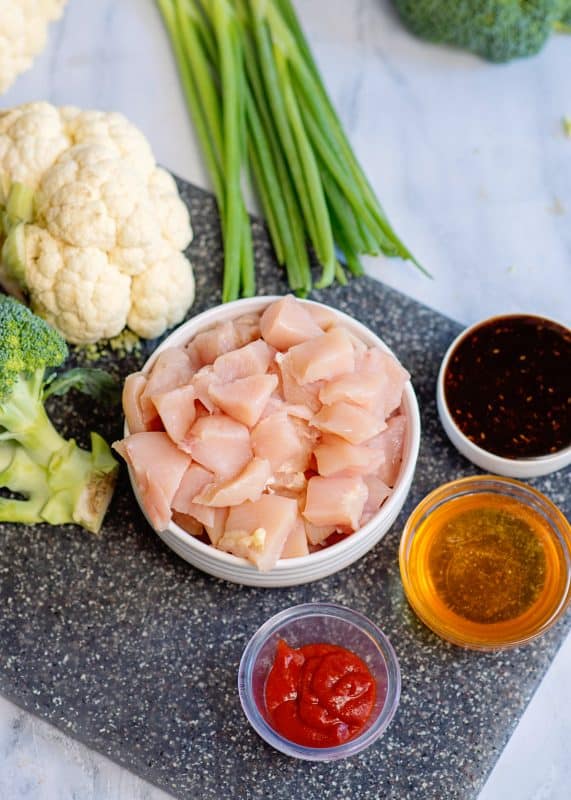
You’ll need: Boneless skinless chicken breasts, cauliflower, broccoli , green onions, teriyaki sauce, honey, and siracha.
Cut up your chicken into bite sized pieces.
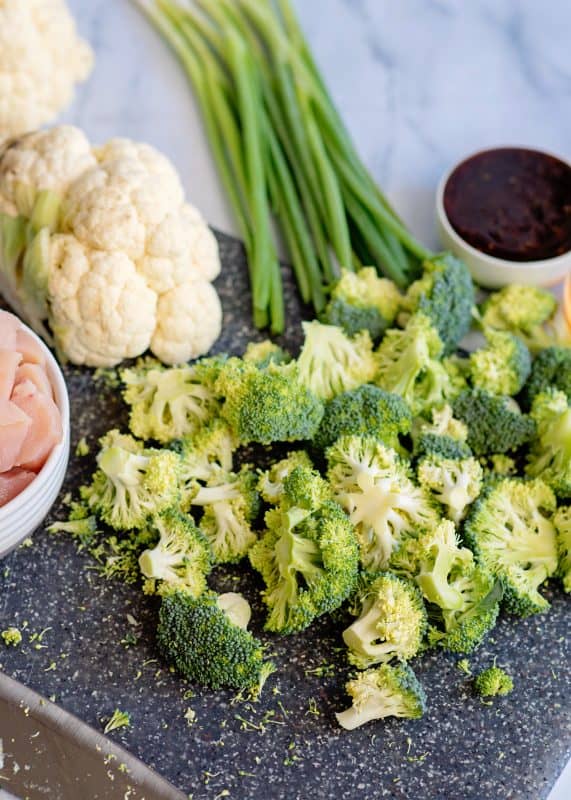
Chop broccoli and cauliflower into florets if they aren’t already.
And dice up green onion.
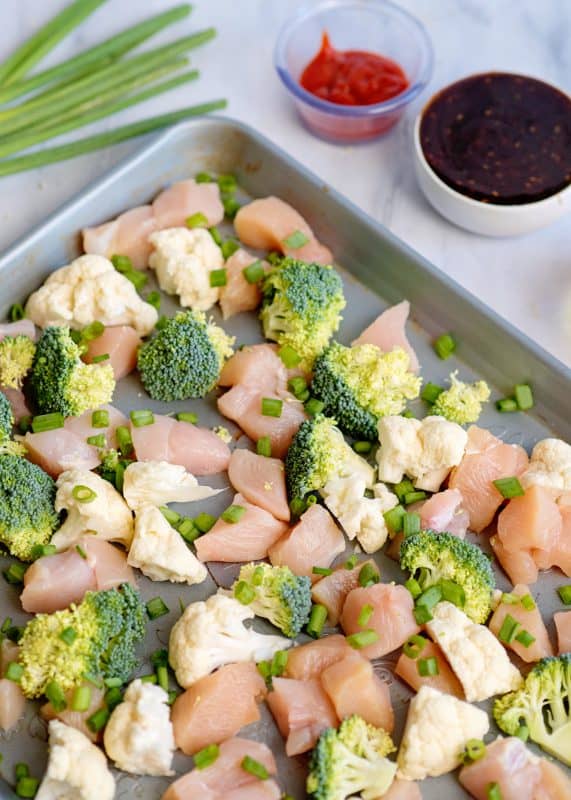
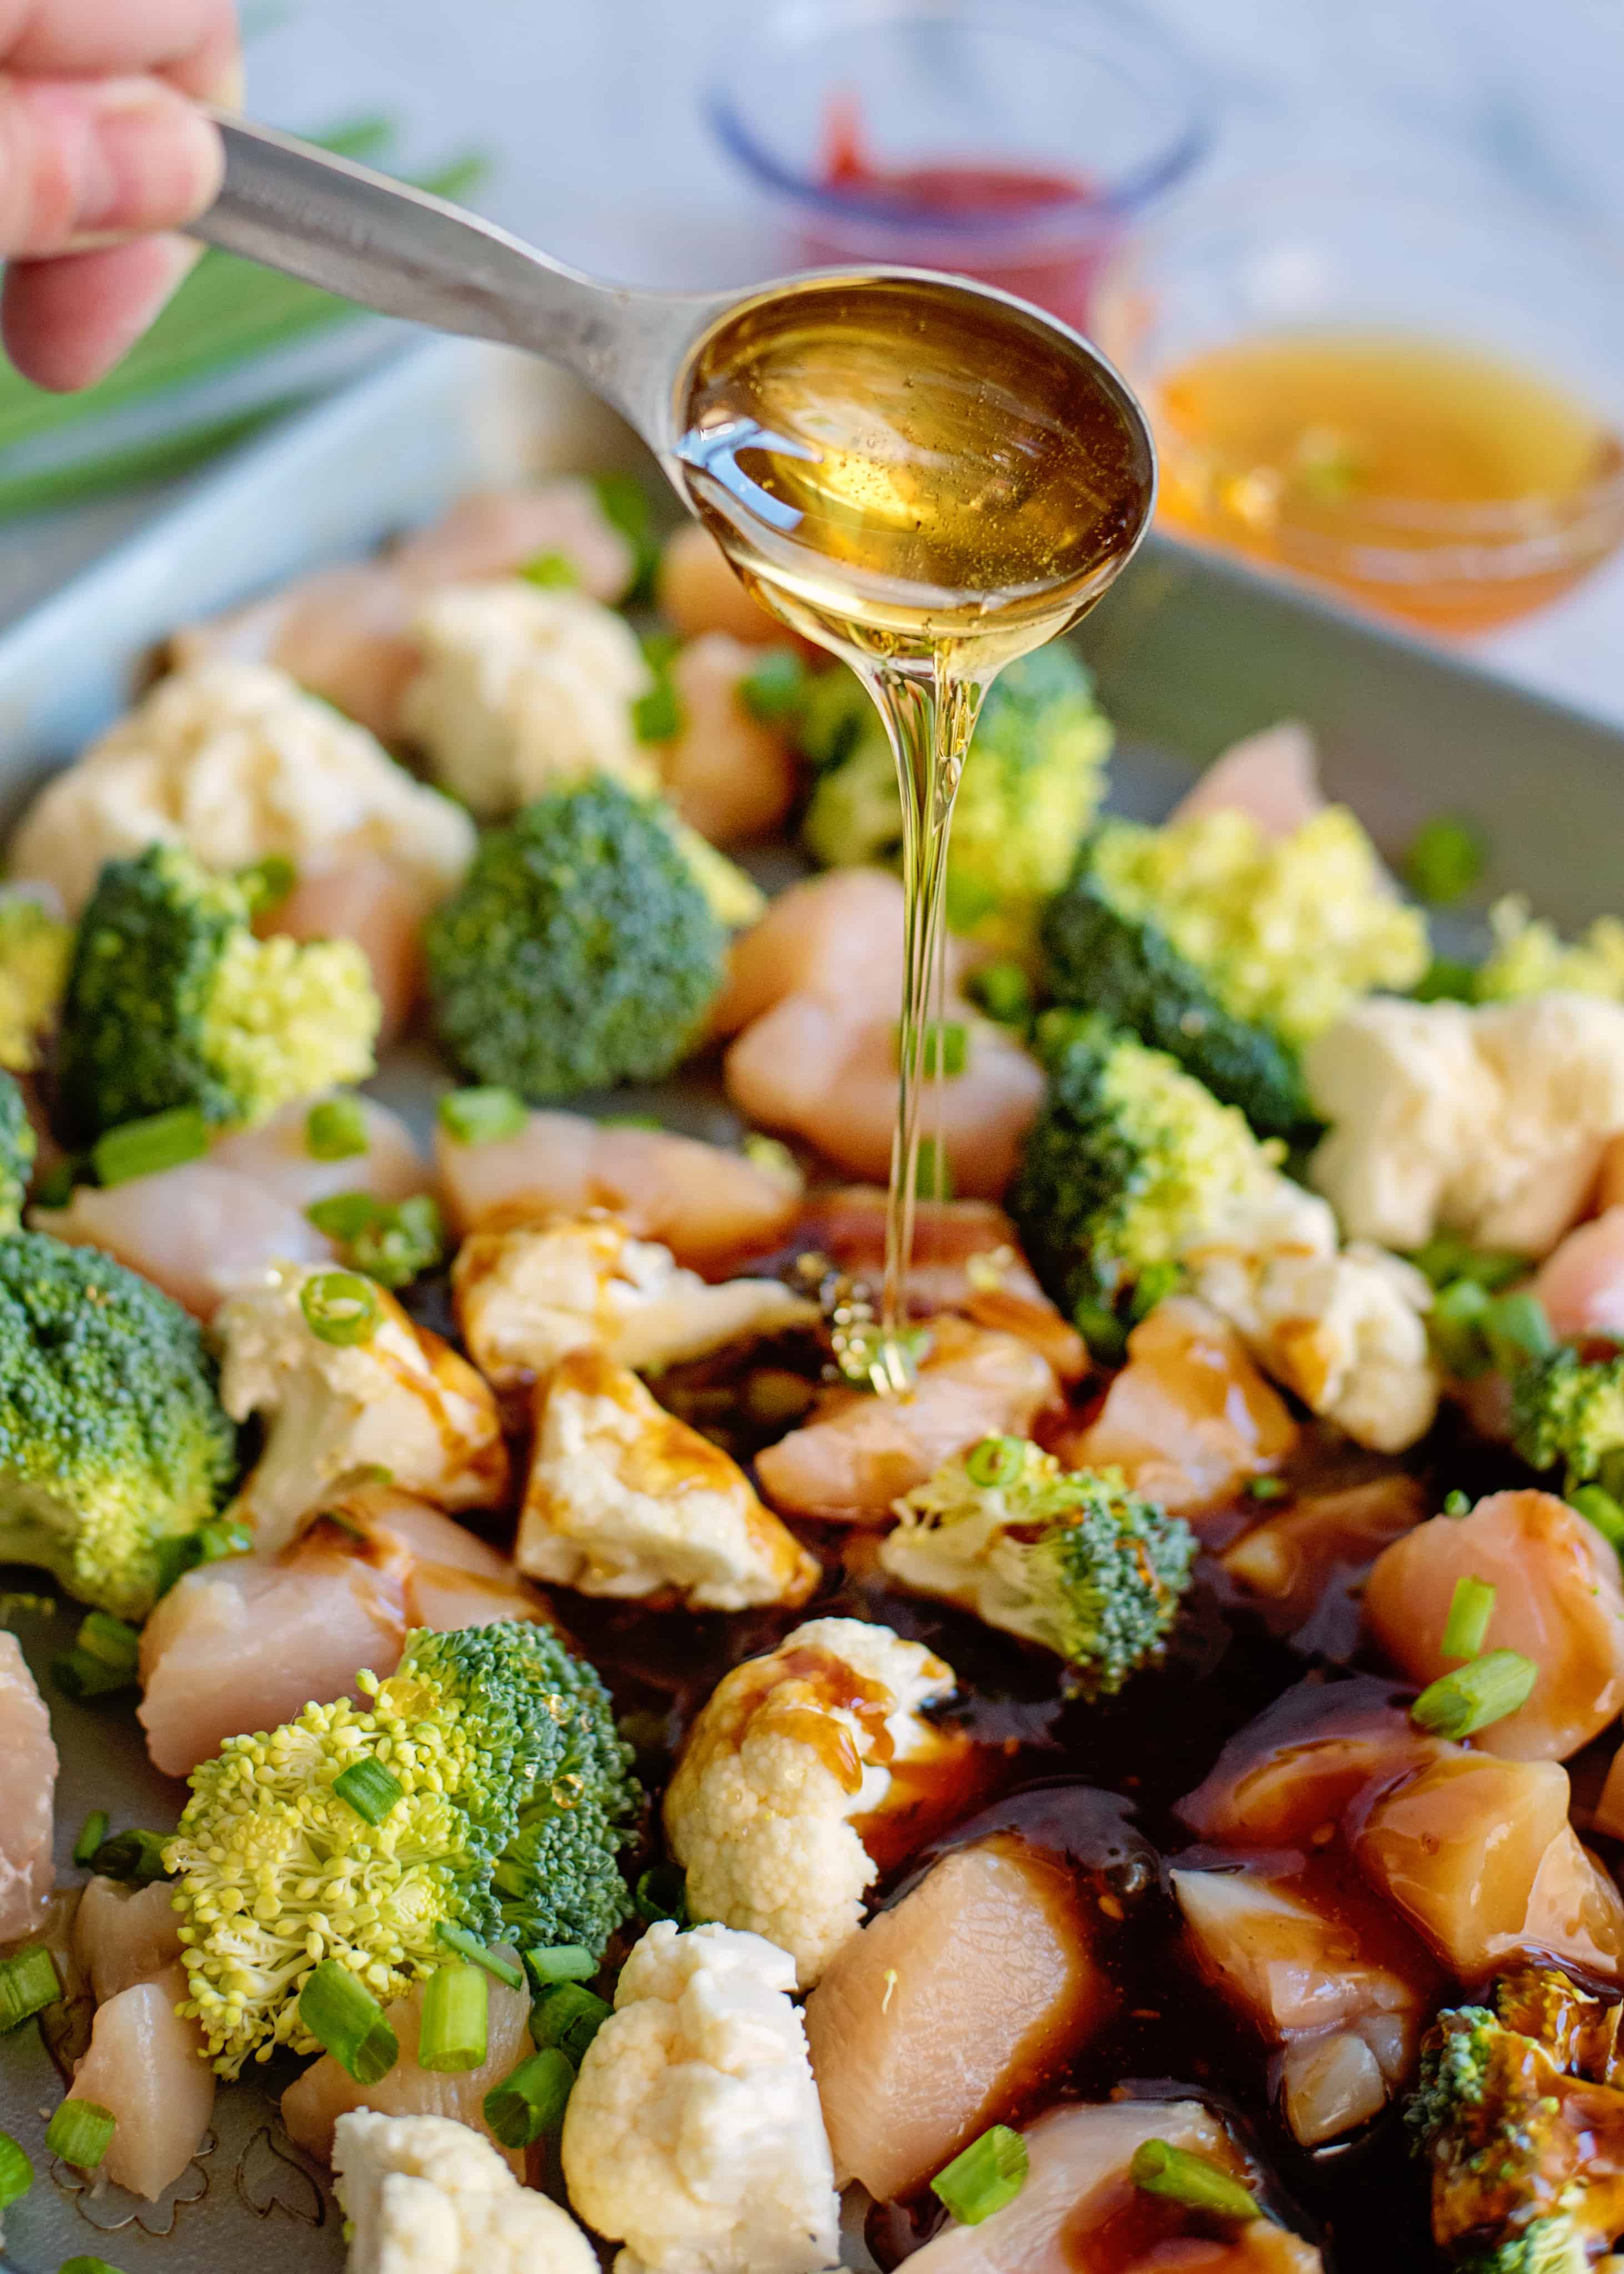
Arrange chicken and veggies on baking sheet that has been lightly sprayed with cooking spray.
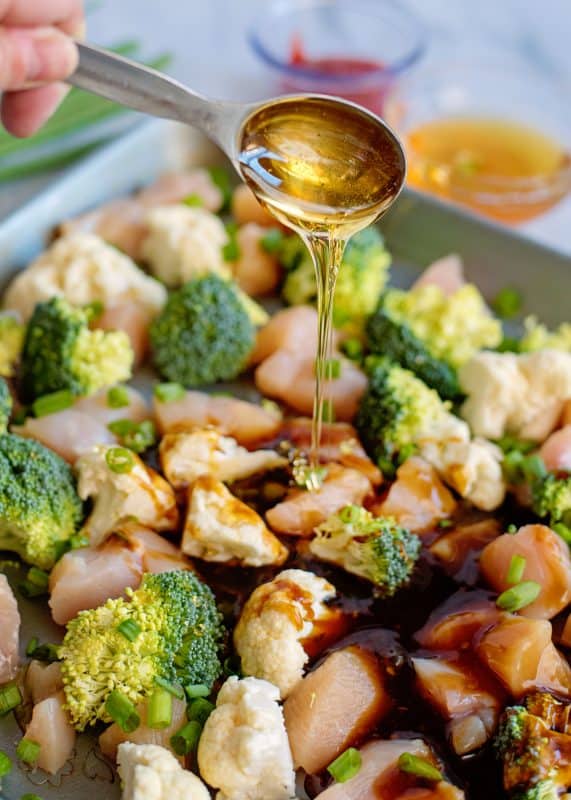
Stir up sauce ingredients and drizzle over all. Toss to coat.
Bake this at 375 for about 30 minutes, stirring halfway through.
Dish is done when chicken is cooked through and vegetables are to your desired tenderness.
Enjoy this low carb meal!
Ingredients
2 poundsboneless skinless chicken breasts
2-3cupsbroccoli florets
2-3 cups cauliflower florets
2green onions, sliced
sauce
1/2cupteriyaki sauce
2tablespoons honey
1teaspoonsiracha
Instructions
Spray large rimmed baking sheet with cooking spray.
Cut chicken into bite size pieces. Cut broccoli and cauliflower into florets and dice green onions.
In a small bowl, stir together sauce ingredients. Place chicken and veggies on baking sheet. Drizzle with all of sauce. Toss to coat. Bake at 375 for about 30 (stirring halfway through) minutes or until chicken is no longer pink in the center and veggies to your desired doneness.
Notes
Note: Due to variance of serving sizes and ingredient substitutions, I don’t offer carb counts on my recipes. I encourage you to use an online carb counter, such as fitness pal, or your favorite app to calculate the count for yourself. Thank you!
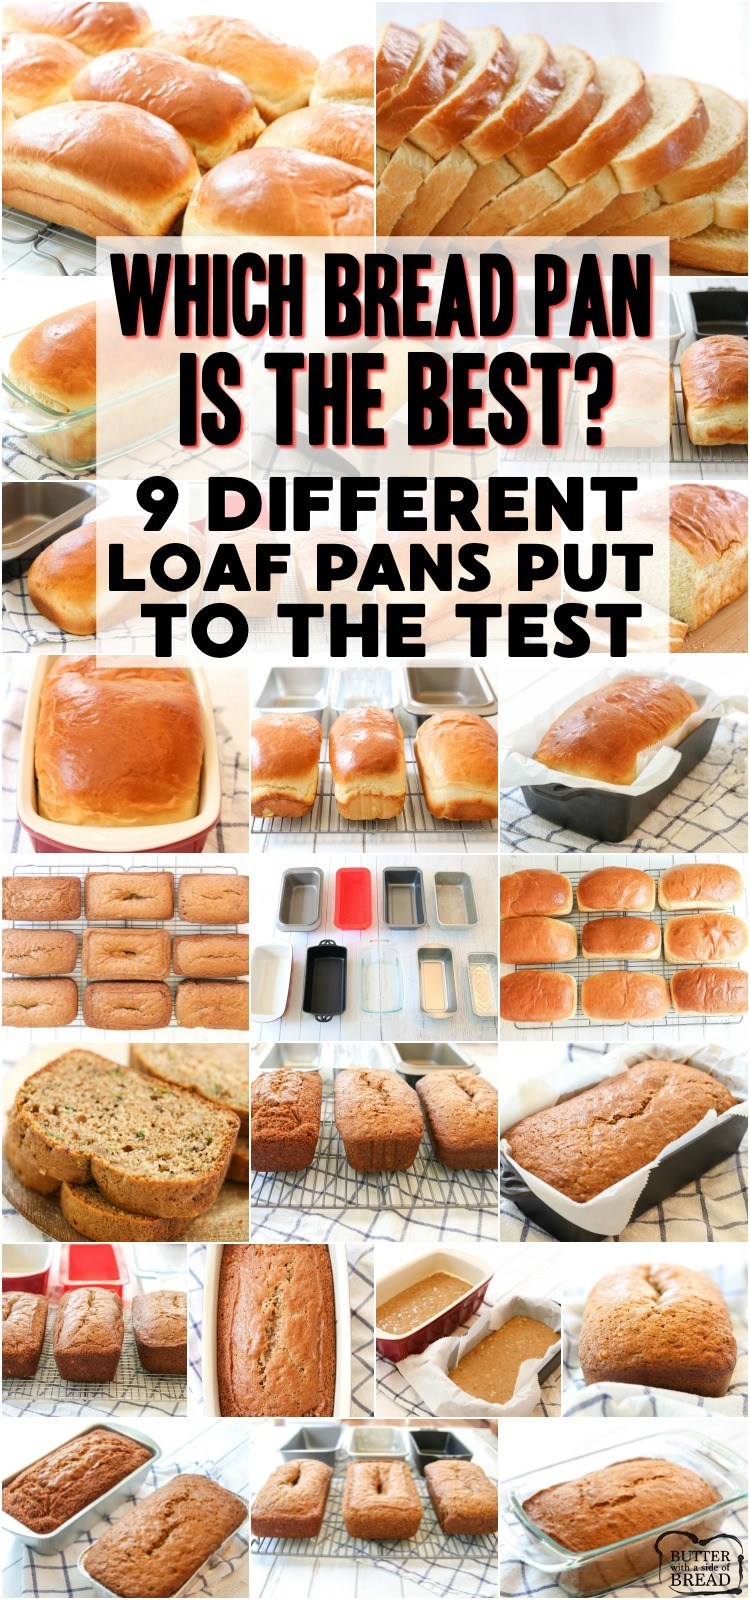
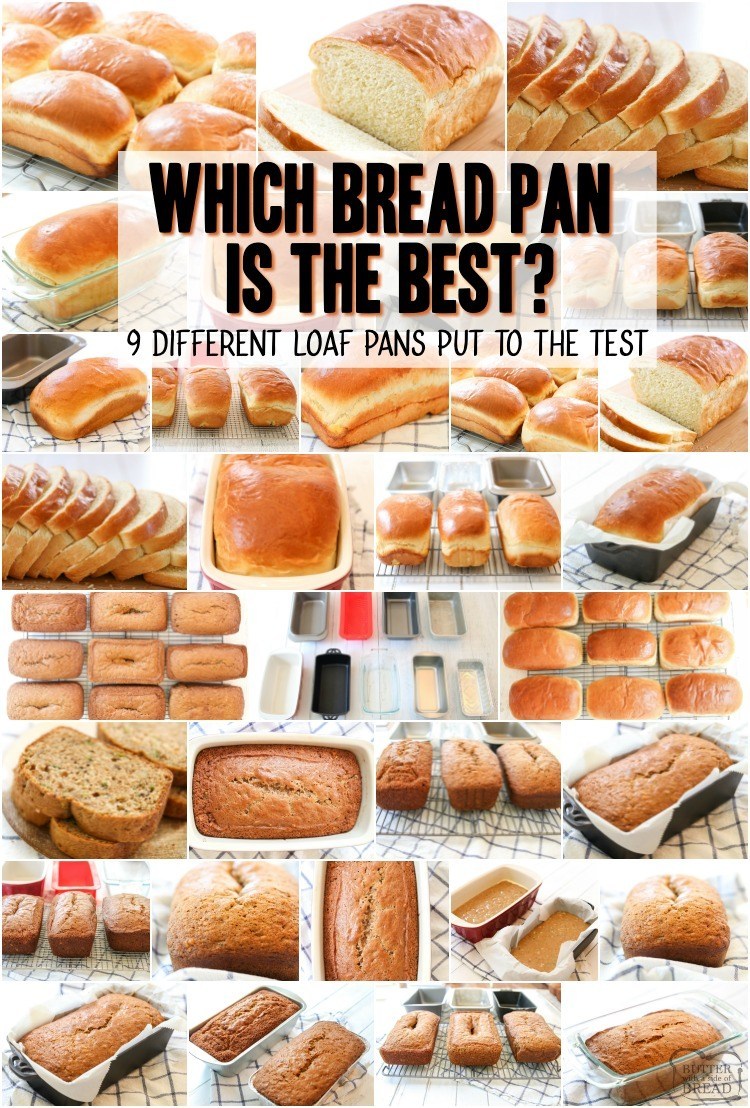
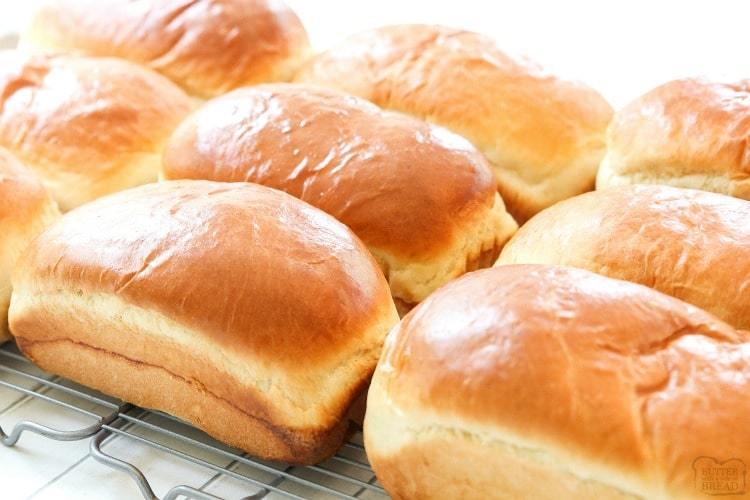
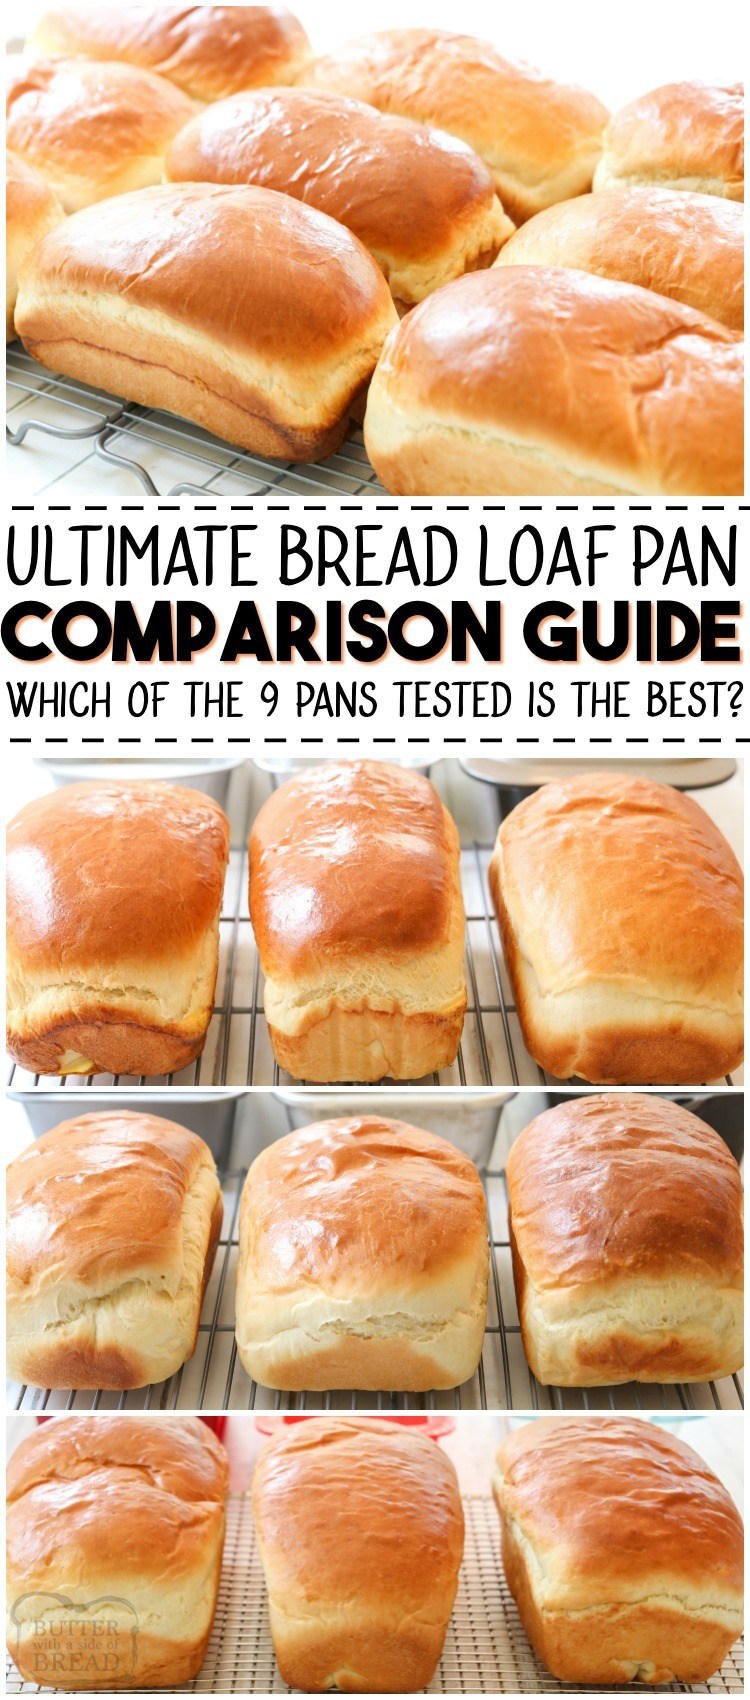
Loaf Pan comparison to see which pan bakes the best bread. 9 different bread pans put to the test with white bread and zucchini bread to see which is the best loaf pan.
I’ve been baking bread for years now and a few months ago I wondered, is the pan I always use the best pan out there? There are so many to choose from- aluminized steel, silicone, glass, ceramic- even cast iron bread pans.
So I set up an experiment. One week, 75+ cups of flour and over 400 pictures later, I have my answer! Read on to see which bread pans I’ll keep and which I’m getting rid of immediately.
Bread Pan Testing Process
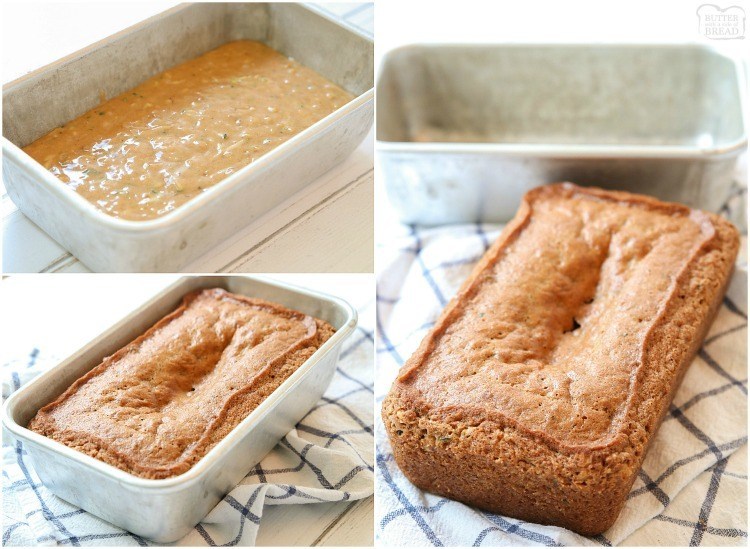
The team baked a loaf of yeast white bread in each pan on one day and a loaf of zucchini quick bread in each bread pan the next day. We measured out the amount of dough or batter so that each pan got the exact same amount. Following that we analyzed how the loaf of bread looked, how evenly it baked, how long it took to cook, the cost of the bread pan and any other physical factors the bread displayed.
We had a team of two people mixing the bread and baking each loaf. Three additional people were brought in to judge the loaves of bread.
We recognize that this is NOT a perfectly designed experiment, but nevertheless, feel it’s useful to compare the types of pans available today. As we continue to use the pans we keep, we’ll update with additional information as it’s deemed helpful.
All bread was baked in a temperature and humidity controlled environment. Kitchen temperature was 73 degrees F and humidity was 37%.
Loaf Pans Compared
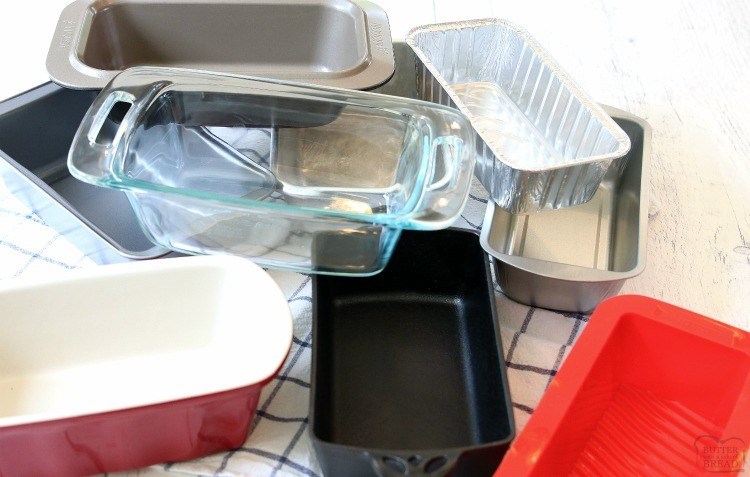
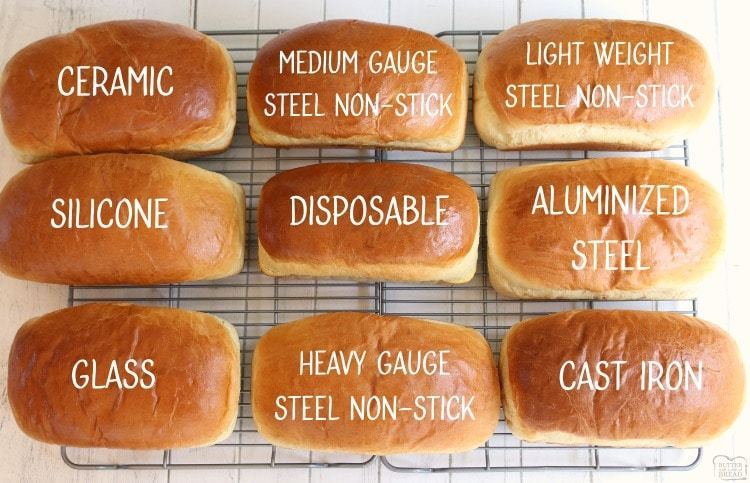
We tested 9 different loaf pans each with 2 bread recipes. We wanted to test out a wide variety of pans that are on the market today.
Steel pans are the most widely available, but do they perform the best? We couldn’t wait to find out! Here are the ones we tested:
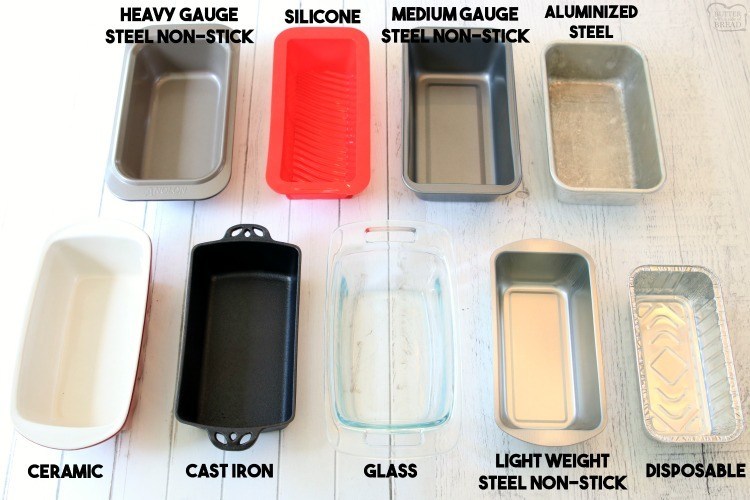
Glass Loaf Pan
Ceramic Loaf Pan
Cast Iron Loaf Pan
Heavy Gauged Steel Non-Stick Loaf Pan
Aluminized Steel Loaf Pan
Medium Gauge Steel Non Stick Loaf Pan
Light-weight Steel Nonstick Loaf Pan
Silicone Loaf Pan
Foil Disposable Loaf Pan
BREAD PAN RESULTS
BREAD PAN RECOMMENDATIONS
All outcome notes below were made by Jessica, chief baker and bread enthusiast.
Cost: $16.97 (as of 7/2019)
Description:
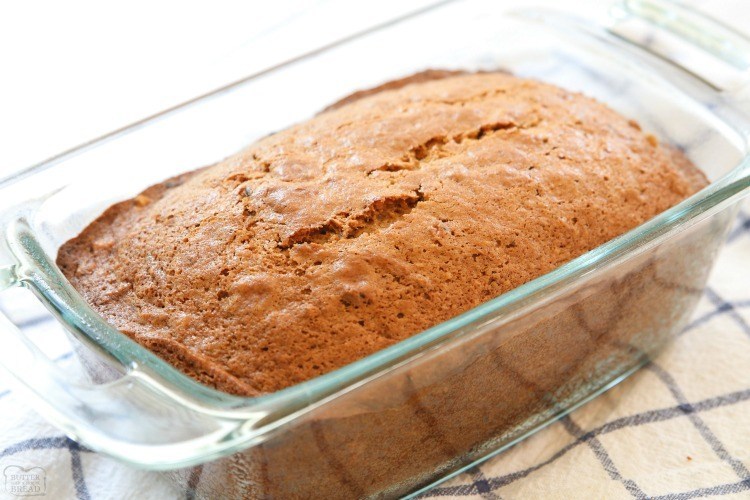
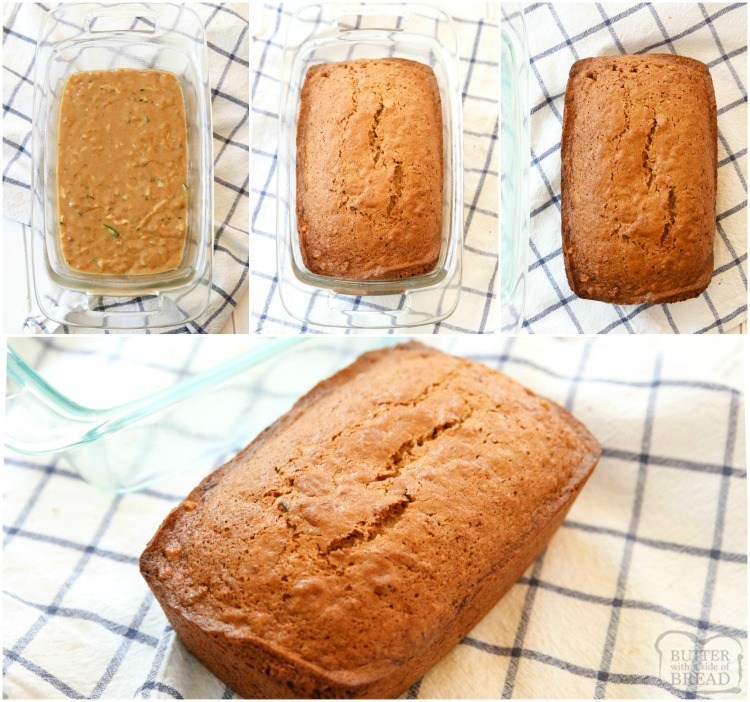
Made of nonporous glass that won’t warp, stain, or absorb odors
Glass is preheated oven, microwave, fridge, freezer & dishwasher safe
Lid is BPA free and top-rack dishwasher safe
Glass bakeware has large ergonomic handles for improved handling
Measures 4 inches wide by 7 inches length by 3 inches tall
Weighs 2 lbs 4 oz
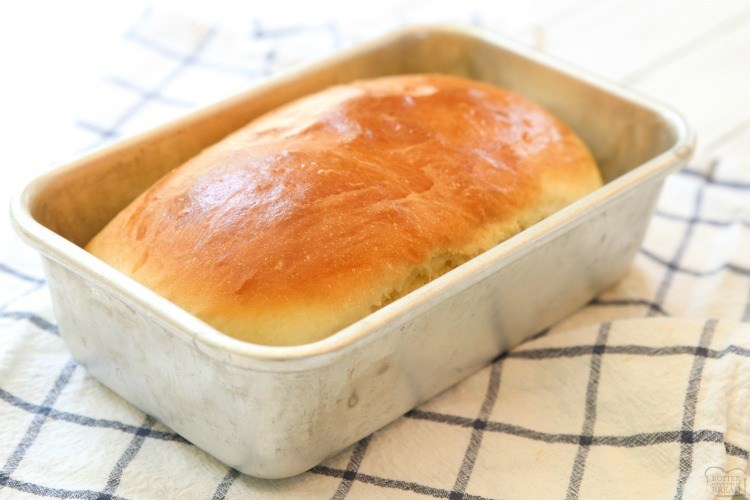
Outcome: To be honest, I’ve used a glass pan in the past and it didn’t wow me, so I didn’t have very high expectations for this pan. However I was pleasantly surprised at how it consistently baked a gorgeous loaf of bread! Both the yeast bread and the quick bread rose well, baked evenly and had great color. The glass pan yielded lovely loaves of bread and I’ll certainly use this pan again.
I did spray the glass pan with non-stick baking spray and had very minor issues with the bread sticking. I sprayed a bit more on the pan when baking the zucchini bread and it didn’t stick at all. Clean-up was simple and took very little time. I am a bit concerned with how the glass pan will look over time after being sprayed with non-stick spray. I’ll have to make sure I clean it thoroughly to avoid baked grease spots.
I plan to keep the glass pan and will use it again.
Glass Bread Pan Rating: 9.25/10
Return to top menu
Cost: $19.03 (as of 7/2019)
Description:
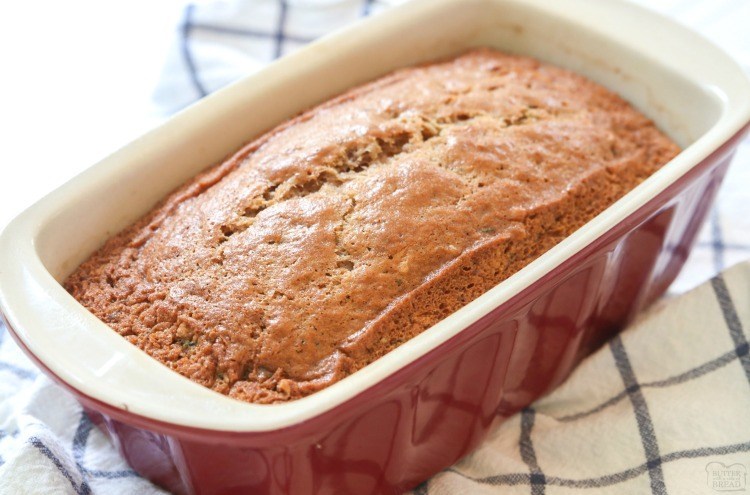
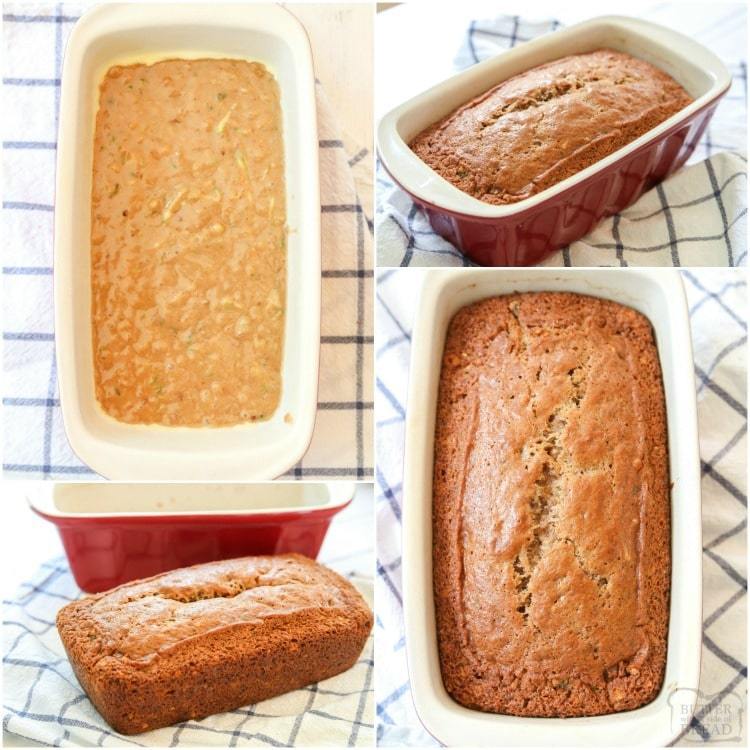
Red Glazed Exterior And Cream Interior
Oven To Table Design
Microwave, Freezer, Oven And Dishwasher Safe
Measures 4 inches wide by 8 inches length by 3.5 inches tall
Weighs 2 lbs 6 oz
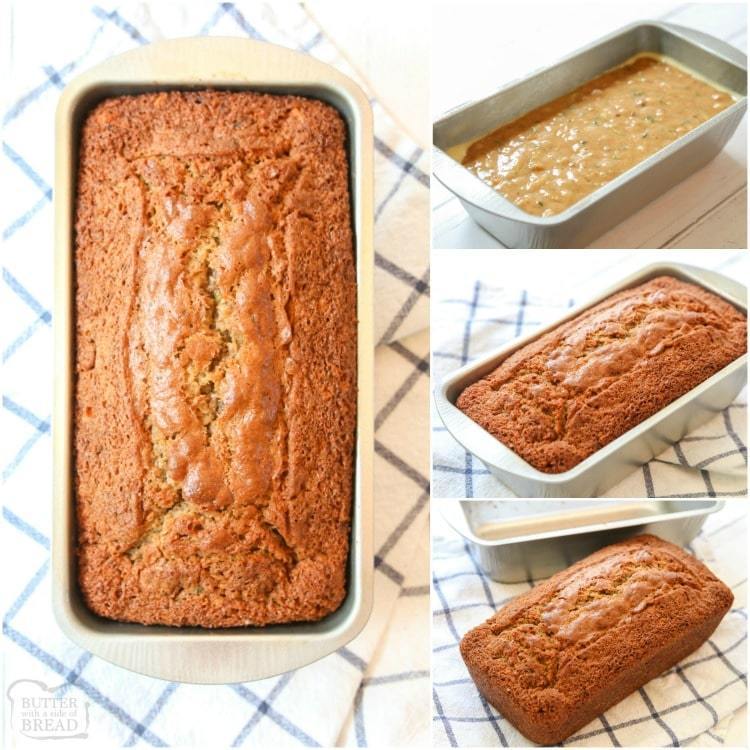
Outcome: I’ve had this ceramic pan for years but I mostly just liked how it looked! It’s just a very pretty pan! After testing with both bread recipes though now I know it also bakes a gorgeous loaf of bread. Loaves were evenly baked, had great lift and color and overall a pleasing appearance.
I did spray the ceramic pan with non-stick baking spray and had no issues with the bread sticking at all. Clean-up was simple and took very little time.
I plan to keep this pan and will use it again.
Ceramic Loaf Pan Rating: 7.7/10
Return to top menu
Cost: $14.47 (as of 7/2019)
Description:
Camp Chef brand cast iron bread pan, weighs 3 lbs 9 oz
True Seasoned & ready to use out of the box
Measures 4.3 inches wide by 8 inches length by 2.8 inches tall
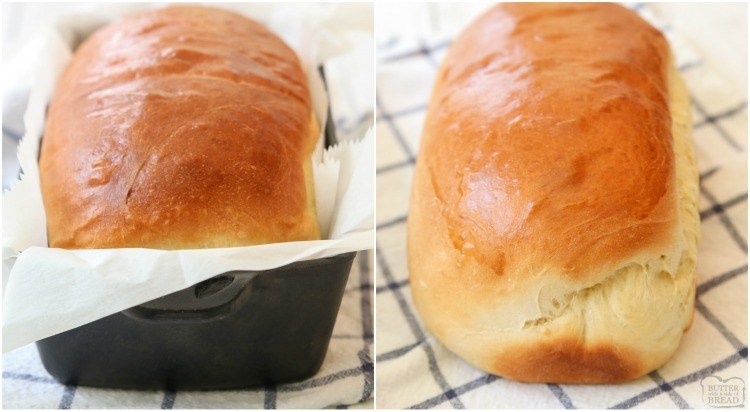
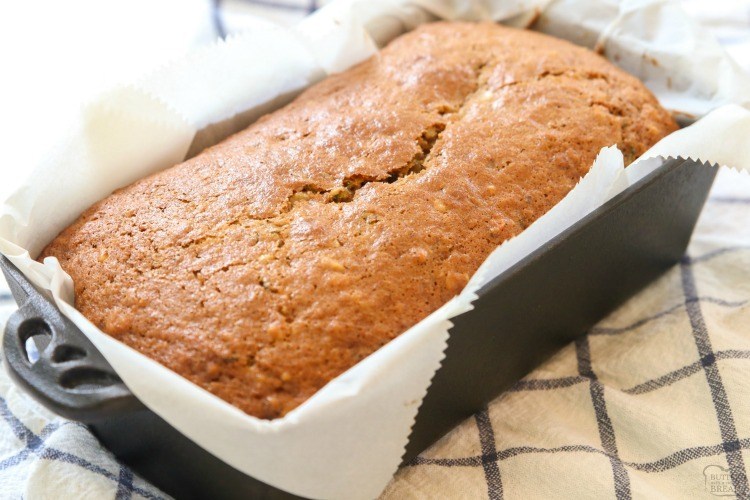
Outcome: I love the look of the cast iron pan but I’ll be honest, I was pretty nervous to bake with it. I worried that it’d take quite a bit longer to bake. I was also concerned about the dough sticking to the pan so I opted to line the pan with a piece of parchment paper.
The results? I love it! The bread baked evenly and looked great.
I’m not sure if the bread would stick to the pan if I opted to not use parchment paper. I’ll bake another loaf and update this with more info if it sticks. I am definitely planning to keep this pan and use it again.
Cast Iron Bread Pan Rating: 7.85/10
Return to top menu
Cost: $19.99 (as of 7/2019)
Description:
Heavy gauge steel construction resists warping.
Comfortable silicone Anolon SureGrip handles provide a slip-free grasp.
Dishwasher suitable and oven safe to 500 degrees Fahrenheit
Measures 4.3 inches wide by 8.3 inches length by 2.5 inches tall
Weighs 1 lb 2 oz
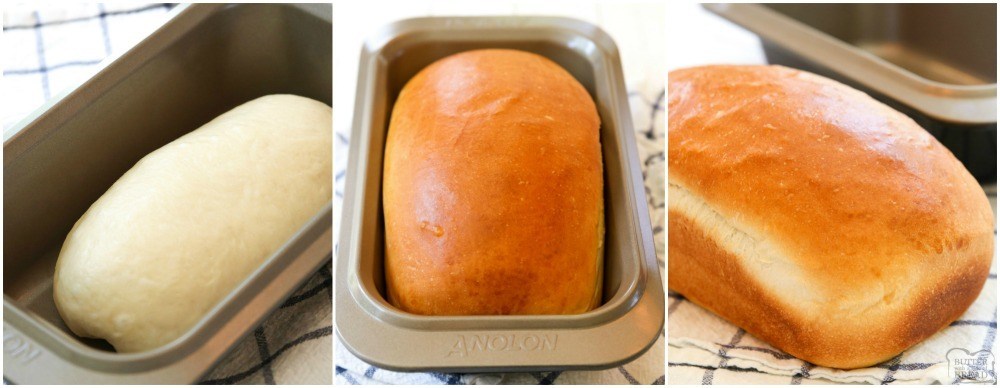
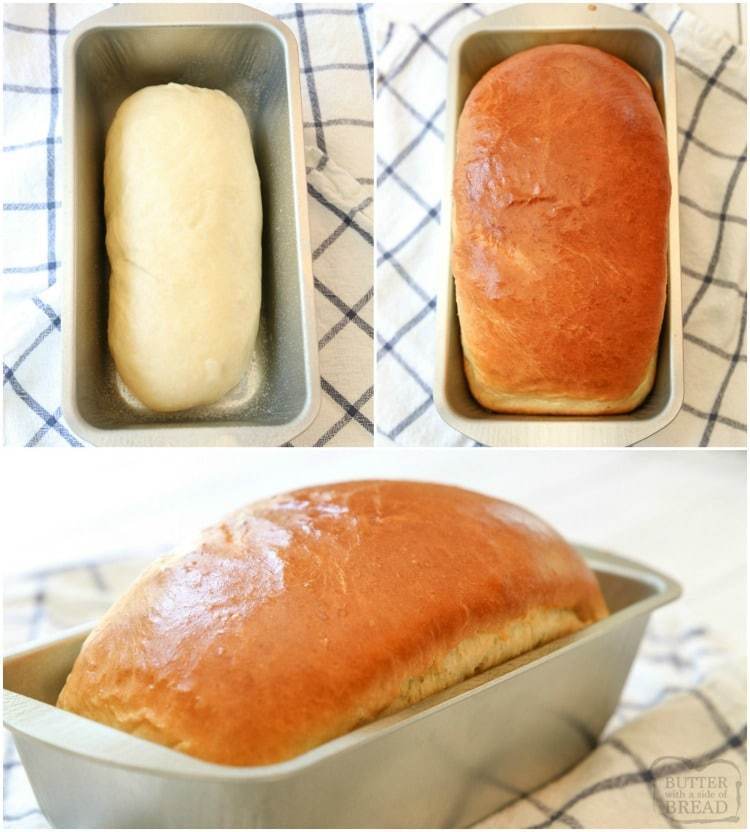
Outcome: This steel pan is the most widely available type of bread pan right now. There are several different brands that offer this same type of pan. I opted for the Analon pan because it was a heavy pan with great non-stick abilities. I was a bit concerned with how dark the pan is and how that would affect the color of the bread.
The bread did cook to full 200 degree F temperature in 4 minutes less than the other loaves. This bread pan baked a beautiful loaf of bread. The top was smooth and well rounded. It was slightly lighter on the top than the bottom, but it still looked lovely.
I didn’t spray the pan at all with non-stick spray and it did not stick. Clean-up was an absolute breeze!
I really liked this pan and will use it again.
Heavy-weight Steel Bread Pan Rating: 8.25/10
Return to top menu
Cost: $19.99 (as of 7/2019)
Description:
Natural aluminum commercial bakeware is made of pure aluminum which will never rust for a lifetime of durability
Baked goods rise and bake evenly due to aluminums superior heat conductivity and the reinforced encapsulated steel rim prevents warping
Easy clean up, hand wash only
Measures 4.5 inches wide by 8 inches length by 3 inches tall
Weighs 11 oz
Outcome: I’ve used this bread pan for years and *thought* that it would perform well. I was wrong! Breads baked in the aluminized steel pan consistently didn’t rise as well. Even after measuring multiple times for a 200 degree F temp with the thermometer, the bread sank upon cooling, indicating that it didn’t bake evenly. It was pretty disappointing!
I’m not sure if the pan didn’t perform well because it was so light weight or if it was something to do with the type of metal? Even the Dollar Store pan and the foil disposable pan loaves looked better!
I’m planning on getting rid of this pan and not using it again.
Aluminized Steel Loaf Pan Rating: 6.2/10
Return to top menu
Cost: $11.99 for 2 pans (as of 7/2019)
Description:
Set of 2 rectangular-shaped bread pans—ideal for baking bread, making meatloaf, and more
Heavy-weight carbon-steel construction provides durability and fast, even heating for uniform browning
Nonstick coating ensures effortless food release; oven-safe to 500 degrees F
Measures 4.3 inches wide by 8.5 inches length by 2.3 inches tall
Weighs 11 oz
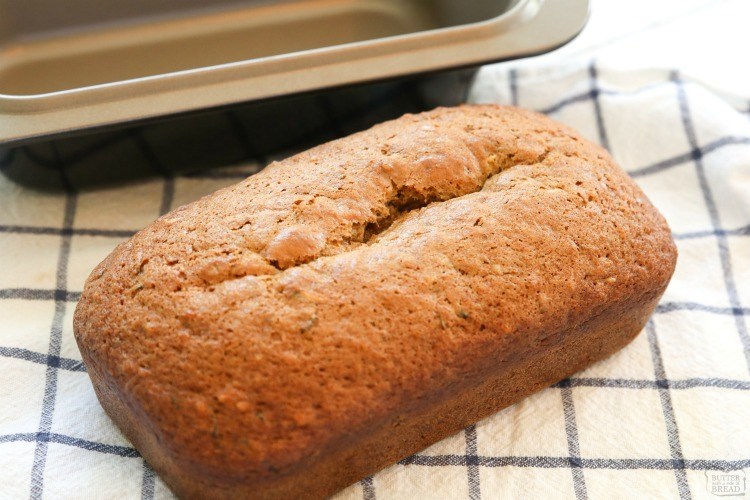
Outcome: The Amazon pan is another steel non-stick coated pan. It’s pretty light weight at just 11 oz. Both loaves of bread initially looked good, but not great. The zucchini bread looked wonderful, I made sure to bake it to the full 200 degrees, but then it sank upon cooling, which indicates uneven baking. Both loaves had slightly uneven coloring with the bottom of each loaf being noticeably darker than the top.
I sprayed the pan with non-stick spray and didn’t have any issues with the loaves sticking.
I likely won’t keep this pan or use it again. It performed okay and was pretty inexpensive. However the Dollar store pan performed very similarly for a fraction of the price. Since I bake bread often, I’d rather spend an additional $5- $6 and use a pan that bakes bread more evenly.
Medium-weight Steel Non-Stick Bread Pan Rating: 6.13/10
Return to top menu
Dollar Store Light-weight Steel Loaf Pan
Cost: $1.00 (as of 7/2019)
Description:
Lightweight Steel pan
Measures 3.5 inches wide by 7.5 inches length by 2.5 inches tall
Weighs 4.5 oz
Outcome: For a pan that costs $1, I was pleasantly surprised with how it performed. It’s a very light weight pan, measuring in at just 4.5 oz. The pan was fairly dark colored too, so I was concerned about uneven baking.
My concerns were warranted, as it did bake somewhat unevenly, but it wasn’t the worst by far. The quick bread did take 10 additional minutes to bake and the loaf was quite dark in color. The crust was harder too, which still tasted good, but I preferred the other loaves more.
The yeast bread stuck to the pan despite the fact that I sprayed it with non-stick spray. I sprayed it very generously when I baked the quick bread and it didn’t stick at all.
Overall, this pan is just okay and I will not keep it or use it again.
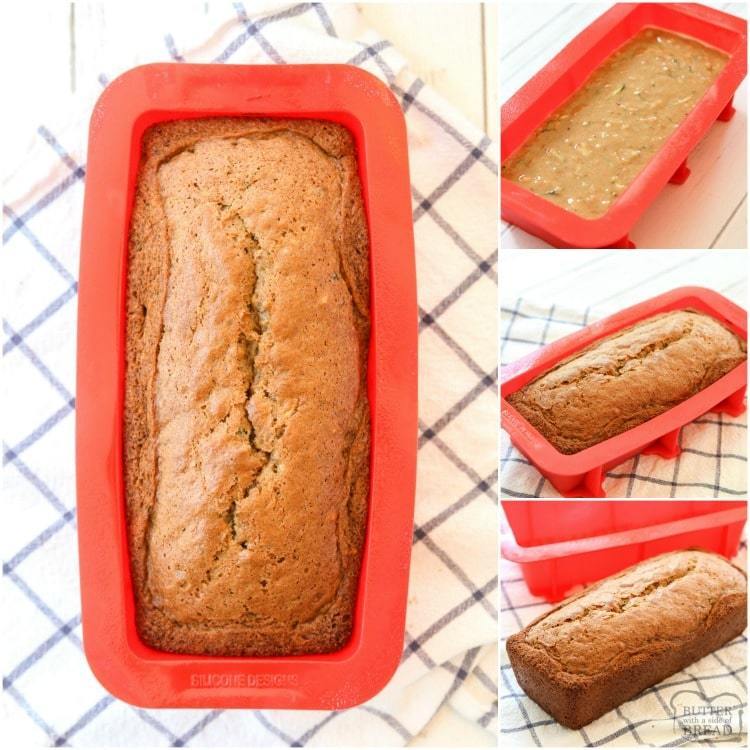
MULTI-PURPOSE – Use for Bread, Quiche, Meatloaf, Lasagna, Pot Pies and More! COMMERCIAL GRADE – Set of 2, Size: 10.75L x 5W x 2.5H inches (each)
Dishwasher safe, oven safe to 450F, microwave safe, freezer safe, built-in stabilizer bars for extra strength
Silicone is safe for your family and good for the environment; make healthy all natural snacks and avoid unhealthy preservatives, food dyes, chemicals and GMO’s found in store bought products
Measures 3 inches wide by 8.5 inches length by 2.5 inches tall
Weighs 6 oz
Outcome: I’ve used a silicone muffin pan in the past and the muffins stuck terribly, so I was nervous to try this bread pan. It did well though! It was a slightly longer pan, so the loaves didn’t quite rise as high as others, but they still looked great. Both loaves were lopsided though, which I thought was interesting.
I did spray the inside of the silicone pans with non-stick spray. I’m not quite sure they needed it, but neither loaves stuck at all so it worked. Clean-up was very easy too. Both loaves cooked a few minutes faster than the others.
I’m not planning on keeping this pan, nor do I plan to use it again. It did okay, but I didn’t like how the loaves baked lopsided each time.
Silicone Bread Pan Rating: 7.15/10
Return to top menu
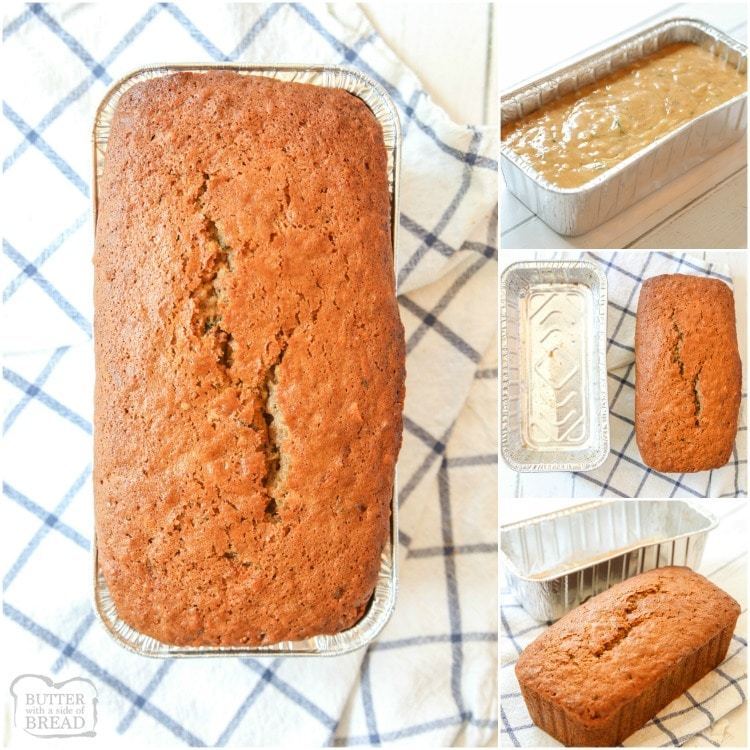
Cost: $2.47 for 3 pans (as of 7/2019)
Description:
Set of 3 foil pans designed for disposable use
Measures 4 inches wide by 7.5 inches length by 2.3 inches tall
Weighs 0.5 oz
Outcome: The foil loaf pan was the smallest and I debated dividing the dough up differently, but in the end I opted to use the same amount of dough as the others. I was pretty surprised at how well both loaves looked- they were lovely!
Despite being up to an inch smaller than the other pans, the dough in the foil pan didn’t rise any higher, so the inside was slightly more dense. It appeared to bake evenly and even baked a few minutes faster than most of the other pans. Overall, the loaves of bread in the foil pans were gorgeous- one judge even rated it in their top 3!
I plan to keep these pans and it’s really helpful to know that these are a good option. They were the least expensive pans I purchased, coming in at just under $1 each. I may use these for baking bread to give as gifts in the future!
Disposable Foil Bread Pan Rating: 7.2/10
Return to top menu
BEST BREAD PAN RESULTS
Here’s how each of the 9 pans we tested ranked, 9 being the worst pan and 1 being the BEST:
9: (Amazon) Medium Gauge Steel Non-Stick Loaf Pan, 6.13
2: (Analon) Heavy Gauged Steel Non-Stick Loaf Pan, 8.25/10
1: Glass Loaf Pan, 9.25/10
Return to top menu
Loaf Pan Recommendations
If you enjoy baking bread and want to use the BEST bread pans, I think the top 4 pans all performed very similarly and are great options!
The cast iron bread pan was the least expensive of the top 4.
The glass pan was a few dollars more and the ceramic and heavy weight steel (Analon) pans were the most expensive of all the pans we tested.
However, it looks like in this case, you get what you pay for, as all 4 of these pans yielded the most evenly baked, aesthetically pleasing loaves of bread.
If you are on a tight budget, I’d opt to use foil pans over buying less expensive steel pans.
I’d avoid using aluminized steel bread pans at all! It was the most expensive and performed consistently poorly.
Return to top menu
Loaf Pan comparison to see which pan bakes the best bread. 9 different bread pans put to the test with white bread and zucchini bread to see which is the best loaf pan.
You might also like these…
We send FREE RECIPE cards every month! Want ’em?
FREE Printable Recipe Cards + have access to our FREE 15-Minute Meals!
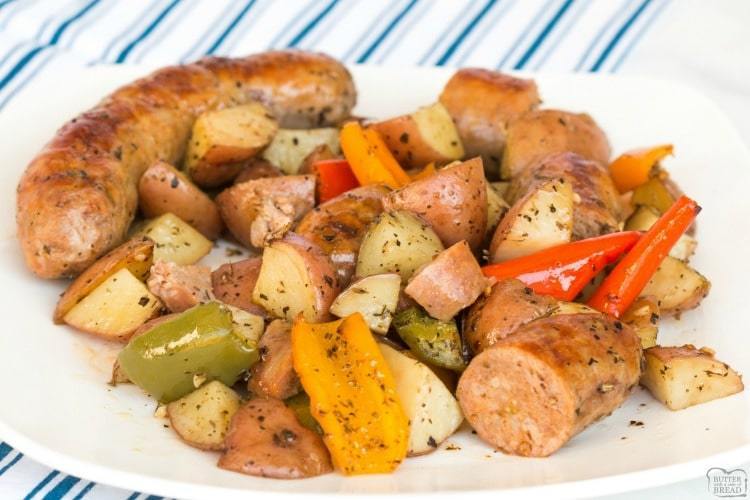
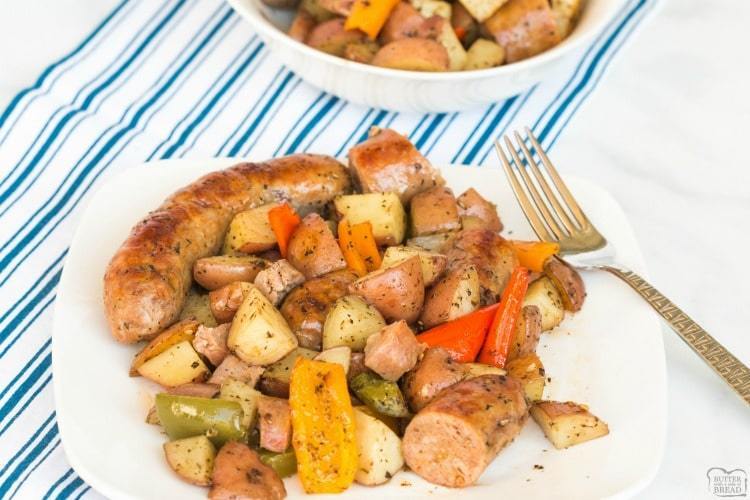
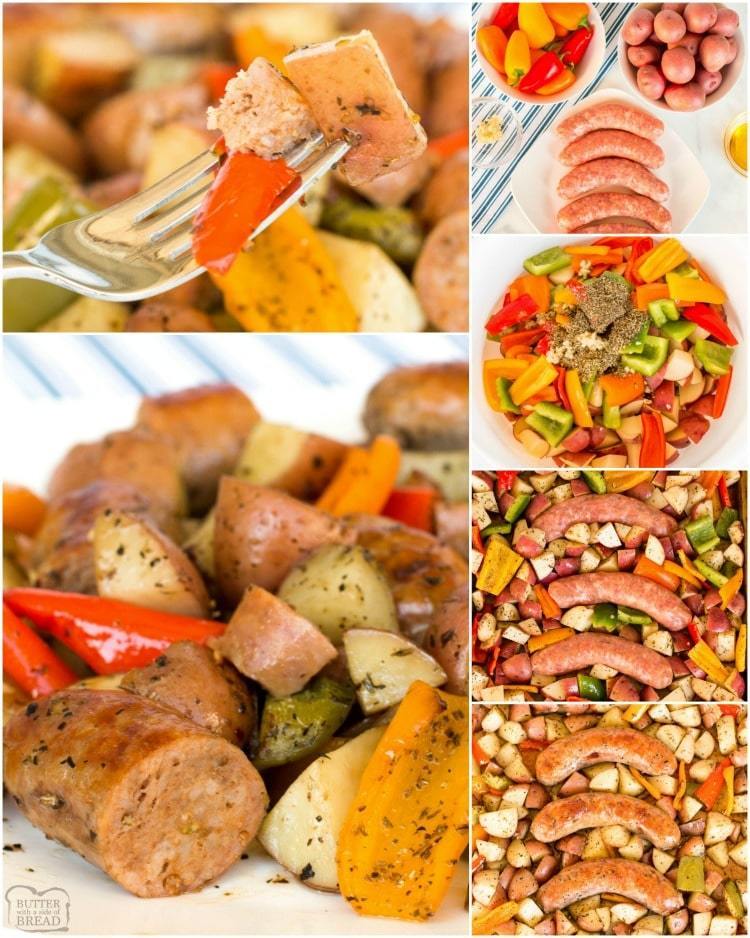
Sausage and Peppers recipe is a delicious, hearty, easy to make sheet pan dinner. With just a few ingredients Baked Italian Sausage & Peppers is quick and simple.
I came up with this recipe about twenty years ago, after overhearing an old friend’s family member talking about a family favorite dish that had similar ingredients.It sounded so delicious that I went home and experimented with different ingredients. After numerous trial and error attempts, I came up with this delicious recipe listed here.
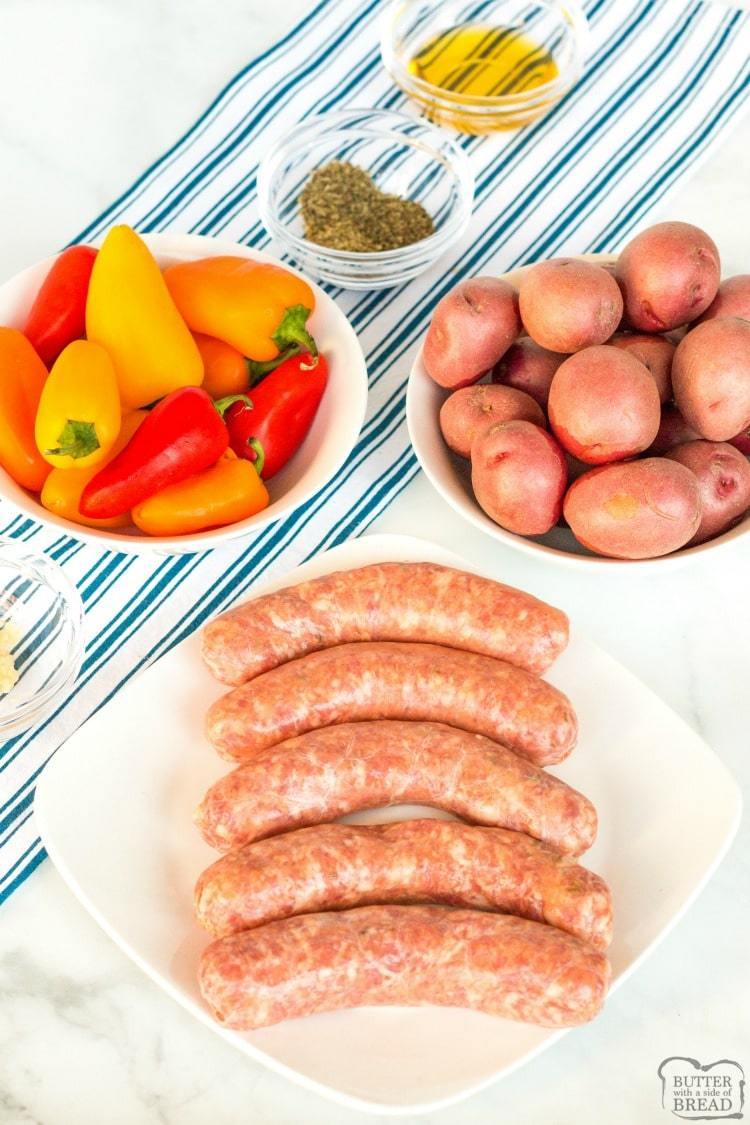
What ingredients to use when cooking Italian Sausage and Peppers
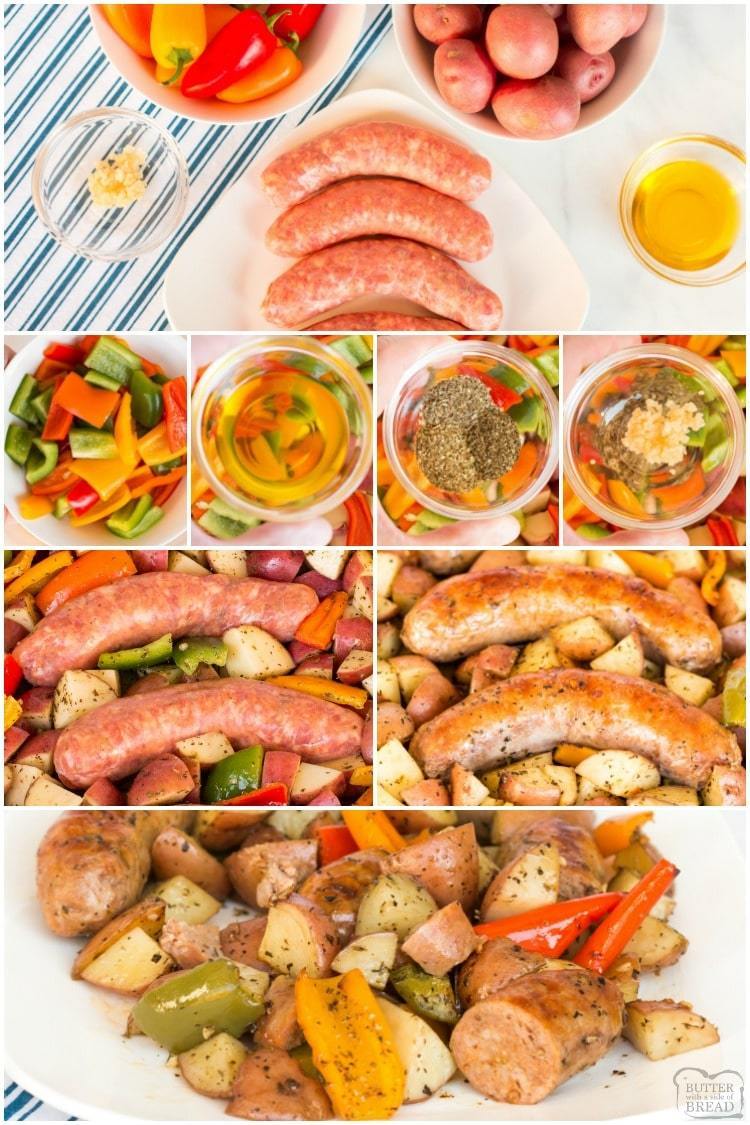
To make Sausage and Peppers recipe you’re going to need:
— Uncooked Italian sausage links (you can substitute the links for ground Italian sausage if you prefer)
— Small red potatoes
— Assorted color bell or sweet peppers
— Italian seasoning
— Oregano
— Basil
— Minced garlic
— Olive oil
For the peppers you can use a couple of full size bell peppers, or like I did for this recipe, use an assortment of smaller sweet peppers. I like to use colorful peppers, I’ll usually use green, red, orange and/or yellow ones. It gives the dish a nice mix of color.
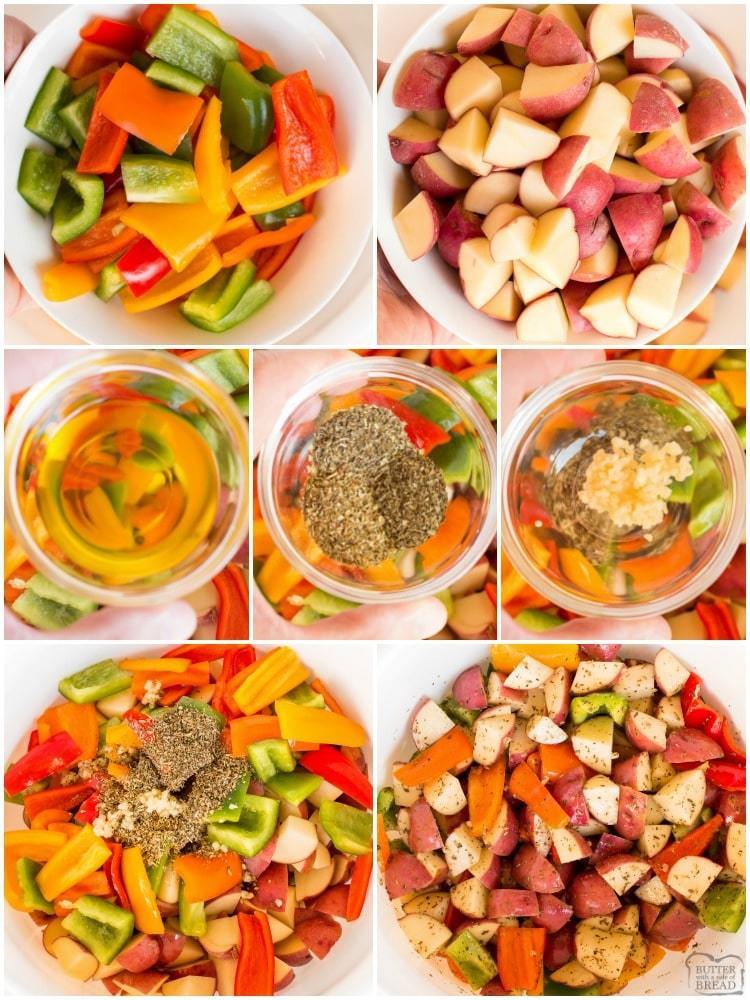
How to Make Sausage and Peppers in the oven
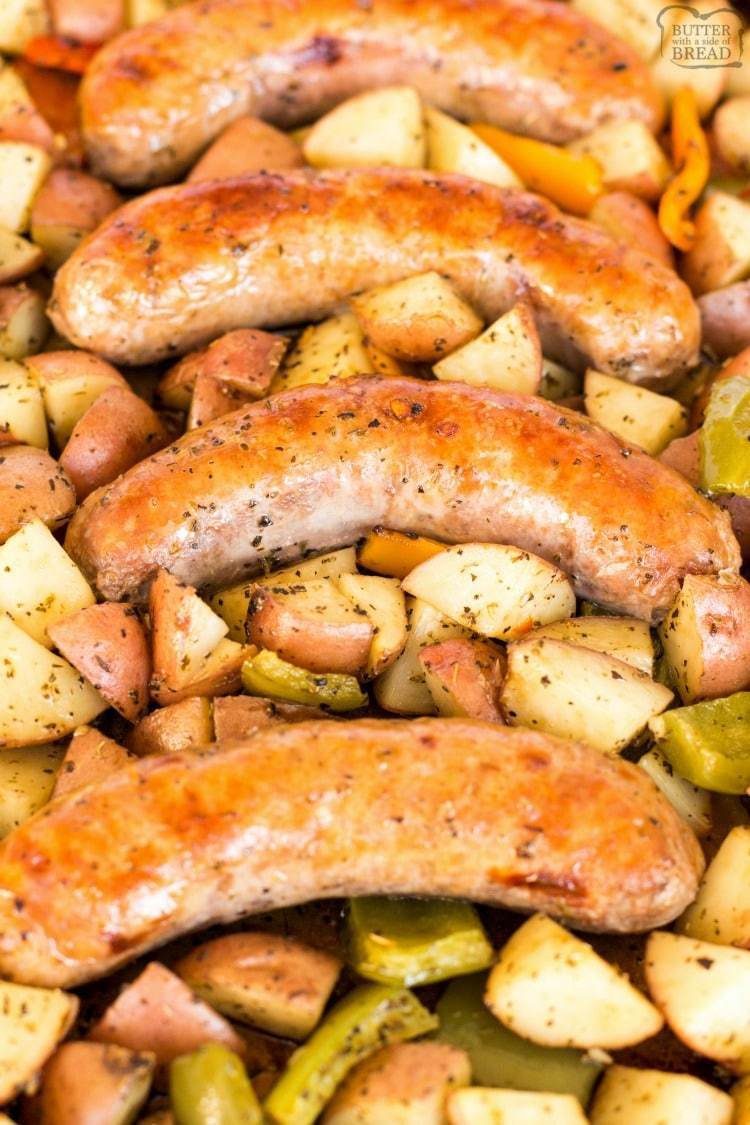
To start, cut the peppers into approximately one-inch pieces. Take the small red potatoes and cut each into four pieces, approximately one-half inch sized. Add the cut potatoes, sliced peppers, seasonings and olive oil into a large mixing bowl. Mix thoroughly.
Spray your baking sheet pan with cooking spray and then pour the contents of the mixing bowl onto your baking sheet pan. Place the Italian sausage links on the pan with the rest of the ingredients. (If you plan on using ground Italian sausage instead of the links, make sure to add the sausage to the mixing bowl with the rest of the ingredients and mix thoroughly).
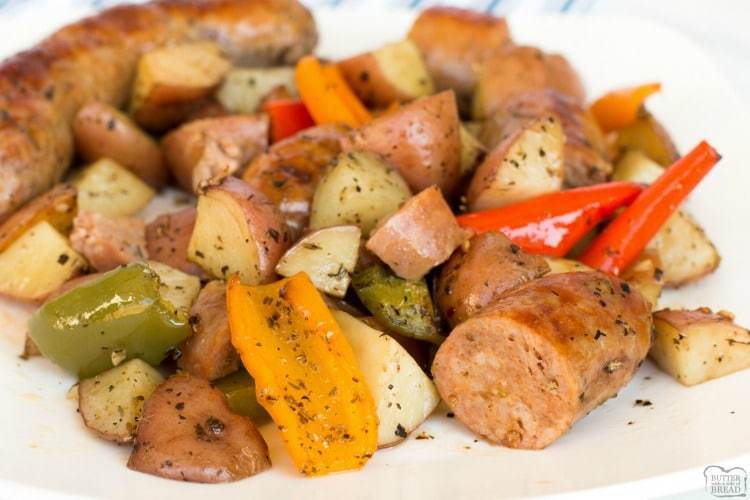
Bake in a pre-heated oven until the sausage is thoroughly cooked, and potatoes are a nice golden brown.Stir the dish about halfway through to make sure all of the potatoes and sausages have a chance to get a nice and golden brown. This will help everything cook evenly too.
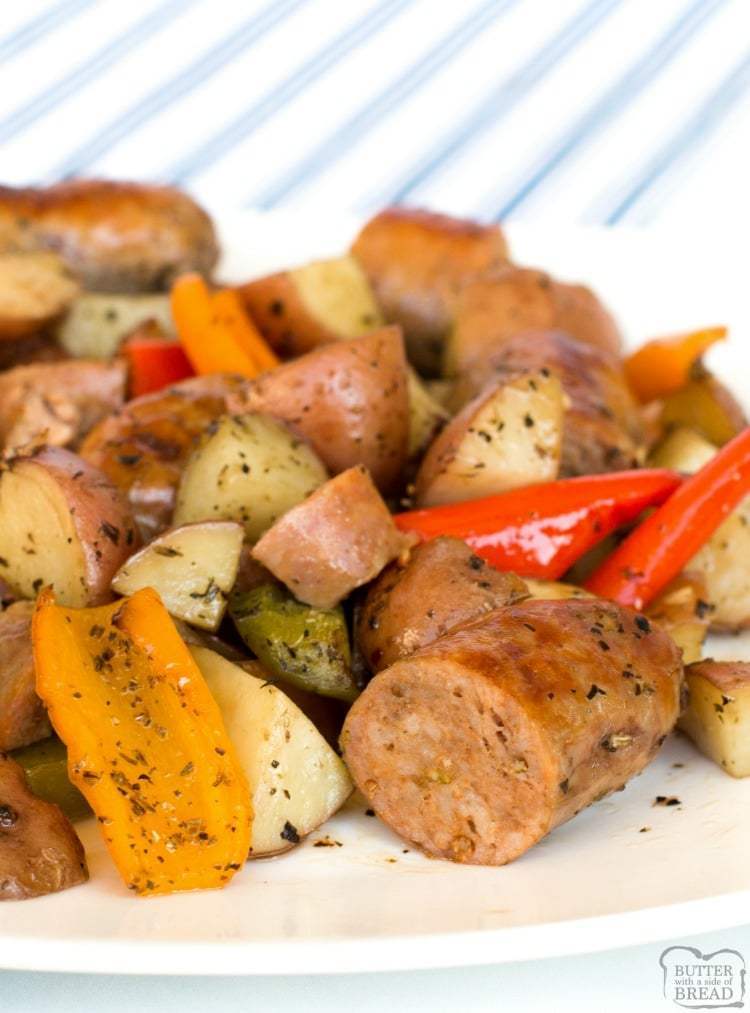
Serve warm and enjoy!
What type of Italian Sausage is best for cooking?
There are many types of seasoned Italian Sausage. Mild, hot and sweet are the three main flavors, which can come in either links, ground sausage or patties. For this recipe I like to use sweet, links. But, you can use whatever type/flavor of Italian Sausage you prefer or have available.
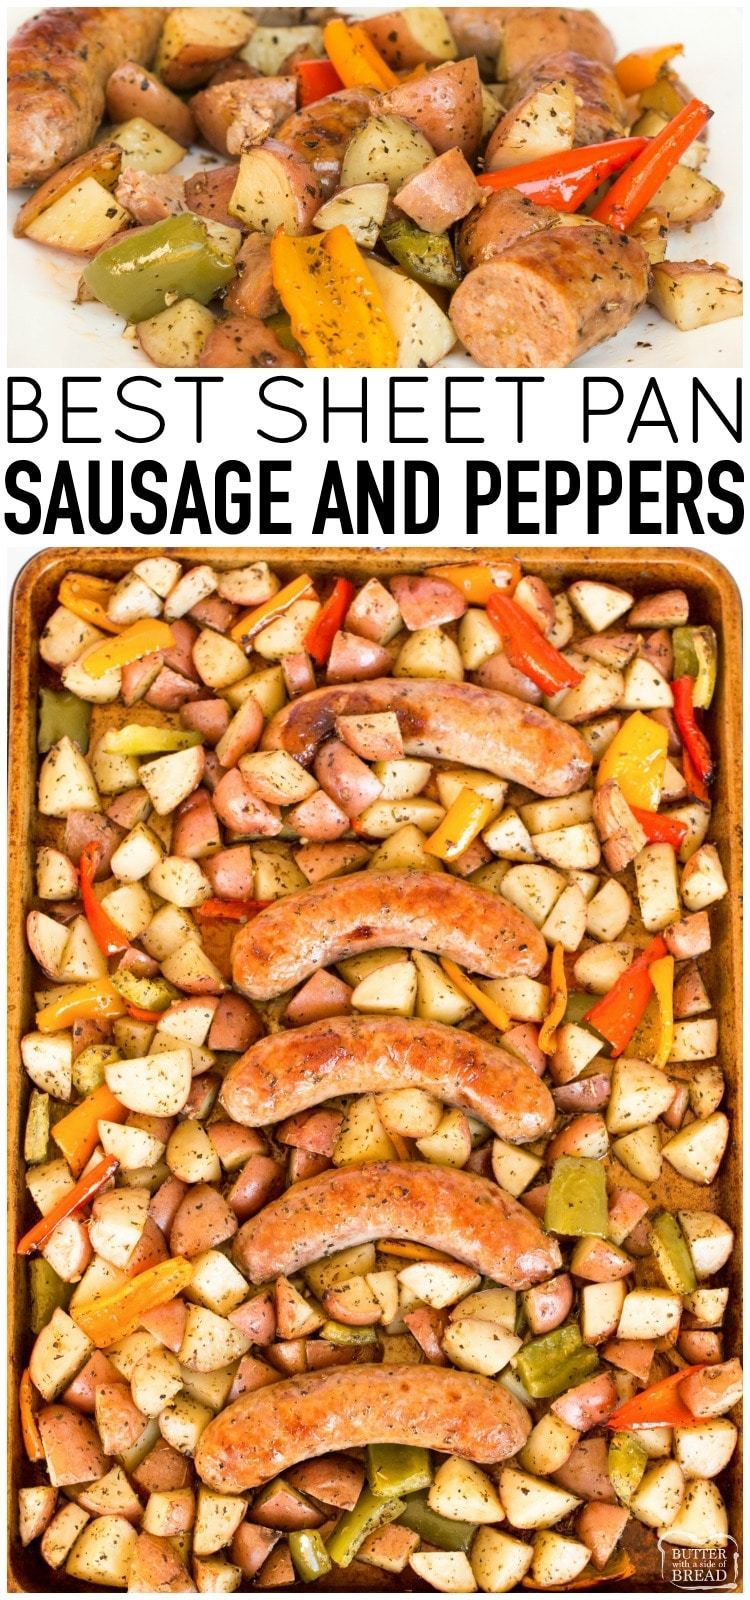
Sheet Pan Sausage and Peppers
Sausage and Peppers recipe is a delicious, hearty, easy to make sheet pan dinner. With just a few ingredients Baked Italian Sausage & Peppers is quick and simple.
Print Pin Rate
Course: dinner, sausage, Vegetables
Cuisine: American, Italian
Keyword: sausage, sausage and peppers, sheet pan sausage and peppers
Prep Time: 15minutes
Cook Time: 1minute
Total Time: 16minutes
Servings: 6people
Calories: 388
Ingredients
Ingredients:
1poundItalian Sausage Linksuncooked
6cupsRed Potatoesabout 2 pounds
2cupsAssorted Sweet Peppersred, orange, green
1teaspoonOregano
1teaspoonItalian Seasoning
1teaspoonBasil
1teaspoonGarlicminced
3tablespoonsOlive Oil
Instructions
Instructions
Preheat oven to 400 degrees.
Cut the potatoes into quarters (or about half inch pieces).
Slice all of the peppers into approximately one inch pieces.
Add all ingredients, except for the sausage, into a mixing bowl and mix thoroughly.
Spray a baking sheet pan with cooking spray. Pour ingredients from the mixing bowl onto the baking sheet pan. Place the sausage links on the pan with the rest of the ingredients.
Bake in the oven for 30 minutes, or until the sausage is cooked through and potatoes are a nice golden brown. After about 15 minutes in the oven, stir the potatoes and turn the sausage, so everything browns evenly.
How to cook Sausage and Peppers with ground sausage:
You don’t have to use Italian sausage links. I have made this recipe with links or ground Italian Sausage.If you do plan on using ground sausage instead of links, be sure to mix the ground sausage with the rest of the ingredients.
Can Sausage and peppers recipe be frozen?
You can totally freeze sausage and peppers recipe! However, before you freeze or refrigerate it first make sure it comes to room temperature, then put the meal in an airtight glass or plastic container. Not allowing it to cool down to room temperature, condensation will build up on the inside of the container.
If you keep your leftovers in the fridge, make sure to eat them within three to four days. If frozen, it should last one to two months.
To reheat frozen Sausage and Peppers, put them in a preheated 375º oven for only as long as it takes to thaw,, and warm up. Try not to overcook while reheating.
How do you know when the Italian sausage is cooked thoroughly?
I use a meat thermometer whenever I cook meat, just to be absolutely sure its cooked thoroughly. It is recommended that sausage gets cooked to an internal temperature of 160 – 165ºF. My all-time favorite meat thermometer is the Thermapen. It’s super fast and incredibly durable. Another option is the ThermoPop which is a more basic version that works just as well!
You can still make sure your sausage is cooked thoroughly even if you do not have a meat thermometer. Make sure the outside is golden brown and when you cut into the sausage, there should be no pink or blood. Any juices running off should be clear.
This recipe for Oven Roasted Italian Sausage, Potatoes and Peppers makes a quick, delicious and hearty Italian meal.With just a few ingredients you too can make this Oven Roasted Italian Sausage, Potatoes and Peppers recipe in no time at all.
You might also like these…
We send FREE RECIPE cards every month! Want ’em?
FREE Printable Recipe Cards + have access to our FREE 15-Minute Meals!
The cookie settings on this website are set to "allow cookies" to give you the best browsing experience possible. If you continue to use this website without changing your cookie settings or you click "Accept" below then you are consenting to this.
Read more about data collection for ads personalisation our in our Cookies Policy page


 We recognize that this is NOT a perfectly designed experiment, but nevertheless, feel it’s useful to compare the types of pans available today. As we continue to use the pans we keep, we’ll update with additional information as it’s deemed helpful.
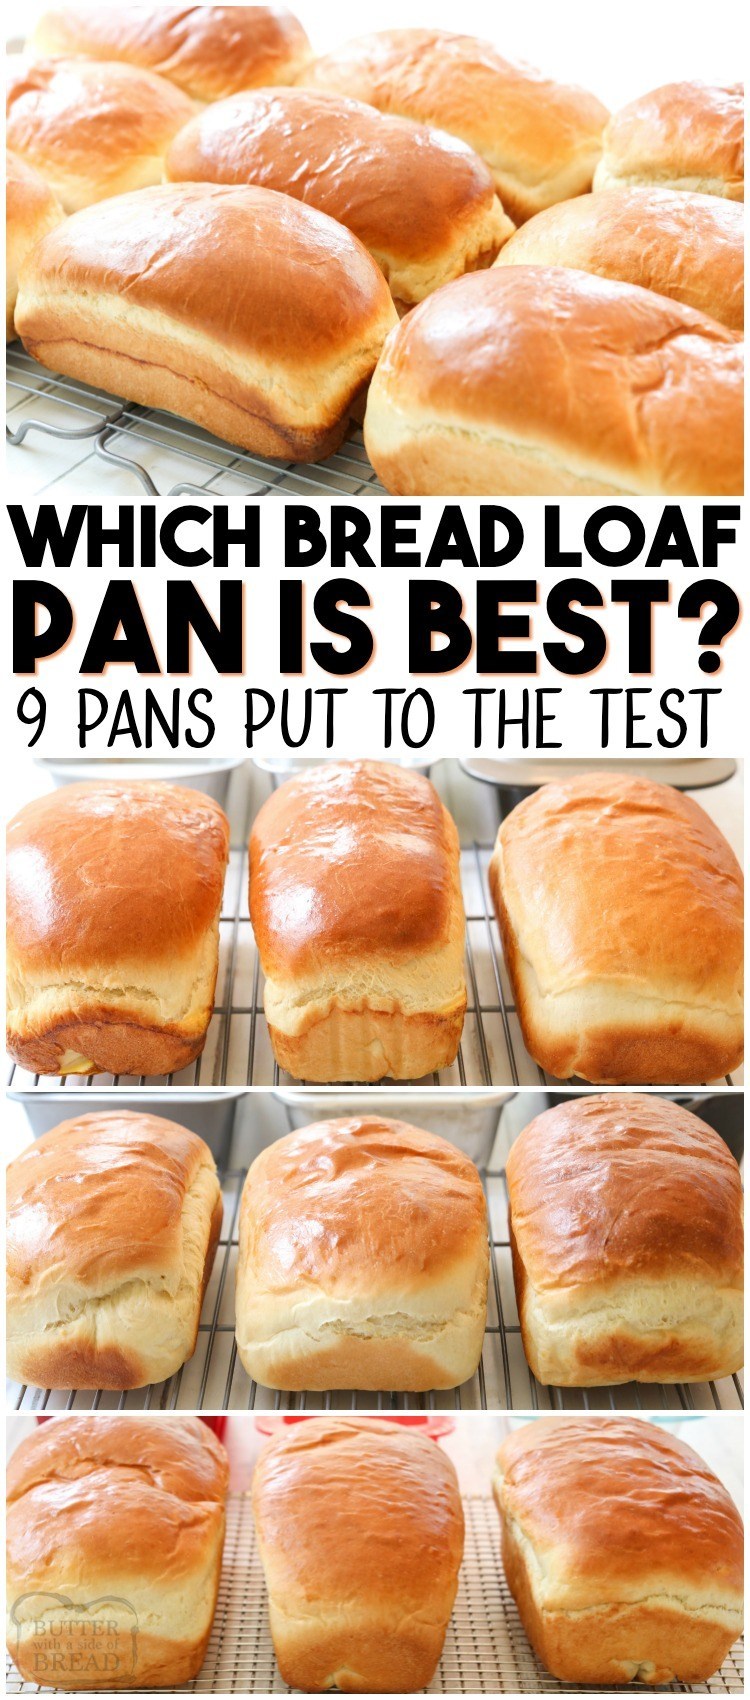


 Loaf Pan Recommendations
 The glass pan was a few dollars more and the ceramic and heavy weight steel (Analon) pans were the most expensive of all the pans we tested.