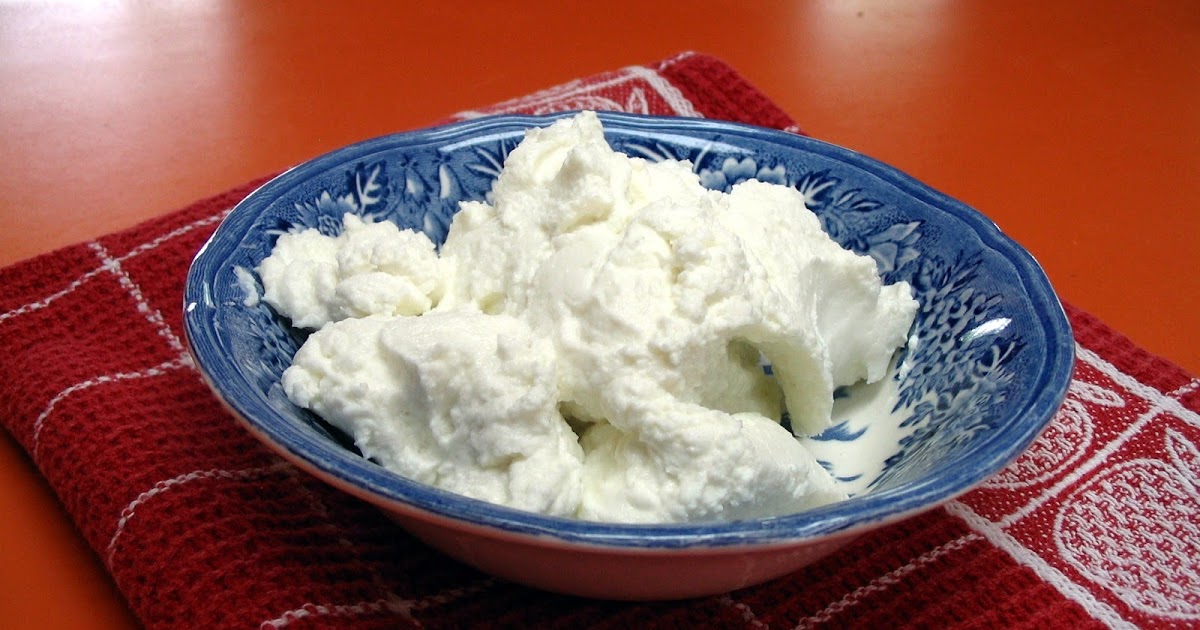
This is fun to make, quick and surprisingly tasty !! It only takes 3 ingredients and makes almost 5 1/2 ounces of cream cheese.
4 cups WHOLE milk 2-3 tablespoons fresh lemon juice (see note below) 1/4 teaspoon table salt (OR) 1/2 teaspoon of kosher salt
Use a heavy saucepan (so it doesn’t scorch), heat the milk (stirring constantly) until it comes to a boil.
Once it starts to boil, turn the heat down to medium (keep stirring) and add the lemon juice one tablespoon at a time………..waiting one minute between each addition (important, keep stirring). (see note below about amount of lemon juice.
Fairly quickly (less than a minute) the milk will start to curdle and the curds will float, leaving a fairly clear, faint green liquid under the curds.
Pour everything through a strainer that is lined with cheesecloth. Let it stain and cool for about 20 minutes. The strained curds will look like this:
After the curds have drained and cooled, put them in a food processor and process for about 3 minutes, or until very smooth. Add the salt and process for another 15 (or so) seconds.
Cover tightly and chill.
This recipe makes almost 5 1/2 ounces
of cream cheese
Note about the lemon juice: With the WHOLE MILK that I use, it only takes 2 tablespoons of fresh lemon juice to get perfect curds, but you might need that 3rd tablespoons with a different brand of milk (just have that 3rd tablespoon ready, just in case).
There is no lemon flavor in this finished cream cheese. If you are going to add herbs or other flavors, add them before you chill the cheese.
It’s time to learn the secrets to making gravy at home with these easy to follow photo instructions to both the slurry and the roux methods. You won’t believe how easy this can be. Get it right first time and every time.
Editor’s Note: Originally published February 15, 2011. Updated with expanded text and instructions along with re-edited photos.
This post is less of a recipe but mostly instructions about techniques. Gravy is so easy if you just know how.
Slurry vs. Roux method of making gravy
I usually use the slurry method with flour which I believe is the easiest and most consistent for the home cook.
The slurry method uses flour (although cornstarch and arrowroot also can be used). The flour is mixed with a cold liquid, usually water, and combine until there are no lumps. I like using a Tupperware shaker, but just a bowl and whisk will do.
With this method, the flour starch is hydrated enough to prevent lumps before sturred into the drippings and liquid slowly. It is then brought to a boil which will help the liquid absorb and cook the “raw” out of the flour.
You can add more thickener if needed or dilute the gravy with some broth or water if needed. I like about 2 tablespoons of flour to thicken 1 cup of gravy. I prefer a little fat in the drippings.
The roux method starts with fat in a pan. Flour is added, and it is cooked until browning some to cook out the raw flour taste, usually only a few minutes. A ratio of 2 tablespoons of flour to 2 tablespoons of fat will thicken 1 cup of liquid.
I find the slurry method easier for home. Leave the drippings in the pan. Add some broth if you need to and thicken away. No need to get all the bits of meat or veggies out of the drippings.
With the slurry method, you add more flour mixture to thicken. With the roux method, you don’t add all the liquid at the start and then add more liquid to thin.
To start, read and understand the instructions BEFORE you start. You will not have time to read and do this at the same time.
Photo Instructions for Gravy with the Slurry Method
Key ratio: for 1 cup of gravy you will need 1 cup of broth and 2 tablespoons flour. Drippings from cooking and 2 tablespoons per cup of gravy is very good.
Equipment: Tupperware Quick Shaker is recommended, but a bowl and whisk will do, stove top pan with a large bottom, a large slotted spoon or whisk.
First
Combine about equal amounts of AP flour and COLD water or broth in your Tupperware Quick Shaker (or a bowl and whisk). I generally make about 50% more than I estimate I need so I can thicken a bit more if needed later.
Shake vigorously and continuously. Get it all mixed. You want about 2 tablespoons of flour per cup of gravy you are making.
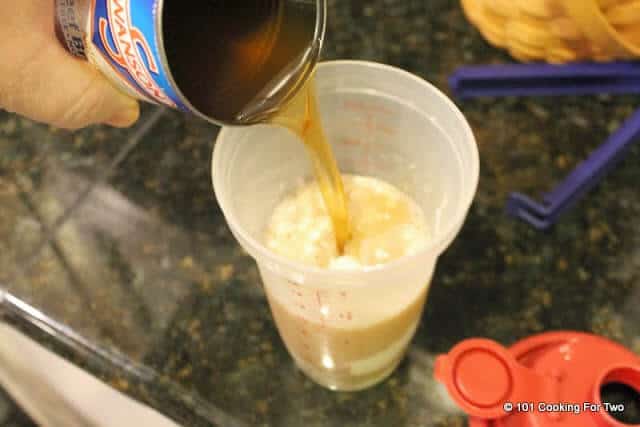
Second
You need fluid from your meat with some fat in it. You could add broth or other liquid to get to the volume you want to make. You can also add soup base or bullion for more flavor.
The liquid needs to be in a stovetop-safe pan. Now over medium-high heat, bring the liquid to a boil. Turn on two burners if the pan will cover them.
Third
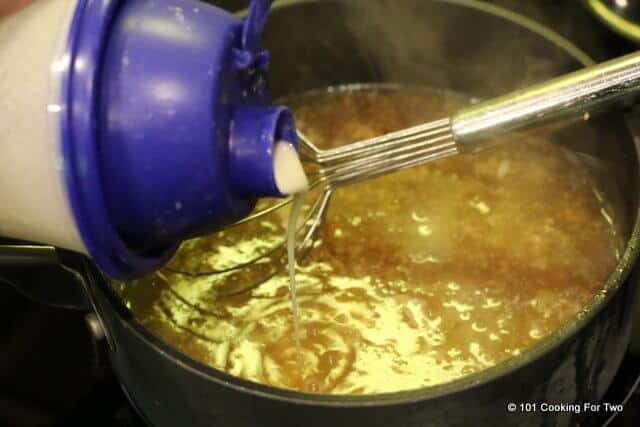
Slowly add the flour mixture to the area of hardest boil SLOWLY while VIGOROUSLY stirring with a slotted spoon or whisk. Turn the heat down a bit.
Pay attention to the thickness and stop adding the flour mixture when you get almost to the consistency you want. It will thicken a little with the cooking in the next step.
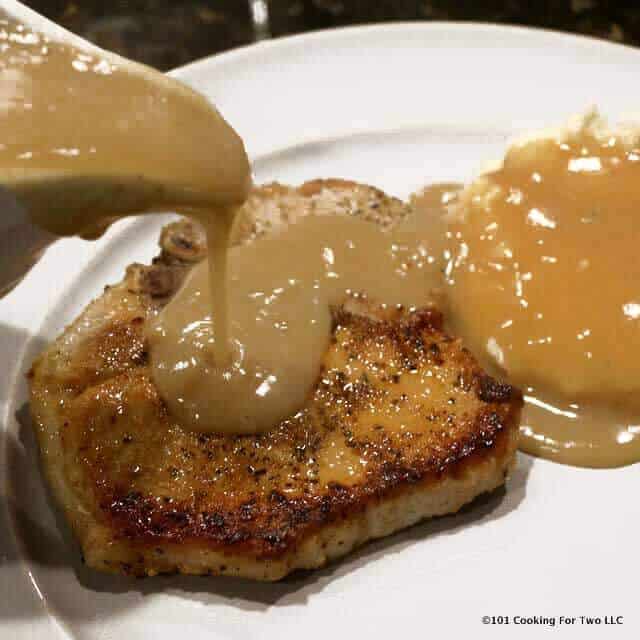
Fourth and Last
Continue to cook for another 2-3 minutes while still stirring continuously then remove from heat and serve immediately. This will cook the “raw” taste out of the flour.
NOTES: The Tupperware Quick Shaker is great in this technique. These are about $13 on Amazon, eBay, a Tupperware dealer or a mall kiosk near you. Google is your friend again.
Photo Instructions for the Roux Method of Making Gravy
Key ratio: for 1 cup of gravy you will need 1 cup of broth, 2 tablespoons fat and 2 tablespoons flour.
First
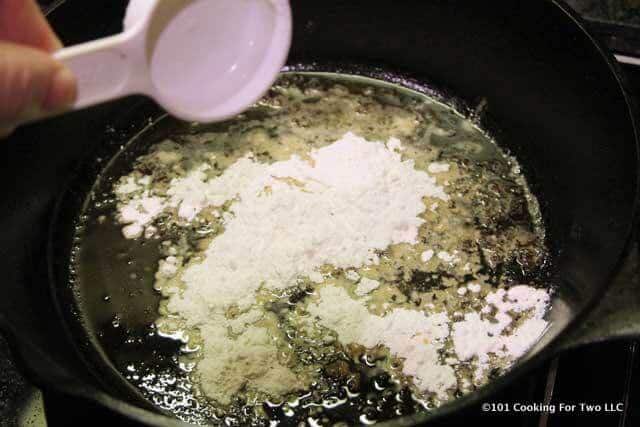
Over medium-high heat, heat your fat (butter, drippings from meat, etc.). When hot add an equal amount of flour slowly while stirring or whisking continuously.
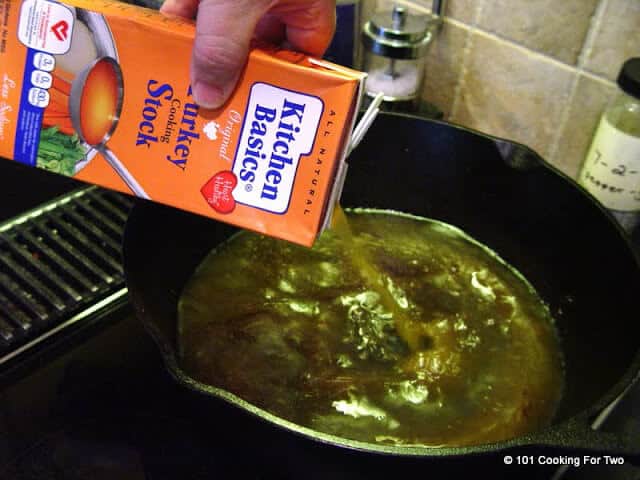
Second
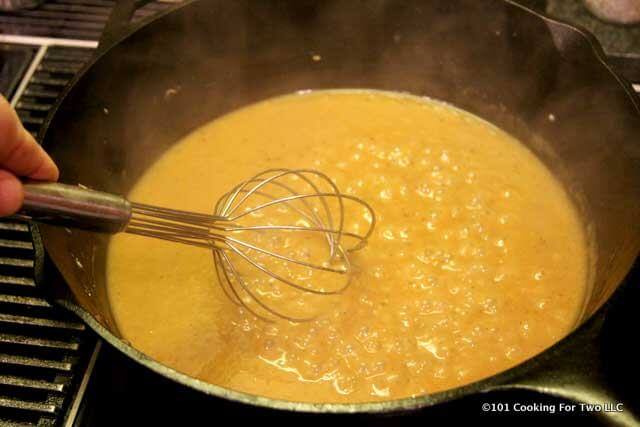
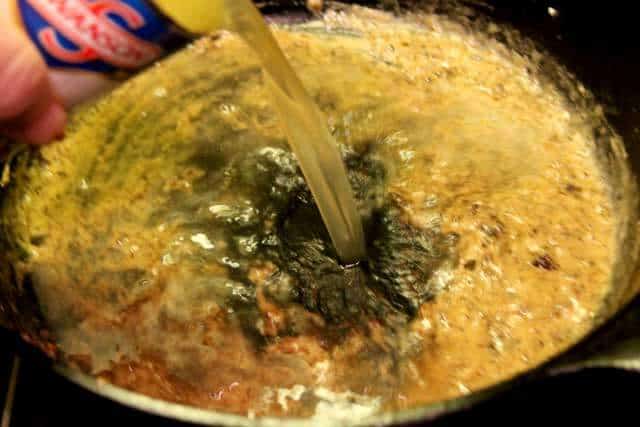
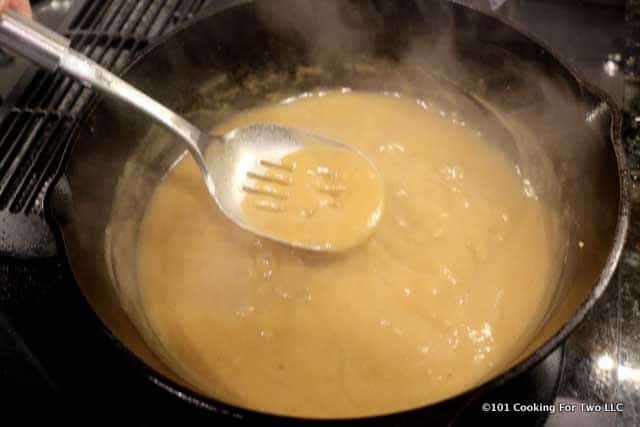
Cook until browning some. Then slowly add the liquid for the gravy. Add most of the liquid but not all.
Third
Stir continuously to combine and decrease heat some. Cook for a few minutes. Add more liquid if needed.
Do you want more recipes from 101 Cooking for Two? Sign up for the newsletter and get all posts delivered straight to your inbox! If you enjoyed this recipe, the pleasure of a rating on the recipe card below is requested.
How To Make Gravy at Home
Votes: 6 Rating: 4.5 You:
Rate this recipe!
Print Recipe
It’s time to learn the secrets to making gravy at home with these easy to follow photo instructions to both the slurry and the roux methods. You won’t believe how easy this can be. Get it right first time and every time.
Servings
Prep Time
2cups
2minutes
Servings
Prep Time
2cups
2minutes
Ingredients
Liquid from the cooking
Extra broth if needed
flour
salt to taste
Servings: cups
Units:
Instructions
The Slurry Method of Making Gravy
PLEASE REVIEW THE PHOTO INSTRUCTIONS BEFORE STARTING – You will not have time to read them while doing this.
Combine about equal amounts of AP flour and COLD water or broth in your Tupperware Quick Shaker (or a bowl and whisk). I generally make about 50% more than I estimate I need so I can thicken a bit more if needed later.
Shake vigorously and continuously. Get it all mixed. You want about 2 tablespoons of flour per cup of gravy you are making.
You need fluid from your meat with some fat in it. You could add broth or other liquid to get to the volume you want to make. You can also add soup base or bullion for more flavor.
The liquid needs to be in a stovetop-safe pan. Now over medium-heat, bring the liquid to a boil. Turn on two burners if the pan will cover them.
lowly add the flour mixture to the area of hardest boil SLOWLY while VIGOROUSLY stirring with a slotted spoon or whisk. Pay attention to the thickness and stop adding the flour mixture when you get most to the consistency you want. It will thicken a little with the cooking in the next step.
Continue to cook for another 2-3 minutes while still stirring continuously then remove from heat and serve immediately. This will cook the “raw” taste out of the flour.
The Roux Method of Making Gravy
PLEASE REVIEW THE PHOTO INSTRUCTIONS BEFORE STARTING – You will not have time to read them while doing this.
Over medium-high heat, heat your fat (butter, drippings from meat, etc.). When hot, add an equal amount of flour slowly while stirring or whisking continuously.
Cook until browning some. Usually 2-3 minutes. Then, slowly add the liquid for the gravy. Add most of the liquid and cook for a few minutes. Add more liquid if needed to thin.
Stir contiously to combine and decrease heat some. Cook for a few minutes.
Recipe Notes
Pro Tips:
General ratio: 2 tablespoons flour:1 cup liquid for both methods. With the roux ratio also add 2 tablespoons oil/fat.
In the slurry method, you add more flour mixture to thicken more if needed.
In a way, the roux method is the opposite. You add more liquid to thin more.
Have the pan over two burners if the pan is large.
________________________________
All nutritional information are estimates and may vary from your actual results. This is home cooking, and there are many variables. To taste ingredients such as salt will be my estimate of the average used.
If you like this recipe or find it useful, the pleasure of a nice 4 or 5 rating would be greatly appreciated. Rating is done by clicking on the stars above.
Originally published February 15, 2011.
Nutrition Facts
How To Make Gravy at Home
Amount Per Serving
Calories 231Calories from Fat 153
% Daily Value*
Total Fat 17g26%
Saturated Fat 3g15%
Polyunsaturated Fat 9g
Monounsaturated Fat 4g
Cholesterol 7mg2%
Sodium 343mg14%
Potassium 262mg7%
Total Carbohydrates 14g5%
Dietary Fiber 0.3g1%
Sugars 4g
Protein 7g14%
Vitamin C1%
Calcium1%
Iron5%
* Percent Daily Values are based on a 2000 calorie diet.
Have you ever read the ingredient list on a package of commercial pepperoni or looked closely at a slice of it and wondered what all those “bits” were? Exactly!! A pretty gross thought isn’t it??
If you want to know exactly what is in YOUR pepperoni, try this super easy recipe. It’s just high quality pork and seasonings baked in the oven at a super low temperature for 6 hours ….and it is delicious, (even picky-picky husband loves it!!)
First of all, keep in mind that when it’s all cooked, it’s NOT going to be bright red/orange like commercial pepperoni, and it’s NOT going to be shaped perfectly round, but that certainly didn’t bother us.
1 pound of ground pork (not sausage) 1 pound of ground beef (lean) 2 teaspoons liquid smoke 2 teaspoons black pepper 2 teaspoons mustard seed 2 teaspoons fennel seed 1 teaspoon paprika 1 to 2 teaspoons red pepper flakes (see notes) 1 teaspoon garlic powder 2 slightly heaping teaspoons salt (see notes) 1 teaspoon sugar 1/4 cup ice water Grind the dry spices together (I used my mortar and pestle) until they are roughly ground (it doesn’t have to be super fine). Mix the meat, flavorings, ice water and liquid smoke together just until combined. (I use my stand mixer). Cover it well, and chill it for 48 hours. After 48 hours, mix again gently and roll the mixture into 2 logs and place them on a foil lined baking sheet (make sure the baking sheet has a lip).
Bake in a pre-heated200° oven for 8 hours. If you seriously want round pepperoni, turn the logs every 2 hours, but I never do that. Your house is going to smell wonderful!! After 8 hours, they will look like this:
The “pepperoni” logs will be quite firm to the touch when they come out of the oven. If there is a lot of fat on your baked pepperoni “logs”, just wipe it off before you chill them, but I seldom have that problem.
CHILL PEPPERONI BEFORE YOU SLICE !!
Let the baked logs cool a little, then wrap them in plastic wrap and chill them until they are very cold before you slice them. Use a sharp knife and slice the sausages very thin.
This treat is VERY easy to make and has a wonderful flavor.
NOTES: I buy pork butt roast when it’s on super sale and just grind it with my stand mixer, but you can also just buy commercially ground pork (UNSEASONED….not sausage!!)
NOTES: Picky-picky husband is very shy when it comes to “heat”, so I make this recipe with 1 + 1/4 teaspoons of red pepper flakes and it’s just right. If you like a spicier pepperoni, just add more flakes. NOTES: A note about the color of this pepperoni. To get a bright red/orange color in pepperoni, people use Morton’s Tender Quick which has salt, sodium nitrate, sodium nitrite and propylene glycol in it. Personally, it is not important to us to have that bright red color, so I just use table salt instead of the Tender Quick and it works just fine. I freeze my baked pepperoni.
The cookie settings on this website are set to "allow cookies" to give you the best browsing experience possible. If you continue to use this website without changing your cookie settings or you click "Accept" below then you are consenting to this.
Read more about data collection for ads personalisation our in our Cookies Policy page