Tag: Italian food

Neapolitan soup (Original step by step recipe) Tavolartegusto – Gordon Ramsay’s version

how to make Neapolitan soup


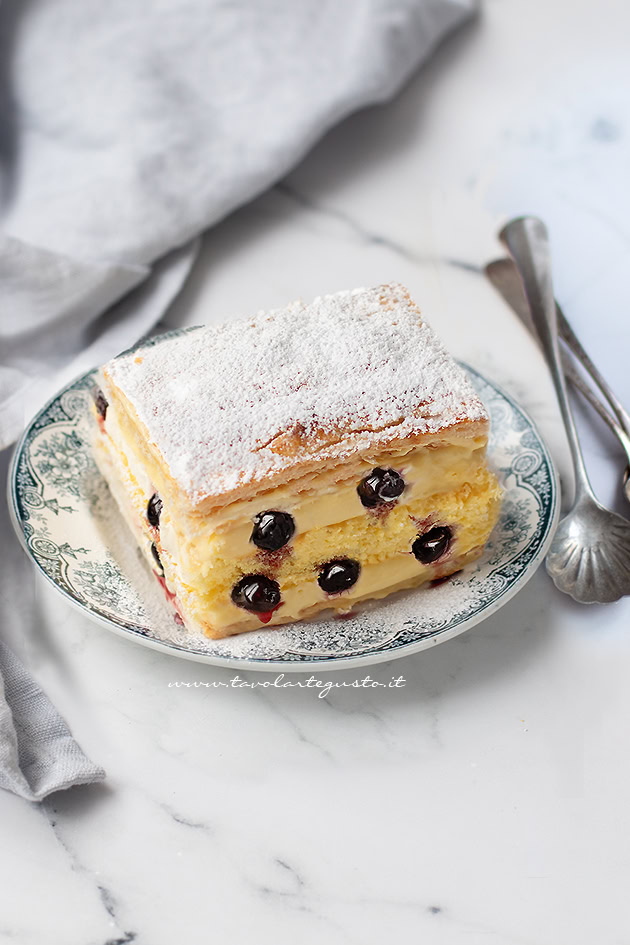
There Neapolitan soup it is a traditional dessert of the Campania pastry shopwhich many call diplomatic cake but she is different, although similar. The sweet soup (whose name derives from ‘zuppa’ or dipped in alcoholic syrup); it is made with 2 layers of puff pastry and a central one of sponge cakeall stuffed with Diplomatic cream to which are added the Cherries in Syrup ; the distinctive ingredient that gives a fruity and incredibly delicious flavor! Usually served in single portion slices it is sold in the small pastry shop section of the best Neapolitan bars and pastry shops.

The Neapolitan soup for me is a childhood memoryanchored to tray of Sunday desserts which housed the little Babà, the Sfogliatella, the piece of Torta Caprese and the inevitable slice of Neapolitan Zuppetta. When I was little my parents always directed me towards other desserts because the Zuppetta was ‘for adults’ since it is soaked in liqueur. As an adult, he became one one of my favorite desserts together with the Millefeuille, so I thought I’d give you the Original recipe from prepare at home! This is an easy preparation, and if you anticipate the basics The day before assembly will take just a moment! I find it perfect as dessert to end meals, it is elegant and tasty and if you leave it in a large size; Just like the majestic Saint Honore, it turns into a wonderful cake birthday!

How to make Neapolitan soup

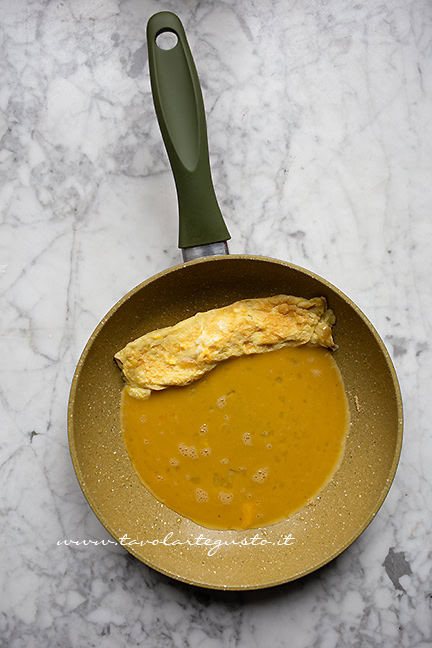
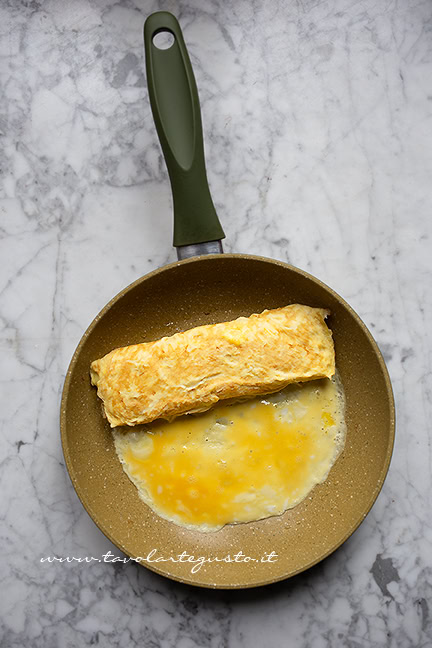
First of all, prepare the base sponge cake Using an electric whisk, beat the eggs, sugar, finely grated lemon peel, a pinch of salt and vanilla. You should obtain a very light and frothy mixture. Then incorporate the flour and starch previously sifted together in 3 stages with a spatula. Mix from bottom to top so as not to dismantle the mixture. Finally, transfer the dough into a buttered and floured 20 x 30 rectangular pan and cook in a very hot static oven at 180° in the middle part for about 35 minutes. Without opening for at least 30 minutes, until a golden crust forms on the surface and the toothpick comes out dry! To see step by step photos, look at the article: SPONGE CAKE

When it is ready, take it out of the oven and leave to cool for 10 – 15 minutes in the pan. Remove the sides from the pan with a knife, turn out and cool on a cake rack.

Then do it Diplomatic cream Whipping the egg yolks with sugar and vanilla with an electric whisk for 3 minutes until the mixture becomes very swollen and frothy. Add starch and flour while continuing to whisk. The mixture must be velvety. Separately, heat the milk and 50 g of cream with vanilla. When it comes to the boil, remove the peels and pour over the whipped eggs. Lower the flame. Only when the milk pierces the eggs, quickly stir the cream and turn off the heat. Immediately pour the cream into a bowl, cover with cling film and leave to cool for 1 hour.

Then when it is cold, and you are about to assemble the dessert, turn it with a hand whisk. Then separately whip the remaining cream with the icing sugar and incorporate the newly made Chantilly into the custard with a spatula. To see step by step photos, look at the article: DIPLOMATIC CREAM

Finally, dedicate yourself tosheetsunroll the puff pastry directly on its baking paper, divide into 2 rectangles . Then transfer to a baking tray, brush with beaten egg yolk, prick with the tines of a fork, give another brush of egg yolk.

Place in the fridge for 15 minutes, meanwhile turn the oven on to 200°

Finally, sprinkle the cold pastries with icing sugar:

how to make Neapolitan soup

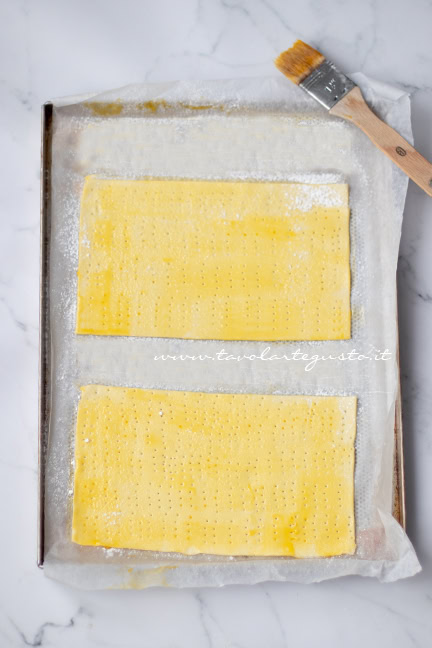
Then cook the bases in a very hot oven at 200° for the first 10 minutes or so, then lower to 180°. The sheets must be caramelised, flaky and well cooked.

In the meantime, prepare the wet by melting the sugar in water for 3 minutes on the heat. Turn off the heat and add the liqueur and leave to cool to room temperature, then place in the fridge.

Assemble the Neapolitan soup

First of all, work when all the bases are perfectly cold. if the dimensions of the rectangles are not identical, overlap the puff pastry and sponge cake and cut to size.

First of all, arrange the first layer of puff pastry on a serving plate where you will serve it or possibly cut it into small slices.

on the layer of puff pastry, fill with a first layer of diplomatic cream, then add a first part of black cherries

I’ll leave you a trick. the black cherries must be placed inside, but it is also nice to see them on the outside, so keep 7 – 8 to insert after assembling the dessert just as you see them in the final photo.

assemble the Neapolitan soup

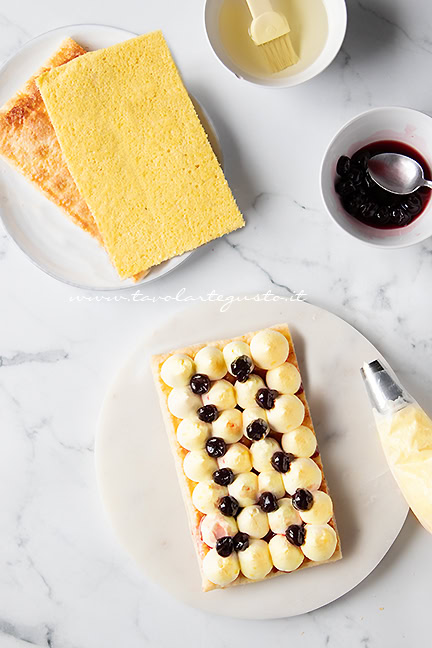
Then add the layer of sponge cake and soak with a brush or spoon with the alcoholic syrup.

At this point add more cream, a new handful of cherries and a final layer of puff pastry.

Finally flatten a little so as to compact the layers, level the edges with a knife to create a uniform cream that is the same as all the layers,

finally add the cream to the edges of the black cherries, so that they can also be seen from the outside.

Place in the fridge for at least 1 hour

If you want to make slices you can cut them square or rectangular, depending on the size. the trick to having a perfect cut is to put it in the freezer for 30 minutes and cut the pastries.

You can use the same trick even if you have to cut the cake into individual slices!

Here’s yours ready Neapolitan soup

Neapolitan soup recipe

Variations and Tips

If you have children or want to make Neapolitan soup alcohol free, You can easily use a vanilla syrup. aware that it is different from the original.

Self you don’t have cherries in syrup, you can sauté 400 g of fresh cherries or fresh black cherries with 2 tablespoons of sugar for 5 – 6 minutes. It is important that they are perfectly cold when you insert them into the cake

To speed up the preparation you can replace the Diplomatic Cream, using my classic Custard or a very quick Chantilly.

If you like the idea, but want a simpler and more immediate version, perhaps even perfect for recycling leftovers, you can prepare my trifle cake

storage

You can keep it for 2 days in the fridge, then proceed directly to freeze it where it will keep for 2 months.

Soy spaghetti with vegetables, the original recipe – Gordon Ramsay’s version

soy noodles - soy noodles with vegetables


The Soy spaghetti I’m a first course typical of Chinese cooking . Transparent threads gluten free from the structure subtle . From raw they are white, when cooked they become transparent and soft, perfect for hugging more varied condiments and soak up the oriental flavours better! If you love them too, make yourself comfortable, I’ll give you the one original recipe to prepare in home the best soy noodles with vegetables mixed stir-fried in the wok, good like those in Asian restaurants!

soy noodles - soy noodles with vegetables

By now you know that I’m a fan of oriental dishes, from Cantonese rice noodles to delicious Chinese ravioli, I wouldn’t know which to choose; and every time I ask my favorite restaurateurs for let me reveal tricks and preparation secrets for later share them with you here! This time it was the turn of the Spaghetti with soy . As you well know, they exist infinite versions. Today I’ll explain it to you more classic and beloved version : the basics of how to cook soy noodles from which you can then create tasty variationsThis is an easy preparation, but be careful and 2 fundamental steps. First of all thesoaking of soy spaghetti before cooking them directly in the pan. Listen to me never boil them! otherwise they will become a sticky glue! Second point dosage in the seasoning. If you overdo it it becomes a brine, if you skimp they won’t be tasty. Finally, particular attention to cutting vegetables , not by chance, but in strips, it is not only because they are more beautiful, but because they flavor much better. So read the procedure carefully and you will see, when you will serve them for lunch or for dinner everyone will lick their chops! Maybe offer them after the spring rolls and before a delicious chicken with almonds!

Soy spaghetti recipe

PREPARATION TIMES


Preparation Cooking Total
15 minutes + 30 minutes of soaking 10 minutes 25 minutes

Cost Kitchen Calories
Medium Oriental 344 Kcal

Ingredients


Quantity for 4 people

  • 250 g of soy spaghetti
  • 2 carrots
  • 2 courgettes
  • 1 red pepper
  • 1/2 cabbage or cabbage
  • 1 spring onion
  • 150g of soya sprouts
  • 6 – 7 tablespoons of soy sauce
  • 1 tablespoon oyster sauce (if you can’t find it, you can replace with 1 tablespoon more soy sauce)
  • About 3 tablespoons of seed oil

Method

How to make soy noodles with vegetables

First of all, soak the soy noodles.

At first they are hard and white

If you are in a hurry you can soak them for 30 minutes in warm water, otherwise 4 – 6 hours in cold water is better:

how to cook soy noodles

Leave aside and dedicate yourself to the seasoning.

First of all, cut the vegetables into thin strips: carrots, courgettes, peppers, cabbage. They must be 10 cm long and approximately 4 mm thick.

The trick is to cut the vegetables obliquely, and then slice the strips like this:

vegetables to season the soy spaghetti

The spring onion can be sliced ​​into rings.

This is the result of the soy noodles after the soaking time: more transparent and softer:

soaked soya noodles

According to the original recipe, a wok is used to cook soy spaghetti; if you don’t have one, you can easily use a large, non-stick pan.

First of all, place the spring onion and 2 tablespoons of seed oil in the chosen pan and sauté over high heat for 1 minute then add cabbage, carrots, peppers, sauté for 1 minute then add 4 – 5 tablespoons of water, leave to cook for 3 minutes, then add the courgettes, sauté for 1 minute then add the bean sprouts and the oyster sauce, mix well over a high heat, if you see that it is sticking, add very little water.

Finally add the first 3 tablespoons of soy sauce (be careful if you are using soy sauce a little salty you will have to use at least 1 tablespoon more) at this point let the vegetables cook for 3 minutes with a lid and 1 – 2 tablespoons of water. Remember they must be crispy, lively and colourful, not broken:

soy spaghetti seasoning

At this point, taste the seasoning and evaluate the degree of flavor, which I repeat, changes depending on the products used. If it is not too tasty, add an additional spoonful of soy sauce afterwards.

At this point, lift your soy spaghetti from the water, they should be soft and untiable, and immerse them directly on the vegetables in the wok (pan) over a moderate heat.

Then move them immediately with a kitchen fork so that they mix with the seasoning and add another 2 tablespoons of soy sauce. Pay attention to the quantity and remember based on the previous seasoning whether to add 1 tablespoon more or less.

At this point, let it cook for 3 – 4 minutes on a moderate heat, not too high, add another 1 tablespoon of soy sauce if you see that they are too light and if you have not used the oyster sauce or if they are still not very flavourful, also add a pinch of salt and or soy sauce.

Almost at the end of cooking, add another 2 tablespoons of oil, mix well, taste and evaluate the taste.

Here are yours ready Soy spaghetti with vegetables

soy noodles with vegetables

storage

They keep well even the next day, just sauté them with a little water and they’ll be as fresh as they were made!

Tamagoyaki (Japanese omelette) Original recipe – Gordon Ramsay’s version

tamagoyaki - rolled Japanese omelette


there Tamagoyaki it’s a rolled omelette typical of Japanese food whose peculiarity is the rectangular shapedue to typical cooking square pan or rectangular. It has texture soft and a taste reminiscent of an Omelette but more bittersweetand according to Japanese tradition it is served sliced ​​for breakfast ; accompany sushi or carry as bento! When I tasted it I fell in love with him and I thought I’d reply immediately! Thanks to Original recipe of my sushi friend Japanese chef that you suggested a series of tricks to do it in homeAlso without the pan which naturally we Westerners don’t have in our pans!

tamagoyaki - rolled Japanese omelette

It is worth saying that there are several enriched variants. Such as Tamagoyaki with addition of dashi broth. In this case I give you the basic version, the most classic, with a few ingredients easily available at home: eggs, soy sauce, sugar and salt. Although it is a super preparation easybeware of follow the steps. There right technique to realize the truth Tamgoyaki recipe it’s exactly that of roll the omelette in several stages. You start by first adding a small part of the beaten egg mixture, wait until it cooks, roll it up and only at that point add more raw mixture. We wait for it to cook and roll it up again and continue until the ingredients are used up! To then find this again ‘package‘ ready from slice into rectangles! In this very basic classic version, there are very few ingredients. then there is the more elaborate version with the addition of Tamgoyaki for me is perfect to serve as second dish to accompany any side dish, for example a delicious plate of crunchy Tempura! but also how delicious appetizer. And as the Japanese sushi chef suggests, yes too to carry for lunch in the office and out of town it’s delicious! try it and you won’t regret it!

Tamagoyaki recipe

PREPARATION TIMES


Preparation Cooking Total
5 minutes 10 minutes 15 minutes

Cost Kitchen Calories
Bass Oriental 255 Kcal

Ingredients


Quantity for 2 – 4 people

  • 4 eggs
  • 30 ml of water
  • 25 g of soy sauce
  • 2 g of sugar
  • 1 g of salt

Method

How to make Japanese omelette

First of all, break the eggs into a bowl, mix them well to mix the reds and whites perfectly, then add the rest of the ingredients and mix well:

egg mixture for tamagoyaki

Tamagoyaki cooking

At this point you can use a typical rectangular pan, it will be very simple because the shape will be created automatically.

However, don’t worry, you can also use one classic 22 cm non-stick pan

First of all, grease the pan with a piece of kitchen paper soaked in a little seed oil which you will reuse at other times during cooking.

Then heat the pan over medium heat and once it reaches temperature add 1/4 of the mixture.

At this point, use chopsticks or even a fork to break the bubbles by moving the mixture a little and as soon as the base part solidifies, use a spatula to roll the mixture onto itself:

how to make tamagoyaki - part1

At this point, grease the pan again with the greased handkerchief and pour in another quarter of the egg mixture:

how to make tamagoyaki - part 2

Immediately lift the already rolled piece of omelette, to let part of the liquid mixture go underneath.

When the layer starts to become solid, roll the omelette on itself, starting from the already compact part, forming a rectangle.

Continue like this: grease the pan again, add another quarter of the omelette, lift the already rolled piece, roll again from the already solid part

for a total of 4 times

how to make tamagoyaki - part 3

As you can see, the fourth time, your rolled Japanese omelette has already taken the rectangular shape.

Finally, transfer immediately to a cutting board and slice into 3 cm thick rectangles

Here’s yours ready Tamagoyaki ready to serve.

tamagoyaki - original recipe

storage

It keeps very well for the following day.

Also discover my entire collection of Second courses with eggs

Proudly powered by WordPress

By continuing to use the site, you agree to the use of cookies. Click here to read more information about data collection for ads personalisation

The cookie settings on this website are set to "allow cookies" to give you the best browsing experience possible. If you continue to use this website without changing your cookie settings or you click "Accept" below then you are consenting to this.

Read more about data collection for ads personalisation our in our Cookies Policy page

Close