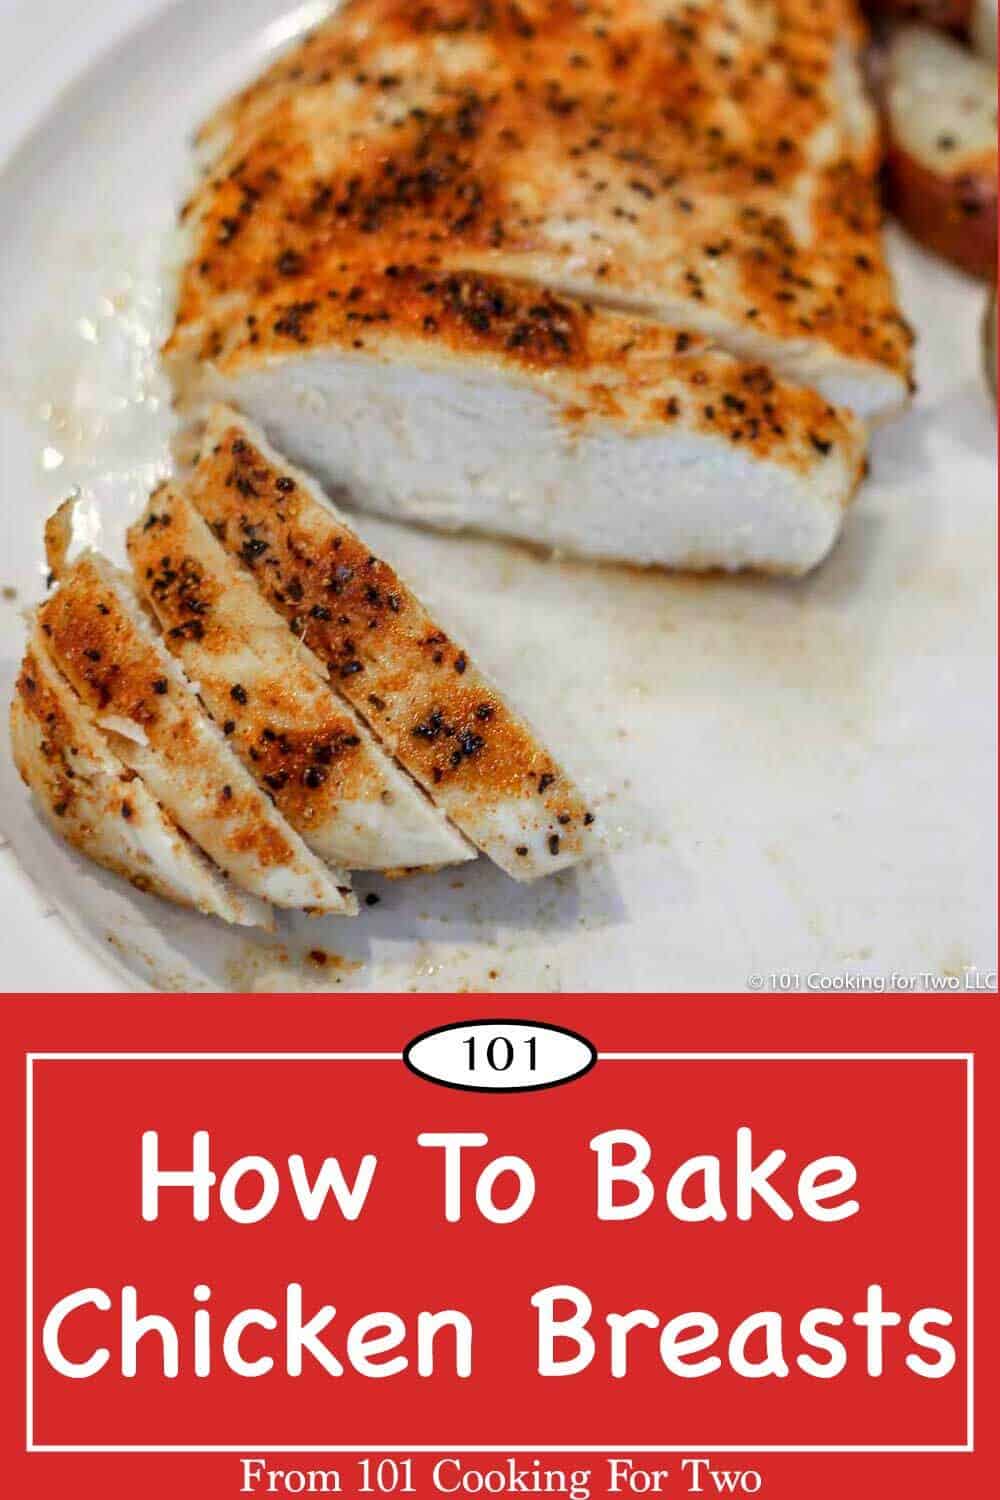
Learn how to oven bake chicken breasts that are moist and tender every time in about 30 minutes by following these easy step by step photo instructions.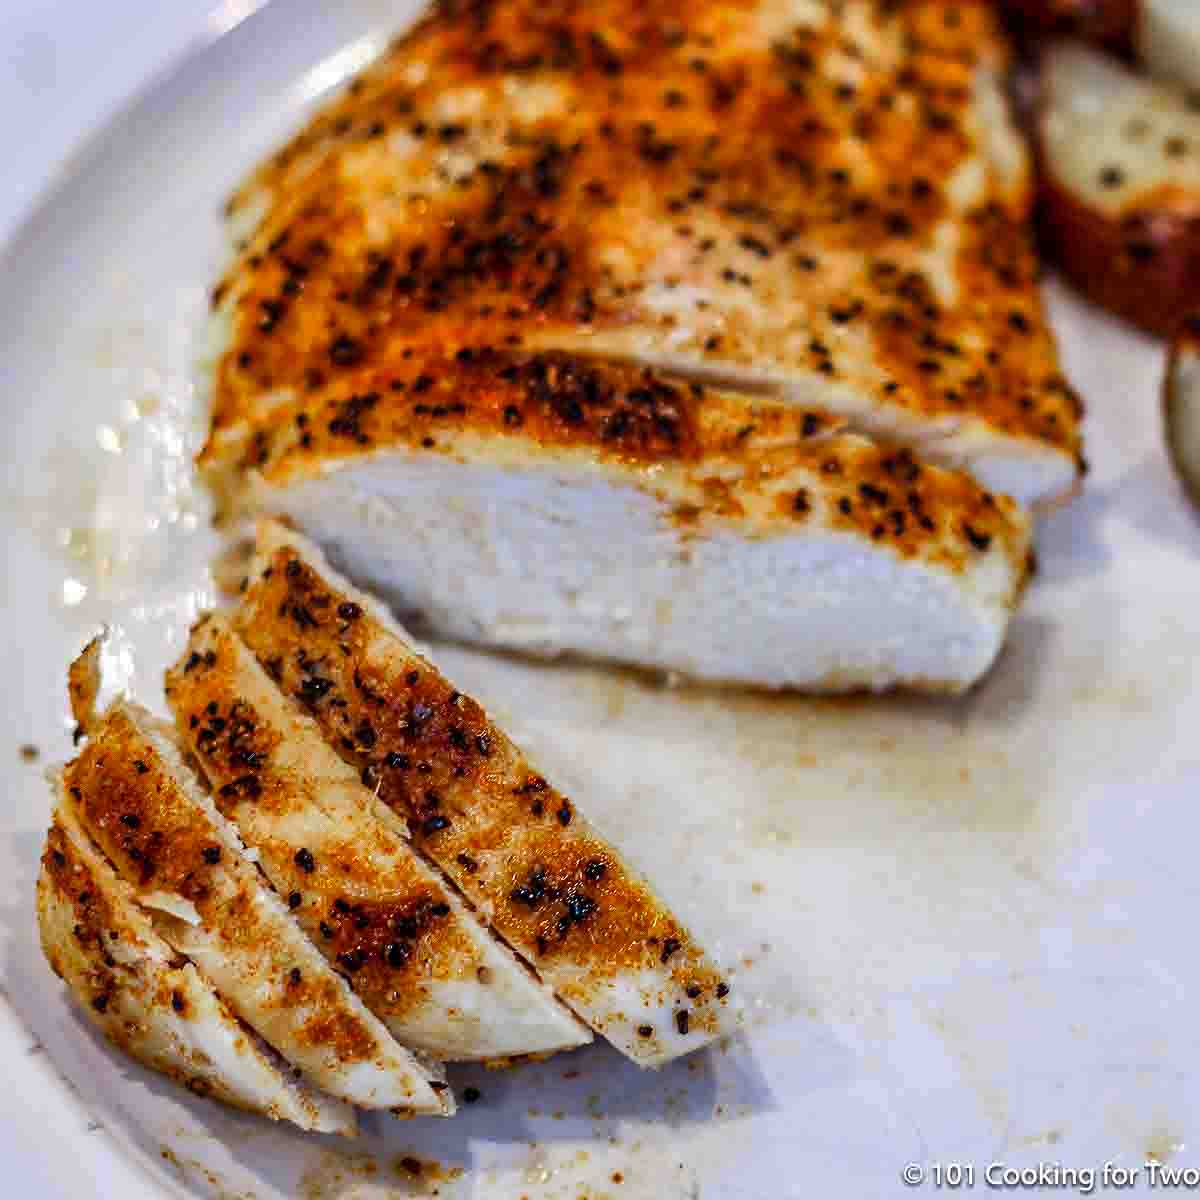
It is time to get back to some basics with skinless boneless chicken breasts, you love them but hate to cook them. Learn the three secrets, and it will serve you for life.
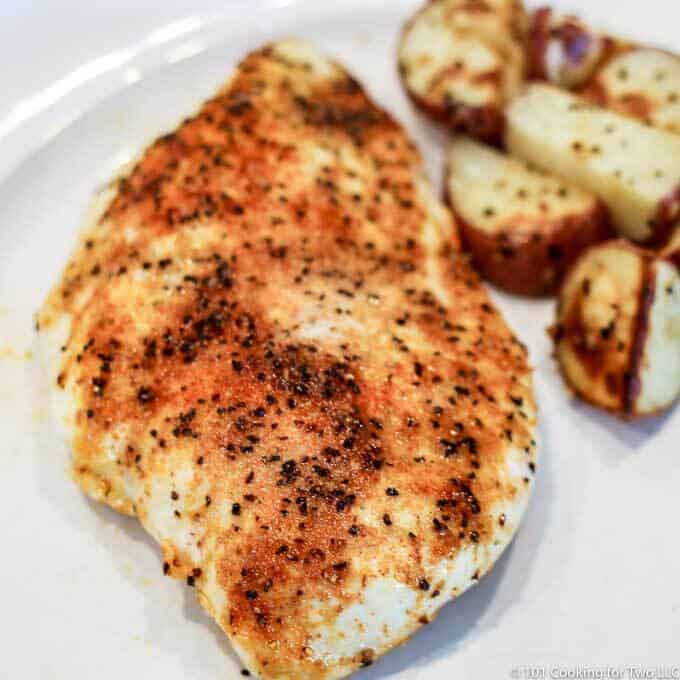
If we get this right, you will have a perfect baked chicken breast that is moist, tender and flavorful. But cooked wrong, we are talking hockey pucks – a rubbery, dry, flavorless disaster.
I will go through the basic technique. You can modify the results with your favorite seasoning. We will end with pick out the three secrets of great chicken breast.
My Rating
A solid five even if it is just a chicken breast. It is perfectly done.
Pro Tips: Recipe Notes on Baked Chicken Breasts
The Three Secrets of Great Baked Chicken Breasts
Drum roll, please…
- Even out the thickness of the breasts
- Cook in a high oven to exactly 165
- Rest after cooking for at least 5 minutes.
Now for the details.
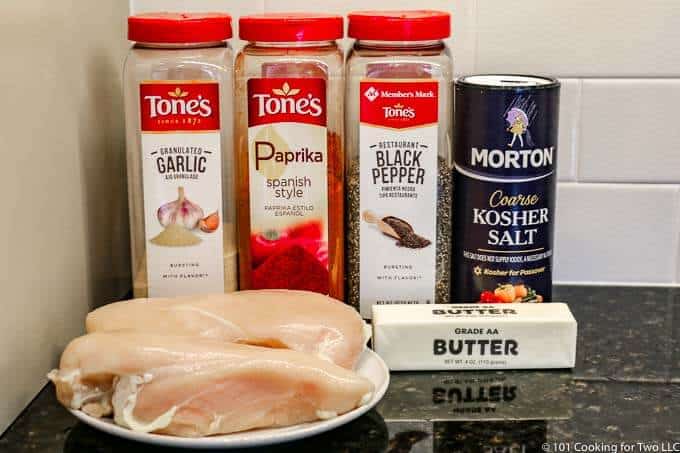
The Chicken Breasts
We are dealing with skinless boneless chicken breasts. Try to pick breasts that are about the same size and thickness.
I prefer fresh chicken breast. Frozen can be fine but must be completely thawed. A few will come pre-brined which is fine but please do not brine or salt again.
The Preparation
Trim any trimmable fat and look for blood vessels and even bones. Pat dry and do not rinse. See Chicken… To Rinse or Not To Rinse? for a safety discussion about rinsing.
(Secret #1) Some breasts are just too thick to cook well. By evening out the thickness of the chicken breast some, you will ensure more even cooking. Otherwise, the thinner parts of the breast will be overcooked by the time the thickest part is done.
We need to adjust the thickness, so all the breasts you are cooking are about the same. Try to get them to about 3/4 inch thick. Don’t measure, don’t obsess, just knock the thick part it down a bit.
I like to use a 1-gallon zip-lock bag to prevent splatter, but plastic wrap will do. Do not just knock them down without protecting from spattering (major health hazard). You should assume that any chicken is contaminated with salmonella.
I use a meat mallet, but you can use the bottom of a pan if you don’t have one. You have something you can use.
The Brine
Optional but nice if you have time. A brine will always improve the results and is so simple to do.
I would consider it more important if you are dealing with previously frozen chicken which can lose some moisture.
The ratio for a brine is 2 cup of water and one tablespoon table salt. Some people will add some brown sugar equal to the salt. Remember that all salt is not equal and 1 teaspoon table salt = 1 1/4 teaspoon Morton kosher salt = 2 teaspoons Diamond Crystal kosher salt.
As little as 15 minutes makes a big difference. But you can brine for up to 2 hours if you want. This is a “heavy brine” in the amount of salt and matches the Cooks Illustrated suggestions. You may see longer brine times suggested but please limit it to 2 hours maximum.
The Seasoning
Start with a brush of melted butter or olive oil. Some will worry about the smoke point but it is not really an issue since the meat it is coating will get nowhere close to the smoke point.
Now we are going to add dry season. If you did brine, DO NOT add more salt. So some of the options just don’t apply for you.
Some simple options are just some of my 7:2:2 Homemade Seasoning Mix if you are cooking to use in other recipes. Or just seasoning salt like Lowrys and pepper if you are in a hurry.
I included in the recipe card a suggested rub that is excellent. And if you brined, you can leave the salt out.
Add some thyme or other flavors. Heat it up some with switching out my paprika for chili powder or add a pinch of cayenne pepper. Try Italian or Cajun, all up to you.
Some people like to add some sugar to their seasoning to get more caramelization and browning. The choices are endless.
Baking the Chicken Breasts
(Secret #2) If you get nothing else out of this, the main key to moist and tasty chicken breasts is in the final internal temperature of 165. Do not overcook – will lead to drying and poor texture. Do not undercook due to safety.
A high oven is the way to go here. 400 degrees or even more is the best choice. This is lean meat and lower temperature will just dry it out. Higher temperature will seal the outside and help keep the meat moist.
Like all meat cooking, your time will vary by the thickness of the meat, exact starting temperature of the meat and your oven. So always cook chicken breast to a final internal temperature of 165 for safety.
How Long to Cook the Chicken Breasts at 400°F Convection?
Chicken breasts at 400°F convection or 425°F conventional will take about 23-26 minutes. Remember the variables of size and thickness of the chicken, the starting temperature of the meat and your oven.
So you are aiming for 165 internal temperature in the thickest part of the breast. Times estimates are provided only for planning purposes.
Some people will remove the chicken a few degrees short of the 165 target assuming (probably correctly) that it will increase a few degrees after removal from the oven. With safety things like this, I prefer being sure you hit 165.
Rest After Cooking
(Secret #3) Be sure you rest the cooked chicken before cutting to allow all of the juices to reabsorb into the meat keeping your chicken breast moist.
5 minutes is usually enough. If longer, tent with foil to keep warm.
Storage
Baked chicken breasts are good in the refrigerator for 3-4 days and if sealed well, can freeze for 3-4 months.
Other Great Chicken Breast Suggestions
Pan Seared Oven Baked Chicken Breast
Parmesan Baked Chicken Breast
![]()
![]()
Preheat oven to 400 degrees convection or 425 conventional. Rack in the middle of the oven.
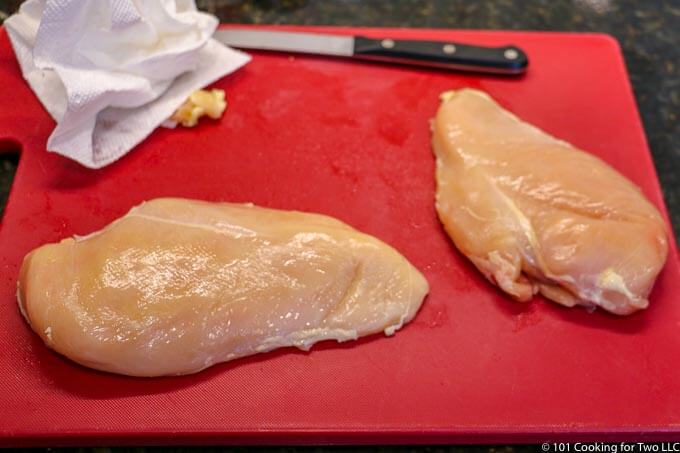
Trim two skinless boneless chicken breasts of trimmable fat. Pat dry.
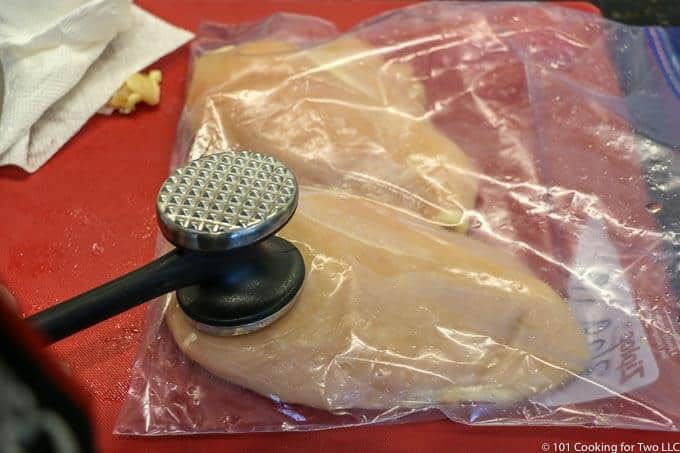
Place the chicken in a ziplock bag and flatten the breasts to about 3/4 inch thick with a meat mallet or heavy pan.
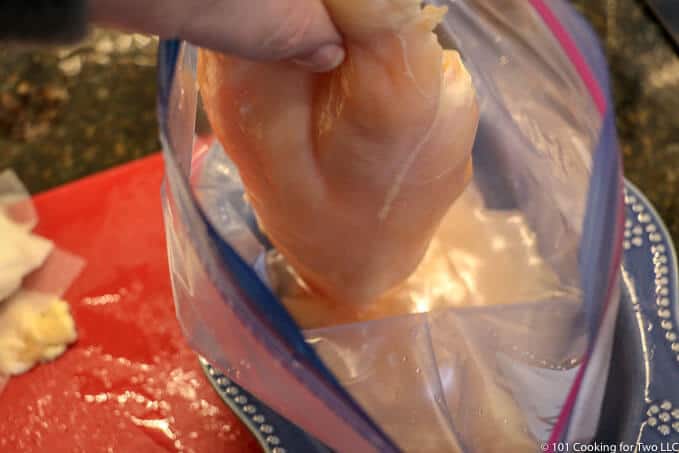
If doing a brine, mix 2 cups of water with 2 tablespoons table salt. 15 minutes will give some results. 2-hour maximum. Be sure to rinse off the brine before proceeding.
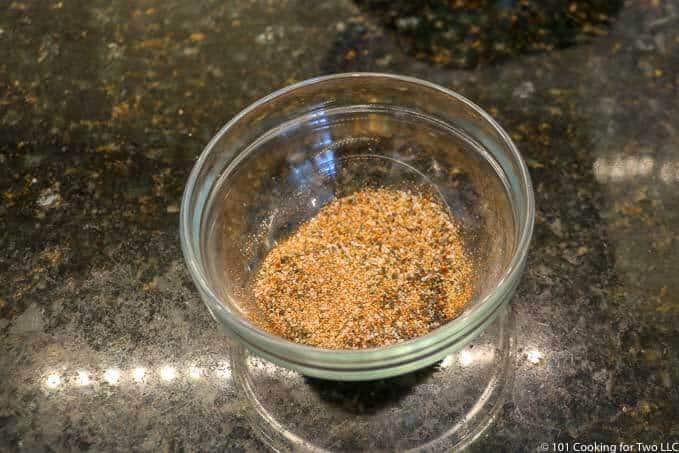
You may use the seasoning you want. Here is a suggested seasoning 1/2 teaspoon kosher salt, 1/2 teaspoon garlic powder, 1/2 teaspoon paprika, and 1/4 teaspoon black pepper. Leave out the salt if using a brine.
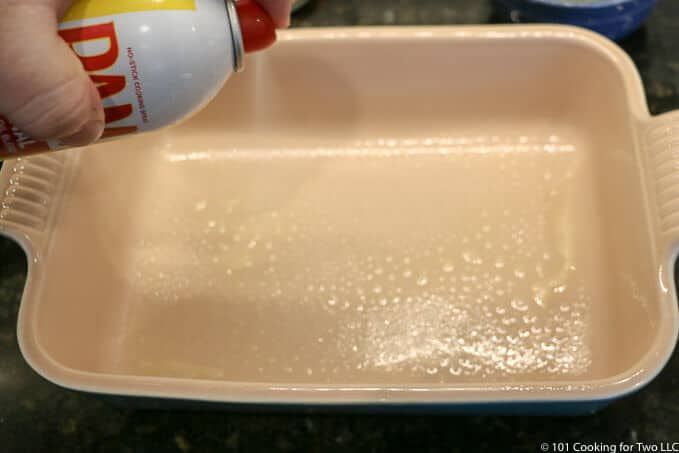
Prep small baking dish with a spray of PAM.
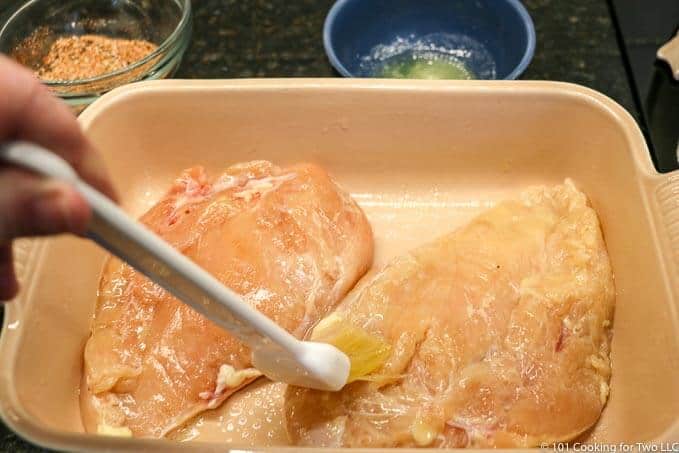
Melt 1 tablespoon butter in the microwave and brush both sides of the chicken.
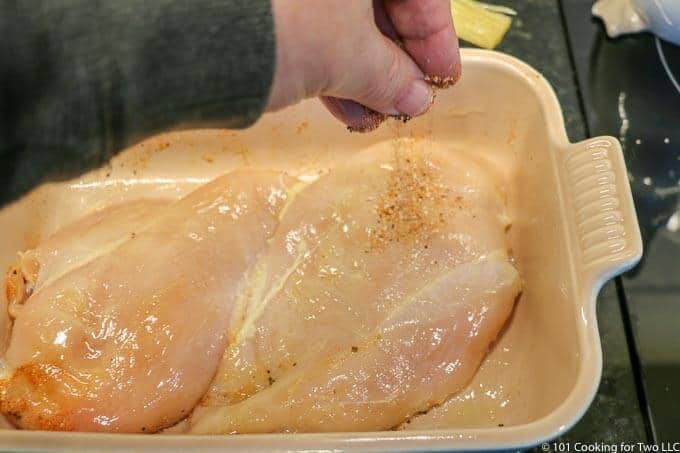
Apply your seasoning to your taste.
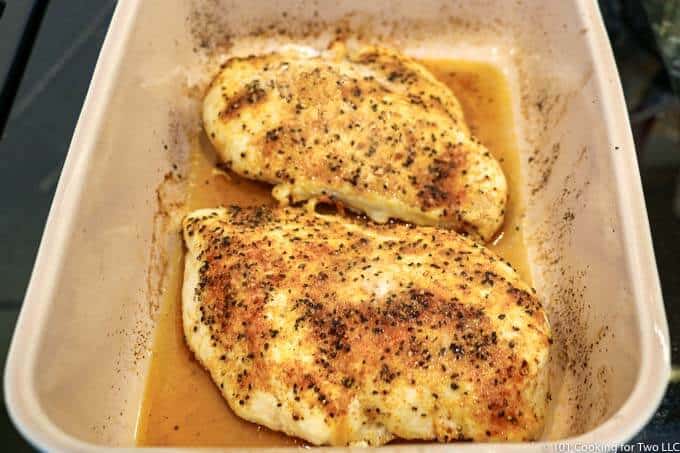
Bake in the preheated oven. It will take about 23-26 minutes and is done when the internal temperature is 165 in the thickest part of the breasts.
Allow to rest for 5 minutes before serving.
![]()
![]()
Do you want more recipes from 101 Cooking for Two? Sign up for the newsletter and get all posts delivered straight to your inbox!![]()
Baked Chicken Breast
Learn how to oven bake chicken breasts that are moist and tender every time in about 30 minutes by following these easy step by step photo instructions.
Prep Time5 mins
Cook Time25 mins
Total Time30 mins
Servings/Adjustment: 2 breasts
Ingredients
- 2 Skinless Boneless Chicken Breasts
- 1 tablespoon butter
Optional Brine
- 2 cups water
- 1 tablespoon table salt
Suggested Seasoning -Use what you want
- 1/2 teaspoon kosher salt
- 1/4 teaspoon pepper
- 1/2 teaspoon garlic powder
- 1/2 teaspoon paprika
Instructions
-
Preheat oven to 400 degrees convection or 425 conventional.
-
Trim two skinless boneless chicken breasts of trimmable fat. Pat dry.
-
Place the chicken in a ziplock bag and flatten the breasts to about 3/4 inch thick with a meat mallet or heavy pan.
-
If doing a brine, mix 2 cups of water with 2 tablespoons table salt. 15 minutes will give some results. 2-hour maximum.
-
You may use the seasoning you want. Here is my suggested seasoning 1/2 teaspoon kosher salt, 1/2 teaspoon garlic powder, 1/2 teaspoon paprika, and 1/4 teaspoon black pepper. Leave the salt out if you have brined.
-
Prep small baking dish with a spray of PAM.
-
Melt 1 tablespoon butter in the microwave and brush both sides of the chicken. Apply your rub to your taste.
-
Bake in the preheated oven. It will take about 23-26 minutes and is done when the internal temperature is 165 in the thickest part of the breasts.
-
Allow to rest for 5 minutes before serving.
Recipe Notes
Pro Tips:
- The brine is optional but always a good idea especially if the breasts have been previously frozen. Remember that all salt is not equal and 1 teaspoon table salt = 1 1/4 teaspoon Morton kosher salt = 2 teaspoons Diamond Crystal kosher salt.
- If using frozen breast, they must be fully thawed before starting.
- If you brine, be sure to rinse off the brine and do not use any seasoning with salt.
- Flatten the chicken to about 3/4 inch thick: the more consistent the thickness, the more even the cooking and better results.
- To save time, you can use a seasoning salt like Lowrys with some pepper for the seasoning if you didn’t brine.
- The time estimate is provided only for planning purposes. Thicker or bigger breast may take longer, smaller or thinner take even less time. There are other variables also so stay alert.
- Do not overcook – will lead to drying and poor texture. Do not undercook due to safety.
- You can not get this right without using a thermometer.
- Be sure to let the chicken rest for 5 minutes before serving.
- Good in the refrigerator for 3-4 days and frozen for 4-6 months.
- A great recipe to scale up or down for your needs.
Nutrition Facts
Baked Chicken Breast
Amount Per Serving (1 breast)
Calories 183 Calories from Fat 72
% Daily Value*
Total Fat 8g 12%
Saturated Fat 4g 20%
Cholesterol 87mg 29%
Sodium 763mg 32%
Potassium 418mg 12%
Protein 24g 48%
Vitamin A 9.1%
Vitamin C 1.6%
Calcium 0.6%
Iron 2.9%
* Percent Daily Values are based on a 2000 calorie diet.
Have a question or something not clear? Ask in the comments.
![]() Do you want more recipes from 101 Cooking for Two? Sign up for the newsletter and get all posts delivered straight to your inbox!
Do you want more recipes from 101 Cooking for Two? Sign up for the newsletter and get all posts delivered straight to your inbox!
![]()
![]()
Nutrition is for one serving. Number of servings is stated above and is my estimate of normal serving size for this recipe.
All nutritional information are estimates and may vary from your actual results. This is home cooking, and there are many variables. To taste ingredients such as salt will be my estimate of the average used.
![]()
If you like this recipe or find it useful, the pleasure of a nice 4 or 5 rating would be greatly appreciated.
Originally Published April 16, 2019