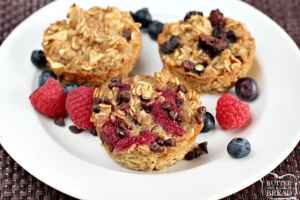
Easy Baked Oatmeal Cups are perfectly portioned and customizable so that everyone in the family can enjoy a quick and healthy breakfast! This baked oatmeal recipe can be enjoyed plain or you can add raspberries, blueberries, chocolate chips, raisins or any other type of topping that you enjoy with oatmeal!
Easy Baked Oatmeal Cups have become a staple around my house. I have been eating Baked Oatmeal Cups for a while, but have been having a hard time getting a couple of my non-oatmeal eating kids to try them. I decided that I needed to add some color and maybe a few chocolate chips and for some reason they are all much more excited about eating oatmeal now!
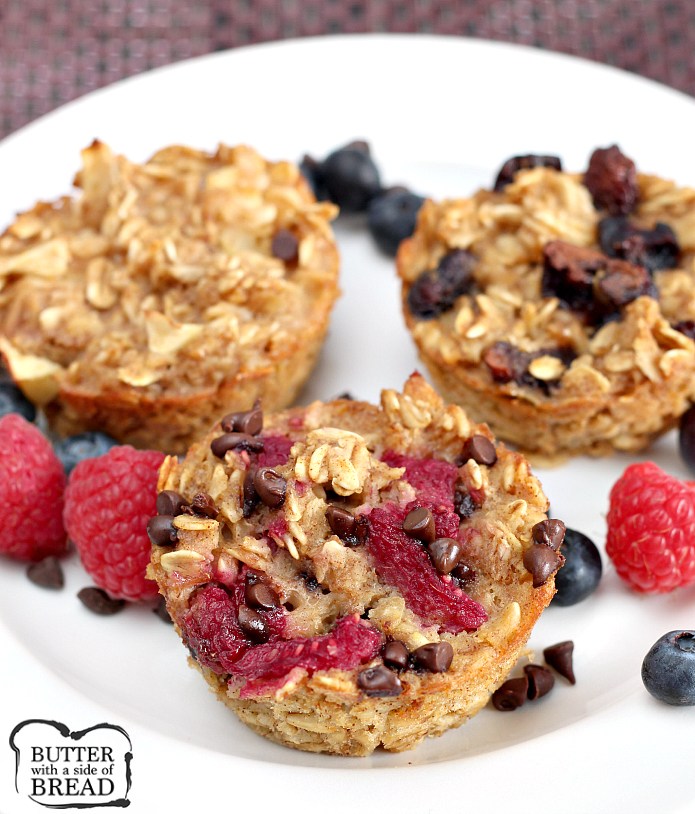
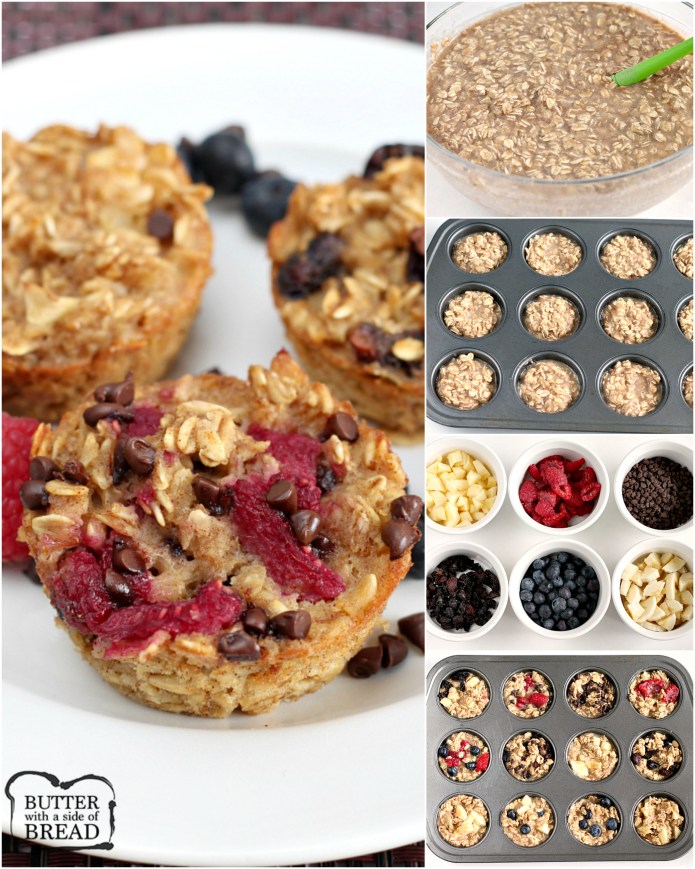
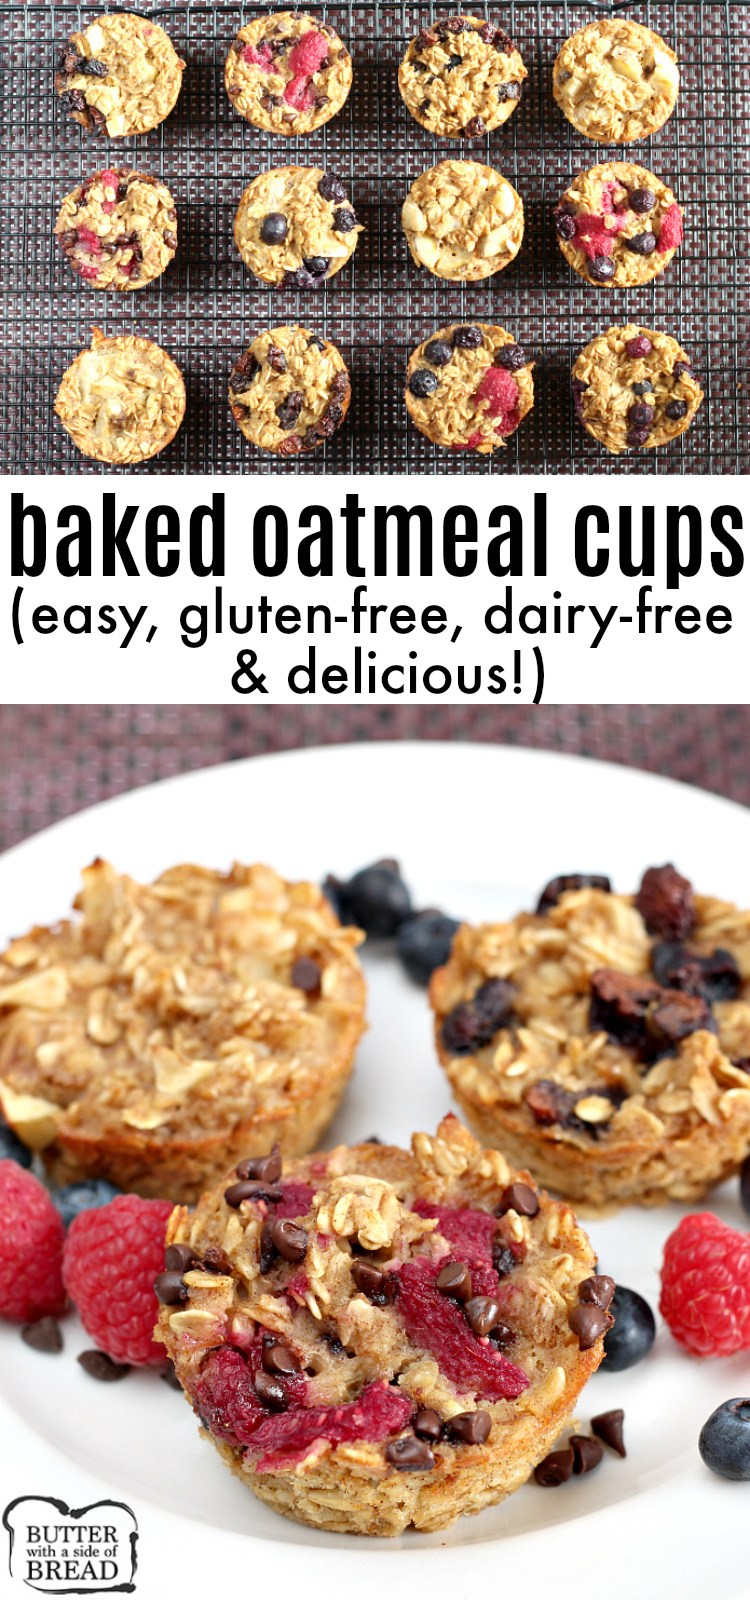
My kids (and I) have all had fun mixing and matching our favorite toppings to create fun flavors – so far I think my favorite is dried cherries with chocolate chips! We like to use whatever kinds of fresh fruit we have on hand and dried fruit works amazingly well too. This recipe makes 24 oatmeal cups so you can make an endless amount of different combinations and everyone in the family can help create their favorite flavors!

Is baked oatmeal healthy?
Baked oatmeal is a low calorie, low fat breakfast food that is healthy and delicious too! Each baked oatmeal cup has about 50 calories, 9 grams of carbohydrates and 1 gram of protein. There are only 2 grams of sugar and 1 gram of fat in each baked oatmeal cup. Adding fresh or dried fruit is a wonderful way to get in a serving of fruit for the day as well!
Is baked oatmeal gluten-free?
Baked oatmeal is gluten free as long as you use gluten free oats and gluten free baking powder. If you use almond milk, baked oatmeal cups are also dairy free!
What kind of oats work best in baked oatmeal?
I like to use old-fashioned rolled oats in baked oatmeal because they provide a much chewier texture, but you can use quick oats instead if you prefer. You can even use a combination of rolled oats and quick oats if you prefer.
What ingredients are in baked oatmeal cups?
-2 eggs
-1 teaspoon vanilla extract
-2 cups unsweetened applesauce
-1 tablespoon honey
-1½ cups unsweetened almond milk (regular milk works fine too)
-2½ cups rolled oats
-1 tablespoon ground cinnamon
-1½ teaspoons baking powder
-toppings of your choice
What toppings can you add to baked oatmeal?
You can add so many different things to baked oatmeal to make it even more delicious! Fresh or dried fruit both work wonderfully in baked oatmeal. Here are a few ideas:
- raspberries
- blueberries
- miniature chocolate chips
- bananas
- raisins
- peaches
- apples
- blackberries
- dried cherries
I love that each batch makes 24 baked oatmeal cups! Everyone in the family can choose their own toppings and customize several oatmeal cups that are just the way they like them! My kids are a lot more likely to eat healthy foods when they are involved in preparing them. Choosing and adding their own toppings to the baked oatmeal is fun and easy for even small children to do!

How do you make baked oatmeal cups?
First you need to combine the eggs, vanilla, applesauce, honey and milk together and mix until well combined.
In a separate bowl, mix the oats, cinnamon and baking powder together. Add the oat mixture to the applesauce mixture and stir until completely mixed. Scoop the batter into well-greased muffin tins. (My favorite way to scoop muffins is to use a large cookie scoop! You will use a #16 scoop which is perfect for cupcakes and muffins – it gives you the perfect amount of batter every single time and all of your baked goods will be consistent in size.)
Place a few toppings on each oatmeal cup and use a toothpick or butter knife to slightly swirl them into the batter. Bake the oatmeal cups at 350°F for 26-30 minutes or until golden brown. Serve the baked oatmeal immediately or cool to room temperature and store in an airtight container. The oatmeal cups can be stored at room temperature for 2-3 days.
I prefer baked oatmeal when it is warm, but baked oatmeal cups are also good at room temperature. Each baked oatmeal cup can be reheated very easily in the microwave – just microwave each cup for about 15 seconds.

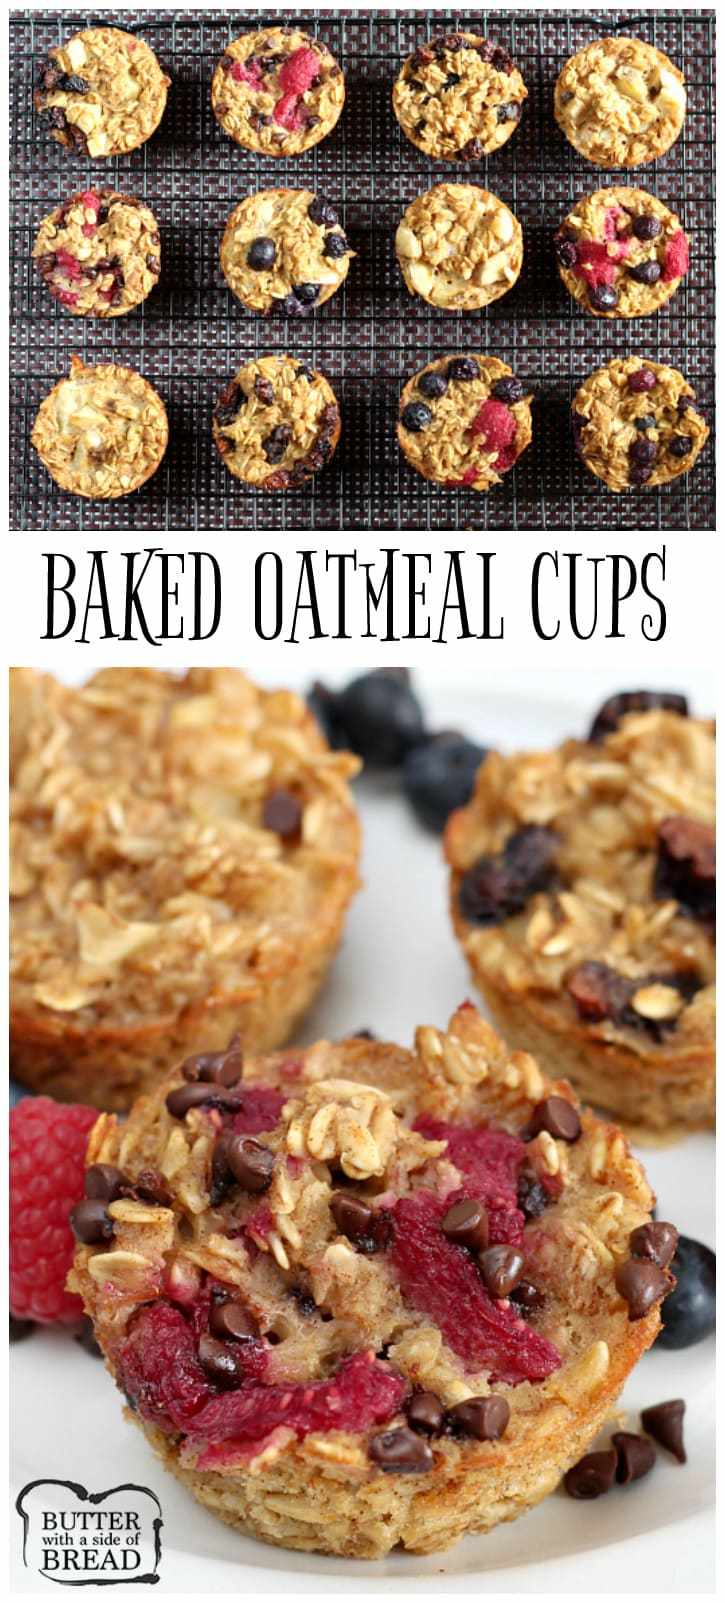
EASY BAKED OATMEAL CUPS
Easy Baked Oatmeal Cups are perfectly portioned and customizable so that everyone in the family can enjoy a quick and healthy breakfast!
Servings: 24
Calories: 52 kcal
:
Ingredients
- 2 eggs
- 1 tsp. vanilla extract
- 2 cups unsweetened applesauce
- 1 Tbsp. honey
- 1 1/2 cups unsweetened almond milk regular milk works fine too
- 2 1/2 cups rolled oats
- 1 Tbsp. ground cinnamon
- 1 1/2 tsp. baking powder
- toppings of your choice small pieces of apple, banana, blueberry, raspberry, dried fruit and miniature chocolate chips
Instructions
-
Combine eggs, vanilla, applesauce, honey and milk together and mix until well combined.
-
In a separate bowl, mix the oats, cinnamon and baking powder together. Add the oat mixture to the applesauce mixture and stir until completely mixed.
-
Scoop the batter into well-greased muffin tins. Place a few toppings on each oatmeal cup and use a toothpick to slightly swirl them into the batter.
-
Bake at 350°F for 26-30 minutes or until golden brown.
Nutrition Facts
EASY BAKED OATMEAL CUPS
Amount Per Serving
Calories 52 Calories from Fat 9
% Daily Value*
Total Fat 1g 2%
Cholesterol 13mg 4%
Sodium 26mg 1%
Potassium 84mg 2%
Total Carbohydrates 9g 3%
Dietary Fiber 1g 4%
Sugars 2g
Protein 1g 2%
Vitamin A 0.5%
Vitamin C 0.2%
Calcium 4.6%
Iron 3%
* Percent Daily Values are based on a 2000 calorie diet.
Can you freeze baked oatmeal cups?
You can freeze baked oatmeal cups for up to 2 months if they are wrapped in plastic wrap and stored in an airtight container. The baked oatmeal cups can be thawed to room temperature or you can heat them up in the microwave if you prefer to eat them warmed.
How many baked oatmeal cups are in one serving size?
Two baked oatmeal cups equal one serving. Each serving (before toppings) has about 100 calories, 18 grams of carbohydrates, 2 grams of protein and 2 grams of fat.

If you love this baked oatmeal recipe, be sure to check out some of our other favorite breakfast recipes!

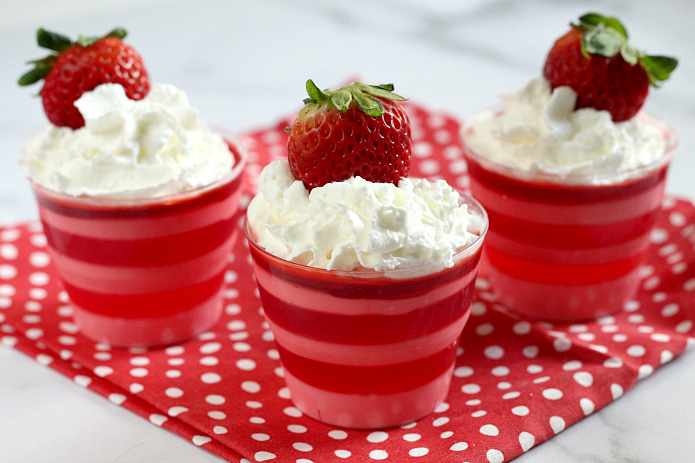
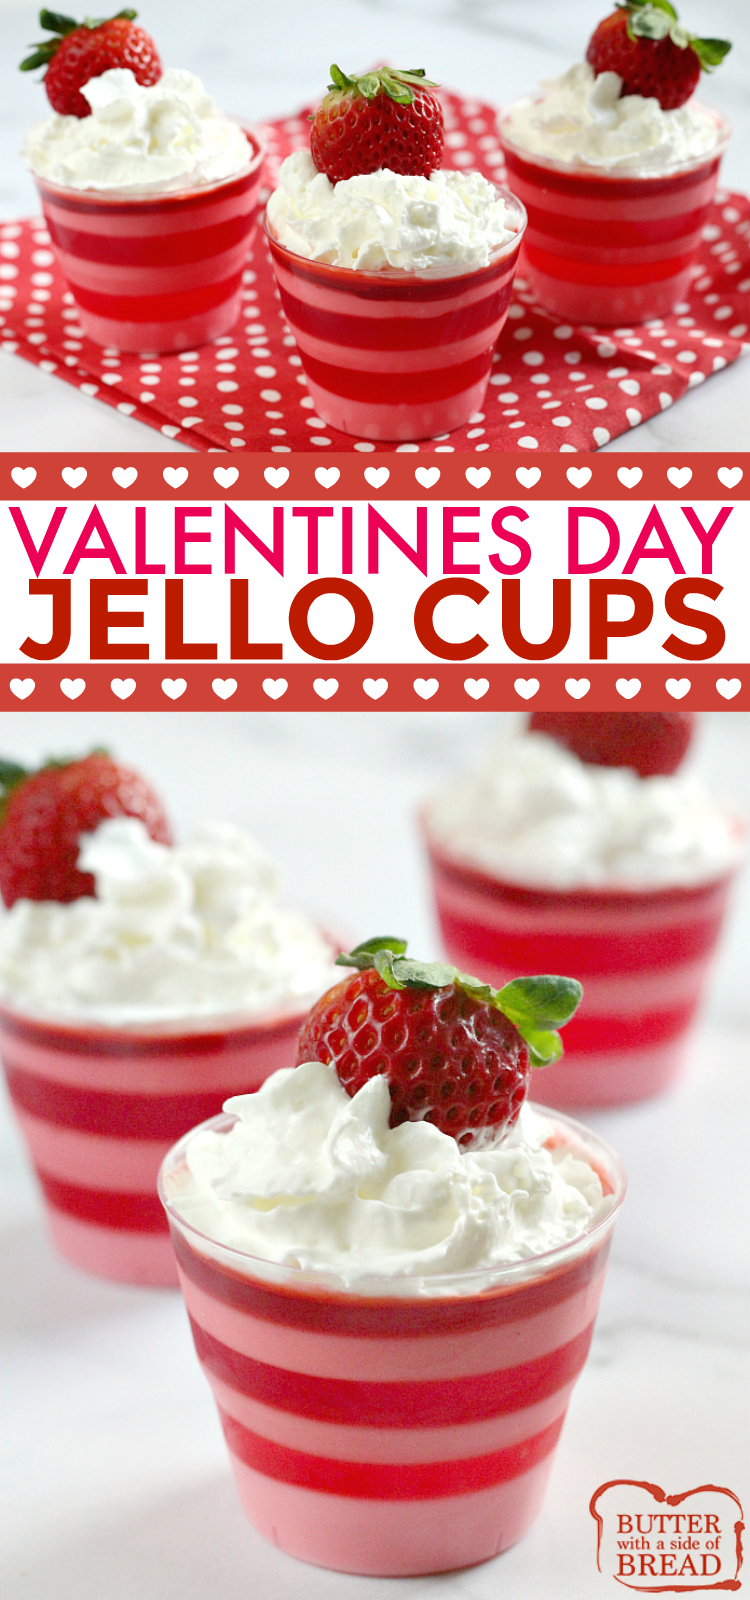
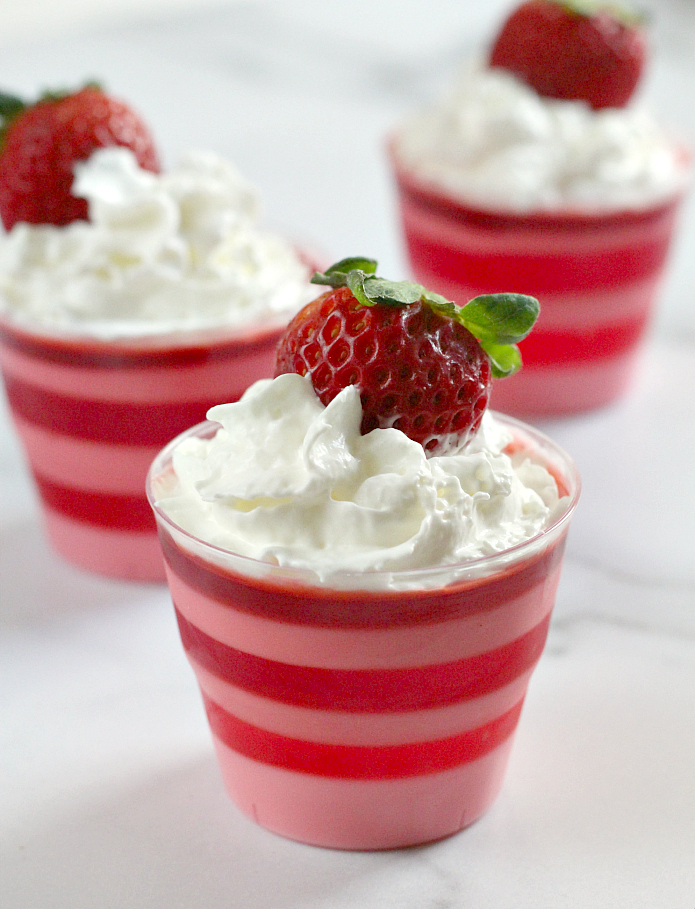 Everyone loves jello and this layered jello recipe is absolutely perfect for Valentines Day! This jello recipe is super easy to make too – you can use any type of red jello that you like – strawberry, raspberry, cherry, etc. To make the other layers, you just combine the jello with yogurt. That’s it!
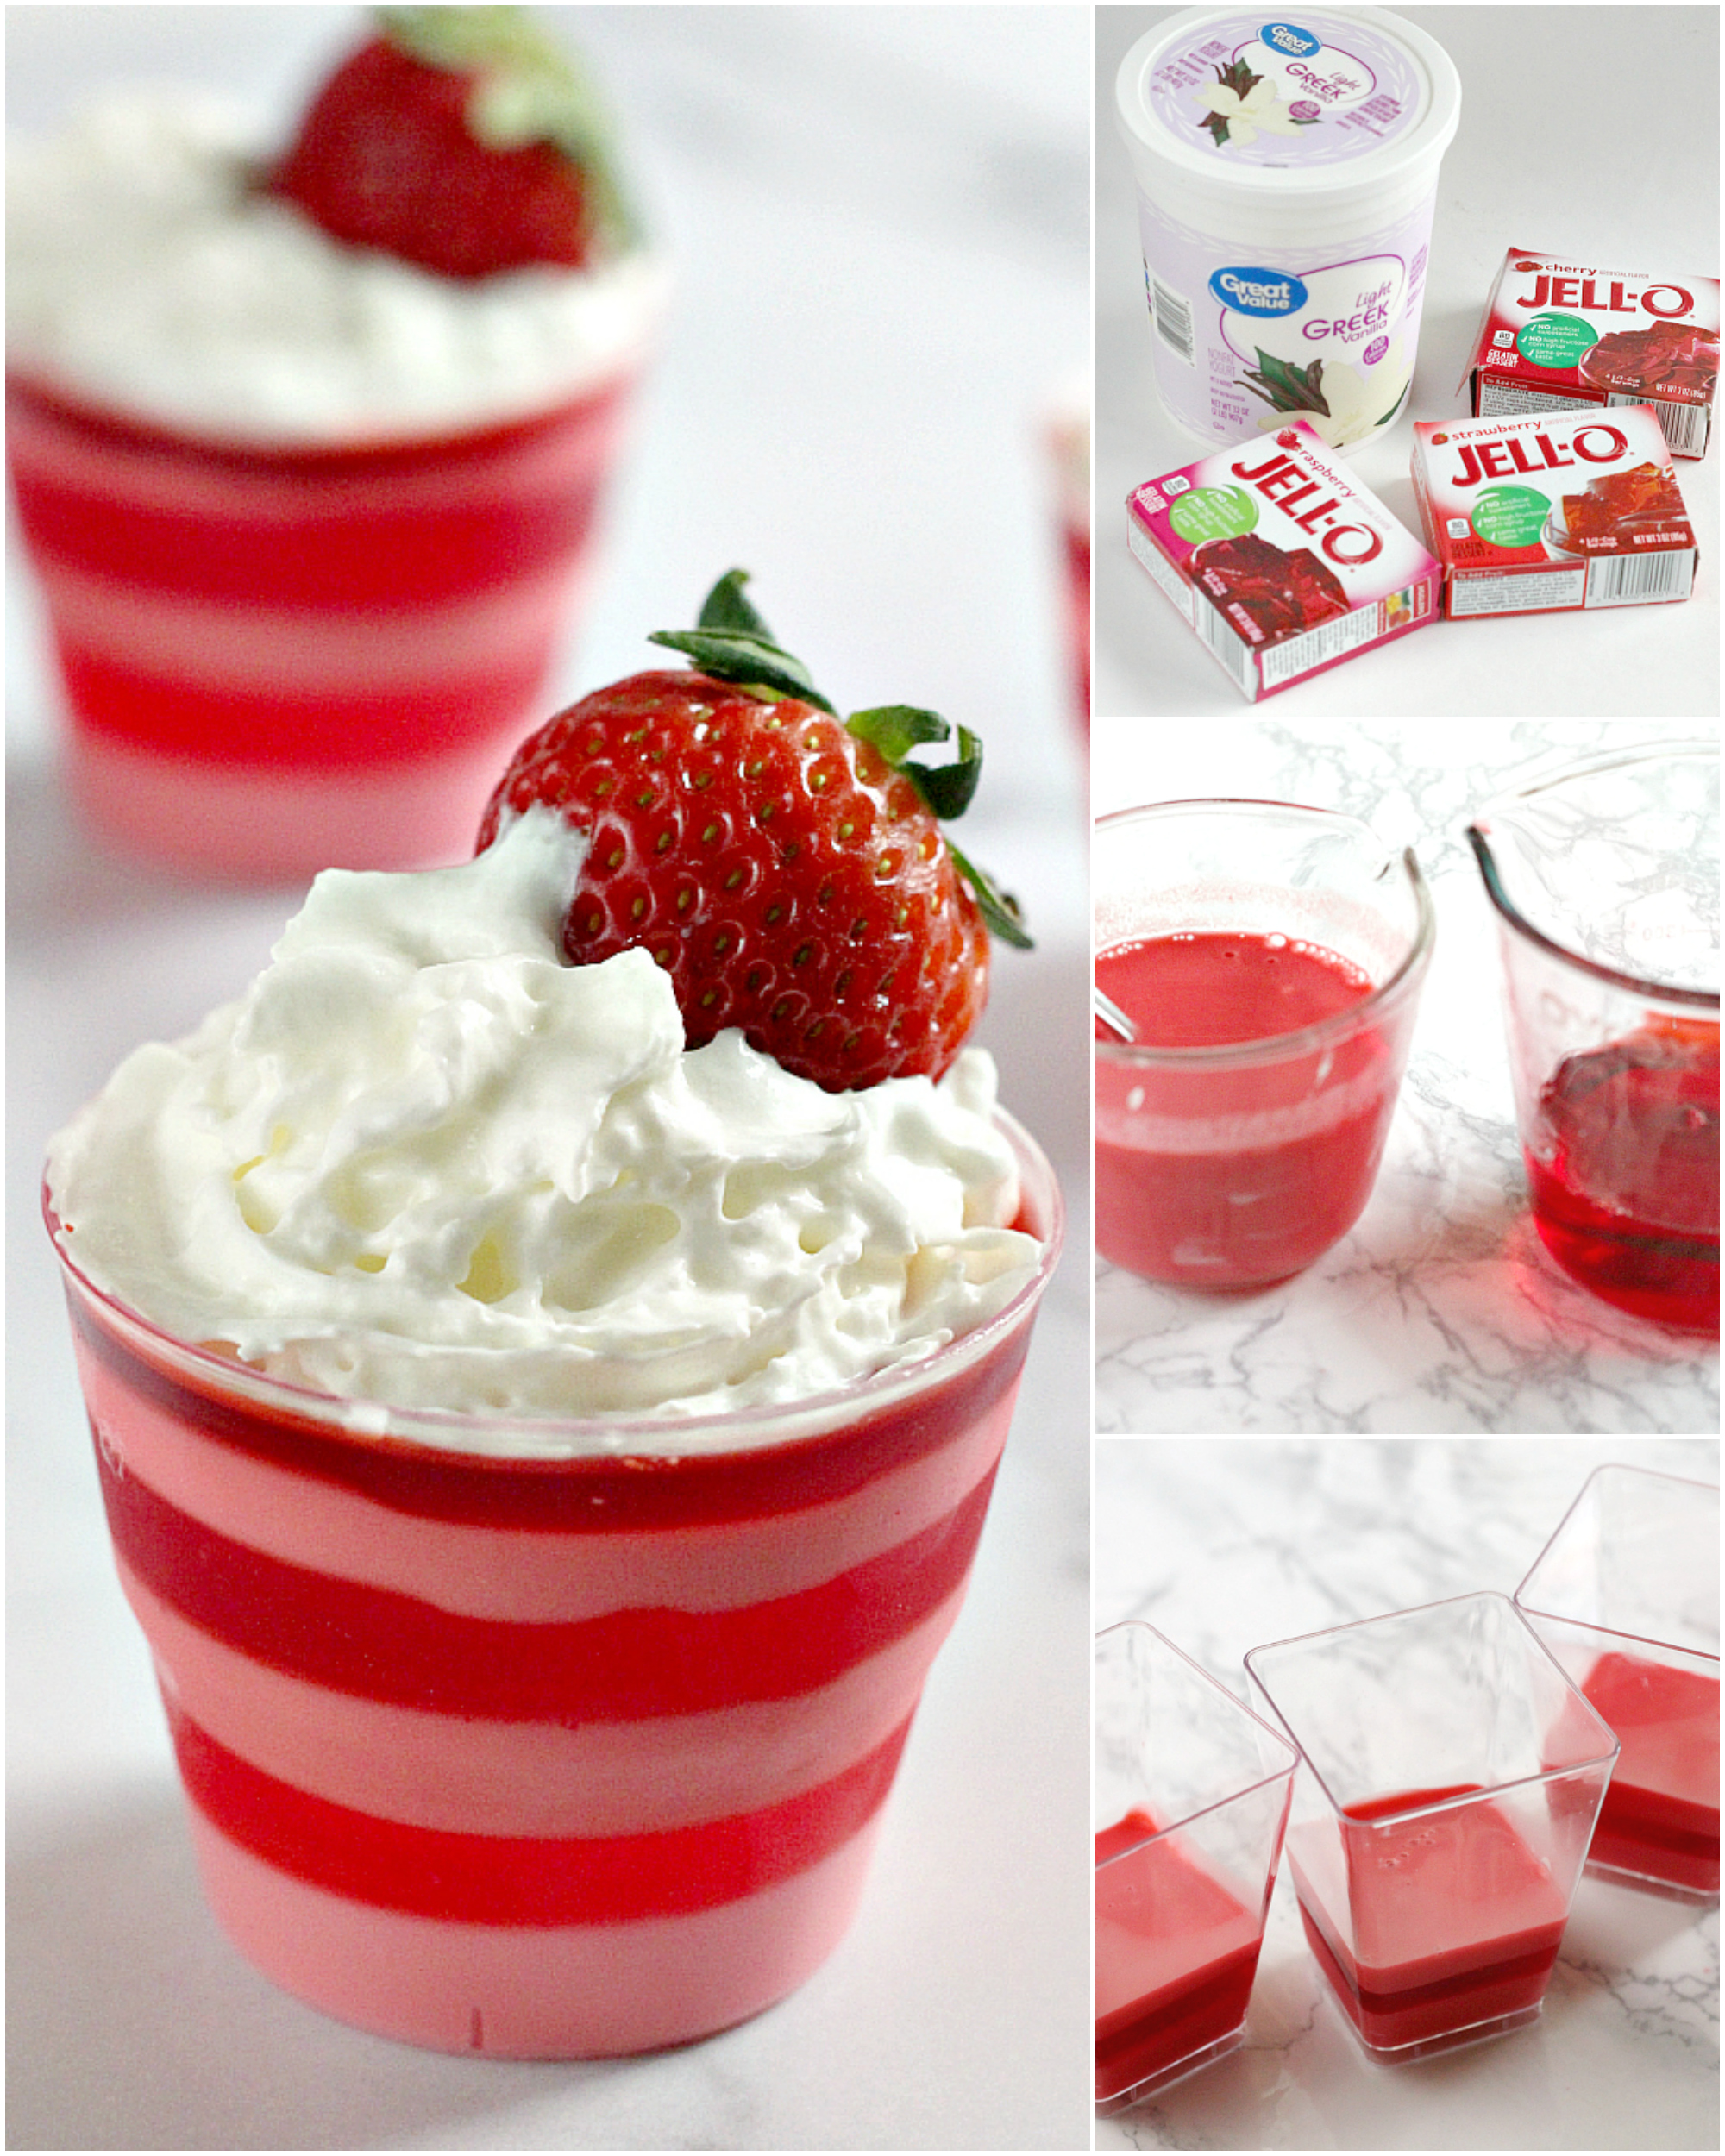


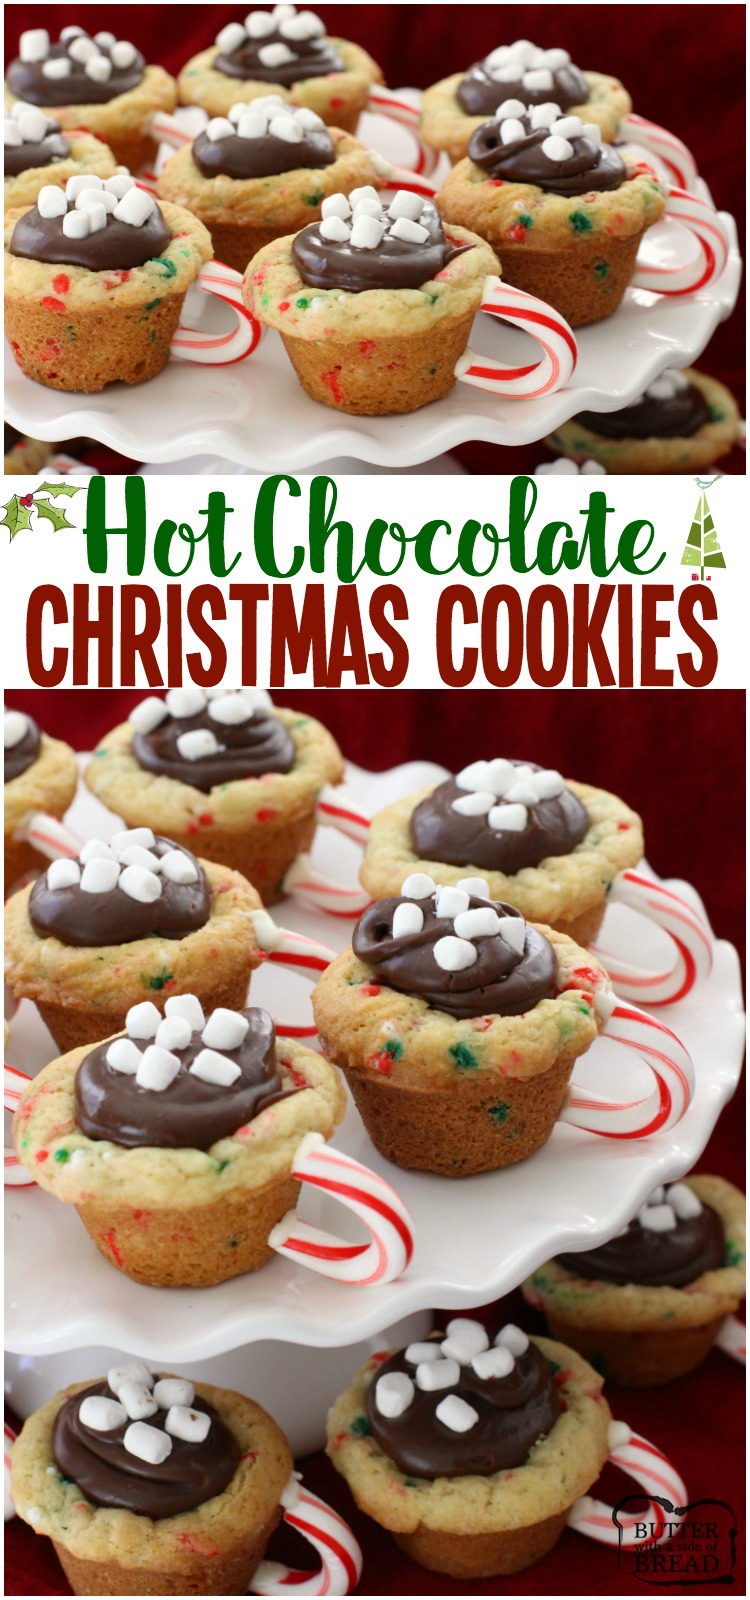
 Hot Chocolate Christmas Cookie Cups
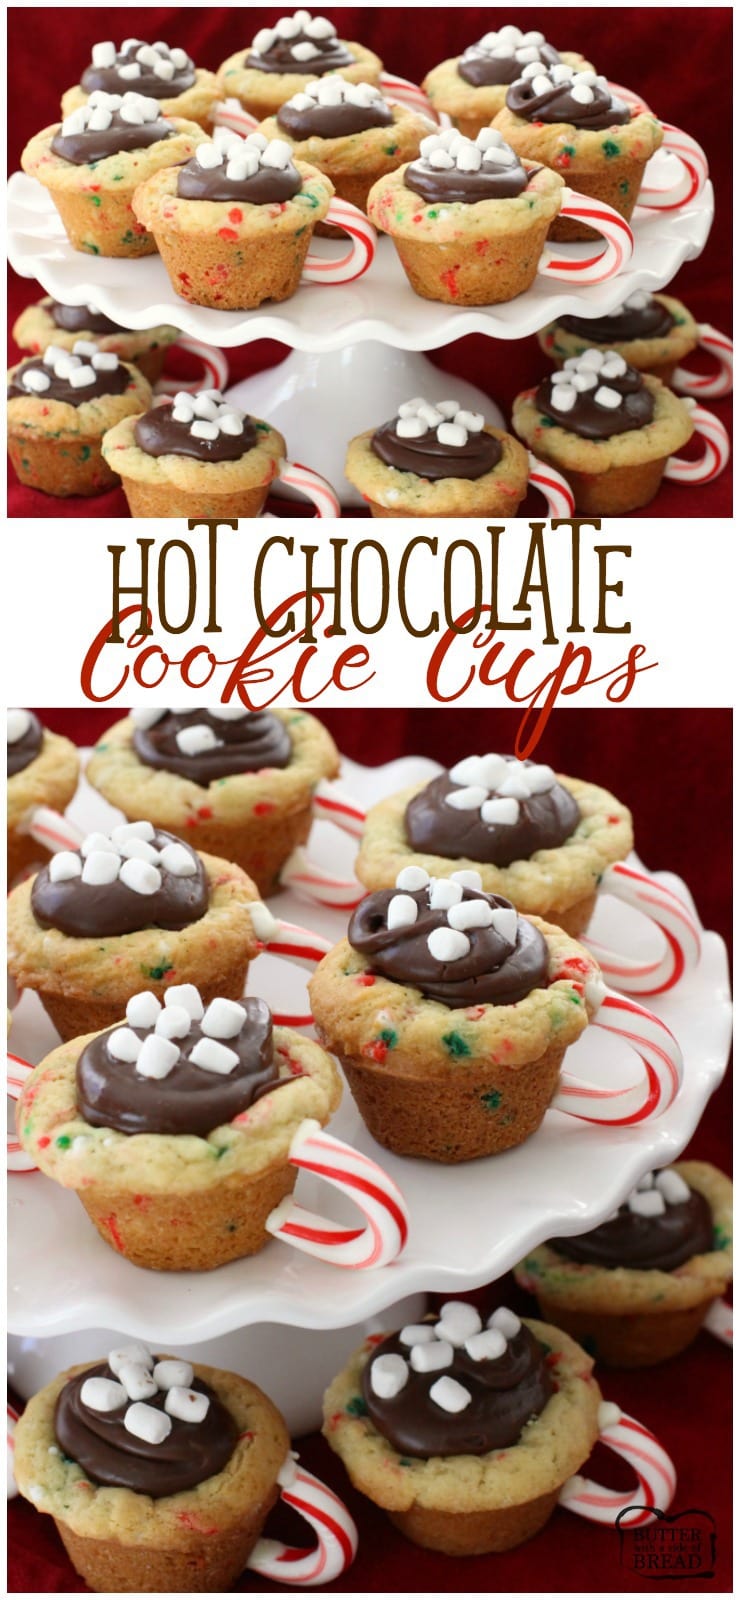