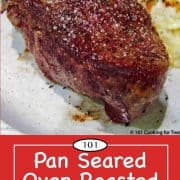
Learn how to cook filet mignon at home and get the best results like the top restaurants. Surprisingly easy with a quick sear on the stovetop, then bake to get your perfect filet. Great reliable results every time that is perfect for two or a crowd.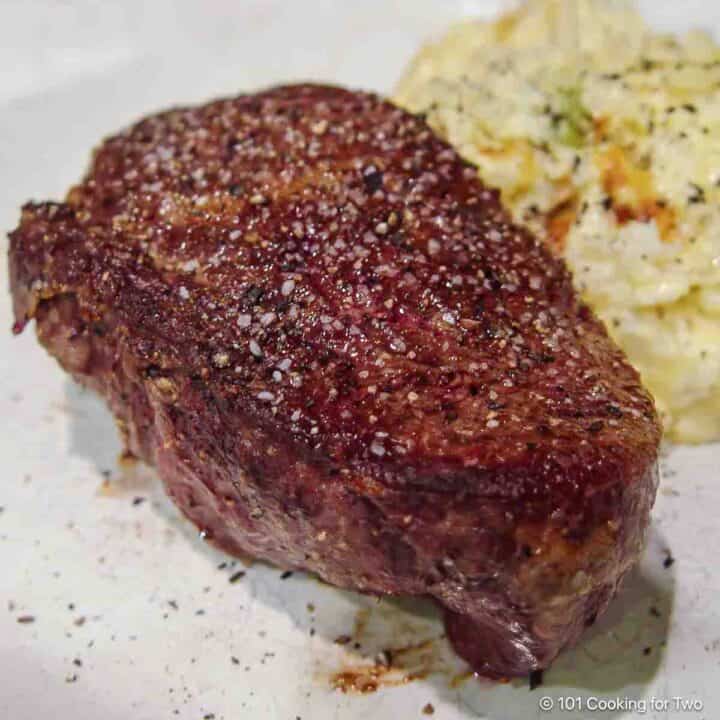
Jump to:
![]()
Introduction and My Rating
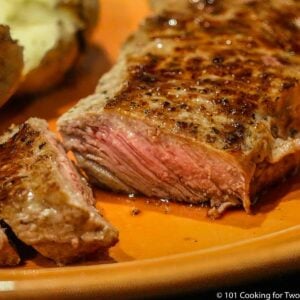
Filet mignon is the tenderest cut of beef and only needs a little seasoning with coarse salt and pepper. This is my go-to method for this cut of the beef tenderloin—extremely dependable under 30 minutes including resting time—a great date night recipe.
Start with a hot pan and sear both sides to get that tasty Maillard reaction then finish by transferring to a hot oven to finish to the final internal temperature you want.
My Rating
An easy 5. I have done this over and over and could survive on it.
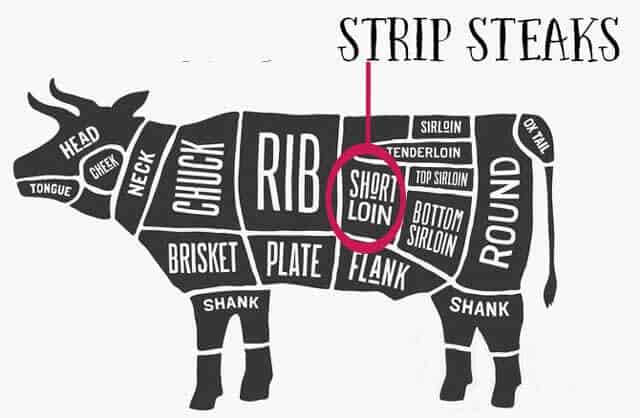
🐄Filet Mignon
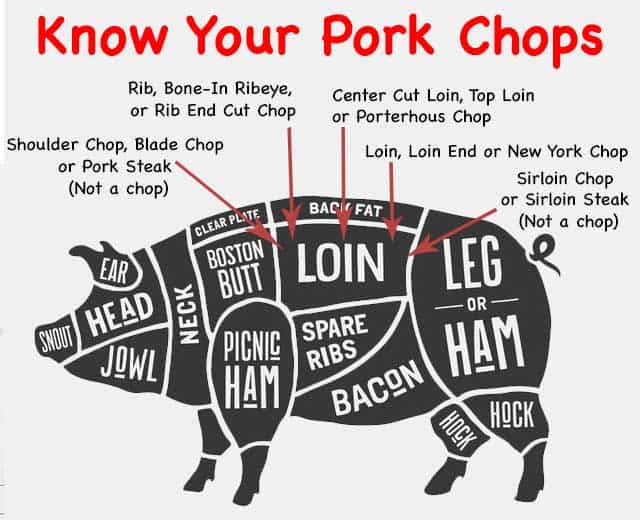
Filet Mignon is a slice of the beef tenderloin, which is the psoas muscle of the cow. Since it does very little work or weight-bearing, it is extremely tender.
Generally, a filet will be about 2-3 inches in diameter. A slice of about 1 1/2 inch thick or a bit less will weight about 8 ounces and is an excellent serving size.
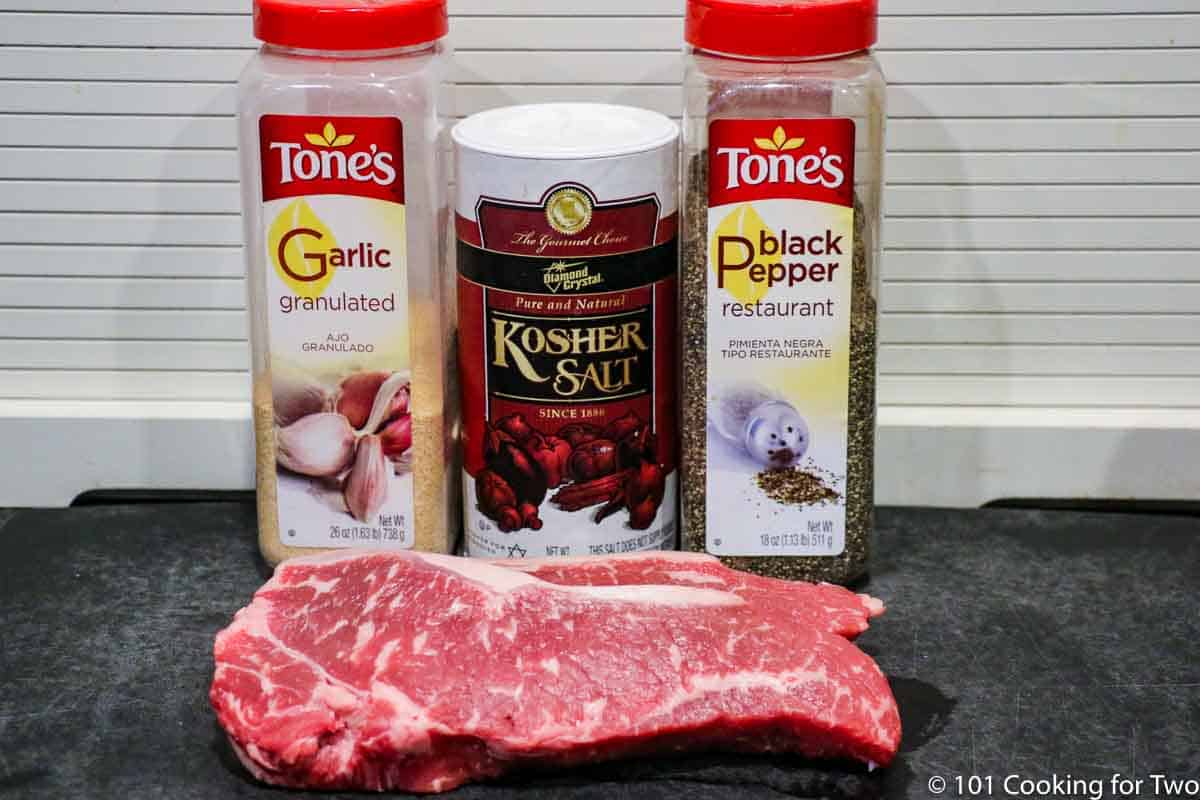
Start with quality filets. It is all about quality here more than almost any other cut of beef. Prime is the top 2%; you can buy it for $35 per pound, which I usually buy at the best meat markets.
Next, just under Prime, is Choice. About half the beef sold in the USA is Choice, and this is what most people will usually buy—an excellent value. It will be about $10-15 per pound. Select is next, but just say no since it is poor quality generally. If you see a beef tenderloin that does not have one of these three ratings, it is guaranteed to be bad.
You can buy whole beef tenderloins and trim it yourself, and if I’m having company, I will cut my own.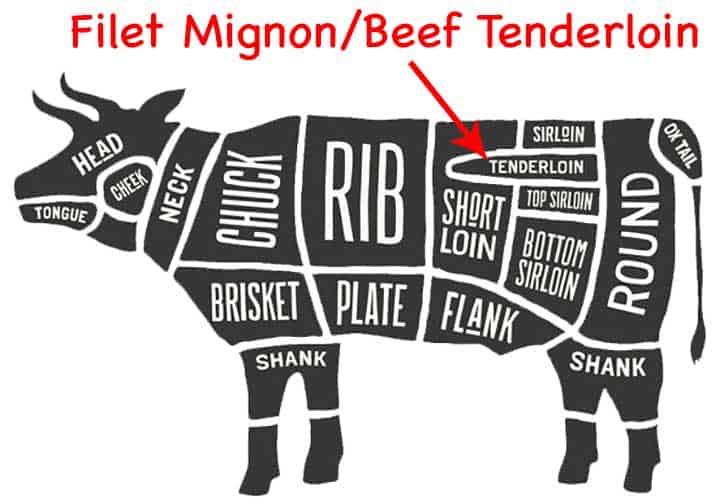
⏰Oven Temperature
I suggest a 400° oven. However, you can use a little lower or higher oven temperature, with or without convection, and get about the same results with a bit of change in time—remember, you are cooking to a final temperature, not by time.
⏰How Long?
In a 400° oven, for a final internal temperature of about 140°, it usually takes about 8-10 minutes. You should remove the filet 3°-5° less than the final serving temperature you want since the meat will increase in temperature when tented and rested which is very important.
For rare, it may be only a few minutes in the oven. If you did a strong sear with a rest to room temperature or if your filets are thinner, check the temperature of the meat when it goes into the oven if you want rare.
If your filet is thicker or was not rested to room temperature, or you want it more in the well-done range, it may take 12-15 minutes or even more.
I always suggest checking the internal temperature of the meat about 4-5 minutes after going into the oven.
There are several variables that will determine the cooking time. The initial temperature of the steak, the thickness of the steak, the temperature of the oven, the length of the sear, and your desired finish level.
A final word to the wise, NEVER COOK BY TIME ALONE, cook to your target internal temperature. and you must use an instant-read thermometer.
🌡️Final Temperature
I like about 140° final internal temperature. My wife is more of a 145° to 150° person usually but is now moving that down some.
So pick the internal temperature you want. Remove the steak a few degrees less and tent lightly with foil for about 5 minutes or a bit more. I find the filet temperature will rise about 3-5 degrees while resting.
The rest after cooking is very important since it will allow the fluid that escapes the cells during cooking to migrate back into the cells and make for a moist and tender filet.
Remember, you can cook a filet a bit more later if needed, but you can not uncook an overcooked filet.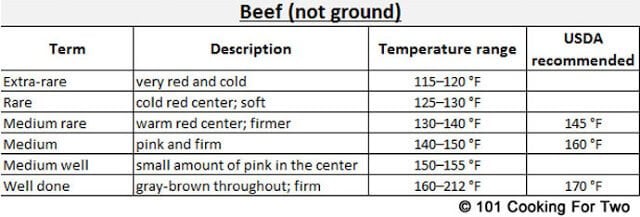
✔️Tips
Seasoning
Just coarse salt and pepper will do—that is enough. We love garlic and recommend a light coat with 7:2:2 seasoning All Purpose Seasoning – 7:2:1 and 7:2:2. I don’t use any other seasoning and definitely no marinade or sauce.
The timing of the seasoning is important. Salt can pull fluid out of your filets, but it will reabsorb in about 1 hour. The general rule is to salt one hour before cooking or just before cooking. I don’t find much difference between the two, so I generally season just before cooking.
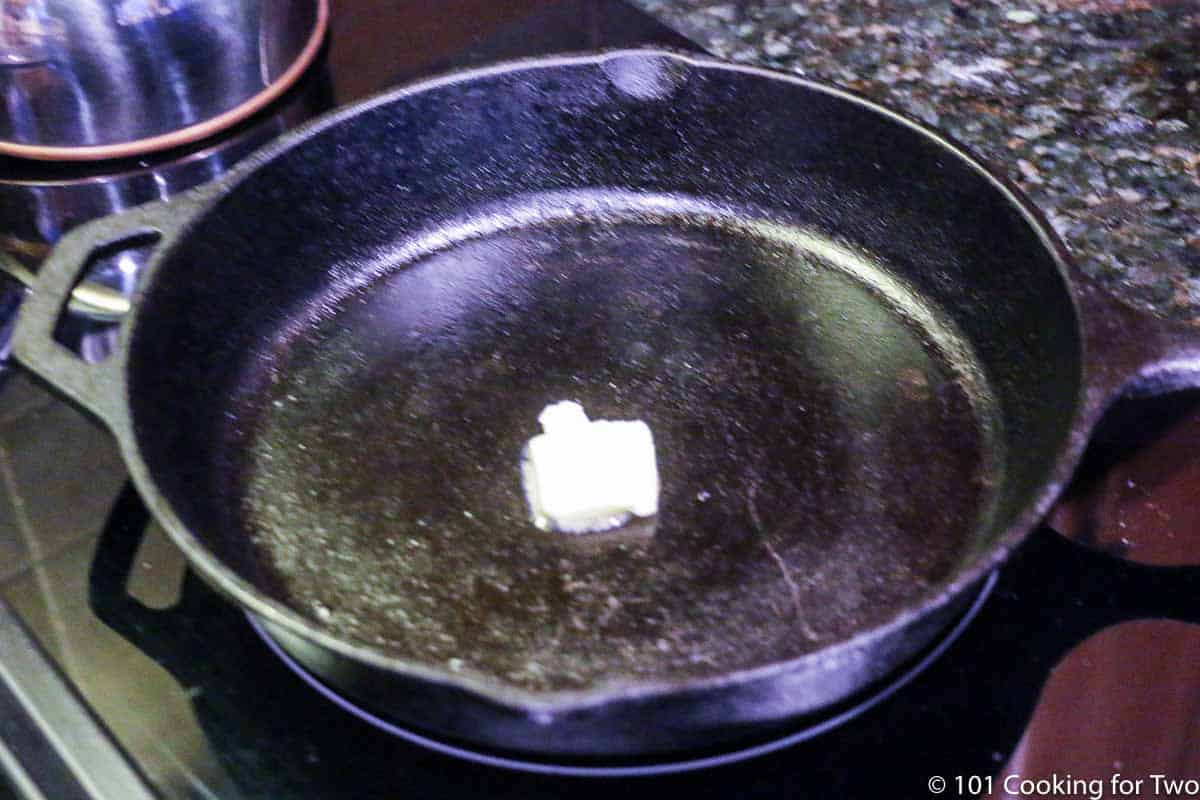
I like butter, so I use butter as an option in the recipe. But butter can smoke if overheated. I don’t seem to have a problem with that, but some people do, especially if their burner is very hot. You can use vegetable oil if you have that issue.
The Pan
The pan does not have to be cast iron, but it is a great choice if you have it since a heavy skillet is preferred. But, any oven-safe pan that can move from stovetop to oven will do.
If you don’t have that, sear in a stovetop pan and move to a different oven-safe pan to finish. If using the later technique, I would preheat the oven pan with the oven, so the steak goes in a hot pan.
Searing
The real secret to cooking the perfect filet mignon is to initially pan sear to get some Maillard reaction (tasty browning) followed by finishing in a 400°-425° oven to the final temperature you want. It is that simple—really.
📖Steak Recipes
How to Grill a Strip Steak on a Gas Grill
How to Grill a Filet Mignon on a Gas Grill
Pan Seared Oven Roasted Strip Steak
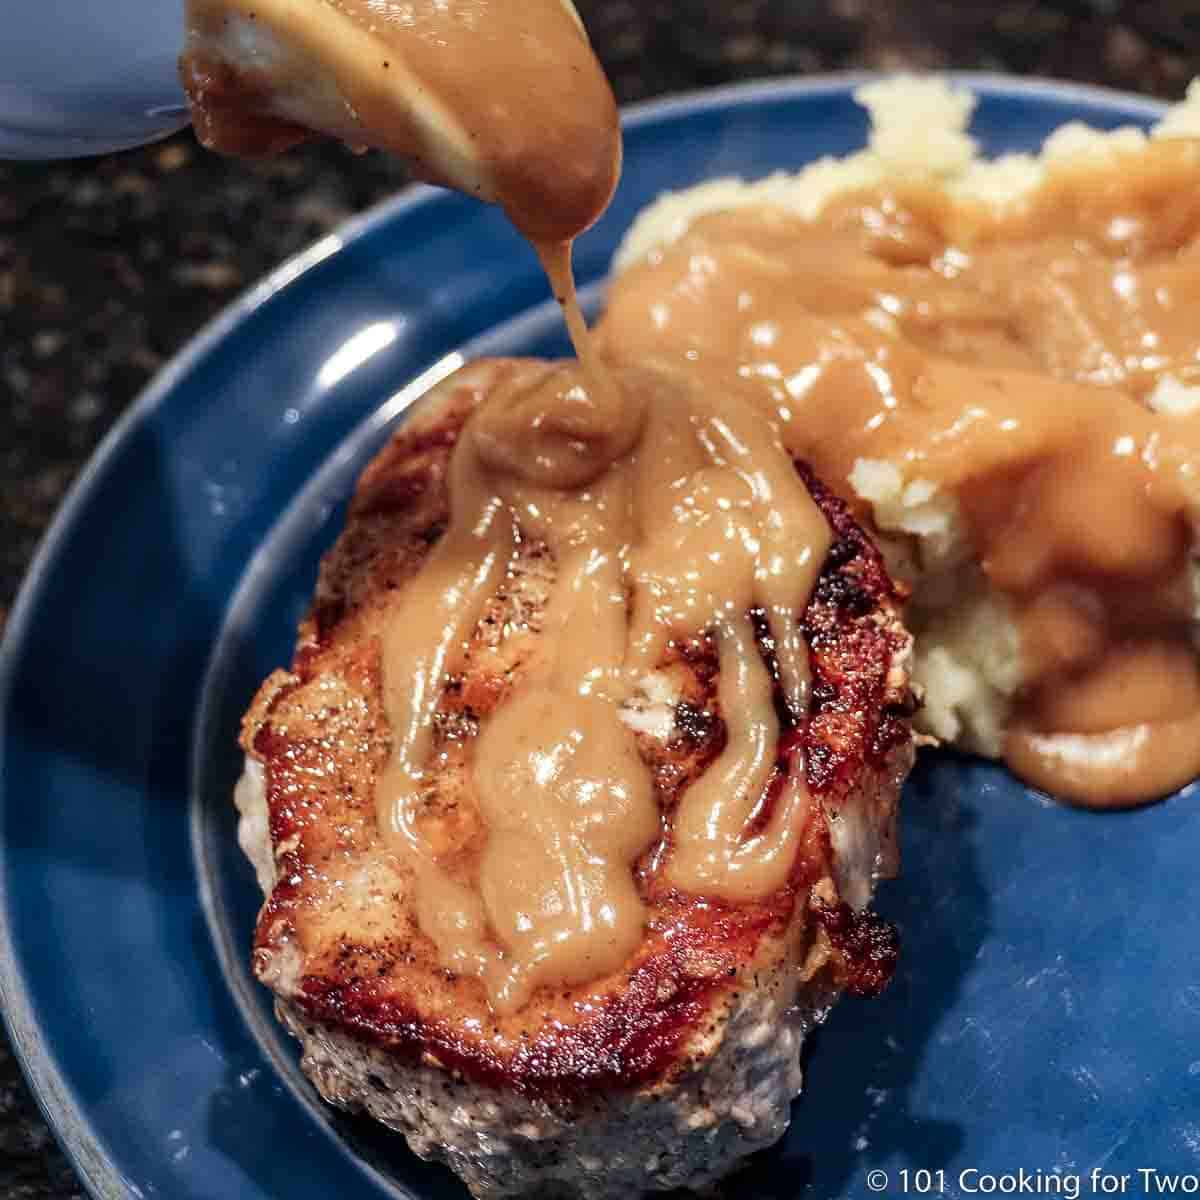
Garlic Filet Mignon![]()
![]()
🖼️Instructions
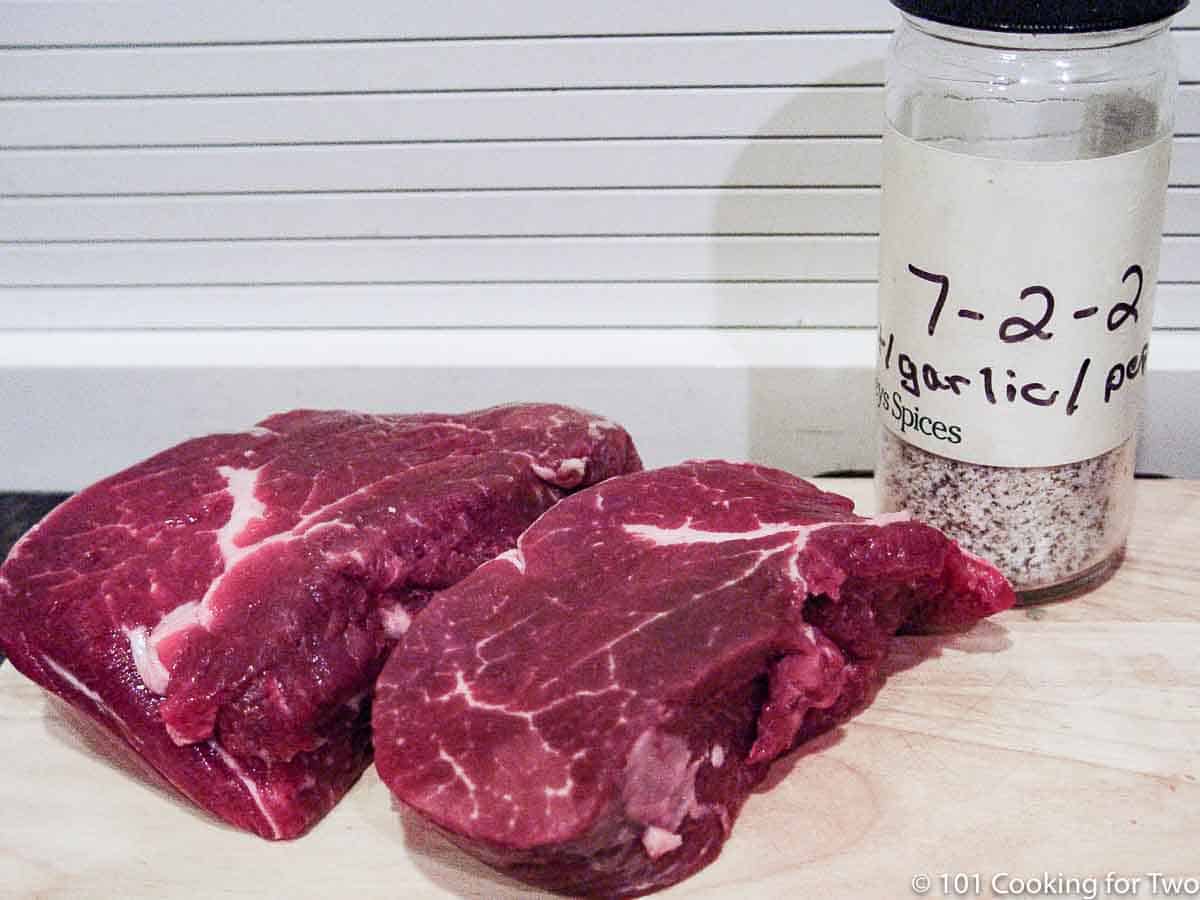
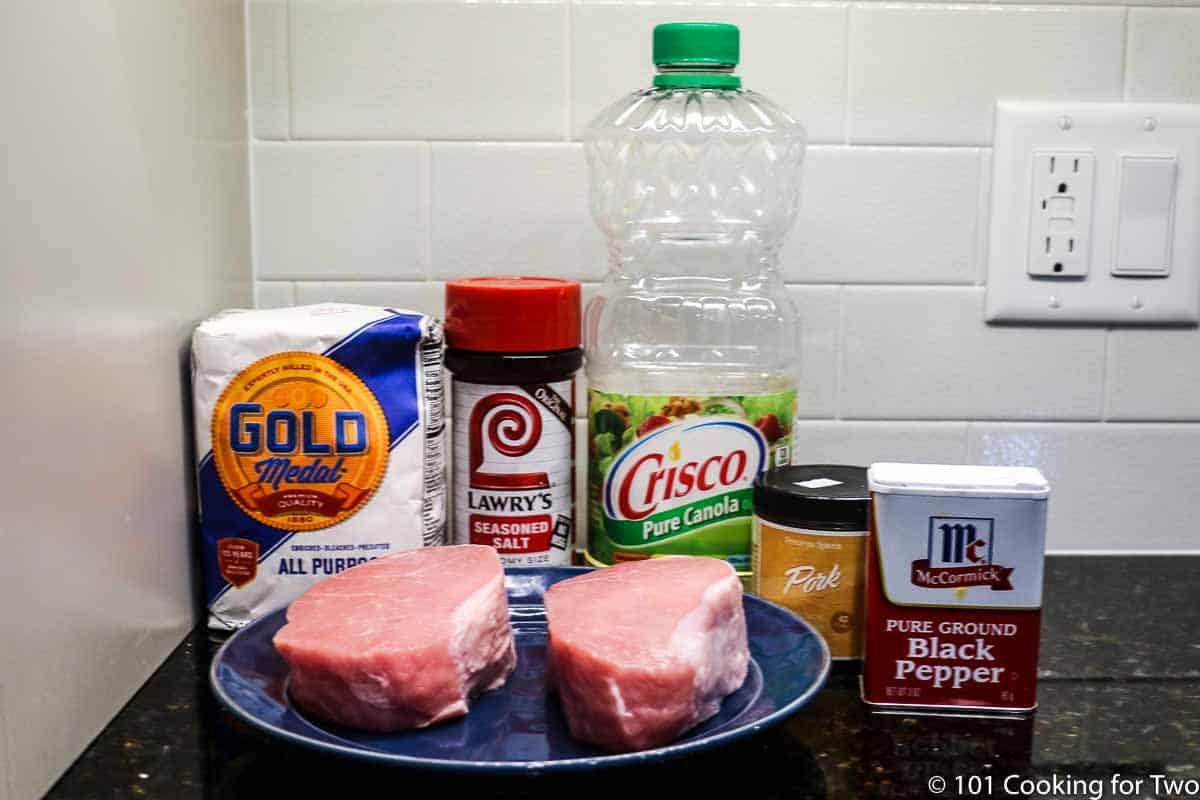
Preheat oven to 400° convection (or 425° conventional oven). Start with 1 1/2 thick filets about 8 oz each and trimmed well. Remove any silver skin. If you have time, rest at room temperature for 30-60 minutes.
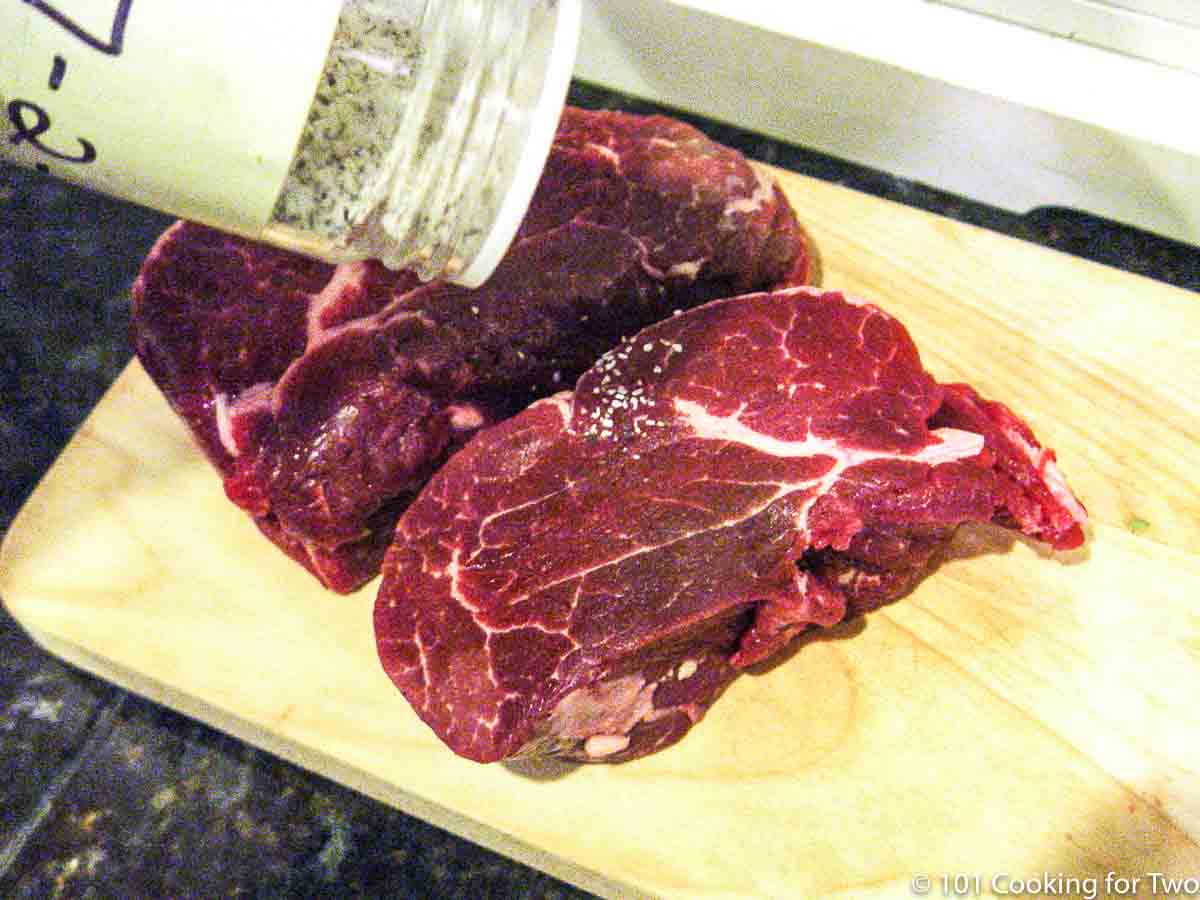
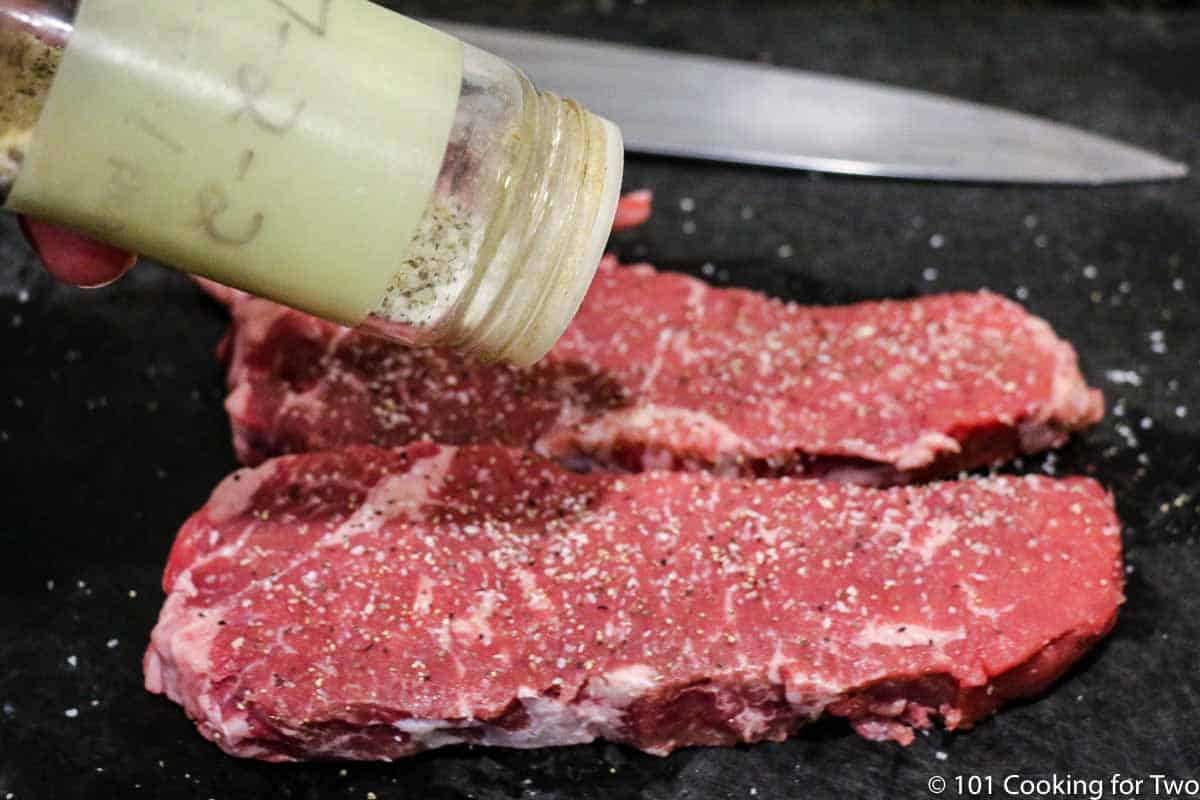
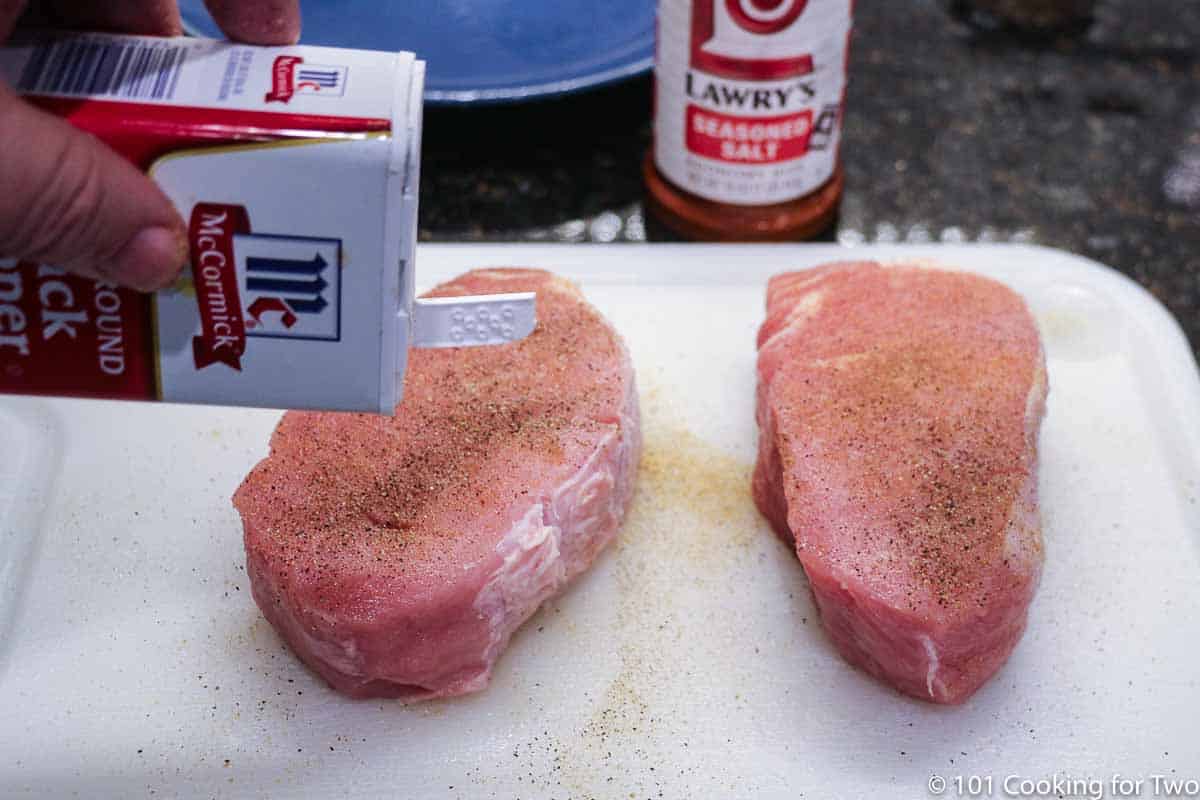
Season all sides to taste. Just kosher salt and pepper will be fine. I use my 7:2:2 (see my post on making 7:2:2). Season just before cooking or 1 hour before cooking to prevent the salt from pulling fluid out of the meat.
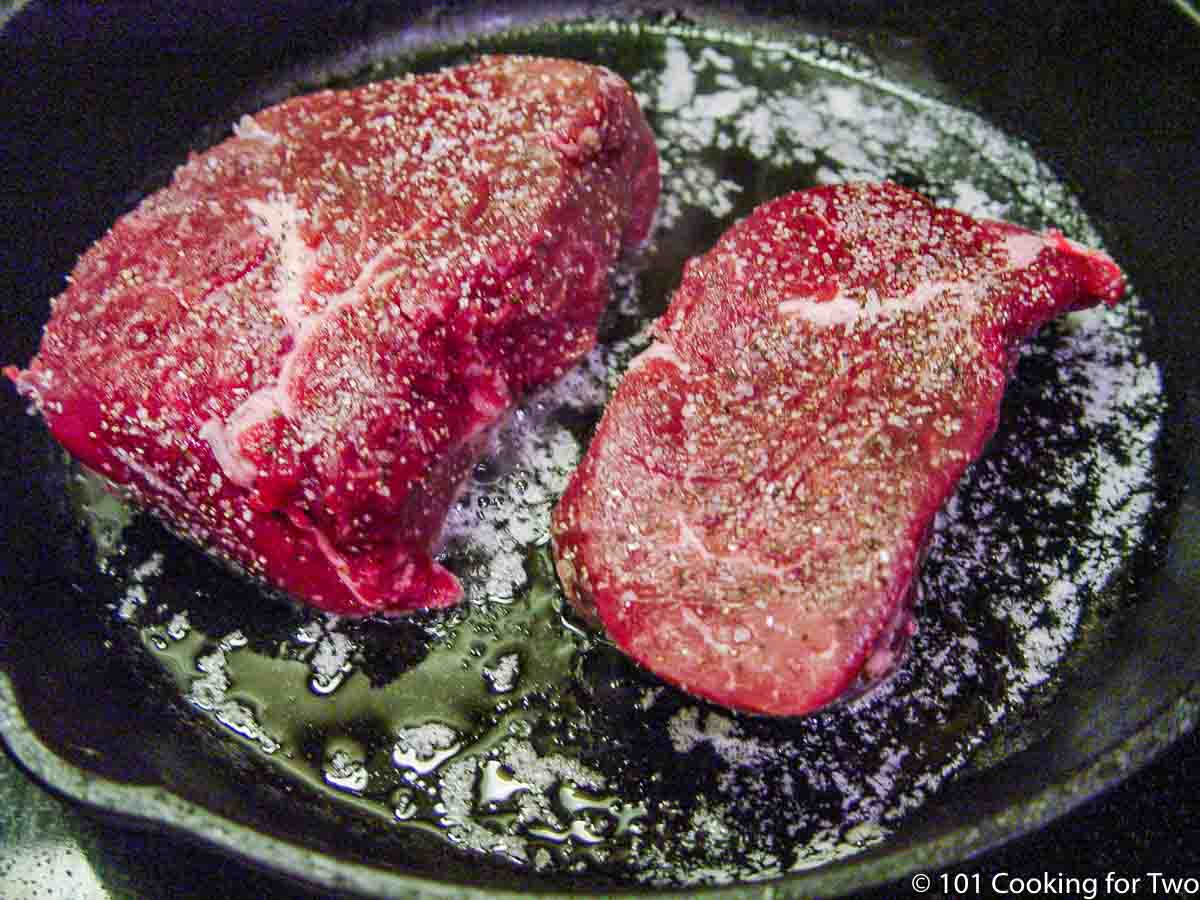
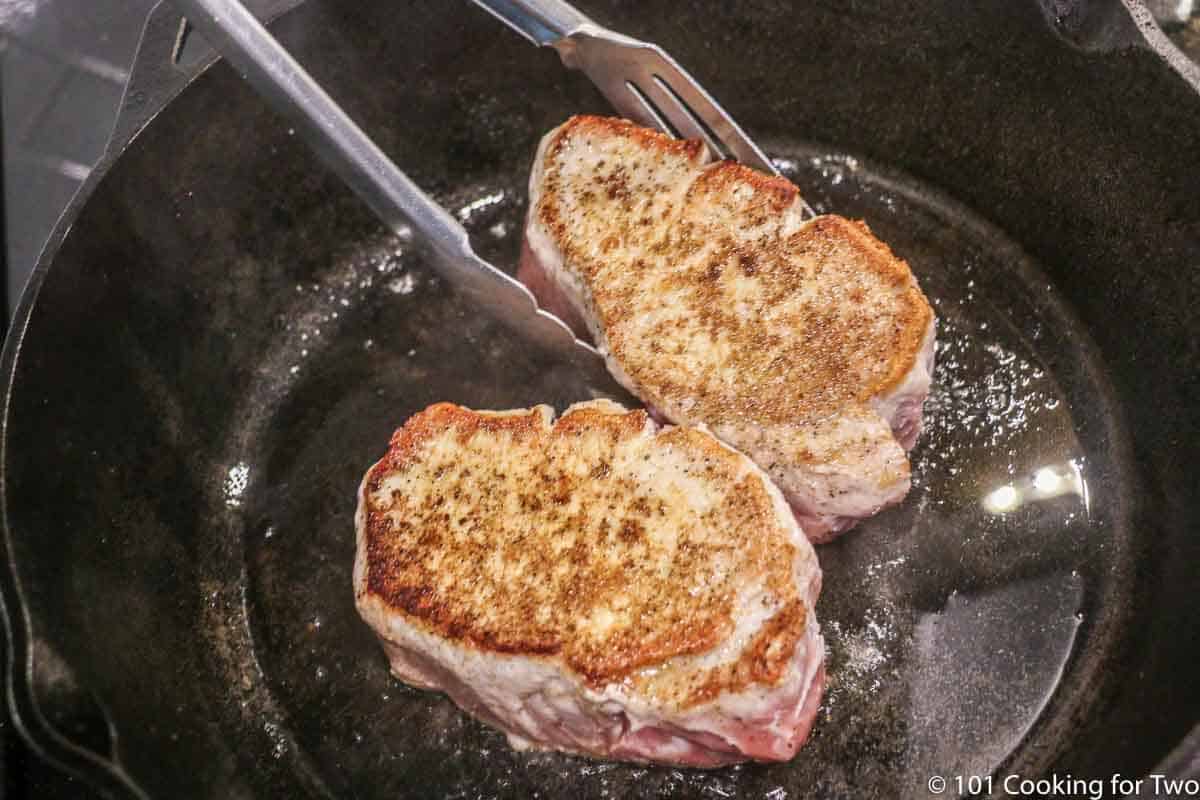
In an oven-safe pan (I love my 10-inch cast iron) over medium-high heat melt 1 tablespoon of butter or use oil. When hot, sear both sides of the filets for 2-3 minutes. Sear, flip, sear, and final flip before going to the oven.
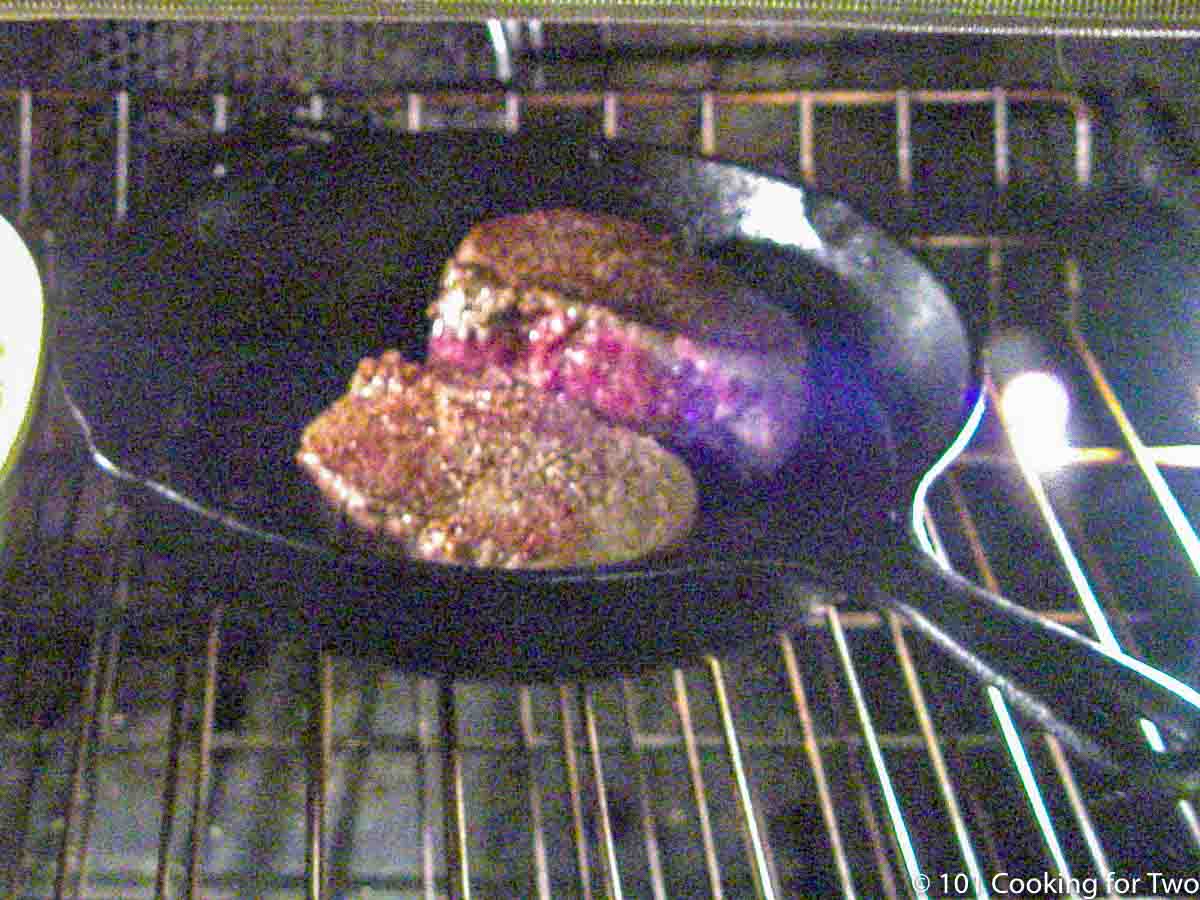
Transfer to the preheated oven. Cook to your desired done temperature minus about 3-5 degrees. For me, medium-rare is always about 8-10 minutes to get an internal temp of about 135°- 140°. If you want rare, check the internal temperature when the meat goes into the oven.
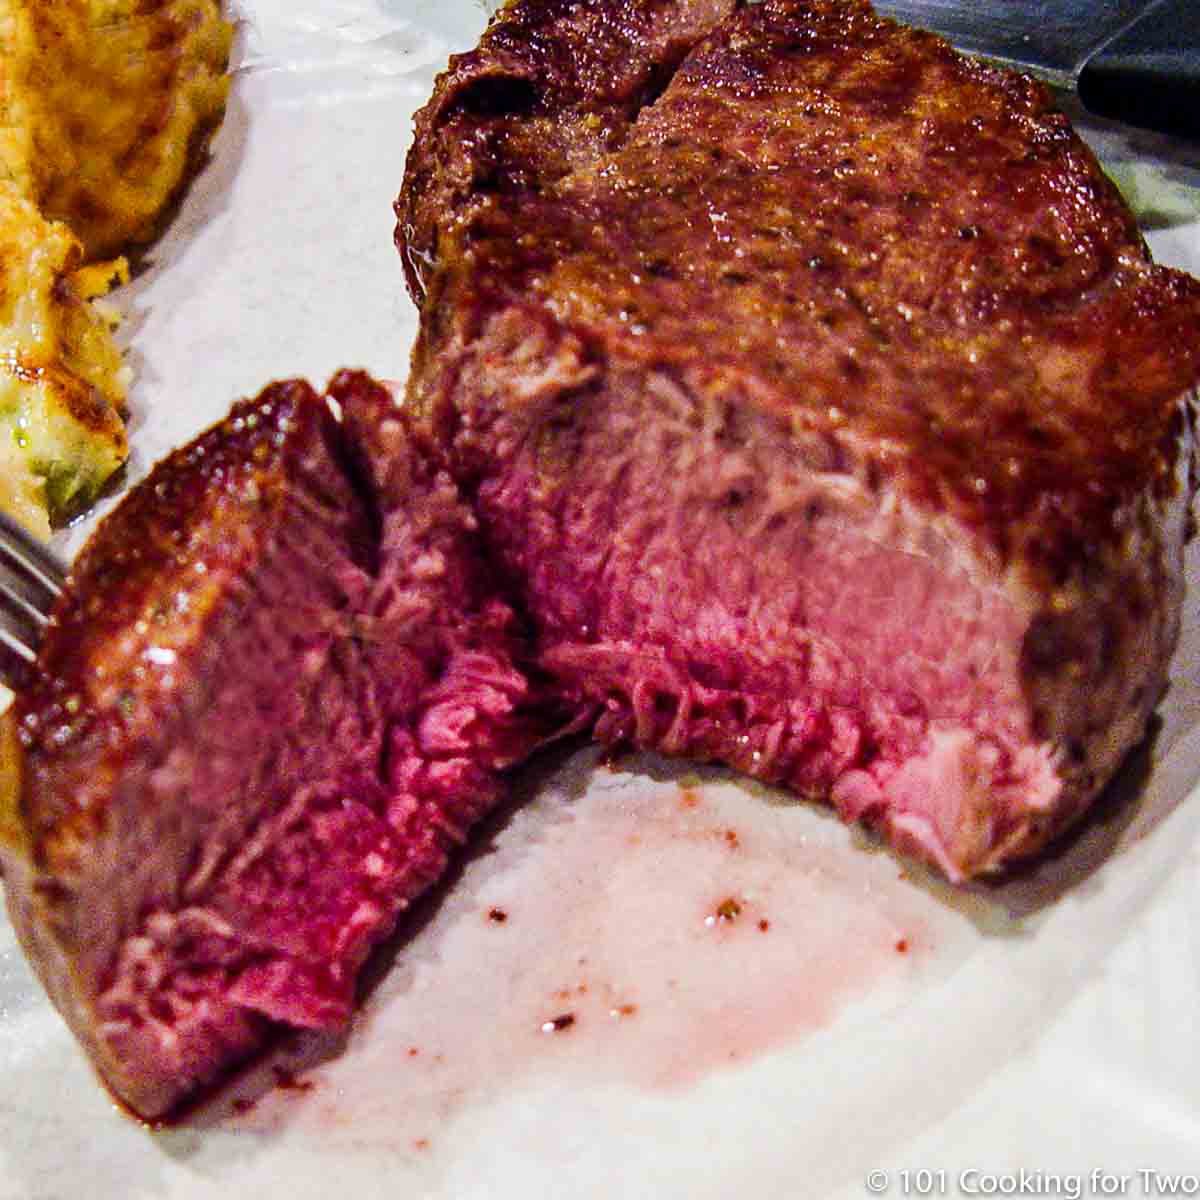
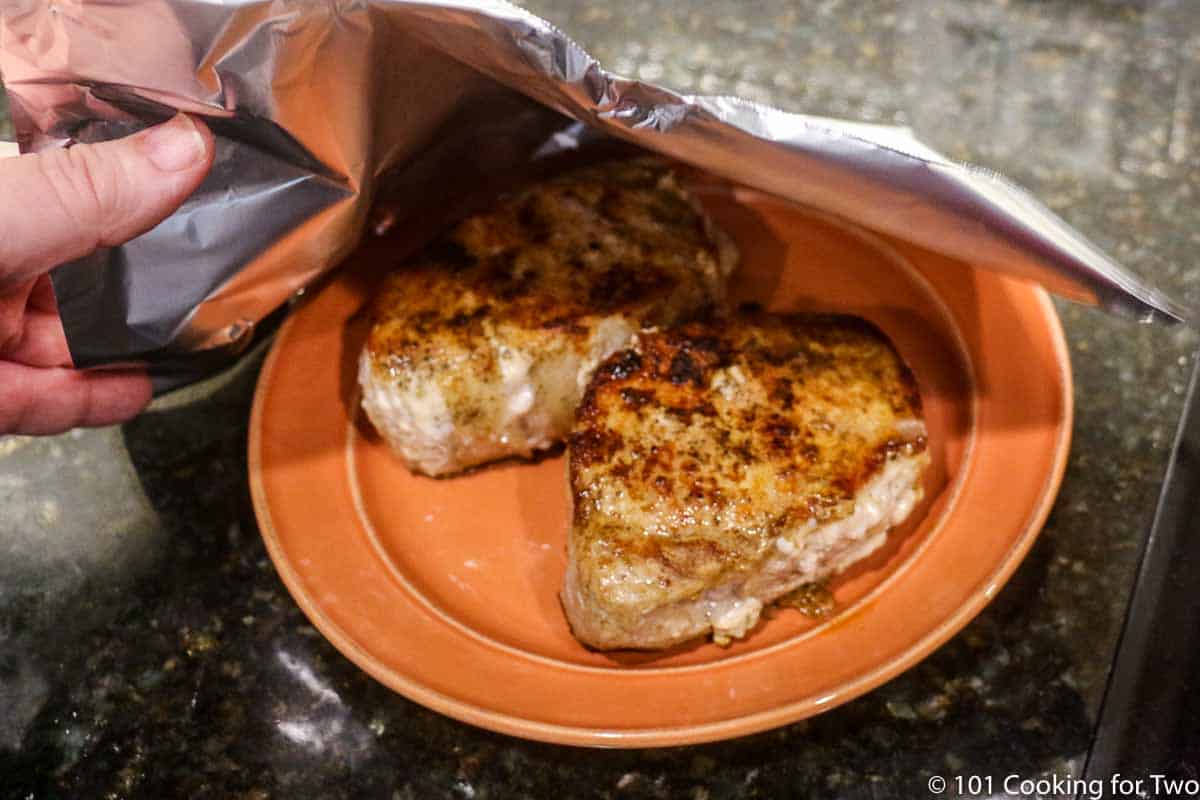
Remove from pan and tent lightly with foil on a plate and let rest for 3-5 minutes before cutting. It needs to absorb fluids internally, and the temperature will rise a few more degrees during the rest.
![]()
![]()
Do you want more recipes from 101 Cooking for Two? Sign up for the newsletter and get all posts delivered straight to your inbox!![]()
📖 Recipe

Pan Seared Oven Roasted Filet Mignon
Learn how to cook filet mignon at home and get the best results like the top restaurants. Surprisingly easy with a quick sear on the stovetop, then bake to get your perfect filet. Great reliable results every time that is perfect for two or a crowd.
Ingredients
Instructions
-
Preheat oven to 400° convection (or 425° conventional). Start with filets about 1 1/2 inch thick of about 8 oz each and trimmed well.
-
Season all sides to taste. Just kosher salt and pepper will be fine. I use my 7:2:2 (see my post on making 7:2:2).
-
In an oven-safe pan (I love my 10-inch cast iron) over medium-high heat melt 1 tablespoon of butter or use oil. When hot, sear both sides of the filets for 2-3 minutes. Sear, flip, sear, and final flip before going to the oven. Get to about the final color you want.
-
Transfer to the preheated oven. Cook to your desired done temperature minus about 3-5 degrees. For me, medium-rare is always about 8-10 minutes to get an internal temp of about 135°- 140°. If you want rare, check the internal temperature when the meat goes into the oven.
-
I suggest checking the internal temperature after 4-5 minutes in the oven to see where you are on the internal temperature. Time can vary some due to the exact temperature of the meat to start, the exact temperature of the oven, the pan used, and the thickness of the meat. Rare may be only a few minutes in the oven so beware if you want rare. DO NOT COOK BY TIME ALONE, YOU MUST CHECK INTERNAL TEMPERATURE. Times are provided to help planning only.
-
Remove from pan and tent lightly with foil on a plate and let rest for 3-5 minutes before cutting. It needs to absorb fluids internally and the temperature will rise a few more degrees during the rest.
Recipe Notes
Pro Tips:
- An 8 oz filet will be about 2-3 inches diameter and close to 1 1/2 inches thick. Quality matters a lot with filet.
- Resting at room temperature will help you get the final internal temperature you want without drying the surface of the meat.
- Try to season one hour before cooking or just before cooking.
- You may use butter or oil in the pan. Butter has a lower smoke point, but I have never had an issue.
- Pan should be hot before starting to sear.
- Sear each side to approximately the final color you want and do a final flip just before going in the oven.
- If you want rare and especially if the filet is thinner, check the temperature when it goes in the oven.
- I suggest checking the internal temperature of the filet about 4-5 minutes after going into the oven.
- There is lots of variability on the time here. The thickness of the meat, the exact starting temperature, the stovetop, amount of searing, exact oven temps, and the pan. All very good reasons not to go by time. Time estimates is given as guides for time management.
- PLEASE USE AN INSTANT READ THERMOMETER. DO NOT COOK BY TIME ALONE; YOU MUST CHECK INTERNAL TEMPERATURE. (Third time in a row.)
- Times are provided to help planning only. You are responsible if you overcook it. You can always cook it a bit more later but you can not uncook an overcooked filet.
- Remove from the oven a few degrees below your final desired temperature. It will rise a few degrees when tented.
- Let rest tented for 5 minutes before serving.
TO ADJUST THE RECIPE SIZE:You may adjust the number of servings in this recipe card under servings. This does the math for the ingredients for you. BUT it does NOT adjust the text of the instructions. So you need to do that yourself.
Nutrition
Calories : 347kcalProtein : 22gFat : 28gSaturated Fat : 9gPolyunsaturated Fat : 2gMonounsaturated Fat : 14gCholesterol : 76mgSodium : 616mgPotassium : 346mgCalcium : 40mgIron : 1.4mg
Serving size is my estimate of a normal size unless stated otherwise. The number of servings per recipe is stated above. This is home cooking, and there are many variables. All nutritional information are estimates and may vary from your actual results. To taste ingredients such as salt will be my estimate of the average used.
Editor’s Note: Originally Published March 10, 2012. Updated with expanded options, refreshed photos, and a table of contents to help navigation.