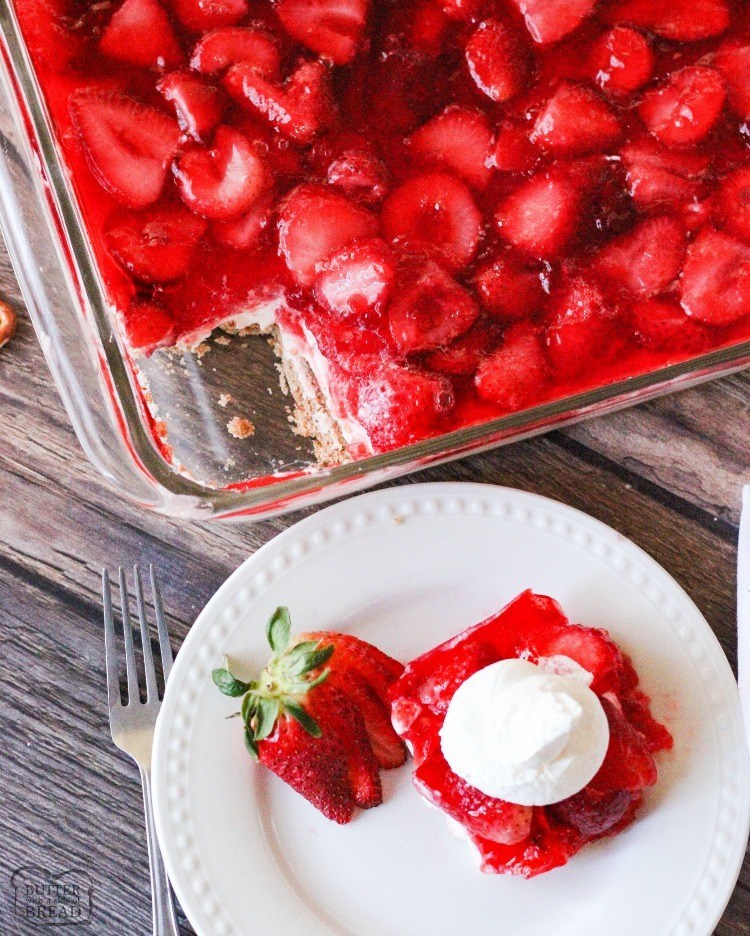
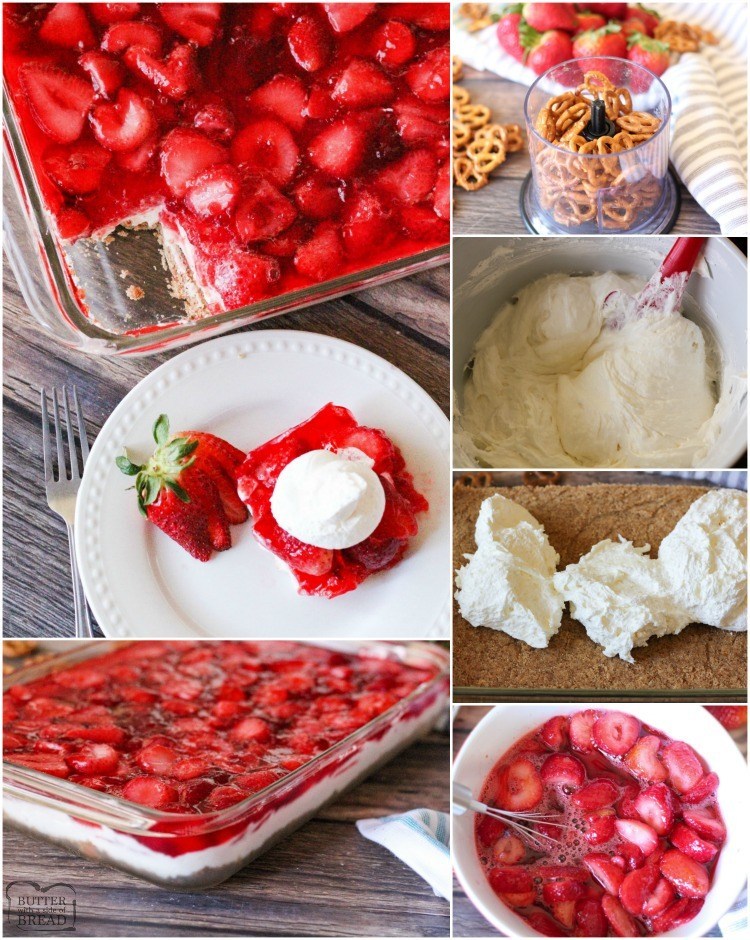
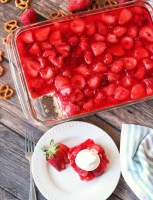
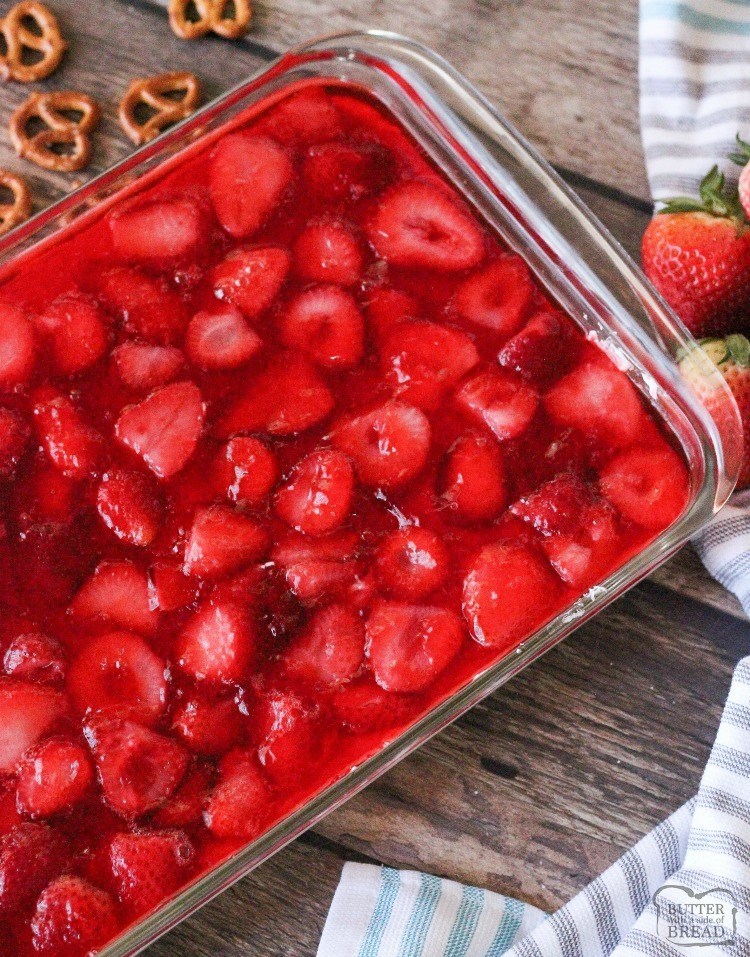
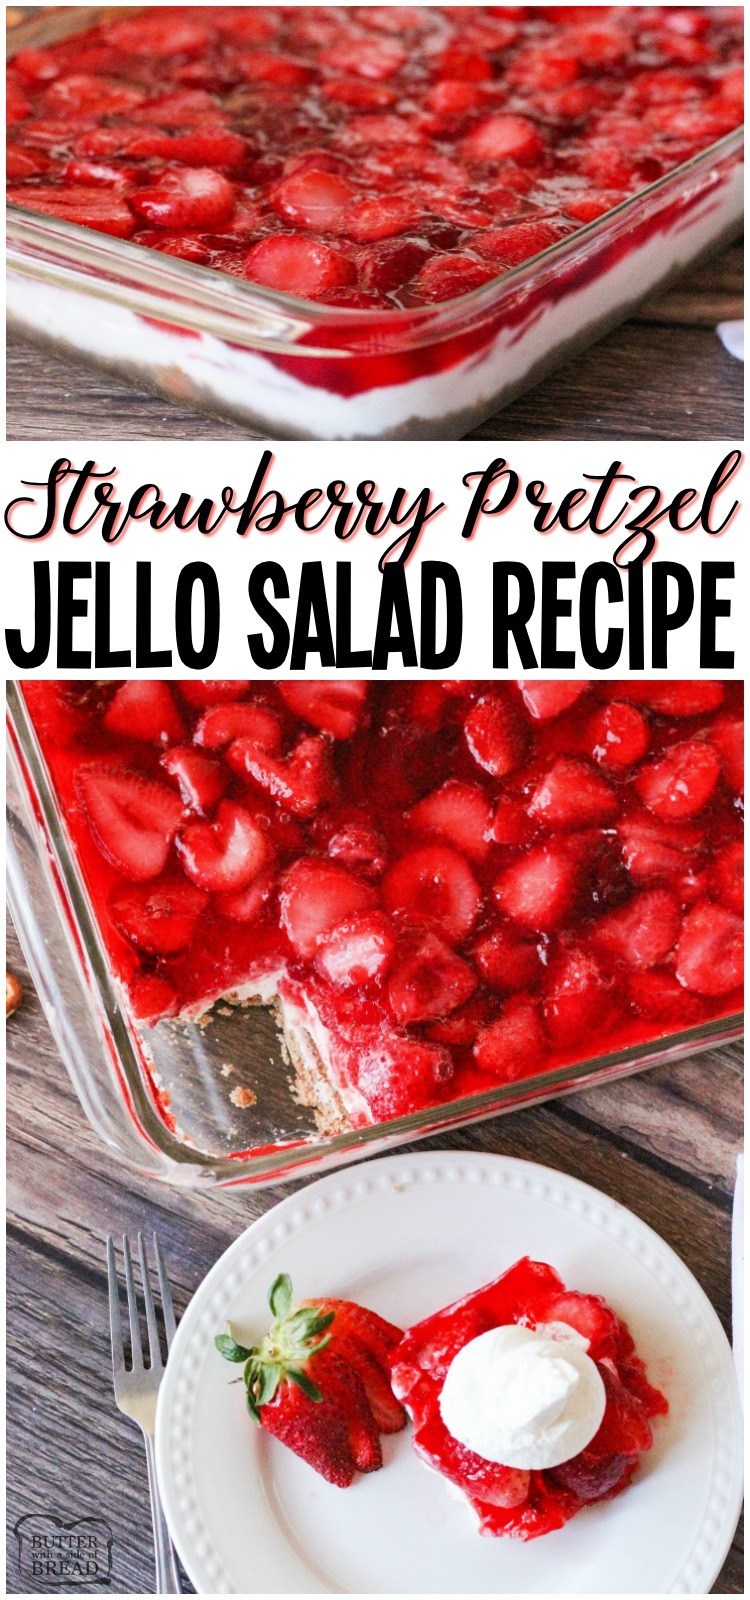
Gorgeous Strawberry Pretzel Salad layered with a buttery pretzel crust, cream cheese whipped topping, strawberries and jello. A simple sweet side dish that is always the first to go!
 Hey there! Sarah again from Feeding Your Fam here to share a delicious Strawberry Pretzel Salad Recipe with you! Are you in charge of bringing a fruity side to your next family party or neighborhood get together? Look no further! This Strawberry Pretzel Salad will be the star of the dinner table. I promise you both old and young will devour this tasty dish!!
How to Make Strawberry Pretzel Salad
This Strawberry Pretzel Salad Recipe is so simple to put together! The first step is to crush up some pretzels for the crust. I find that the pretzel twists work great for the crust, but use what you have. If you just have pretzels sticks, crush those babies up! The easiest way to bring all of the crust ingredients together quick and easy is with a food processor. Simply crush up the pretzels until you have 2 cups, add in the sugar and butter and process until a nice crumbly mixture is made.
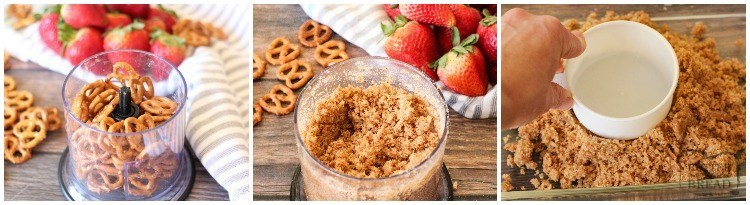 If you don’t have a food processor an easy way to make this crust is with a large zip top bag. Fill it with your pretzels and crush with a rolling pin. Add the sugar and butter and mix with your hands until the crust has formed.
In the bottom of a greased 9 x 13 inch baking dish lay down the first layer of the pretzel crust. A simple tip to get the pretzel crust to lay evenly in the pan is to take the backside of a measuring cup and press down the crust until an even layer is filled in the bottom of the pan. Bake the crust until it is golden brown.
 Pretzel Jello Salad filling
 Pretzel Jello Salad filling
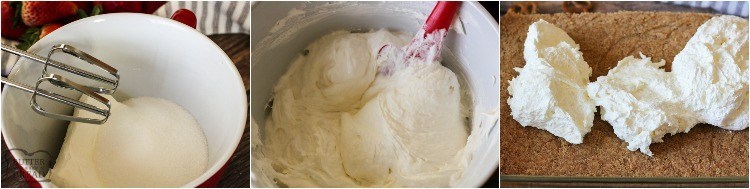
The next delicious layer to this Strawberry Pretzel Salad is the tastiest!! Combine a block of softened cream cheese, sugar and whipped topping. This process is best when the sugar and cream cheese are mixed together first with either a hand mixer or stand mixer. Once a smooth mixture is made, the whipped topping can be folded in until this layer is well combined and ready to layer on the cooled pretzel crust. Spread the cream cheese layer all the way to the edges creating a seal so the Jello layer won’t bleed through.
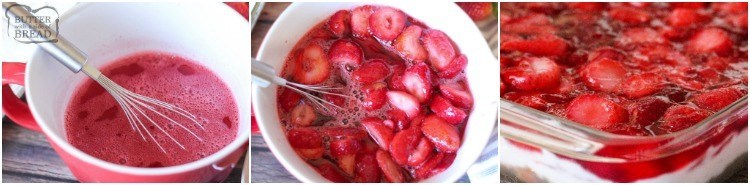
Lastly, comes the Jello and strawberries. For this Strawberry Pretzel Salad Recipe, you will need one large box of Jello and frozen strawberries. I like to use the sliced strawberries, they are easier to work with and lay flat as the top layer. Combine the Jello and boiling water until the Jello has fully dissolved, then add in the frozen strawberries and stir until the strawberries get a little soft.
Last layer tip- pour the jello onto the cream cheese layer over a slotted spoon to prevent craters forming in the cream cheese. Slowly cover the cream cheese layer with the Jello and then add on the strawberries.
Refrigerate until the Jello sets, about 2-3 hours. Slice and enjoy!!!
Ingredients Needed for Strawberry Pretzel Salad
 Ingredients Needed for Strawberry Pretzel Salad
Strawberry Pretzel Salad really only needs a few simple ingredients!
- Pretzels
- Butter
- Sugar
- Whipped topping
- Cream cheese
- Strawberry Jello
- Frozen Strawberries
I hope you enjoy sharing this Strawberry Pretzel Salad with those you love!! It is sure to become one they request you to bring to every get together!!
Recipe for Strawberry Pretzel Salad
Crust:
–2 C crushed pretzels
–¾ C melted butter
–¼ C sugar
Topping:
–8 oz. cream cheese
–1 C sugar
–12 oz whipped topping
–1 (6 oz) Large box strawberry Jello
–2 c boiling water
–4 c frozen sliced strawberries
Step-by-Step Instructions for making Strawberry Jello Pretzel Salad
 Step-by-Step Instructions for making Strawberry Jello Pretzel Salad
- Preheat oven to 400ºF and prepare a 9 x 13 inch baking dish by coating with cooking spray.
- In a food processor pulse pretzels until 2 cups crushed. Add melted butter and sugar to the processor and pulse until finely crushed. Pour the crust mixture into the prepared baking dish. With the back of a measuring cup, press the crust until an even layer is formed in the pan. Bake the crust for 8 minutes until golden. Remove from oven and allow to cool before adding the whipped cream cheese layer.
- In a mixing bowl combing the softened cream cheese and sugar. Whip to combine with a hand mixer. Fold in the Cool Whip and spread over the cooled pretzel crust making sure to go completely to the edges to seal the crust.
- In a large mixing bowl combine the Jello and boiling water, mix until Jello is dissolved. Add in the frozen strawberries and stir for 1 minute. The Jello will begin to thicken. Carefully pour the Jello mixture over a slotted spoon evenly onto the cream cheese layer. Layer the strawberries.
- Set in fridge until firm, 2-3 hours.
Strawberry Pretzel Salad
Gorgeous Strawberry Pretzel Salad layered with a buttery pretzel crust, cream cheese whipped topping, strawberries and jello. A simple sweet side dish that is always the first to go!
Print Pin Rate
Prep Time: 20 minutes
Cook Time: 8 minutes
Total Time: 30 minutes
Servings: 15
Calories: 301kcal
Ingredients
Crust:
- 2 C crushed pretzels
- ¾ C melted butter
- ¼ C sugar
Filling:
- 8 oz. cream cheese
- 1 C sugar
- 12 oz whipped topping
Topping:
- 1 6 oz Large box strawberry Jello
- 2 c boiling water
- 4 c frozen sliced strawberries
Instructions
-
Preheat oven to 400ºF and prepare a 9 x 13 inch baking dish by coating with cooking spray.
-
In a food processor pulse pretzels until 2 cups crushed. Add melted butter and sugar to the processor and pulse until finely crushed. Pour the crust mixture into the prepared baking dish.
-
With the back of a measuring cup, press the crust until an even layer is formed in the pan. Bake the crust for 8 minutes until golden. Remove from oven and allow to cool before adding the whipped cream cheese layer.
-
In a mixing bowl combing the softened cream cheese and sugar. Whip to combine with a hand mixer. Fold in the whipped topping and spread over the cooled pretzel crust making sure to go completely to the edges to seal the crust.
-
In a large mixing bowl combine the Jello and boiling water, mix until Jello is dissolved. Add in the frozen strawberries and stir for 1 minute. The Jello will begin to thicken.
-
Carefully pour the Jello mixture over a slotted spoon evenly onto the cream cheese layer. Spread the strawberries evenly over the top. Set in fridge until firm, 2-3 hours.
Nutrition
Calories: 301kcal | Carbohydrates: 34g | Protein: 3g | Fat: 17g | Saturated Fat: 11g | Cholesterol: 41mg | Sodium: 283mg | Potassium: 119mg | Fiber: 1g | Sugar: 24g | Vitamin A: 10.2% | Vitamin C: 27.4% | Calcium: 4.3% | Iron: 4.4%
Can you use real whipped cream instead?
If you can’t find Cool Whip, which is the brand name of whipped topping where you live or you prefer not to use it in recipes, you can use stabilized whipped cream instead. If you just use regular whipped cream, the consistency will be too light and the cream will not hold up very well when mixed into the jello salad. It’s very simple to make your own stabilized whipped cream and it just takes a few minutes!
How do you make stabilized whipped cream?
To make stabilized whipped cream, you will need the following ingredients:
- 4 ounces of cream cheese (softened to room temperature)
- 1/3 cup powdered sugar
- 1 tsp vanilla
- 1 cup heavy whipping cream
- Beat the cream cheese with the powdered sugar and vanilla until soft and smooth.
- In a separate bowl, beat the whipping cream just until soft peaks form.
- Add the cream cheese mixture to the whipped cream and beat until stiff peaks are formed. Store in the refrigerator until ready to use.
A little tip for making whipped cream faster. Use a metal bowl for whipping the cream and place the bowl in the freezer for about 30 minutes before you make the whipped cream. This will significantly decrease the amount of time that you will need to beat the whipped cream – the process will go much faster!


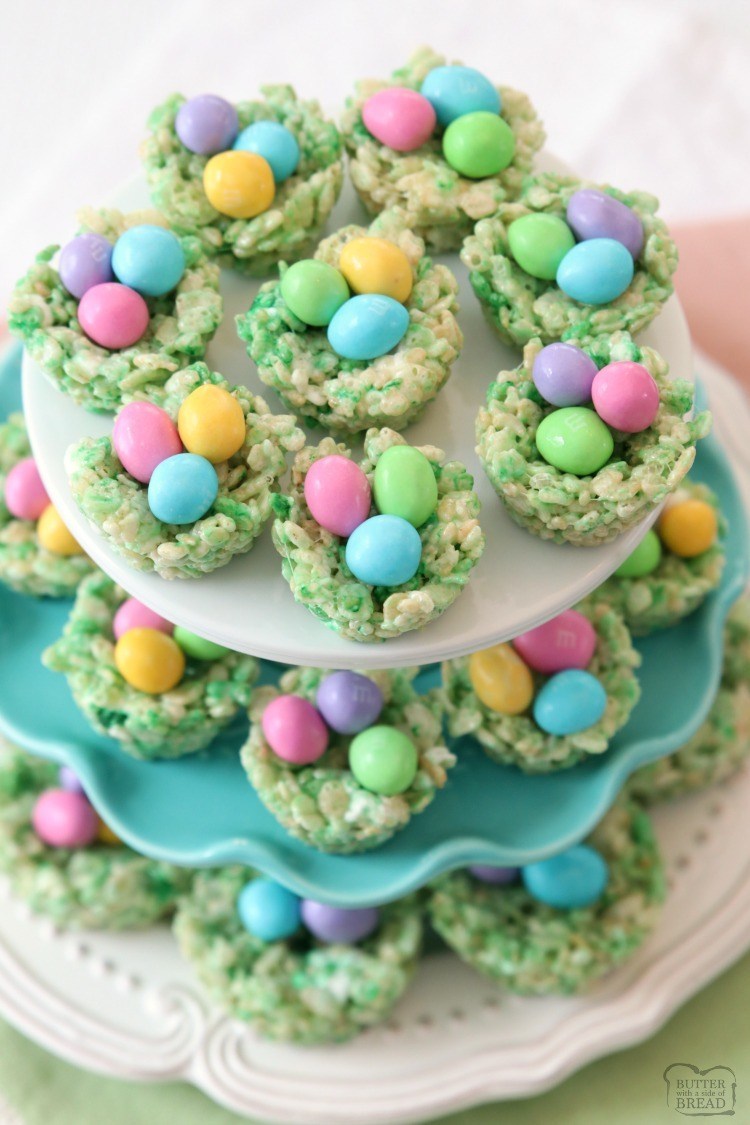
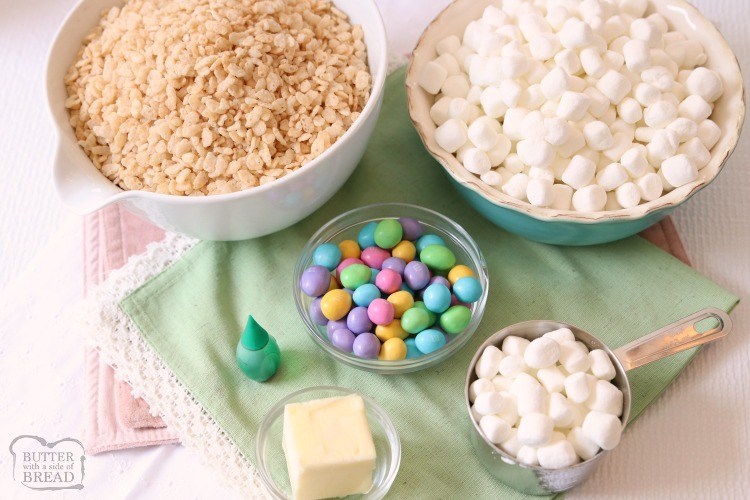 How to make Marshmallow Easter Desserts
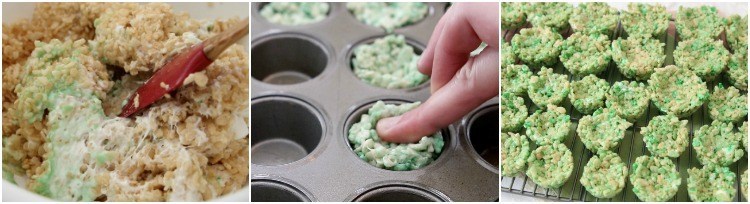
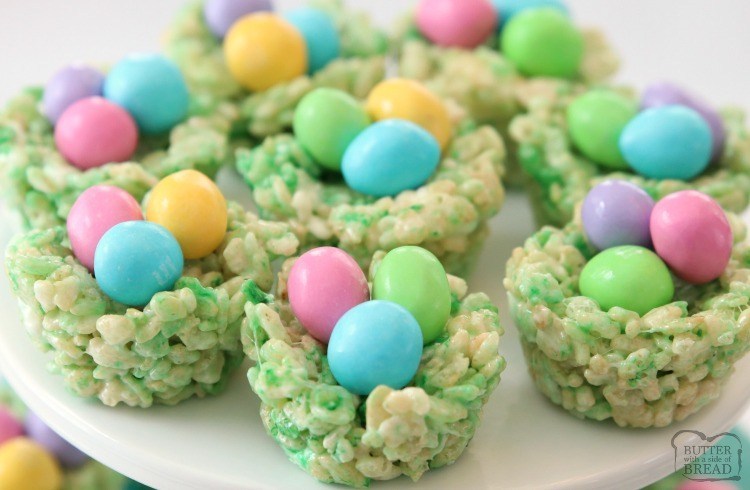
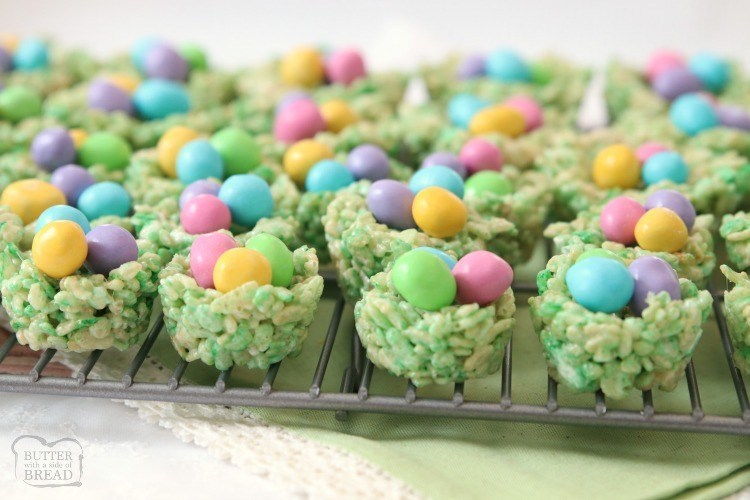 Shape Easter treats
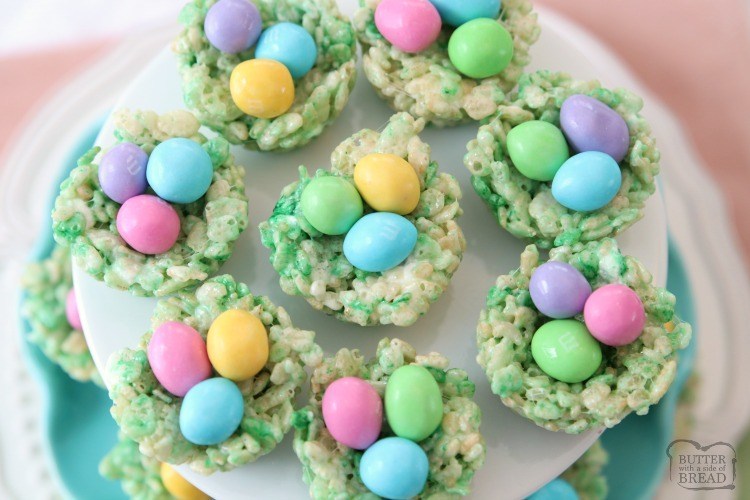 Easter Rice Krispie Treats directions
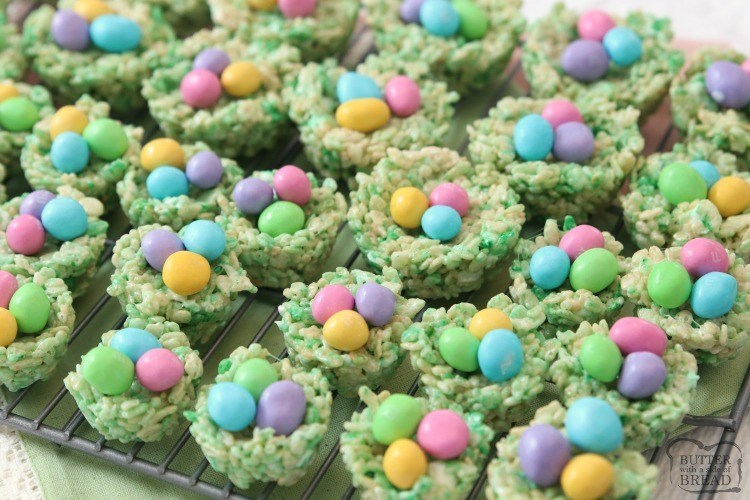

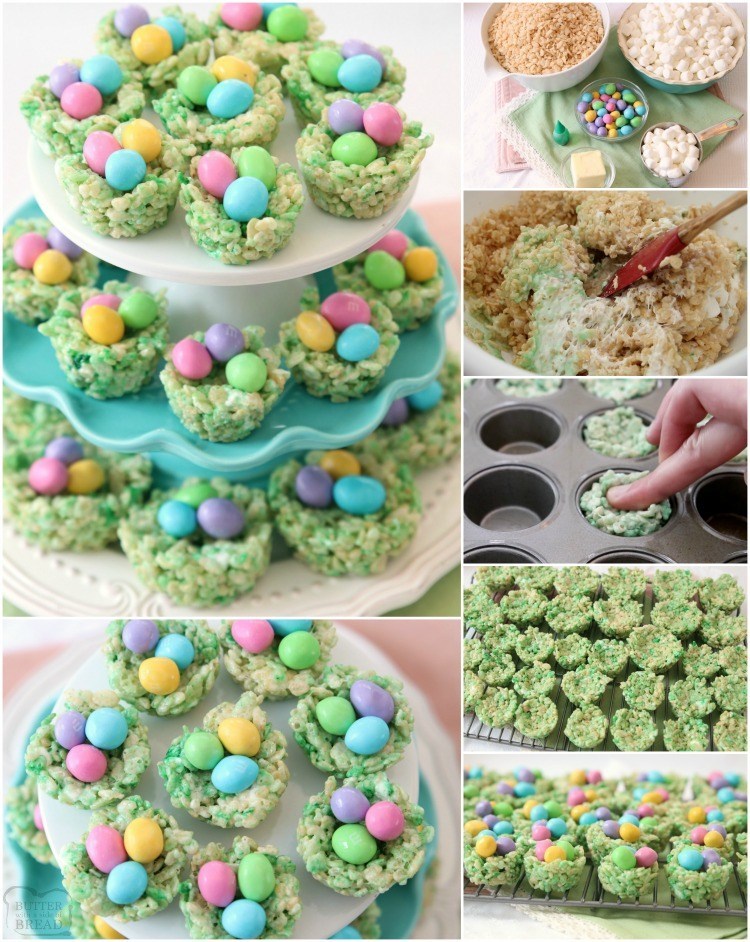
 How do you keep Rice Crispy Treats soft?