An easy to prepare, cost efficient, and gluten-free side dish that offers loads of antioxidants and
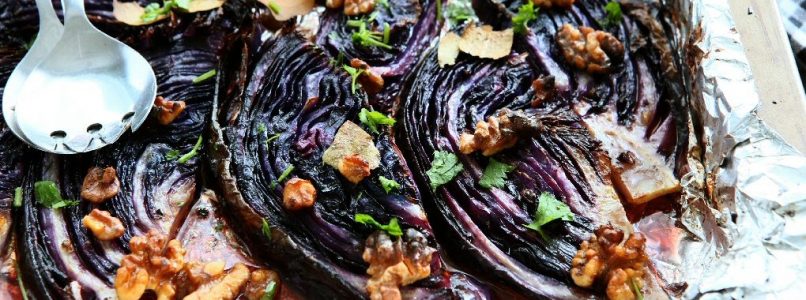
makes a delicious accompaniment to almost any meat or fish dinner, but goes particularly well with Knusprige Schweinshaxe – German Roasted Pork Knuckle. The humble red cabbage is incredibly versatile and brightens up the holiday table with its beautiful, intense purple colour.
Mix beef broth and apple cider vinegar together and pour over the cabbages. Season with black salt and black pepper. Roast in the middle of hot oven for 40-50 minutes or until just tender.
Mix some apples, a pie crust, sugar, flour, cinnamon, and butter, and you get a great tasting basic apple crumb pie. Just follow these easy step by step photo instructions.
Editor’s Note: Originally Published May 18, 2012. Updated with expanded discussion and updated photos.
I seem to use the terms simple and easy a lot, naming my recipes, but I do mean it. I like simple and easy since I rarely do a recipe that takes a lot of time, is complex, or takes too much of my time for too little return.
When I decided to do this recipe, I wanted an everyday basic apple pie — something most people can do if they just look at the steps and love.
I’m not making the pie crust. I have made pie crusts before, and it falls in the too much time for the return category here. The premade ones are what most of use everyday cooks use.
The filling is simple and very good, and I topped with a very nice but again easy crumb topping.
My Rating:
A solid lower 5. There are better apple pies but not by much and not this simple. I see no need to add complexity to a recipe that produces this great of results.
Pro Tips: Recipe Notes for Easy Apple Crumb Pie
Inspired by southerncooking.about.com. I change up a few things and expanded the instruction details.
What Apples to use?
Some good choices are Cortland, Honeycrisp, Northern Spy, Pink Lady, Fuji, Granny Smith, or Ida Red. But I’m not very picky about my apples.
There are many good apples for cooking and a few not so good, but I believe you use what you have. Delicious Apples are probably the only common poor choice.
Pie Pan Size
Standard pie pans are 9 inches in diameter and 1-1/4 inches deep. There are larger 9-1/2- and 10-inch pans, and I have seen bigger, but here I suggest the standard size here.
The Pie Crust
I have made pie crust and consider it a bit too much work for everyday cooking. If you want to make your own, fine, but the premade work fine for a great everyday pie.
Apple Pie Storage
Keep your apple pie covered loosely with foil or plastic wrap. You can generally keep baked apple pie at room temperature for up to two days. If refrigerated, your pie will keep 3-4 days. I do not suggest freezing pie.
Other Pie Suggestions
Easy Fresh Strawberry Pie
Everyday Blueberry Crumb Pie
Or try this easy quick bread: Apple Pie Bread
Preheat oven to 375 and place a cookie sheet on the bottom rack for any overflow.
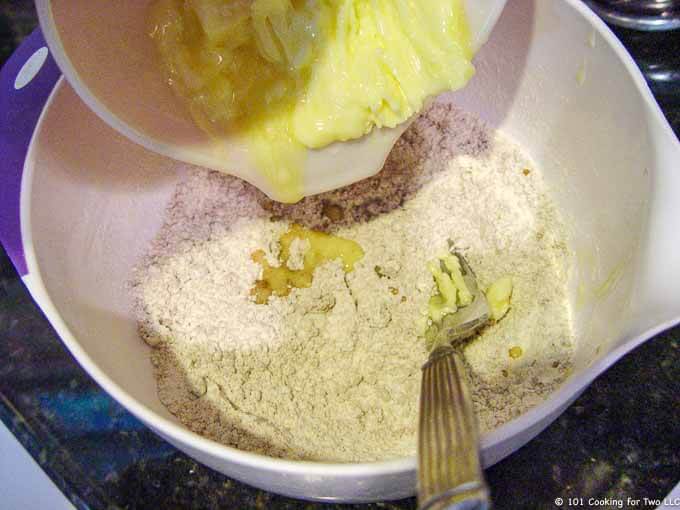
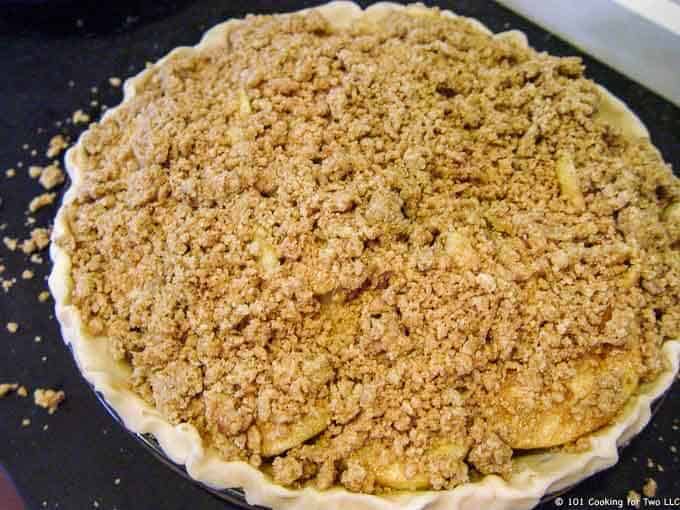
Start with one cup of AP flour in a large mixing bowl. Add 1/2 cup brown sugar, 1/2 teaspoon cinnamon, and 1/8 teaspoon salt. Mix this well. Microwave 1 stick (4oz) of butter in a bowl for 20 seconds on high. It will be partially melted. Stir with a fork and then dribble into the flour mixture.
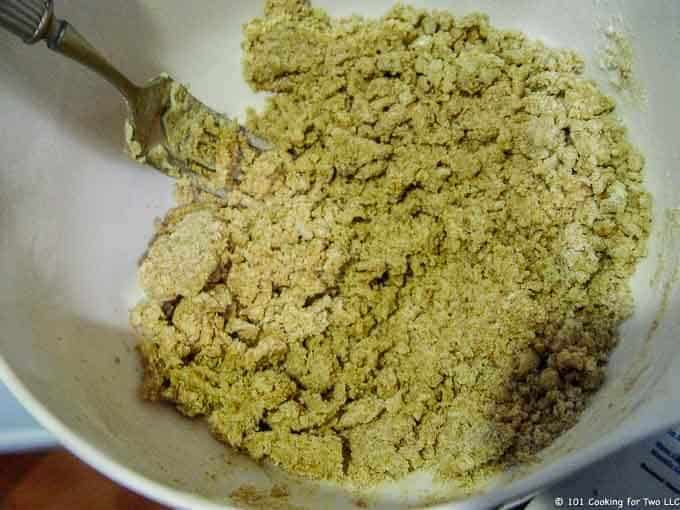
Mix with a fork until well blended. Set aside.
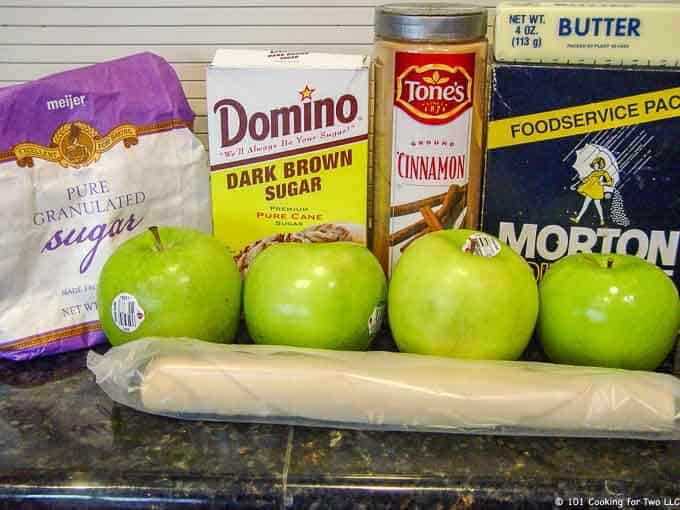
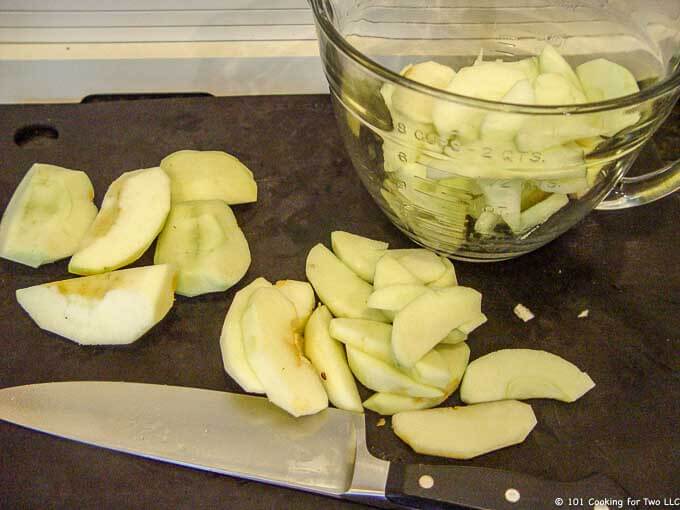
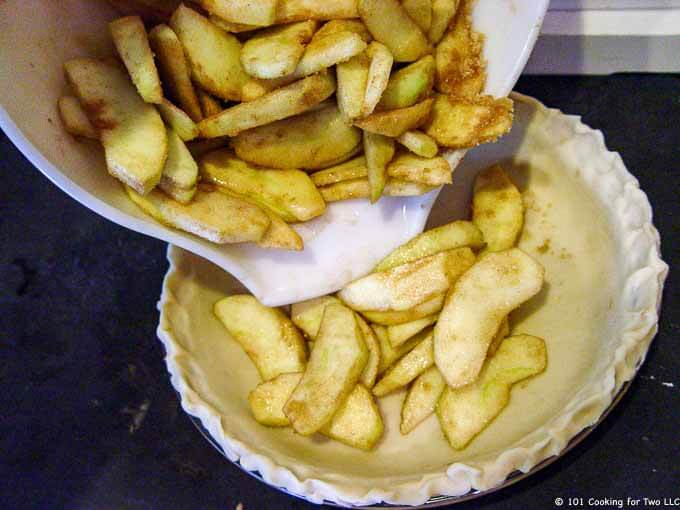
Peel and slice apples. I used four good size Granny Smiths. You need 5-6 cups of apple.
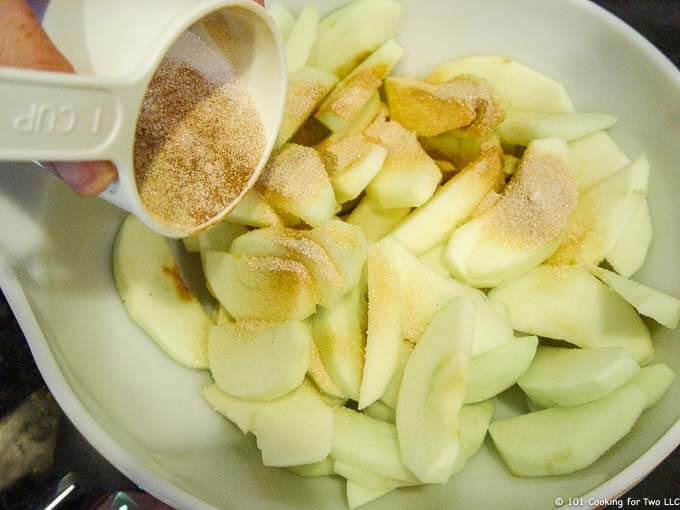
Mix 1/2 cup granulated sugar and 1 teaspoon cinnamon together then sprinkle over the apple slices. Mix well to coat.
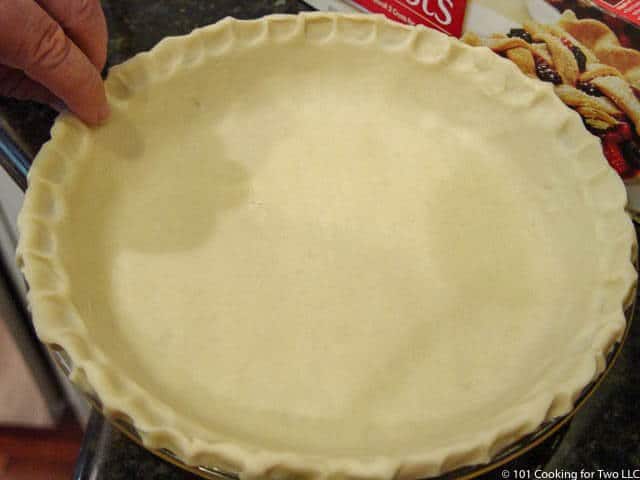
Prepare a pie crust. Either make one or use a Pillsbury refrigerated one and crimp the edges.
Pour apple into a 9-inch uncooked pie crust.
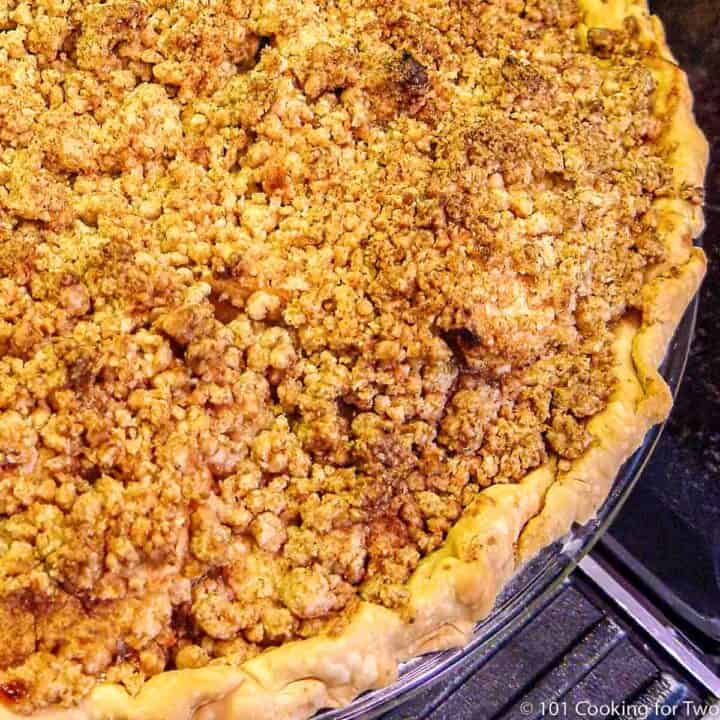
Top with the crumb mix.
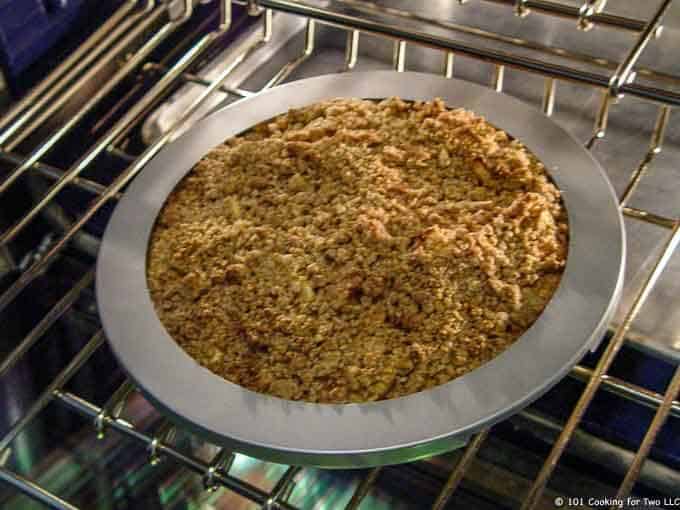
Bake on the middle rack. About 20 minutes into baking, check the pie. You may need to protect the edges of the crust, either with aluminum foil or with a fancy-dancy pie crust protector thingy.
Bake a total time of about 50 minutes until golden brown. Allow to cool completely before cutting. 3-4 hours.
Do you want more recipes from 101 Cooking for Two? Sign up for the newsletter and get all posts delivered straight to your inbox!
Easy Apple Crumb Pie
Mix some apples, a pie crust, sugar, flour, cinnamon, and butter, and you get a great tasting basic apple crumb pie. Just follow these easy step by step photo instructions.
Prep Time15mins
Cook Time50mins
Total Time1hr5mins
Author: Dan Mikesell AKA DrDan
Course : Dessert
Cuisine : American
Servings/Adjust Amount: 8
8
Ingredients
1uncooked pie crust – I used Pillsbury
5-6cupscooking apples – pealed and sliced
1cupAP flour
1/2cupbrown sugar – packed
1/2teaspooncinnamon
1stick butter – 1/2 cup
1/2cupgranular sugar
1teaspooncinnamon
Instructions
Preheat oven to 375 and place a cookie sheet on the bottom rack for any overflow.
Start with one cup of AP flour in a large mixing bowl. Add 1/2 cup brown sugar, 1/2 teaspoon cinnamon, and 1/8 teaspoon salt. Mix this well.
Microwave 1 stick (4oz) of butter in a bowl for 20 seconds on high. It will be partially melted. Stir with a fork and then dribble into the flour mixture. Mix with a fork until well blended. Set aside.
Peel and slice apples. I used four good size Granny Smiths. You need 5-6 cups of apple.
Mix 1/2 cup granulated sugar and 1 teaspoon cinnamon together then sprinkle over the apple slices. Mix well to coat.
Prepare a pie crust. Either make one or use a Pillsbury refrigerated one and crimp the edges.
Pour apple into a 9-inch uncooked pie crust. Top with the crumb mix.
Bake on the middle rack. About 20 minutes into baking, check the pie. You may need to protect the edges of the crust, either with aluminum foil or with a fancy-dancy pie crust protector thingy.
Bake a total time of about 50 minutes until golden brown. Allow to cool completely before cutting. 3-4 hours
Recipe Notes
Pro Tips
Some good choices for the apples are Honeycrisp, Pink Lady, Fuji, Granny Smith, and Ida Red. But most apples will be fine other than Delicious.
Use a standard pie pan, which is a 9-inch diameter and 1-1/4 inches deep.
I use refrigerated pie crust. You can use frozen or make your own.
Be sure to fully cool the pie before cutting. It will take 3-4 hours. Store loosely covered for up to 2 days at room temperature or 3-4 days refrigerated. I do not suggest freezing pie.
Check Out Other Great Recipes
Make it Perfect First Time and Every TimeDon’t miss out, check the full post above. Almost every recipe includes easy step by step photo instructions so you can visualize yourself cooking this recipe along with helpful tips and options.
Nutrition is generally for one serving. Number of servings is stated above and is my estimate of normal serving size for this recipe.
All nutritional information are estimates and may vary from your actual results. This is home cooking, and there are many variables. To taste ingredients such as salt will be my estimate of the average used.
The best enchilada sauce and you can make it at home with these easy step by step photo instructions. Blow them away with great taste. Never buy canned enchilada sauce again.
Editor’s Note: Originally published February 1, 2010, Updated with expanded instructions and refreshed photos. The recipe is great and will not be changing.
We all hate canned enchilada sauce. The powder mix is horrible. I have never met anybody who thought they were even adequate. You must make it yourself.
Again, I’m using my tiny Mexican paperback cookbook I found in California. But it was a little bland, so I upped the spicing some to make it just right. I also simplified the method.
My Rating
This recipe is dear to my heart and will the best enchilada sauce you will ever use.
Pro Tips: Recipe Notes for Homemade Chicken Enchilada Sauce
The Quality of The Ingredients
The tomato sauce is the major ingredient, and cheap tomato sauce will make poor tasting enchilada sauce. Use a brand you know and trust and not generic el-cheapo. I use Hunts.
A note about the onion: resist the temptation to use too much just to use it up. It will dominate the taste.
The other ingredients are basic things.
The Pan
I usually don’t talk about the cookware, but we are simmering tomato products that are acidic. You must use a non-reactive pan, usually meaning a non-stick pan. Otherwise, some of the metal comes into the sauce.
How Long to Simmer?
This only takes 10 minutes to put together. A 30-minute simmer is good.
But if you are going to use it where it is cooked more (like my Chicken Enchilada Casserole), then 10 minutes is enough.
Also, you could add 1/2 cup of shredded cheese. I usually don’t, and I almost always use it in my casserole.
Related Recipes
Healthier Chicken Enchilada Casserole in 60 Minutes
Crock Pot Chicken Enchilada Casserole
Excellent Chicken Enchilada Casserole
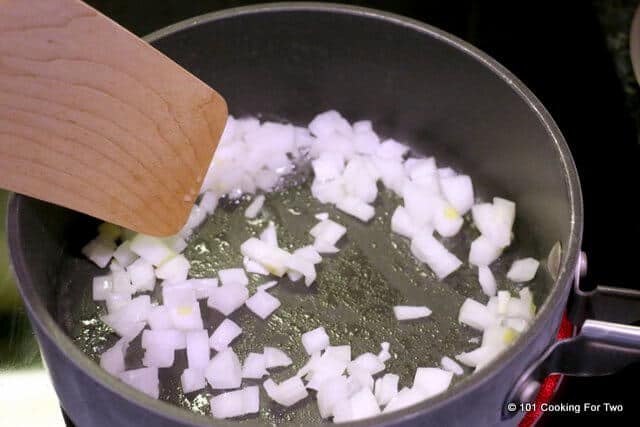
Add 2 tablespoons oil to the medium-size saucepan over medium-high heat. Add 1/2 cup minced onion ( about 1 small to medium) and saute until transparent — about 5 minutes.
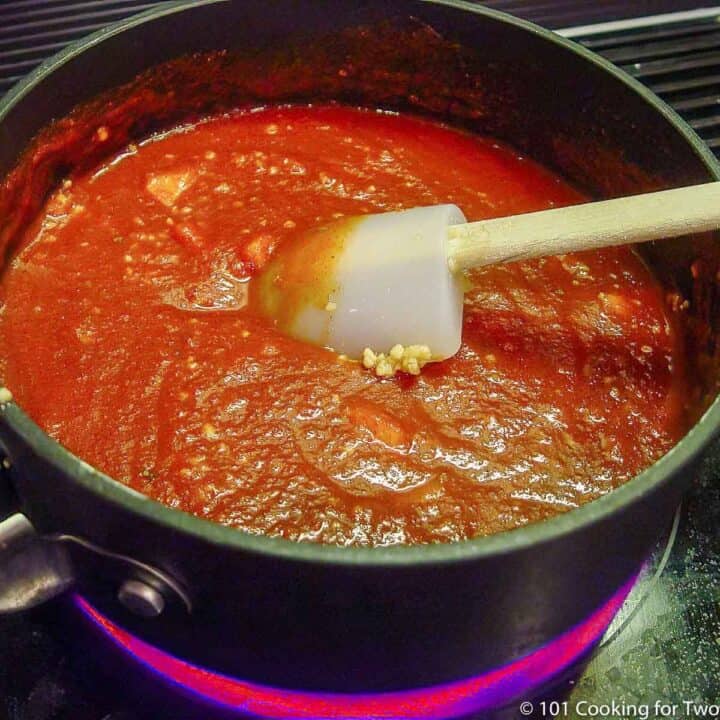
Add tomato sauce and spices. Mix well and simmer over medium-low heat. It is best to put a lid on the saucepan since it will tend to splatter.
Simmer for at least 10 minutes if being used in a casserole or 30 minutes otherwise.
Do you want more recipes from 101 Cooking for Two? Sign up for the newsletter and get all posts delivered straight to your inbox!
Homemade Enchilada Sauce
The best enchilada sauce and you can make it at home with these easy step by step photo instructions. Blow them away with great taste. Never buy canned enchilada sauce again.
Prep Time5mins
Cook Time30mins
Total Time35mins
Author: Dan Mikesell AKA DrDan
Course : Sauce
Cuisine : Mexican
Keyword : Enchilada Sauce
Servings/Adjust Amount: 4cups
4
Ingredients
32oztomato sauce
1/2cuponion – minced about 1 small to medium
2tablespoonsoil
2tablespoonschili powder
2teaspoonspaprika
1teaspoonsalt
1/2teaspoonground cumin
1/2teaspoonoregano
2clovesgarlic
Instructions
Add oil to medium-size saucepan over medium-high heat. Add onion and saute until transparent. About 5 minutes.
Add tomato sauce and spices. Mix well and simmer over medium-low heat. Cover with lid since it will splatter.
Simmer for at least 10 minutes if being used in a casserole or 30 minutes otherwise
Make it Perfect First Time and Every TimeDon’t miss out, check the full post above. Almost every recipe includes easy step by step photo instructions so you can visualize yourself cooking this recipe along with helpful tips and options.
Recipe Notes
Pro Tips
Use a good brand name tomato sauce. I like Hunts.
Do not use more onion.
Use a non-reactive pan with a lid. Usually, that means non-stick.
Good refrigerated for 3-4 days and maybe frozen for 3-4 months.
Nutrition Facts
Homemade Enchilada Sauce
Amount Per Serving (1 cups)
Calories 142Calories from Fat 72
% Daily Value*
Fat 8g12%
Saturated Fat 1g5%
Sodium 1838mg77%
Potassium 881mg25%
Carbohydrates 17g6%
Fiber 6g24%
Sugar 11g12%
Protein 4g8%
Vitamin A 2661IU53%
Vitamin C 18mg22%
Calcium 54mg5%
Iron 3mg17%
* Percent Daily Values are based on a 2000 calorie diet.
Have a question or something not clear? Ask in the comments.
If you like this recipe or find it useful, the pleasure of a nice 4 or 5 rating would be greatly appreciated.
Nutrition is for one serving. Number of servings is stated above and is my estimate of normal serving size for this recipe.
All nutritional information are estimates and may vary from your actual results. This is home cooking, and there are many variables. To taste ingredients such as salt will be my estimate of the average used.
The cookie settings on this website are set to "allow cookies" to give you the best browsing experience possible. If you continue to use this website without changing your cookie settings or you click "Accept" below then you are consenting to this.
Read more about data collection for ads personalisation our in our Cookies Policy page