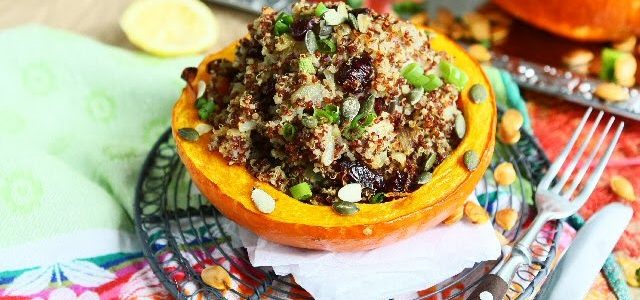
Autumn means PUMPKINS, one of the very low calorie vegetables. They are a particularly good source of dietary fibre, as well as a range of vitamins and minerals. Quinoa (a mix of white and red), cooked in vegetable stock, scented with cinnamon, tossed with pumpkin seeds and cranberries, is stuffed into Hokkaido pumpkin halves, then baked until tender for a delicious, gluten-free, vegetarian meal. You can easily replace the Hokkaido with another squash like acorn or kabocha.
1 tbsp Olive oil
1 Small yellow onion, cut into 1/3-inch dices
3/4 tsp Ground cumin
150 g Quinoa, rinsed in cold water and drained
450 ml Vegetable stock
50 g Dried, unsweetened cranberries
1 / 800 g Hokkaido pumpkin
30 g Pumpkin seeds
1/3 tsp Ground cinnamon
1-2 tsp Fresh lemon juice
Salt and freshly ground black pepper
Heat the olive oil in a heavy-bottomed saucepan over medium heat. When it is hot, add the diced onion and ground cumin and cook, stirring frequently, until the onion is soft and golden brown, about 10 minutes.
Add the quinoa to the saucepan and stir to coat the grains. Add the stock and raise the heat to high. When the liquid comes to a boil, reduce the heat to low, add the cranberries, and cover the pan. Cook at a slow simmer until the liquid has been absorbed, 20 minutes.
Meanwhile, cut the Hokkaido pumpkin in half. Scoop out and discard the seeds and fibers. Place the pumpkin halves on a rimmed baking sheet and set it aside.
When the quinoa is cooked, remove the pan from the heat and stir in the pumpkin seeds, cinnamon and lemon juice. Season with salt and pepper to taste.
Position a rack in the lower third of the oven and preheat the oven to 190C/375F.
Divide the quinoa filling among the pumpkin halves. Transfer the baking sheet to the oven and roast until the quinoa is hot and the flesh of the pumpkins is tender when pierced with a skewer or fork, 50 minutes. Serve immediately.
Full of quality and tasty ingredients, these sesame logs with walnuts, oats and fresh ginger are easy to make and are perfect as a on the go energy snack, a sweet lunchbox filler, or as an afternoon pick-me-up without the refined sugar. Instead of logs, you can shape these into balls or bars if you prefer. Can’t find Medjool dates? No problem. Just use regular deglet noor dates, which are equally delicious and sweet with a firmer texture. Medjool dates, by contrast, have a rich, almost caramel-like taste and a soft, chewy texture.
120 g Walnuts, toasted
45 g Rolled oats
200 g Medjool dates, pitted and chopped
1 tbsp Freshly grated ginger
1/3 tsp Black salt
50 g Sesame seeds, toasted
Heat a large frying pan over medium-high heat. Add the walnuts to the hot, dry pan in a single layer. Cook, stirring frequently until the walnuts start to brown and they smell toasted, about 5 minutes. Transfer the walnuts to a plate or baking tray to cool completely.
Process walnuts and oats in a food processor until finely chopped. Add in dates, ginger and salt. process until mixture forms a paste.
Shape level tablespoons of mixture into 5cm long logs and place them on a baking-paper-lined tray. Chill for 15 minutes.
Meanwhile, stir sesame seeds in a frying pan over medium heat for 2 minutes or until lightly toasted. Cool. Roll logs in sesame seeds and chill for 1- 2 hours or until firm.
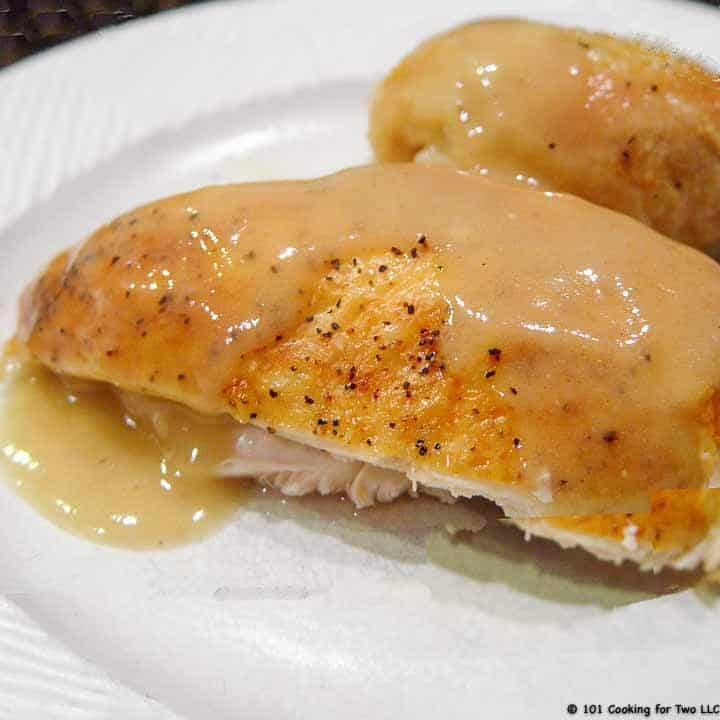
Classic roasted whole chicken at home that is juicy and crispy. Just follow these easy step by step photo instructions.
Editor’s Note: Originally Published October 22, 2011. Refreshed with expanded and clarified instructions and updated photos.
This is very close to that “ideal” recipe of just throw something in the oven and have it come out with great taste and moisture with crispy skin.
Based on a Cooks Illustrated recipe called Weeknight Roast Chicken. I took the technique and expanded the details and a few other changes.
My Rating
A great roasted chicken your family will love.
Pro Tips: Recipe Notes for Simple Roasted Whole Chicken
The general idea is to preheat an oven with a skillet to 450, prep the chicken with some oil or butter, and season to taste. Put the chicken in the hot pan so the dark meat will cook faster, being in direct contact with the skillet.
Also, the pan will keep the liquid from evaporating completely for a pan sauce or in my case, gravy. Cook until breast temp of 120 and then turn off the over and let it continue to cook in the hot oven. It works well.
The Chicken
Cooks Illustrated called for a 3 1/2 to 4-pound chicken. Mine was 5 pounds, so a little bigger. Mine took 35 minutes to reach the “turn off the oven” point vs. their 20-25. The bigger the chicken, the longer it will take.
I no longer recommend rinsing chicken. See Chicken: To Rinse or Not To Rinse? for detailed discussion. But drying the skin is critical for crispy skin.
Oil vs. Butter
The classic thought is always to use butter. Some feel it adds some taste.
The argument for vegetable oil is several studies show the skin to be a bit crispier, and many people don’t think the butter adds any taste.
The choice is yours.
The Gravy
I’m using the slurry method of homemade gravy in this recipe. You can easily adjust the volume to your needs. While 2 cups are enough if you just want some on the meat, you will want 4 cups if you are doing potatoes and gravy as a side dish.
See How To Make Gravy at Home for a more detailed discussion.
About Turning the Oven Off
Yes, it works fine. I have done this in three different ovens. But I do suspect that some ovens may lose heat faster and it may not work in those few ovens. Also, bigger chickens will be more likely not to work well.
If turning the oven off makes you too nervous, leave it at 200 as long as you are using a remote thermometer of some type to monitor for 165 in the breasts. Never cook by time alone.
Also, try not to open the oven door more than absolutely necessary. Again, a remote thermometer is very handy here.
Other Whole Chicken Options
Grilled Whole Chicken on a Gas Grill
BBQ Grilled Butterflied Whole Chicken
Crispy Spiced Up Oven Roasted Chicken
Alabama BBQ Chicken with White BBQ Sauce
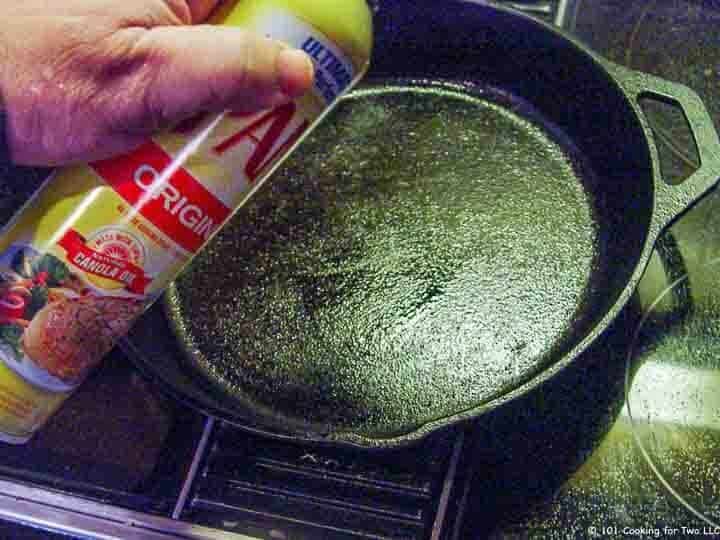
Spray a 12-inch oven-safe pan (cast iron preferred) with PAM. Place in the oven and preheat to 425 convection or 450 conventional.
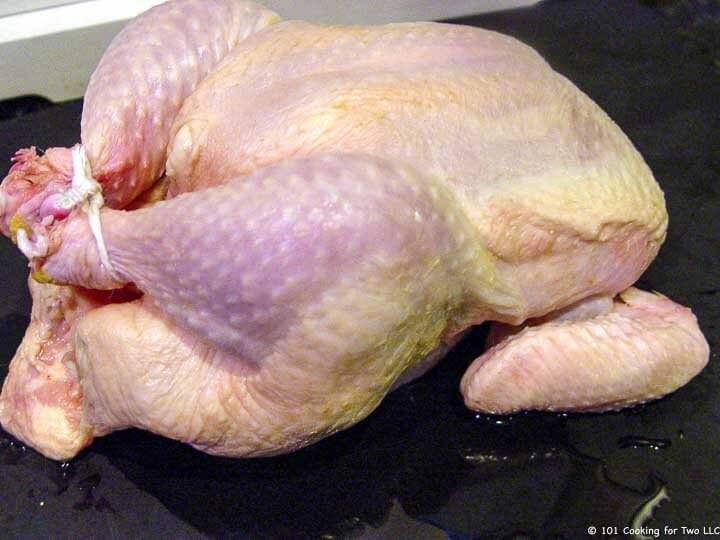
Pat dry a whole chicken, tie legs together with butcher twine and tuck wings under.
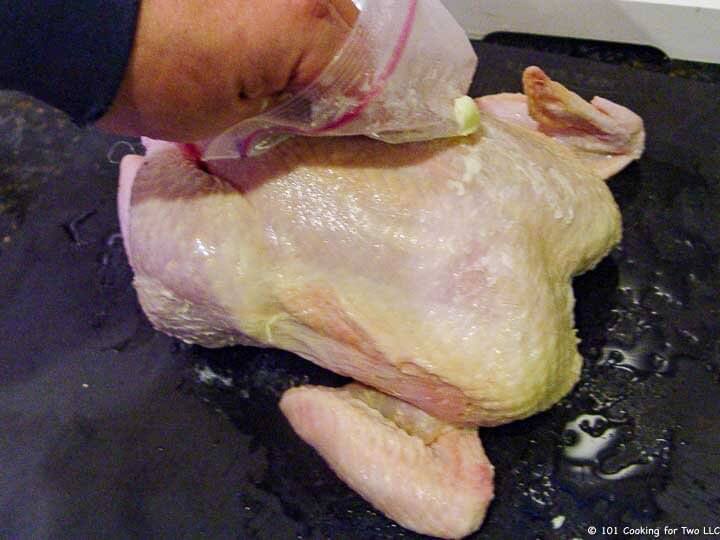
Coat the surface with a tablespoon of butter or a bit of vegetable oil.
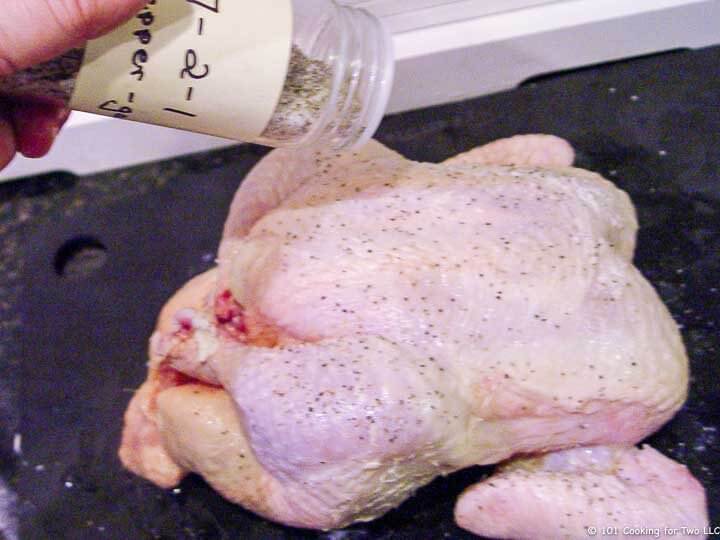
Season the chicken with salt and pepper to taste. I’m using some of my 7:2:1 All Purpose Seasoning .
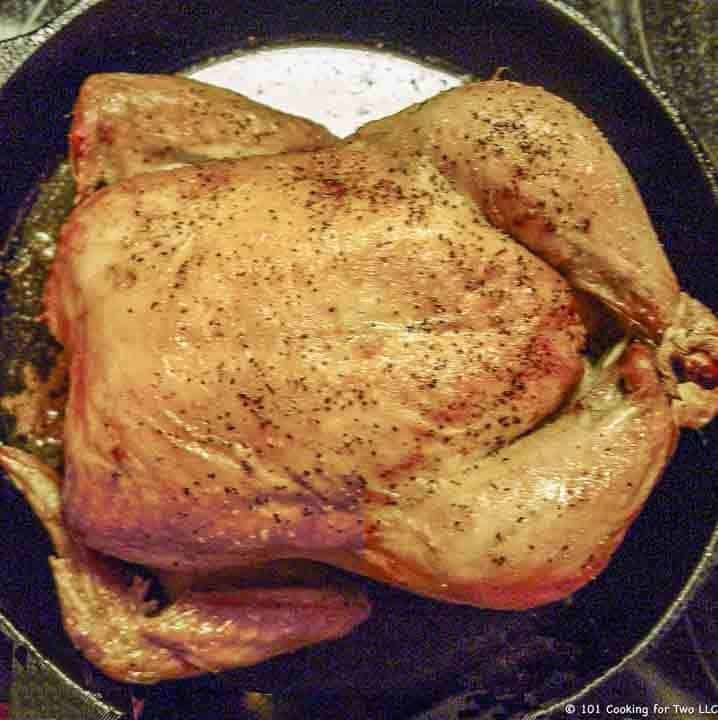
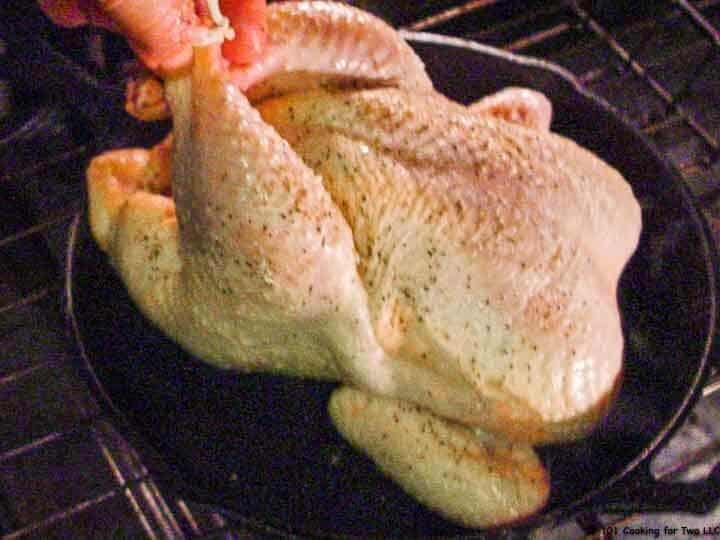
Transfer the chicken to your preheated pan. Let it roast until breast temp is 120, and thigh is 135. About 30 minutes, it depends on size and oven.
Turn OFF oven and let set in the hot oven until breast temp is 165 and thigh is 175+, about 30 minutes. Move chicken to a plate and pour any liquid in the chicken cavity into the pan.
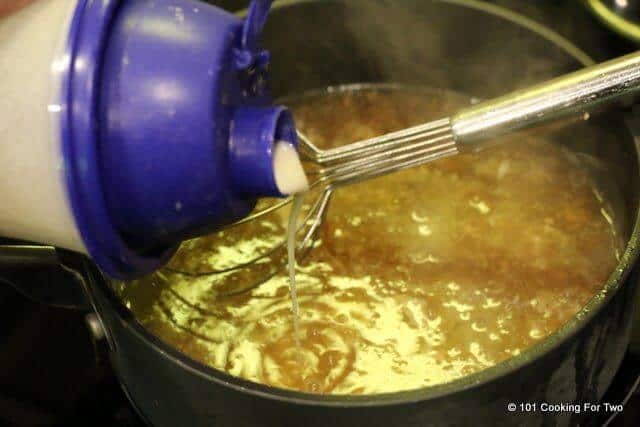
Combine flour with a cup of cold water. You need 2 tablespoons of flour for every cup of gravy you are making. You can use a bowl and whisk to combine the flour and water, or I like to use a Tupperware shaker.
Move the pan to the stovetop and add the amount of chicken broth you want for gravy. Over medium-high heat, bring to a boil.
Slowly add most of the water/flour mixture while continuously stirring. In about 2-3 minutes, the mixture will thicken. Add more flour mixture is not thick enough and continue to stir. Continue this until the desired thickness. Add salt to taste.
Do you want more recipes from 101 Cooking for Two? Sign up for the newsletter and get all posts delivered straight to your inbox!
Simple Roasted Whole Chicken
Classic roasted whole chicken at home that is juicy and crispy. Just follow these easy step by step photo instructions.
Optional Gravy – this is for 2 cups. Double if having potatoes and gravy
1/4cupAP flour
2cupschicken broth
to taste salt
Instructions
Spray a 12-inch oven-safe pan (cast iron preferred) with PAM. Place in the oven and preheat to 425 convection or 450 conventional.
Pat dry a whole chicken, tie legs together with butcher twine and tuck wings under.
Coat the surface with a tablespoon of butter or a bit of vegetable oil.
Season the chicken with salt and pepper to taste. I used my 7:2:1 All Purpose Seasoning .
Transfer the chicken to your preheated pan. Let it roast until breast temp is 120 and thigh is 135. About 30 minutes depending on size and oven.
Turn OFF the oven and let set in the hot oven until breast temp is 165 and thigh is 175+. About 30 minutes. Move the chicken to a plate and pour any liquid in the chicken cavity into the pan.
Optional Gravy Instructions
Combine flour with a cup of cold water. You need 2 tablespoons of flour for every cup of gravy you are making. You can use a bowl and whisk to combine the flour and water or I like to use a Tupperware shaker.
Move the pan to the stovetop and add the amount of chicken broth you want for gravy. Over medium-high heat, bring to a boil.
Slowly add most of the water/flour mixture while continuously stirring. In about 2-3 minutes, the mixture will thicken. Add more flour mixture is not thick enough and continue to stir. Continue this until the desired thickness. Add salt to taste.
Make it Perfect First Time and Every TimeDon’t miss out, check the full post above. Almost every recipe includes easy step by step photo instructions so you can visualize yourself cooking this recipe along with helpful tips and options.
Recipe Notes
Pro Tips
This should be fine for 4 to 5-pound chickens. The times will vary by size.
Season to your taste.
Crispy skin depends on drying the skin well with a paper towel before starting.
Most people will use butter to coat the chicken, but the oil may give a crisper skin.
The gravy is optional. 2 cups are enough for just the chicken, but you will want 4 cups if doing mashed potatoes with gravy.
I have done this in three different ovens with good results, but I suspect there are some ovens that will lose heat faster and may not get to the 165 after turning the oven off.
Try not to open the oven when the oven is off. Use a remote thermometer if you have one.
If turning the oven off makes you too nervous, leave it at 200 as long as you are using a remote thermometer of some type to monitor for 165 in the breasts. Never cook by time.
Gravy is not included in nutrition.
Nutrition Facts
Simple Roasted Whole Chicken
Amount Per Serving
Calories 290Calories from Fat 189
% Daily Value*
Fat 21g32%
Saturated Fat 7g35%
Cholesterol 100mg33%
Sodium 493mg21%
Potassium 240mg7%
Carbohydrates 1g0%
Sugar 1g1%
Protein 24g48%
Vitamin A 236IU5%
Vitamin C 2mg2%
Calcium 14mg1%
Iron 1mg6%
* Percent Daily Values are based on a 2000 calorie diet.
Have a question or something not clear? Ask in the comments.
If you like this recipe or find it useful, the pleasure of a nice 4 or 5 rating would be greatly appreciated.
Nutrition is for one serving. Number of servings is stated above and is my estimate of normal serving size for this recipe.
All nutritional information are estimates and may vary from your actual results. This is home cooking, and there are many variables. To taste ingredients such as salt will be my estimate of the average used.
The cookie settings on this website are set to "allow cookies" to give you the best browsing experience possible. If you continue to use this website without changing your cookie settings or you click "Accept" below then you are consenting to this.
Read more about data collection for ads personalisation our in our Cookies Policy page