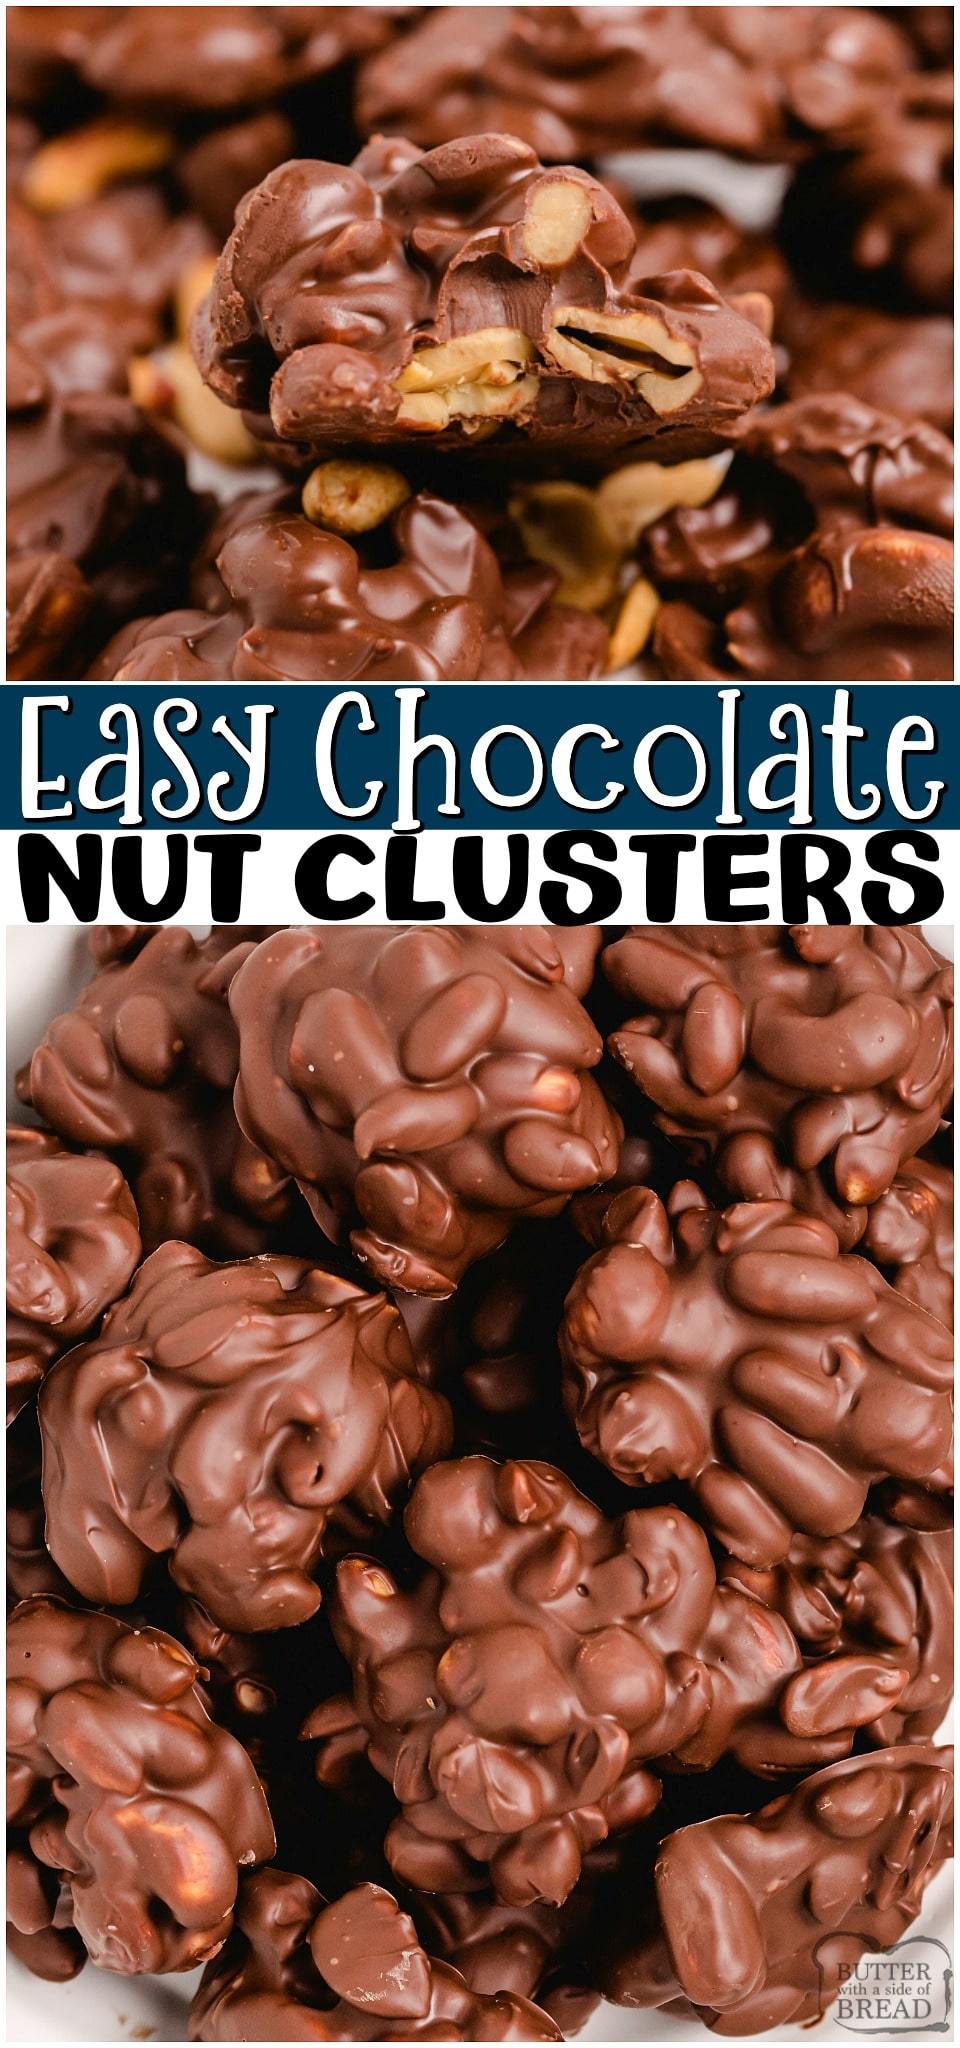
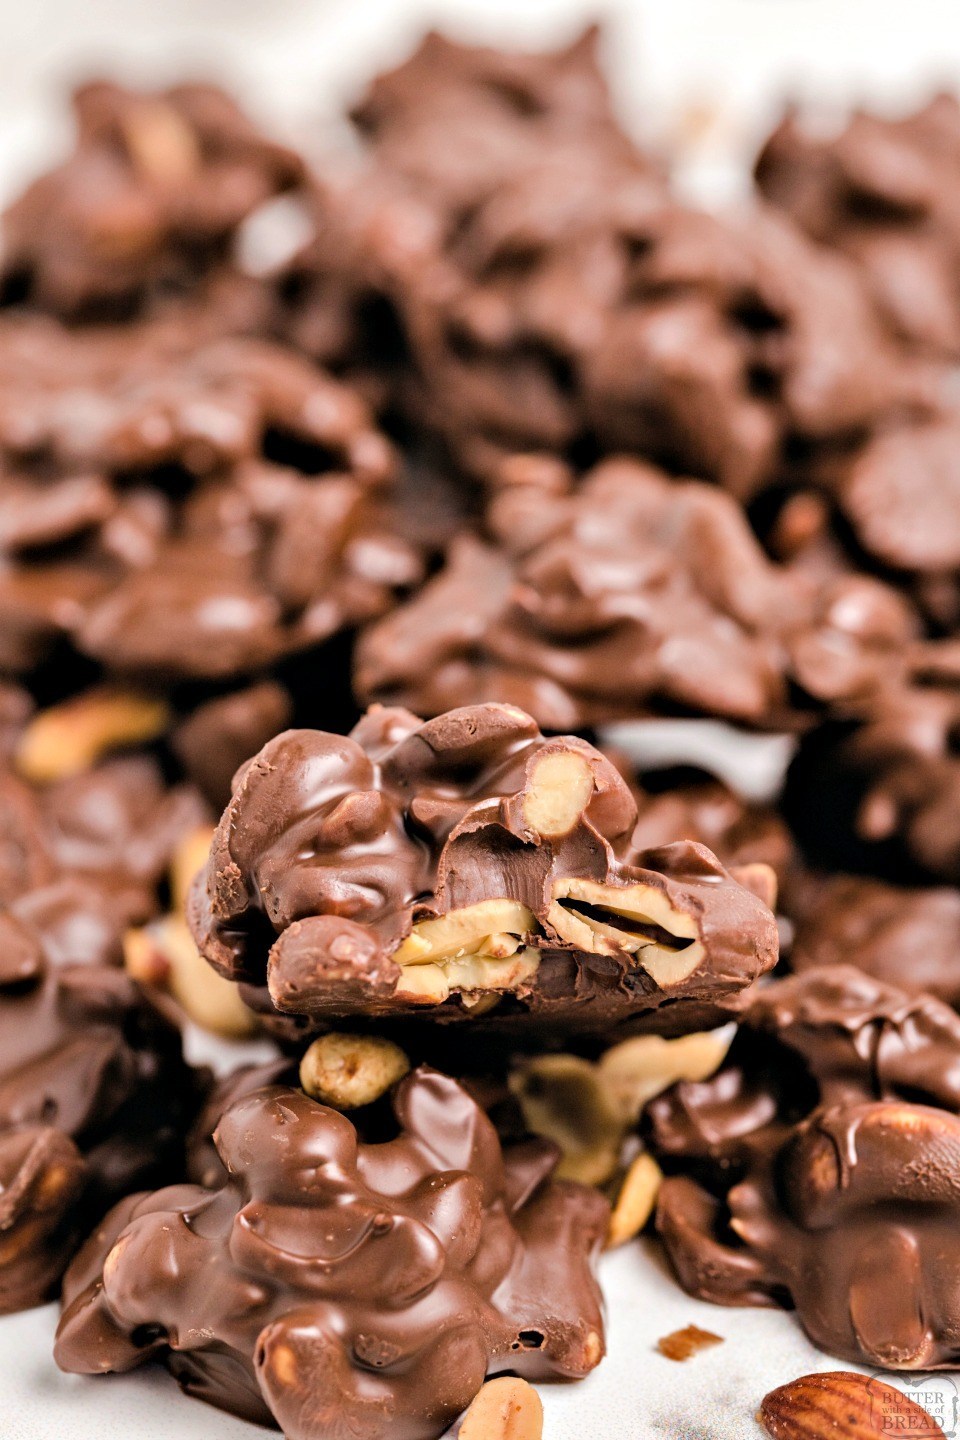
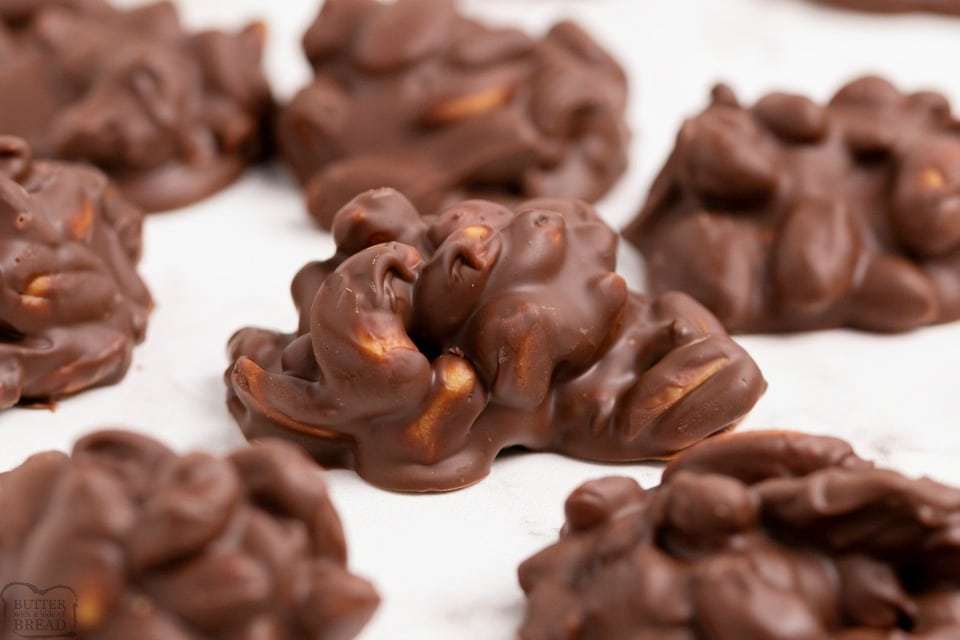
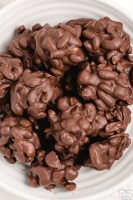
Chocolate Nut clusters are a fun & simple holiday treat! Salted Nuts covered in rich chocolate cooled & set into perfect candy clusters for gift trays!
 These super easy, bake-free little treats are the perfect addition to any Holiday Party or gift tray. Use them in your next cookie exchange or simply dress them up in a gift box and deliver to family and friends for the holidays. Everyone will enjoy the thoughtful gesture and these delicious chocolate clusters.
What Are Chocolate Nut Clusters?
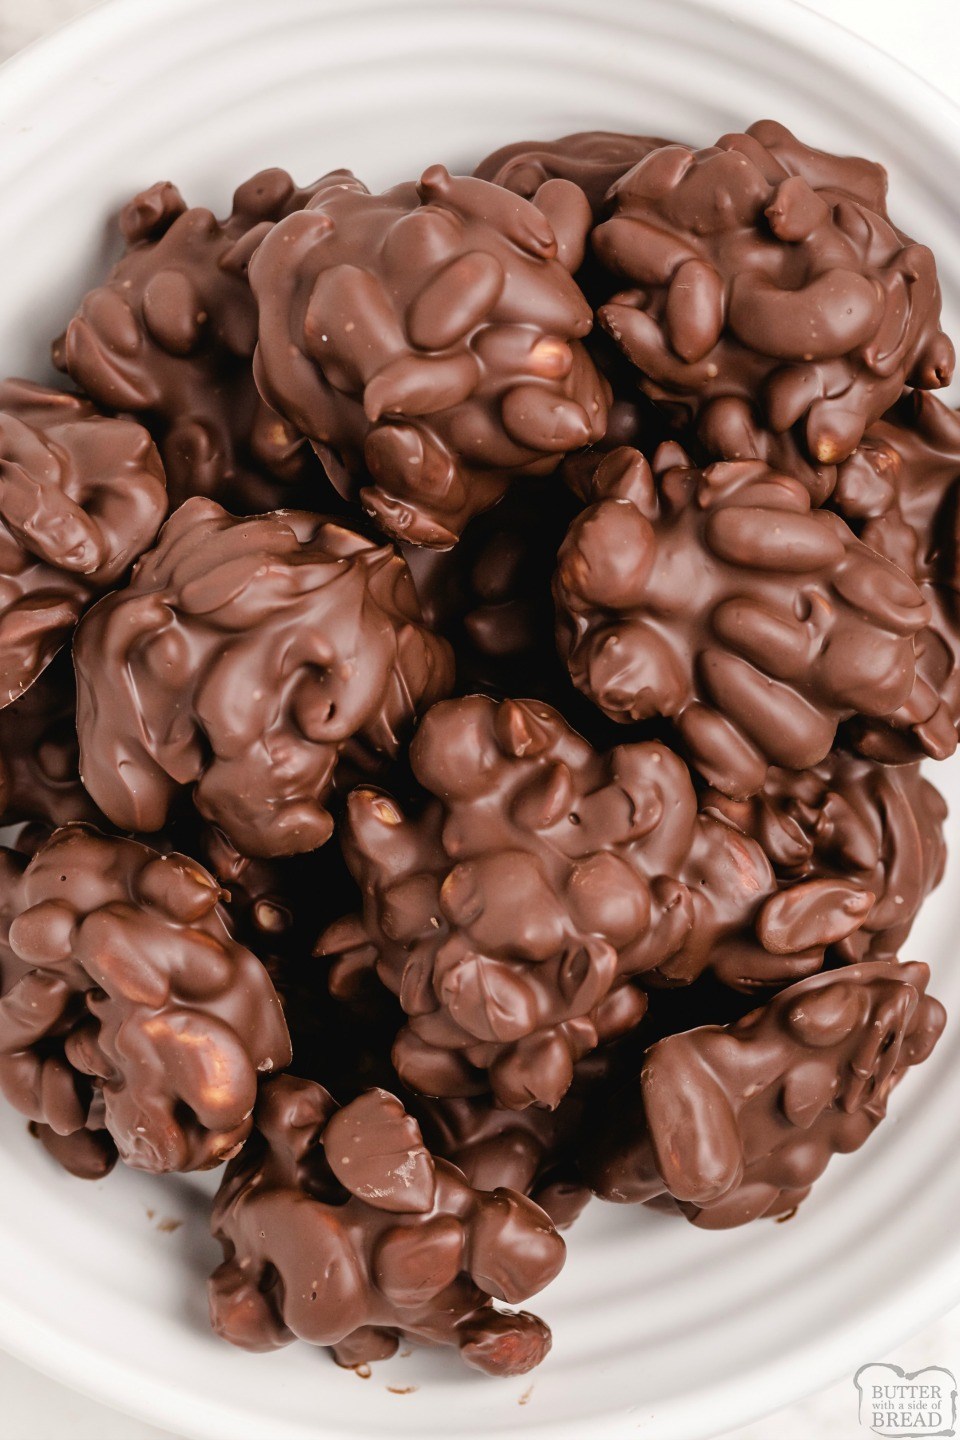
They’re exactly that! A handful of mixed nuts tossed together in melted chocolate and then scooped into little mounds to harden. Tasty chocolate covered mixed nuts are a fun way to enjoy a salty and sweet treat.
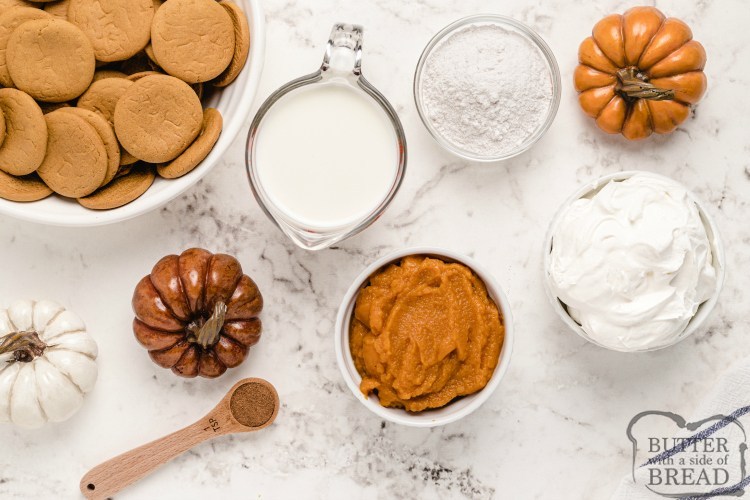
 Nut Cluster Ingredients
 Nut Cluster Ingredients
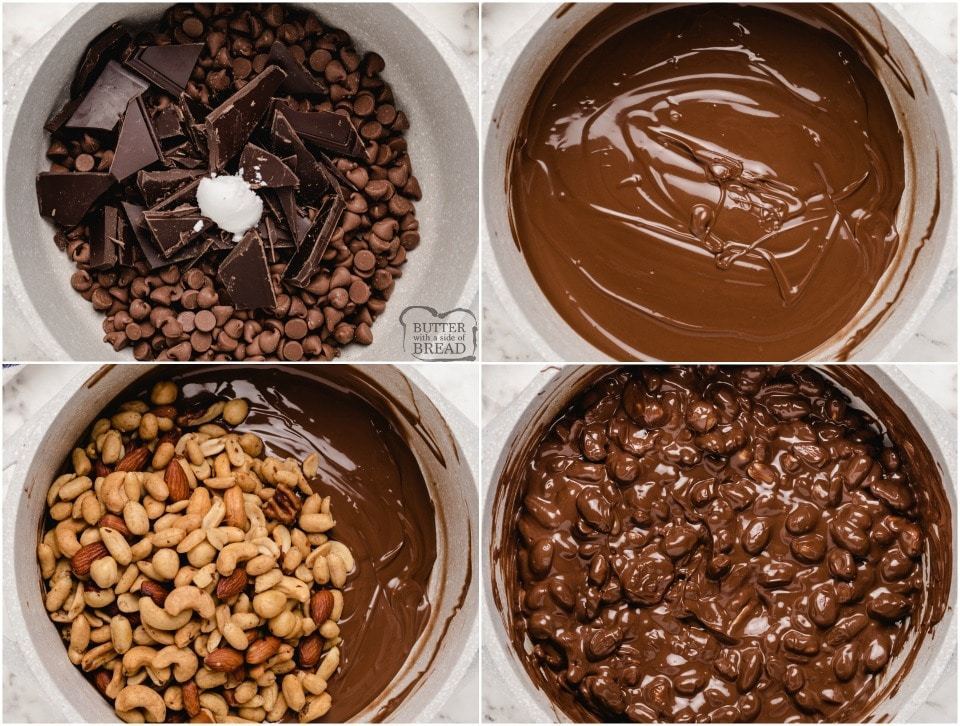
Chocolate Chips: You want to use 1 package of milk chocolate chips, but other chocolate varieties can be used for a change of flavor.
Semi Sweet Baking Chocolate: This is the bar of chocolate in the baking aisle, not the baking cocoa. You want 4 ounces (about half a bar) to help deepen the chocolate flavors.
Oil: Using 1 teaspoon of coconut oil or even shortening will help to melt the chocolate down so that it’s nice and creamy.
Mixed nuts: Use your own selection of your favorite nuts, salted or unsalted to get a treat you know you’ll like! You’ll need two cups worth!
How to Make Chocolate Salted Nut Clusters using a Double Boiler
 How to Make Chocolate Salted Nut Clusters using a Double Boiler
Make a double boiler for melting the chocolate by taking a saucepan and bringing 2 quarts of water to a boil, reduce to a simmer. Place a glass bowl of the same size or slightly smaller inside the simmering water. No water should be in the bowl- it just sits on top of the boiling water.
Place the milk chocolate chips and the baking chocolate inside the waterless pot and stir until melted.
Add in the 2 cups of mixed nuts and stir until completely coated.
NOTE: If your stove has a “Melt” setting- skip the double broiler and just add chocolate to a medium sized saucepan instead. (NO WATER NEEDED!)
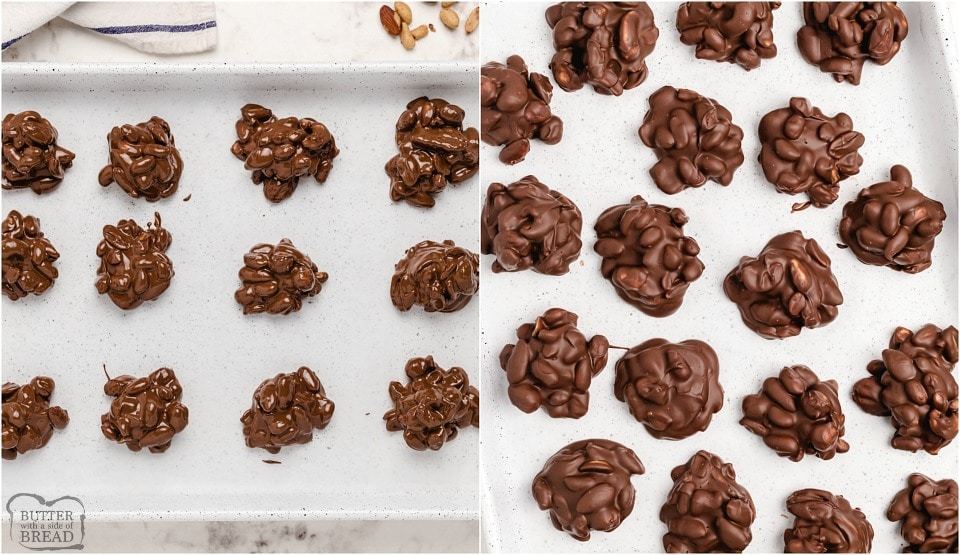
Scoop the chocolate nut mixture using medium sized spoons onto parchment lined cookie sheets.
Place the cookie sheets inside of your fridge until the chocolate has set. Enjoy!
 How to Make Chocolate Nut Clusters using a Microwave
 How to Make Chocolate Nut Clusters using a Microwave
Place all of the chocolate in a medium sized glass or ceramic bowl. Microwave on high for 1 minute 30 seconds. Let sit 3-4 minutes, in the microwave. Stir gently. Add time in 30 second intervals, letting chocolate sit for 2-3 minutes after each warming segment before stirring.
Once chocolate is completely melted, add in the 2 cups of mixed nuts and stir until completely coated.
Scoop the chocolate nut mixture using medium sized spoons onto parchment lined cookie sheets.
Place the cookie sheets inside of your fridge until the chocolate has set. Enjoy!
Chocolate Mixed Nut Clusters
Chocolate Nut clusters are a fun & simple holiday treat! Salted Nuts covered in rich chocolate cooled & set into perfect candy clusters for gift trays!
Print
Pin
Rate
Servings: 20
Calories: 206kcal
Ingredients
- 12 oz milk chocolate chips
- 4 oz semi sweet baking chocolate
- 1 tsp coconut oil or shortening
- 2 cups mixed nuts salted
Instructions
How to Make Chocolate Mixed Nut Clusters using a Double Boiler
-
Make a double boiler for melting the chocolate by taking a saucepan and bringing 2 quarts of water to a boil, reduce to a simmer. Place a glass bowl of the same size or slightly smaller inside the simmering water. No water should be in the bowl- it just sits on top of the boiling water.
-
Place the milk chocolate chips and the baking chocolate inside the waterless pot and stir until melted.Add in the 2 cups of mixed nuts and stir until completely coated.
-
NOTE: If your stove has a “Melt” setting- skip the double broiler and just add chocolate to a medium sized saucepan instead. (NO WATER NEEDED!)
-
Scoop the chocolate nut mixture using medium sized spoons onto parchment lined cookie sheets. Place the cookie sheets inside of your fridge until the chocolate has set. Enjoy!
How to Make Chocolate Nut Clusters using a Microwave
-
Place all of the chocolate in a medium sized glass or ceramic bowl. Microwave on high for 1 minute 30 seconds. Let sit 3-4 minutes, in the microwave. Stir gently. Add time in 30 second intervals, letting chocolate sit for 2-3 minutes after each warming segment before stirring. Once chocolate is completely melted, add in the 2 cups of mixed nuts and stir until completely coated.Scoop the chocolate nut mixture using medium sized spoons onto parchment lined cookie sheets.Place the cookie sheets inside of your fridge until the chocolate has set. Enjoy!
-
Once chocolate is completely melted, add in the 2 cups of mixed nuts and stir until completely coated.
-
Scoop the chocolate nut mixture using medium sized spoons onto parchment lined cookie sheets.Place the cookie sheets inside of your fridge until the chocolate has set. Enjoy!
Nutrition
Calories: 206kcal | Carbohydrates: 18g | Protein: 4g | Fat: 14g | Saturated Fat: 5g | Cholesterol: 3mg | Sodium: 14mg | Potassium: 118mg | Fiber: 2g | Sugar: 13g | Vitamin A: 41IU | Vitamin C: 1mg | Calcium: 33mg | Iron: 1mg
Can I use peanuts instead of mixed nuts?
Yes, if you don’t want to use mixed nuts or you happen to have peanuts on hand then they can be used. Peanut chocolate clusters taste delicious!
How to store chocolate covered nuts
These nuts will do best if kept stored inside of an airtight container in the fridge for up to 2 weeks. While they can survive at room temperature as well, they are best tasting when cold. Plus side, you don’t have to worry about chocolate melting either!

Chocolate mixed nut clusters are a fun & simple holiday treat! Salted Nuts covered in rich chocolate cooled & set into perfect candy clusters for gift trays!
Related


 Yum
Yum